

Youtube can be addictive. There is so much information it is mind-boggling. Recently I became entranced by acrylic pouring videos and using an easy and budget-friendly method created amazing paintings with my grandsons on a Sunday afternoon. We used a votive candle cup to pour over, but I’ve included an even easier Youtube video that shows how to pour paint into and out of a measuring cup. I think I will try this technique next.
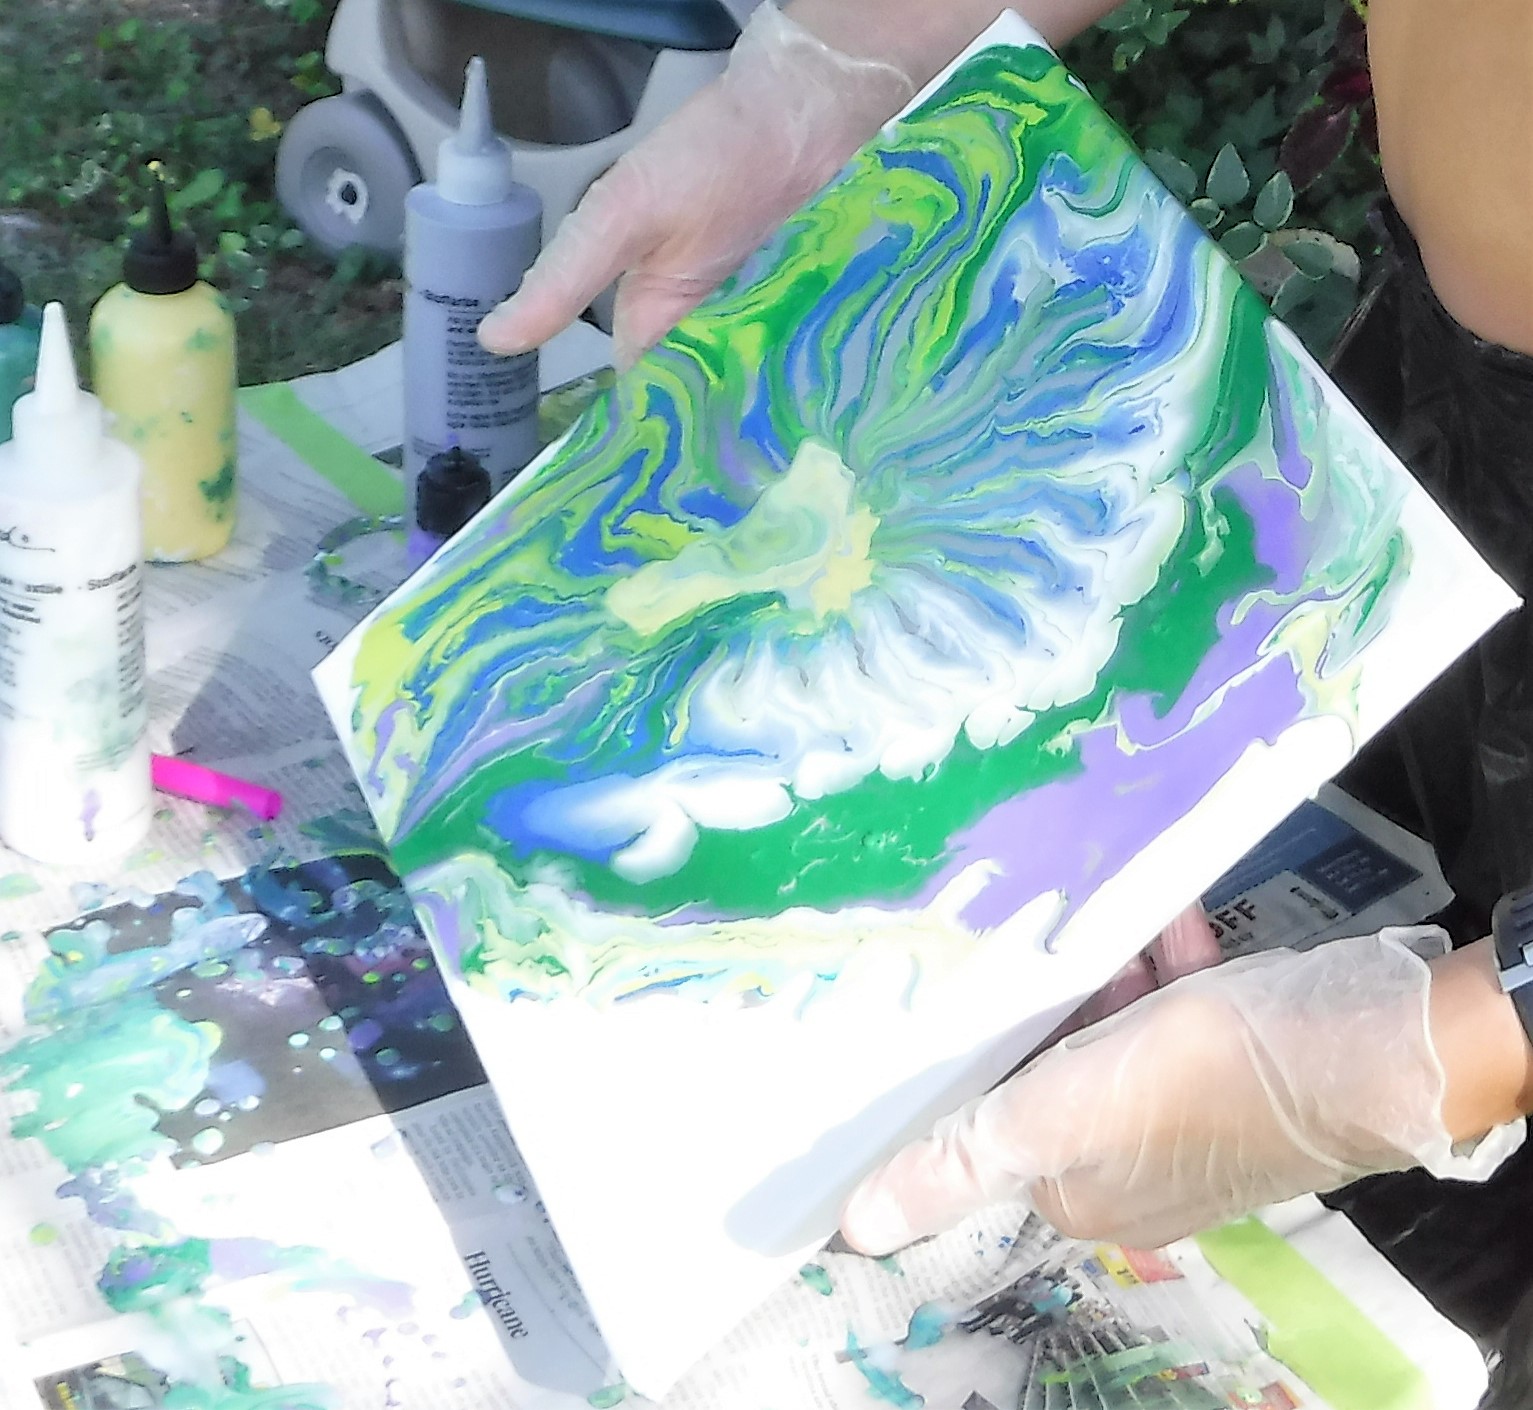
I bought inexpensive acrylics at 3 for $1.00 at A.C. Moore. I had Elmer’s glue on hand and plenty of leftover squirt bottles from a tie-dying project. The canvas size is 12 x 12, purchased in bulk at 7 for $10.00 by using a 50% off coupon. Buying materials when they were on sale kept the cost of creating seven canvases under $20.00.
Pre-mixing your liquids/paints is key for a successful painting. I pre-mixed 16 ounces of 1/2 glue and 1/2 water in a leftover ricotta container and stirred well until combined. I poured my acrylic paints into the squirt bottles, added an equal amount of the glue/water mixture, and shook well. Another helpful tip is to elevate the canvas by pushpins on the bottom. This allows the paint to flow off the edges. Cover all surfaces and wear old clothes, or do as we did and cover yourself with a large trash bag. Protective gloves are a MUST…unless, of course, you want rainbow colors under your fingernails for weeks.
Before we started we covered the blank canvas with a layer of the glue/water mix and squeegeed it around with a piece of cardboard until the surface was covered. Begin to pour your acrylics onto the canvas. We poured over a votive candle cup. It worked great. Grooves on the outer surface are key to creating the interesting design.

Pour the paint on top color by color. Keep adding color in varying amounts.

Add paint until the design is about an inch or two from the edges. Remove the votive cup (THIS CAN BE SLIPPERY) and let the paint run into the center before you begin to tilt.

This is me, Nanny, watching my grandsons have FUN!

The younger grandsons, ages 9 and 6, have smaller hands and so we worked as partners to tilt the canvas and allow the paint to run to the edges. Tip: It’s difficult for smaller hands to keep thumbs out of the way.
The twelve-year-old grandson has bigger hands than I do and was able to tilt his canvas on his own.
The thickness of the paint creates a 2 – 3 day drying time. I can’t wait until later in the week when I will have fun again creating a pour in PINKS with my grand-daughters. Happy Painting!
(There are so many techniques and products you can use for creating acrylic pours. I had a great time researching techniques and watching instructional videos on Youtube.)


Cool! My daughter and her fiancé paint from YouTube vids and some of the results are beautiful. I’ve tried a couple too.
LikeLiked by 1 person
We had so much fun. Thanks for stopping by my blog today. 🙂
LikeLiked by 1 person
Yw 🙂
LikeLiked by 1 person
great job! love the colors and such a great activity to do together with the little ones.
LikeLiked by 1 person
I can’t wait to create the pink paintings with the girls.
LikeLiked by 1 person
I wouldn’t touch a project like that with a ten-foot pole. That’s marvelous that you were so daring, and everyone was thrilled. I hope you’ll share the pink-pour adventure, too.
LikeLiked by 1 person
I’ll try to post the pinks too!
LikeLiked by 1 person
Looks like my kind of painting.
LikeLiked by 1 person
It was so much fun!
LikeLike
Nice post Nancy. I love all the details❣️
LikeLiked by 1 person
Thanks so much…they are fun to create and easy enough for the three year old to do with help. She and her sister used pinks/purples for theirs.
LikeLiked by 1 person
My grandson loves to participate too. We love pouring on 4×4 ceramic tiles. Quick fun and done. Then if we wanna keep them we coat with resin and he has a cherished piece for life. Good entrainment.
LikeLiked by 1 person
That’s a great idea…do you ever use them as coasters?
LikeLiked by 1 person
Yes but you do have to coat them with a heat safe protectant. Or the cups stick
LikeLiked by 1 person
Thanks so much for the tip.
LikeLiked by 1 person
Pingback: Place – Mullica Hill in Doors – MINDING MY P'S WITH Q