
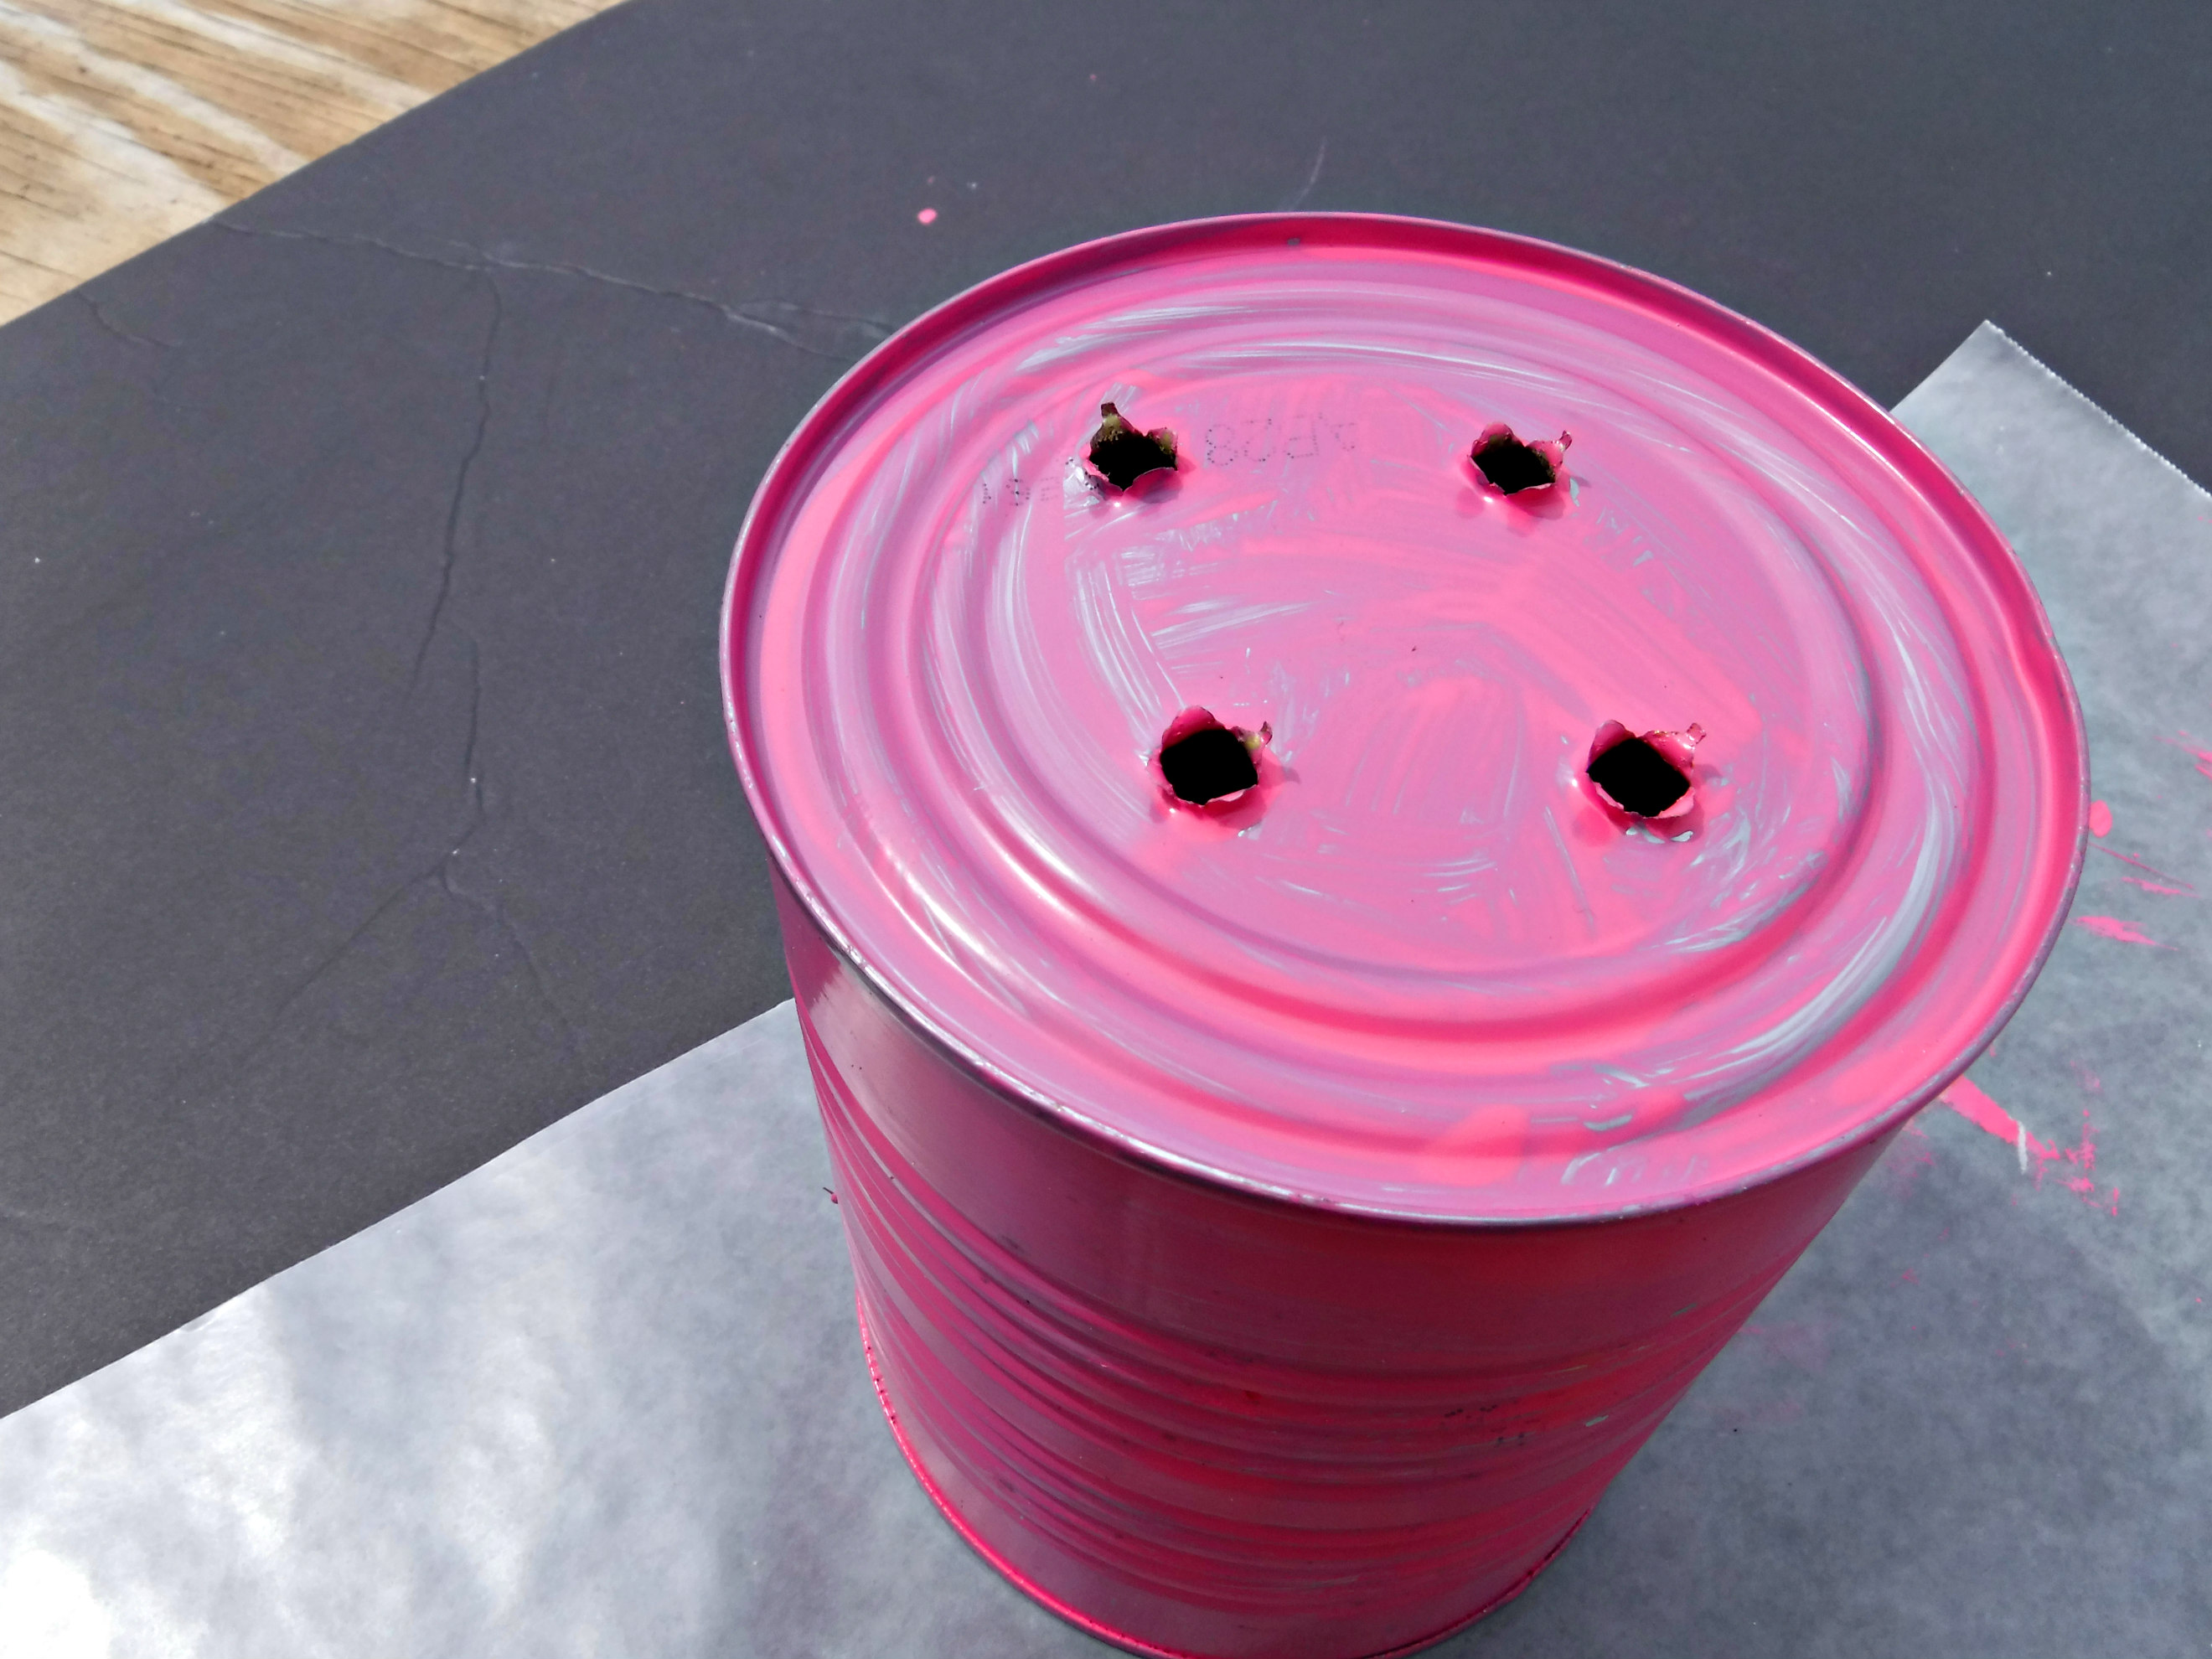
After the holes are punched in the tin cans it’s time to begin painting with acrylic paint. There will be residue from glue on the can, this can be removed with a heat gun and rag. I didn’t bother since I knew the cans would only be used for one season.

It took three coats of paint to get the look I wanted. Even before I had finished painting all the cans in pastel rainbow shades, rust had begun to work its way through the first layers. No bother…it adds a bit of shabby chic to the look of the project. I was very careful of the sharp edges inside the cans, but even being aware didn’t stop me from getting three small cuts on my fingers from the razor-sharp edges. I should have put a piece of masking tape over the holes in the sides as this is where I cut myself every time while painting.
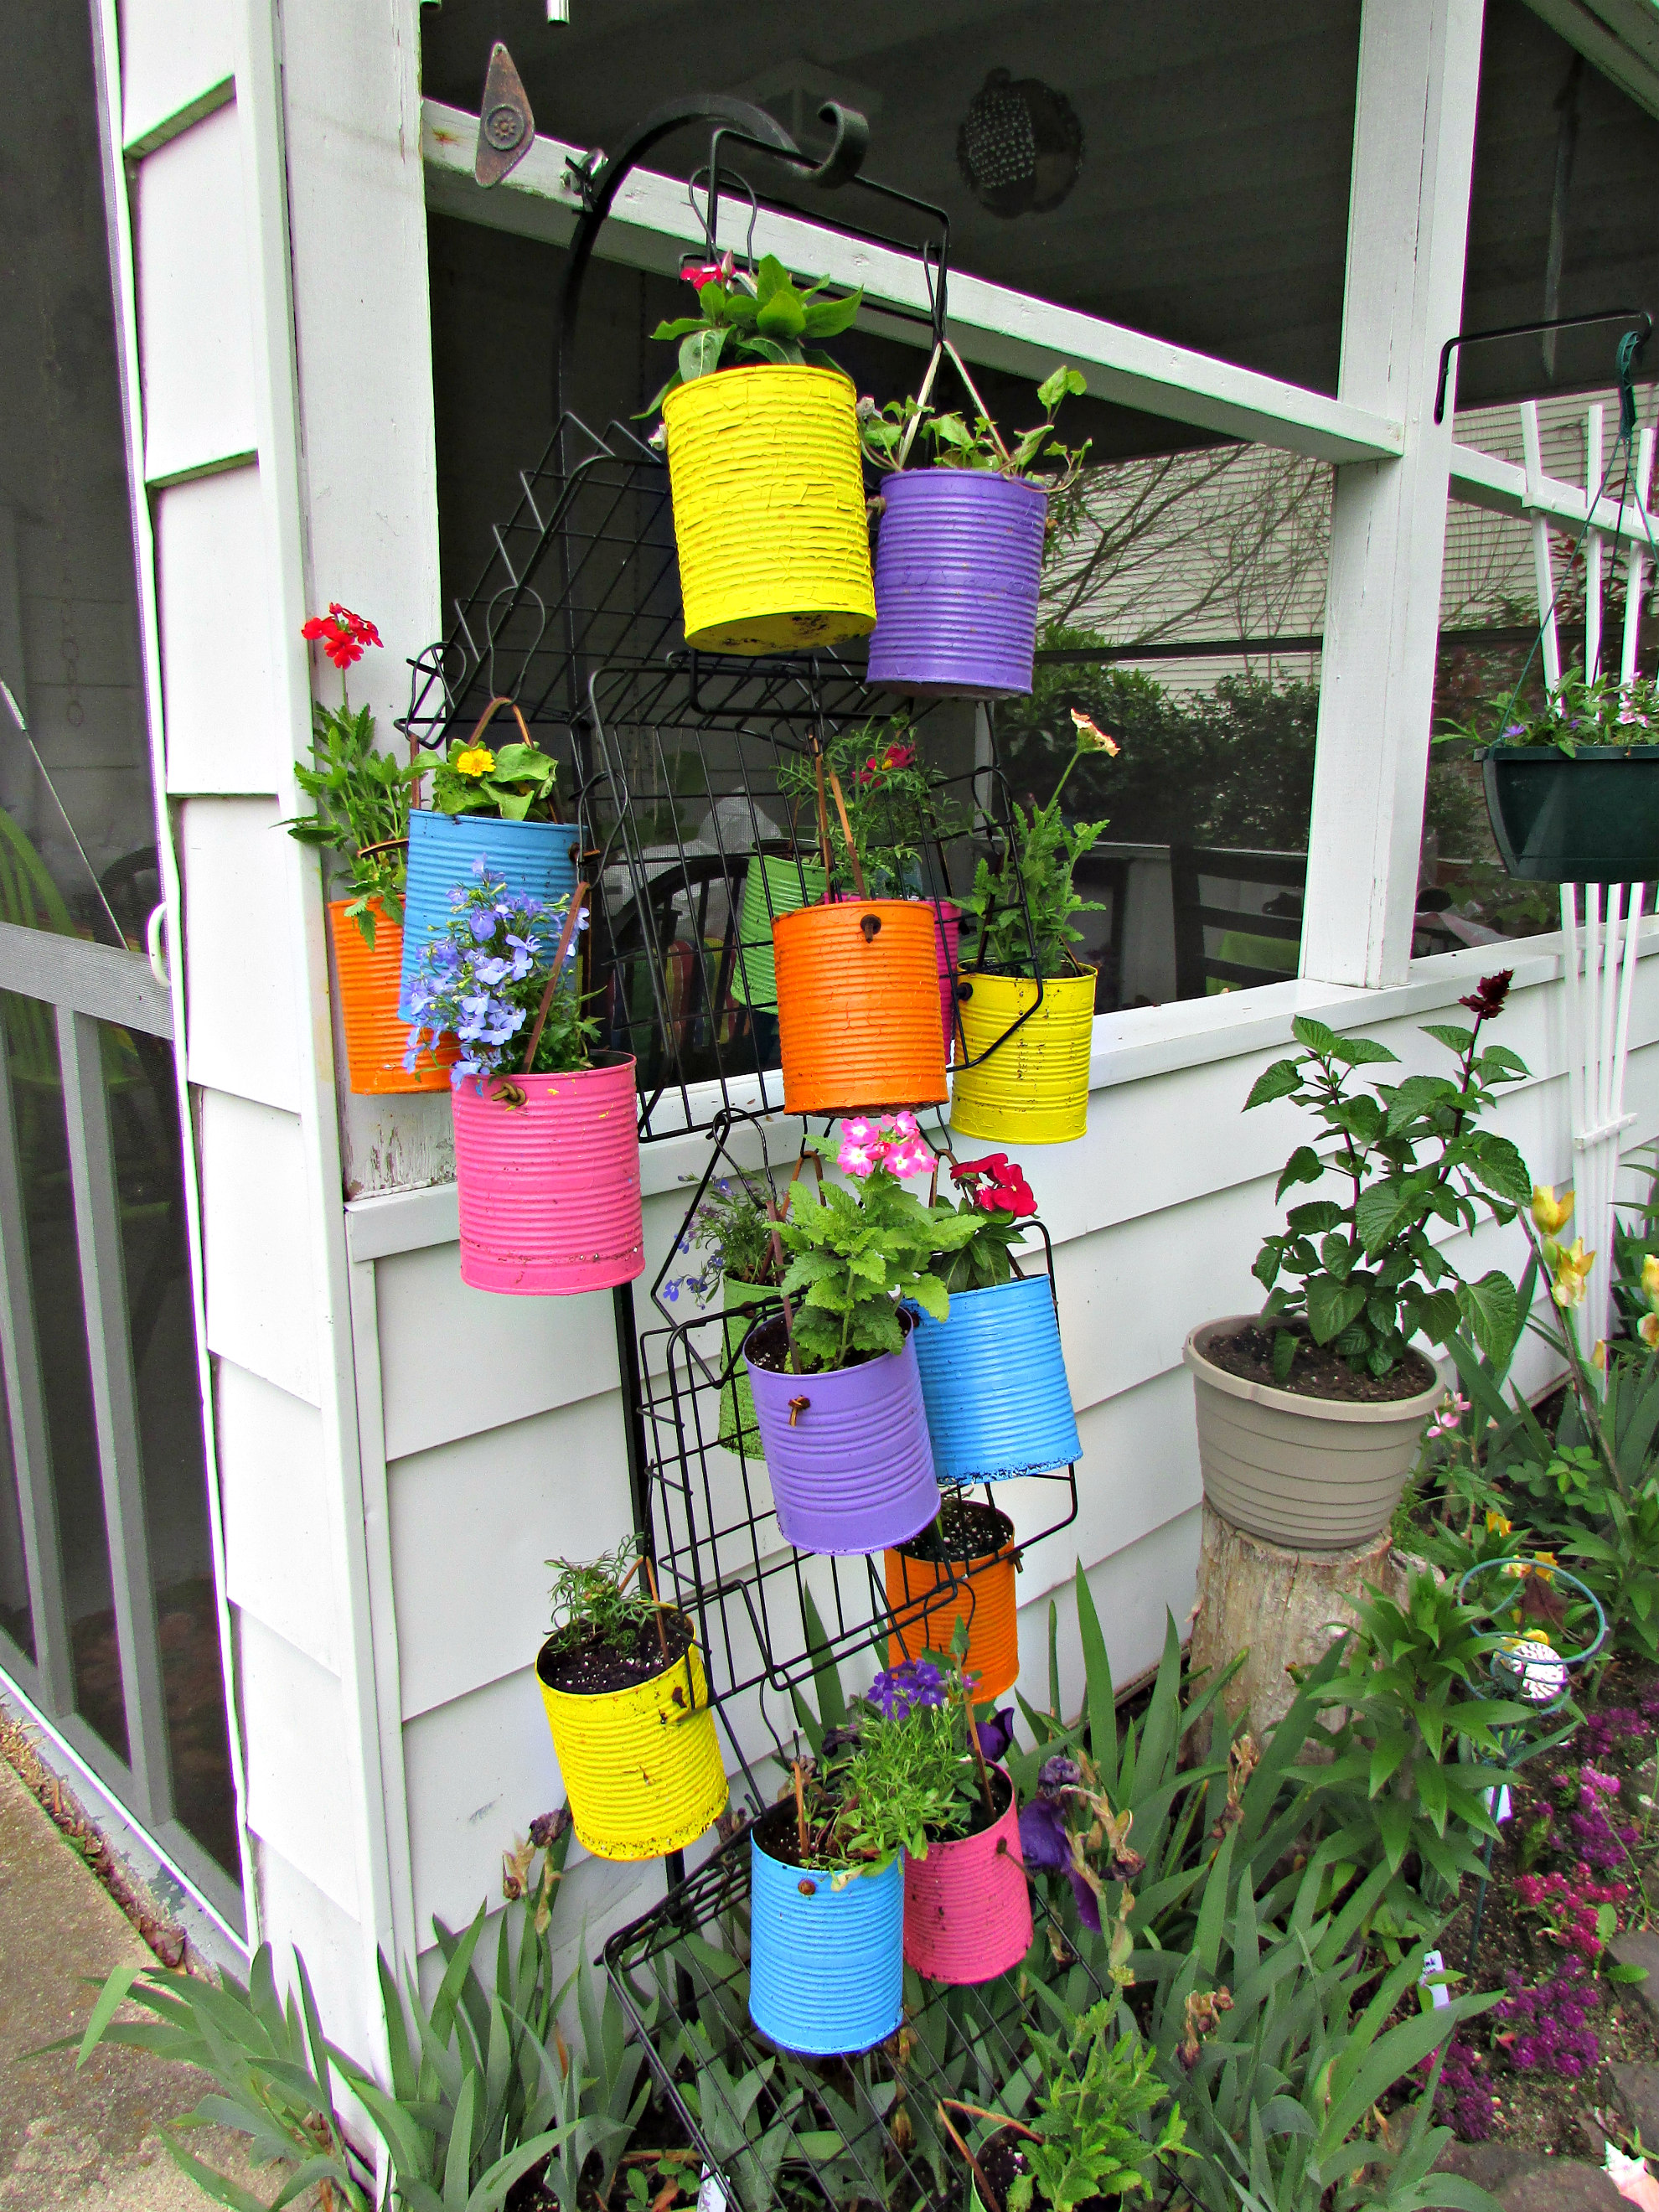
The look of the cans is even better than I had hoped. The rack I wired together from thrift store inbox trays is perfect and holds eighteen cans. Stringing leather strips through the side holes gives me a strong hanger for the weight of the cans. I’m happy with my project and pleased it gives me more room to grow flowers specifically designated for flower pressing.


They came out wonderful – 😉
And I was wondering how many coats of paint it took when I first saw the pictures – and so then I read it took three .
I like the custom feel to this project
LikeLiked by 1 person
I was hoping only two coats, but the lighter colors, especially yellow, is hard to cover. I really could have used four coats on that one, but since they are for only a season, left it alone at three. I had a request for directions for the rack and I’ll photograph one of the cans close up. The acrylic reacted to rain on some of them and they have a really interesting rippled/crackle effect without any crackle medium.
LikeLiked by 1 person
Truly a fun and colorful project and had the recycle and upcycle aspect (green earth project)
LikeLiked by 1 person
😃
LikeLiked by 1 person
Truly spring colours. Yesterday when you posted part 1, I thought you were going to recycle the tins for storing some spaghetti sauce. Today I was pleasantly surprised to see these beauties.
How did you paint them, Kathy ? Spray paint or with a brush?
Please share in a post how you made the wire rack( even a youtube video would help).
Susie
LikeLiked by 1 person
Hi Susie, I can post a part three for the rack, but since it was a one time build I will have to include still photos and an explanation. Thanks so much for your interest. It was fun to put this together, but of course I ran into some problems while doing it and that is what I can post tomorrow. Thanks for the idea. I used an inexpensive brush, nylon bristles, and it worked fine for these cans. They began to age rapidly, so they are a one season pot. Kathy
LikeLiked by 1 person
I am really interested in this, especially the rack and how you hung the tin pots up with the beautiful flowers in them. Of course,I am curious about the leather hangers too.
LikeLiked by 1 person
I will create a new post tomorrow…part III…it will show the mechanics of my rack.
LikeLiked by 1 person
They’re lovely to look at, so colorful.
LikeLiked by 1 person
I love color Arlene. Thanks so much for stopping by today.
LikeLiked by 1 person
Love it!
LikeLiked by 1 person
Thanks so much! I’m enjoying it.
LikeLiked by 1 person
That was a marvelous project and so colorful!
LikeLike
Thanks Anne…it was so much fun…other than the small tin can cuts I have on my hands. I always look like I’ve been in a battle during summertime with it’s weeding and playing around.
LikeLike
I love the sound of that — tin can cuts. Hope you will heal quickly.
LikeLiked by 1 person
They were small and already almost invisible.
LikeLiked by 1 person
This is so pretty! I love how bright and colorful it is. You did an amazing job!!
LikeLike
Thanks…so much fun!
LikeLiked by 1 person
These look so good. Thanks for sharing.
LikeLiked by 1 person
Thanks for taking a look and the comment. It’s appreciated.
LikeLiked by 1 person
What a bright spot! Beautiful!
LikeLike
It reminds me of our vacations to Jamaica and is already bringing me a lot of joy. Thanks for stopping by.
LikeLike
I love the bright and cheery colors! So festive for spring time. ❤️
LikeLike
Thanks, I enjoy looking at it, and so far nothing is drying out too fast.
LikeLiked by 1 person
Awesome idea, I love all the colors too!
LikeLiked by 1 person
Thanks so much…disaster today though….I fell and took the whole thing down with me. 😒
LikeLiked by 1 person
😲 😢
LikeLiked by 1 person