Phlowers & Planting – Friday Flowers/Moonflowers

Moonflower Vines are one of my favorite night-blooming annuals. I grow them yearly and have found it best to start them earlier than the seed packet recommends. To ensure mid-season blooms, I start my seeds in mid-winter, which, for me, means today. I always soak the seeds first. The seeds soaking in water were gathered from last year’s plants.

If the seed is viable, it will sink to the bottom of the jar as it draws in the water. So far, only one has taken the plunge. Hopefully, many more will follow suit.

Planting – Moonflower Seeds

moonflower

Last summer, I published a post on my Moonflower Vines. These night-blooming flowers glow in the soft light of the moon, all the while exuding a captivating fragrance.  I buy Moonflower seeds  off  the racks of big-box stores, but I deviated from my norm this year and bought a packet at Longwood Gardens.

moonflower packet

Renee’s Garden is a trusted brand of seeds.

moonflower packet 2

I appreciate the fact that each packet states the seeds are, “Not treated or genetically engineered.” Renee’s Garden also offers advice on their blog: Renee’s Blog

I soaked the seeds overnight as per directions on packet, and planted them in recycled yogurt containers. (Some gardeners also nick the outer shell of the large seed.) I filled each cup with organic potting soil in bottom half,  seed starter mix as top layer. I placed these in an empty plastic container, set it beside my heating vent, and in less than a week…

SPROUTS!!!

moonflower sprouts

Oh the JOY of gardening from seed! I started these Moonflower vines much earlier than recommended. This is due to my experience with them; they are very slow-growing  for a few weeks. I’m hoping to enjoy my Moonflowers blossoms by  late May. Happy Gardening!

How to Grow A Moonflower Vine Indoors.

Photograph – The Bone Yard

LILY SEEDPOD
LILY SEEDPOD

Autumn has brought out the beauty in the “Bone Yard” of my garden as my blossoms turn into seeds.

In response to The Daily Post’s writing prompt: “Change.”“This week, show us a change in progress. This can be done in one or multiple photos — we’ll let you decide!”

ZINNIA SEEDPOD
ZINNIA SEED HEAD

MOONFLOWER SEEDPOD
MOONFLOWER SEEDPOD

ECHINACEA SEED HEAD
ECHINACEA SEED HEAD

VITEX/CHASTE-BERRY SEEDS

ACORNS - WASHED BY RAIN FROM THE ROOF
ACORNS – WASHED BY RAIN FROM THE ROOF

Pic-Monkey is a terrific site for adding special effects to photographs.

Plant – Moonflower Vine

blog 069

I have mixed feelings about Moonflowers. They are devilishly hard to grow…at least this is true in my case. Every year I am lured by the packages of seeds with the big white bloom on the front. I am also tantalized by the thought of inhaling their fragrance once again. Last year, the one Moonflower vine I grew under lights was killed by an unseasonable frost. This year, I started my seeds even earlier and had three out of a dozen or so seeds sprout and grow. Two of the vines were piddling, but one was a winner. This vine grew and twined itself around all the other small sprouts on my grow table. I was entranced, then disaster struck, the dreaded spider mite. I would not give up on the plant and discard it as I knew I should. Instead I diligently sprayed the plant with a mister several times a day. In fact, I sprayed all my sprouts as a precaution in combating the spider mites. Mites hate moisture, the best way to kill them is to drown them.

blog 055

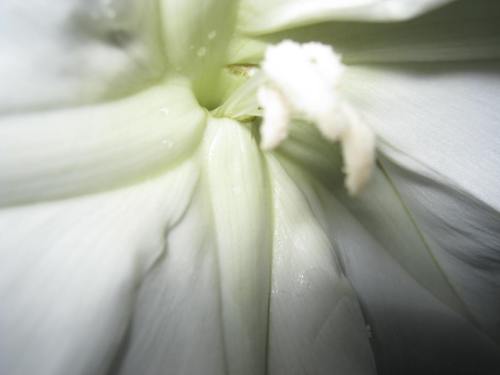
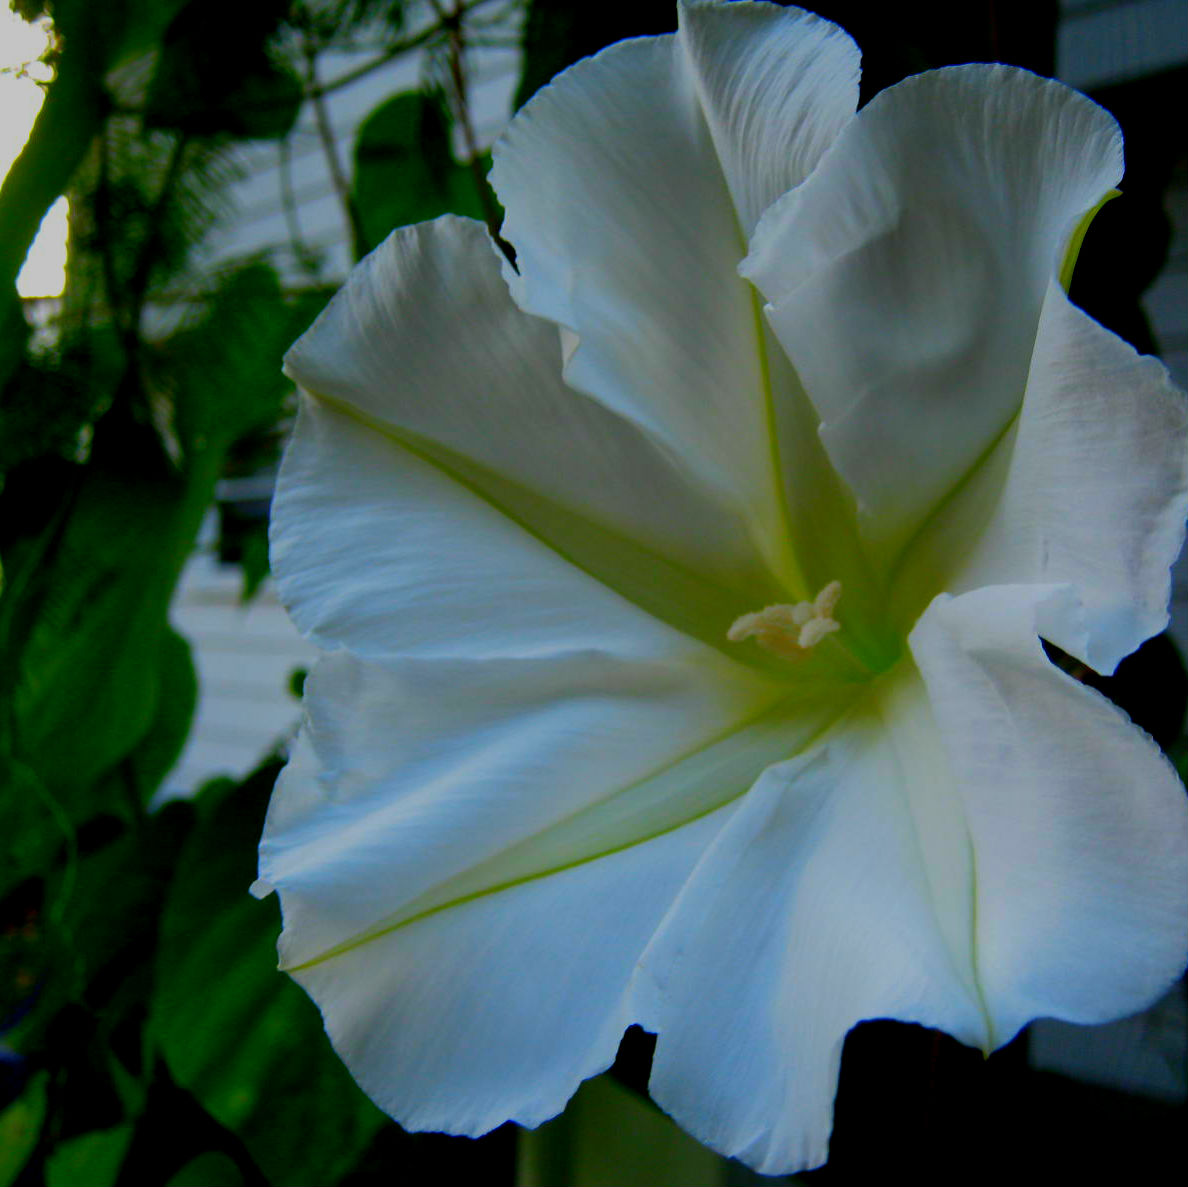
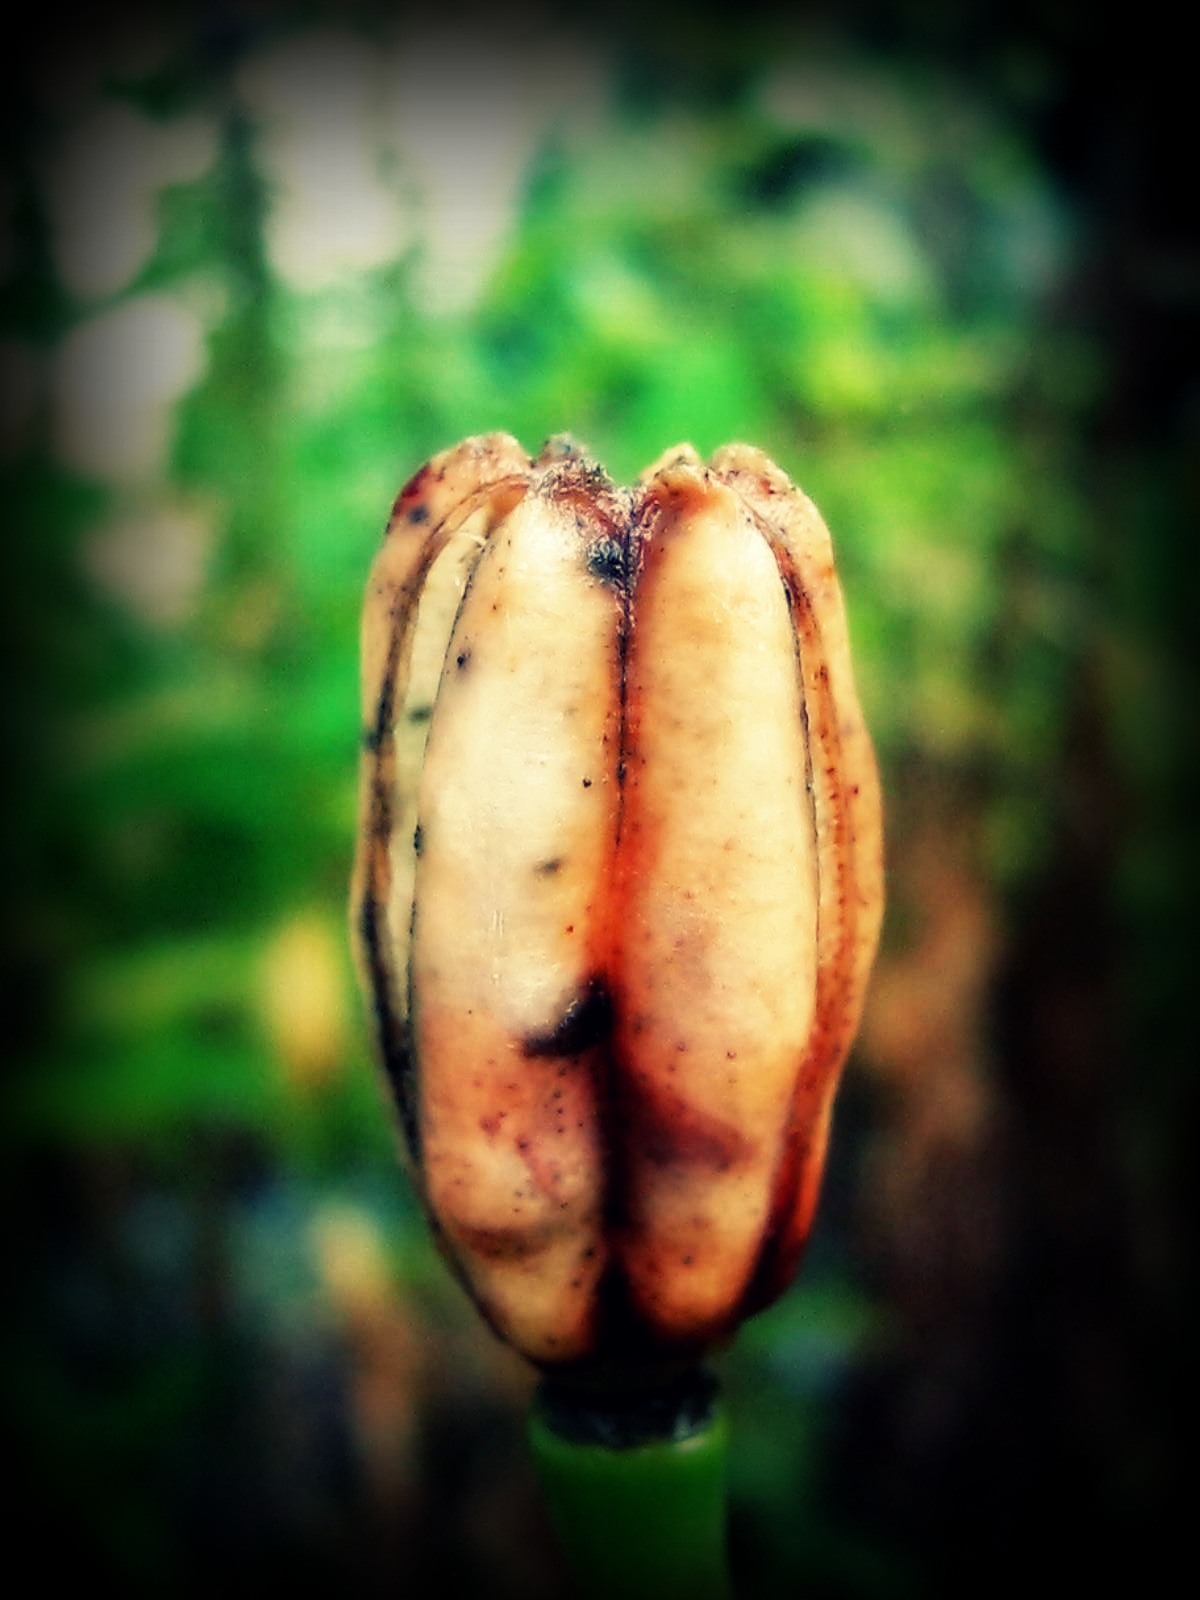
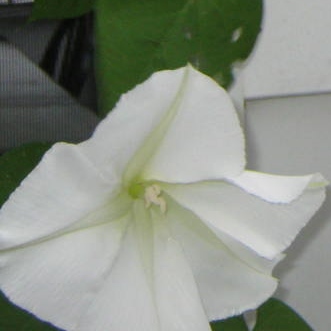
Long story a bit shorter…here’s a photograph of my best Moonflower vine ever. The early start, the constant misting, produced a plant that is already blooming for me. It’s been blooming for about two weeks here in Southern New Jersey. This afternoon I spotted a beautiful bud and thought the flower was ready to unfurl it’s petals. Tonight I checked the plant, and yes, a gorgeous bloom had opened and was filling the air with its lovely, ethereal fragrance. How could anyone not love a Moonflower?

blog 059

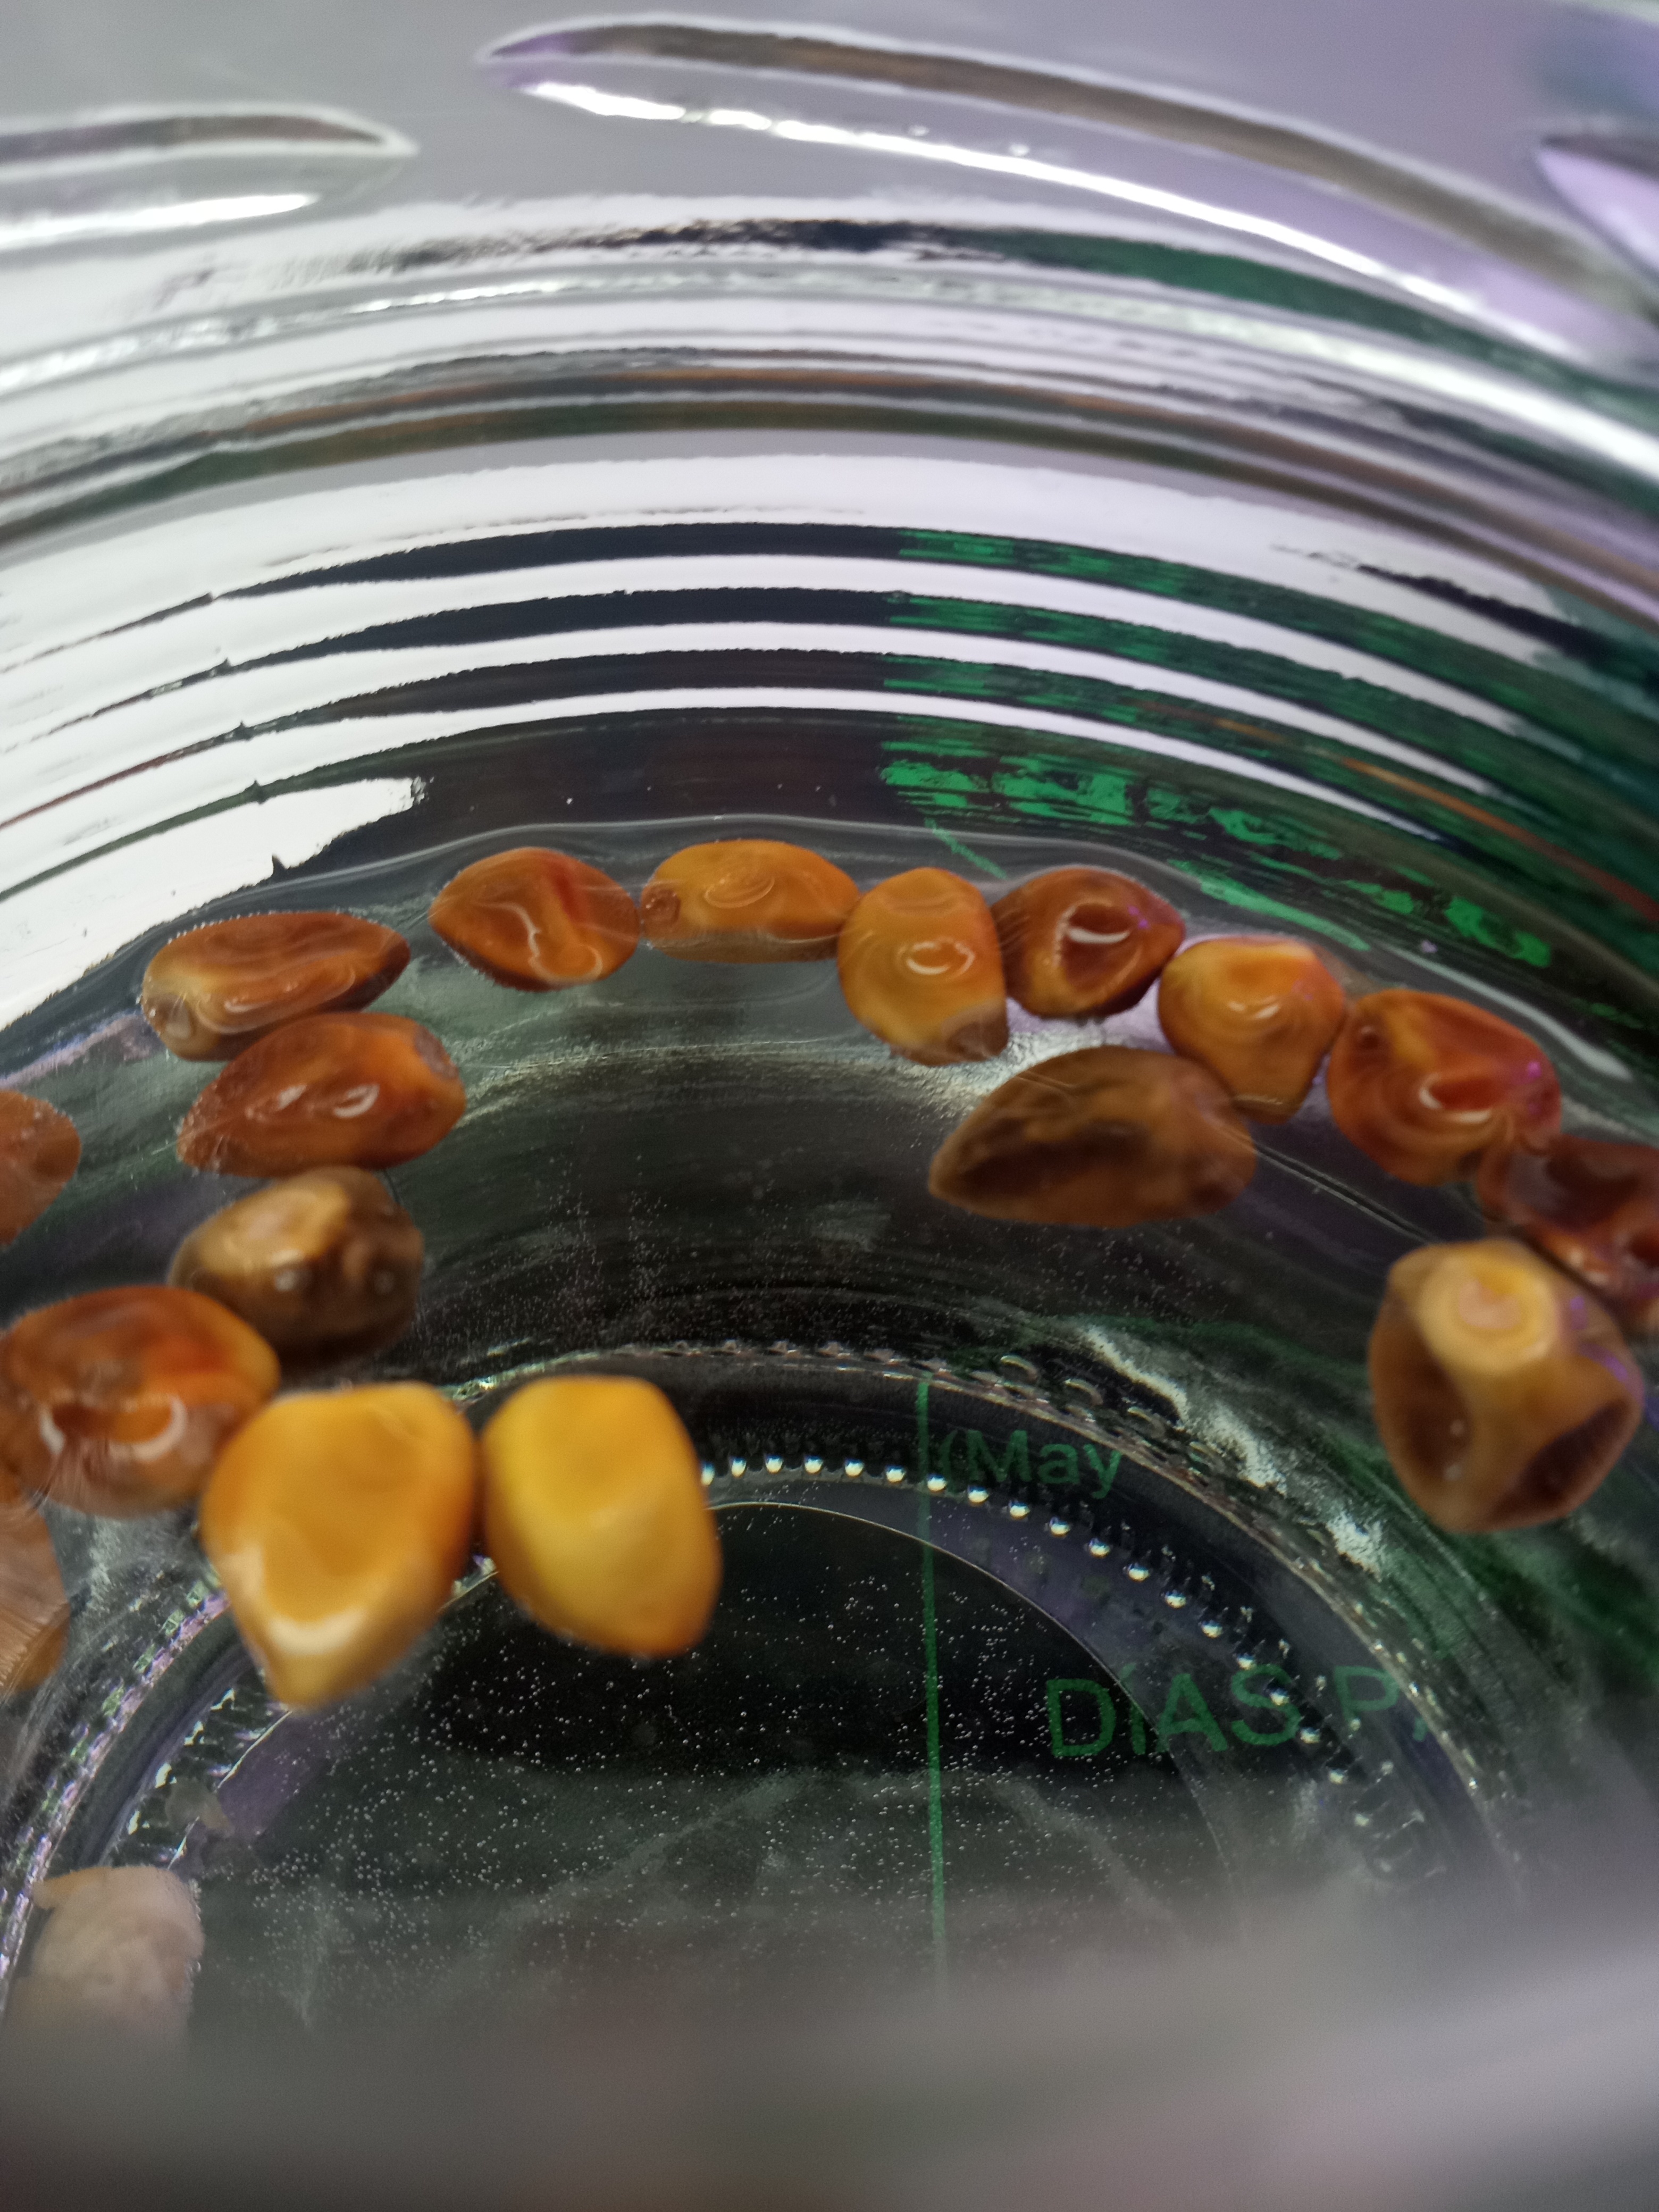
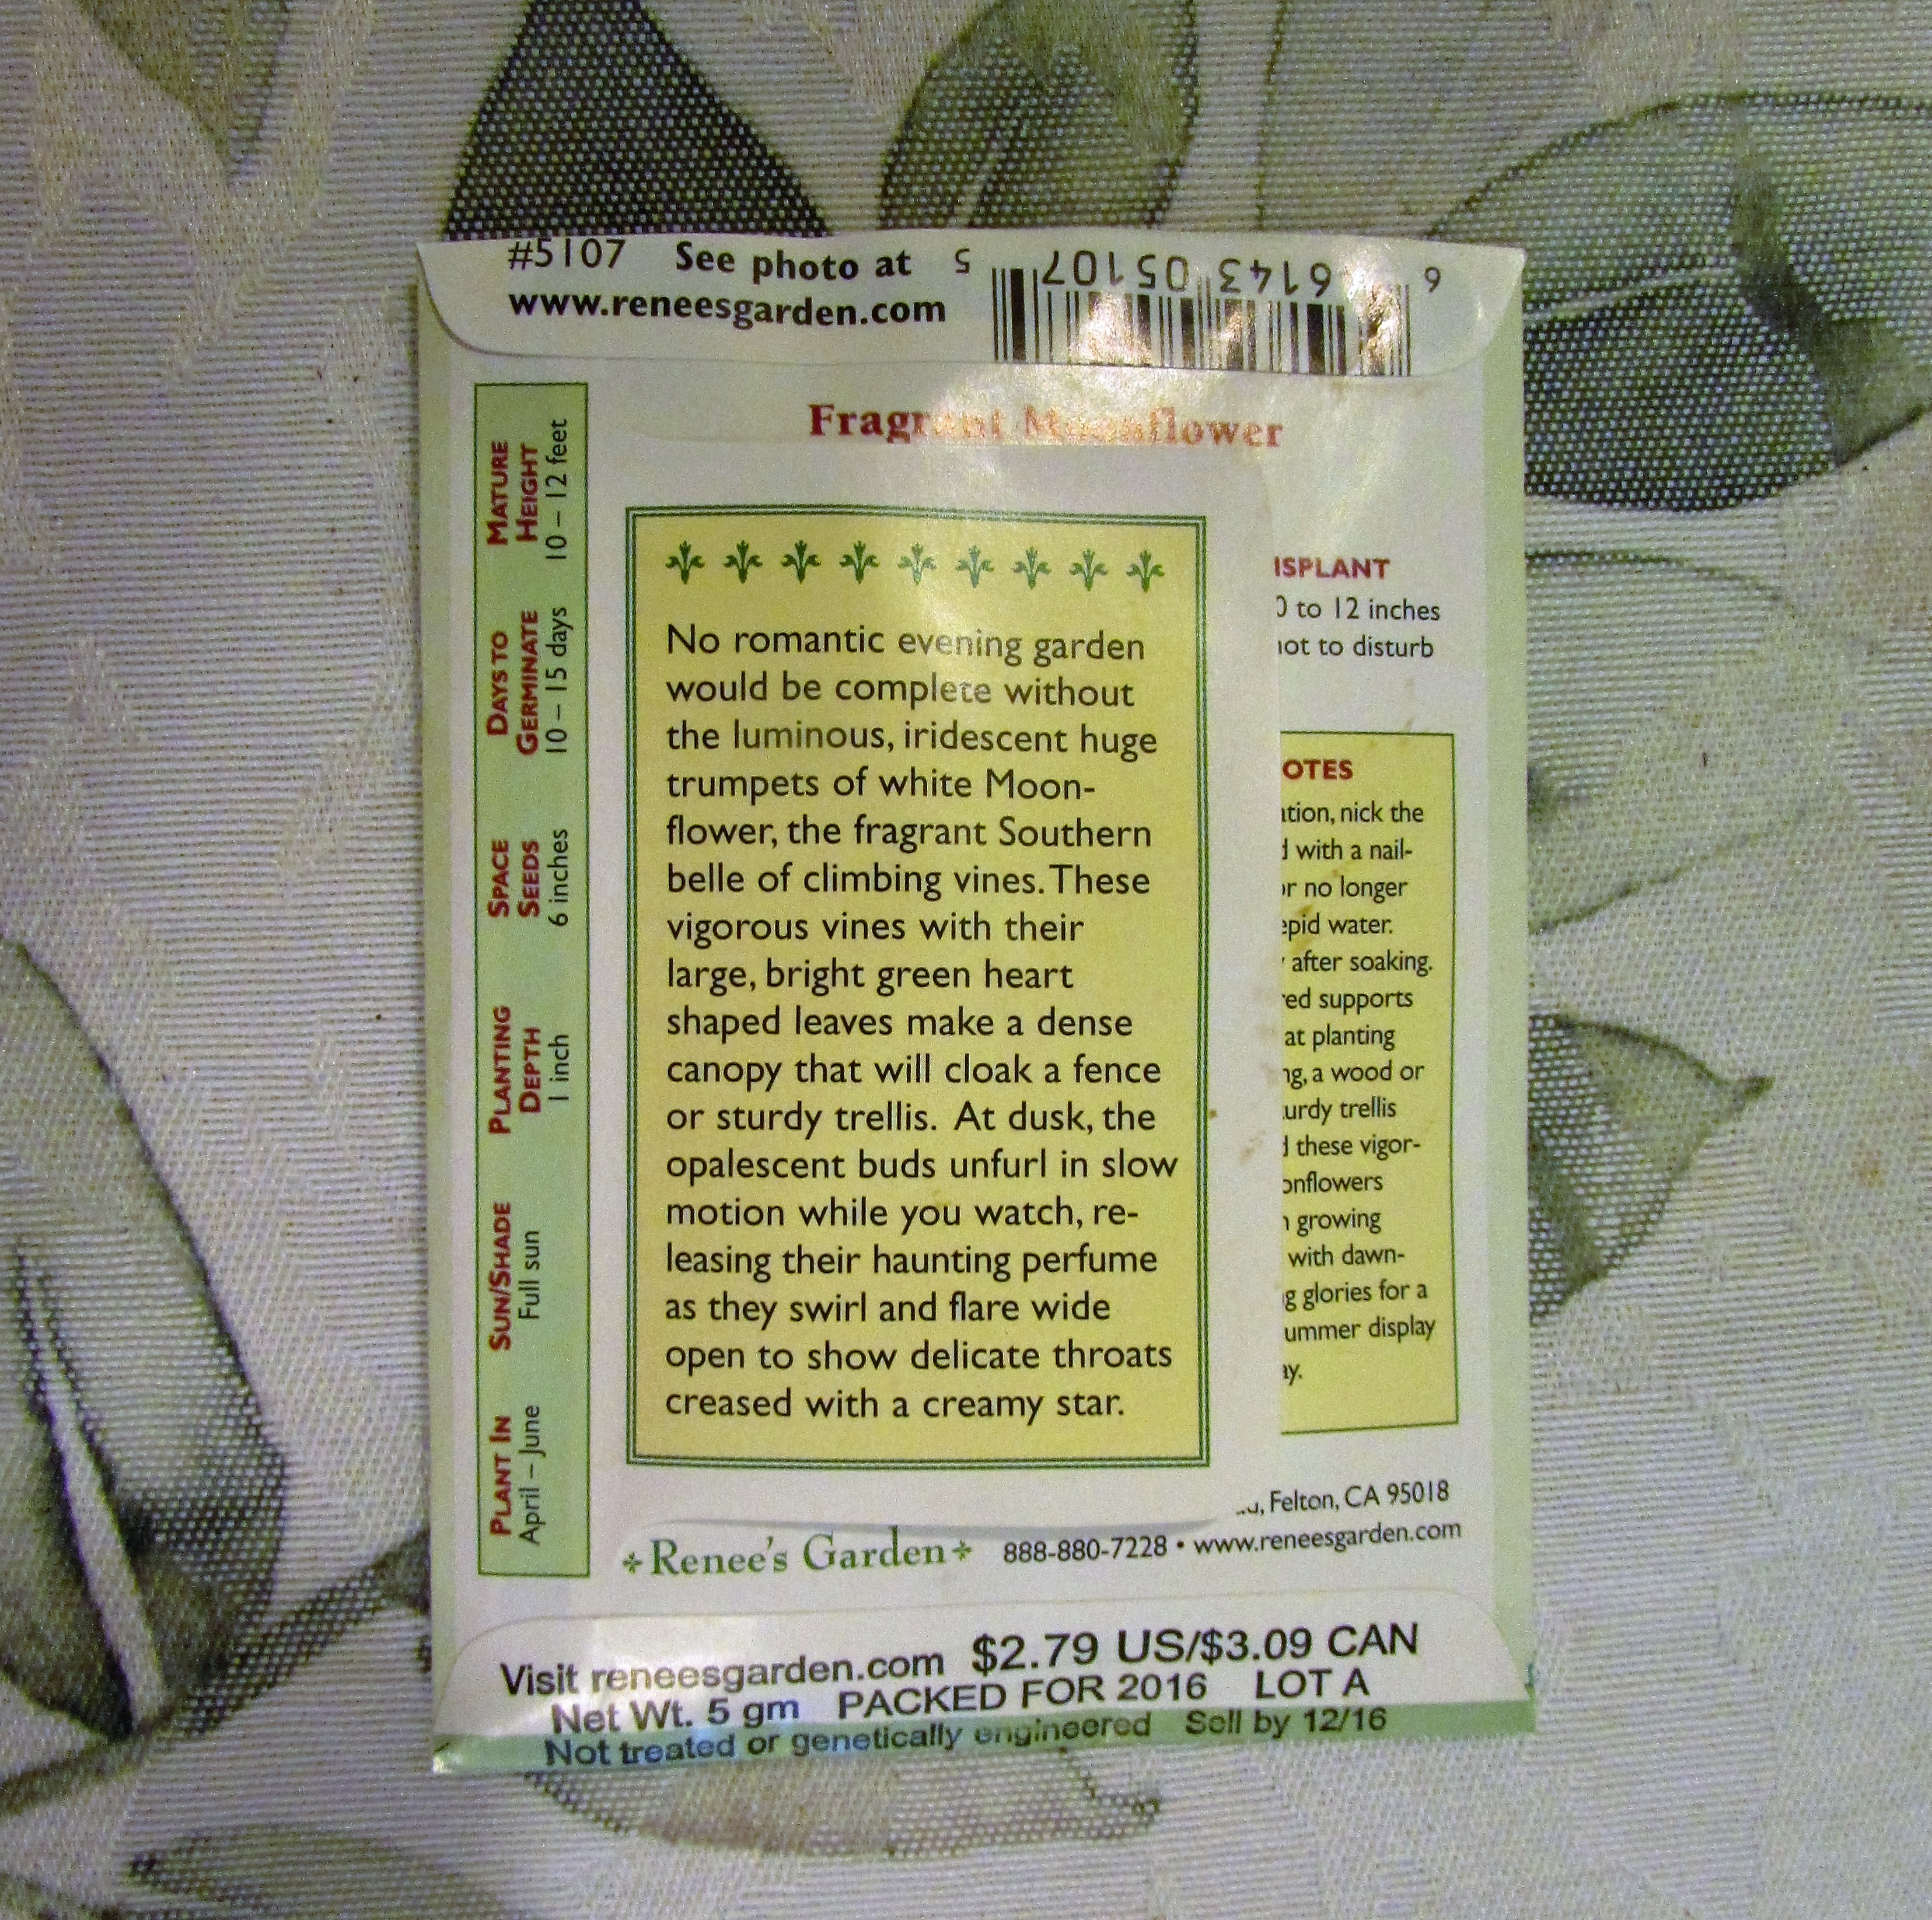
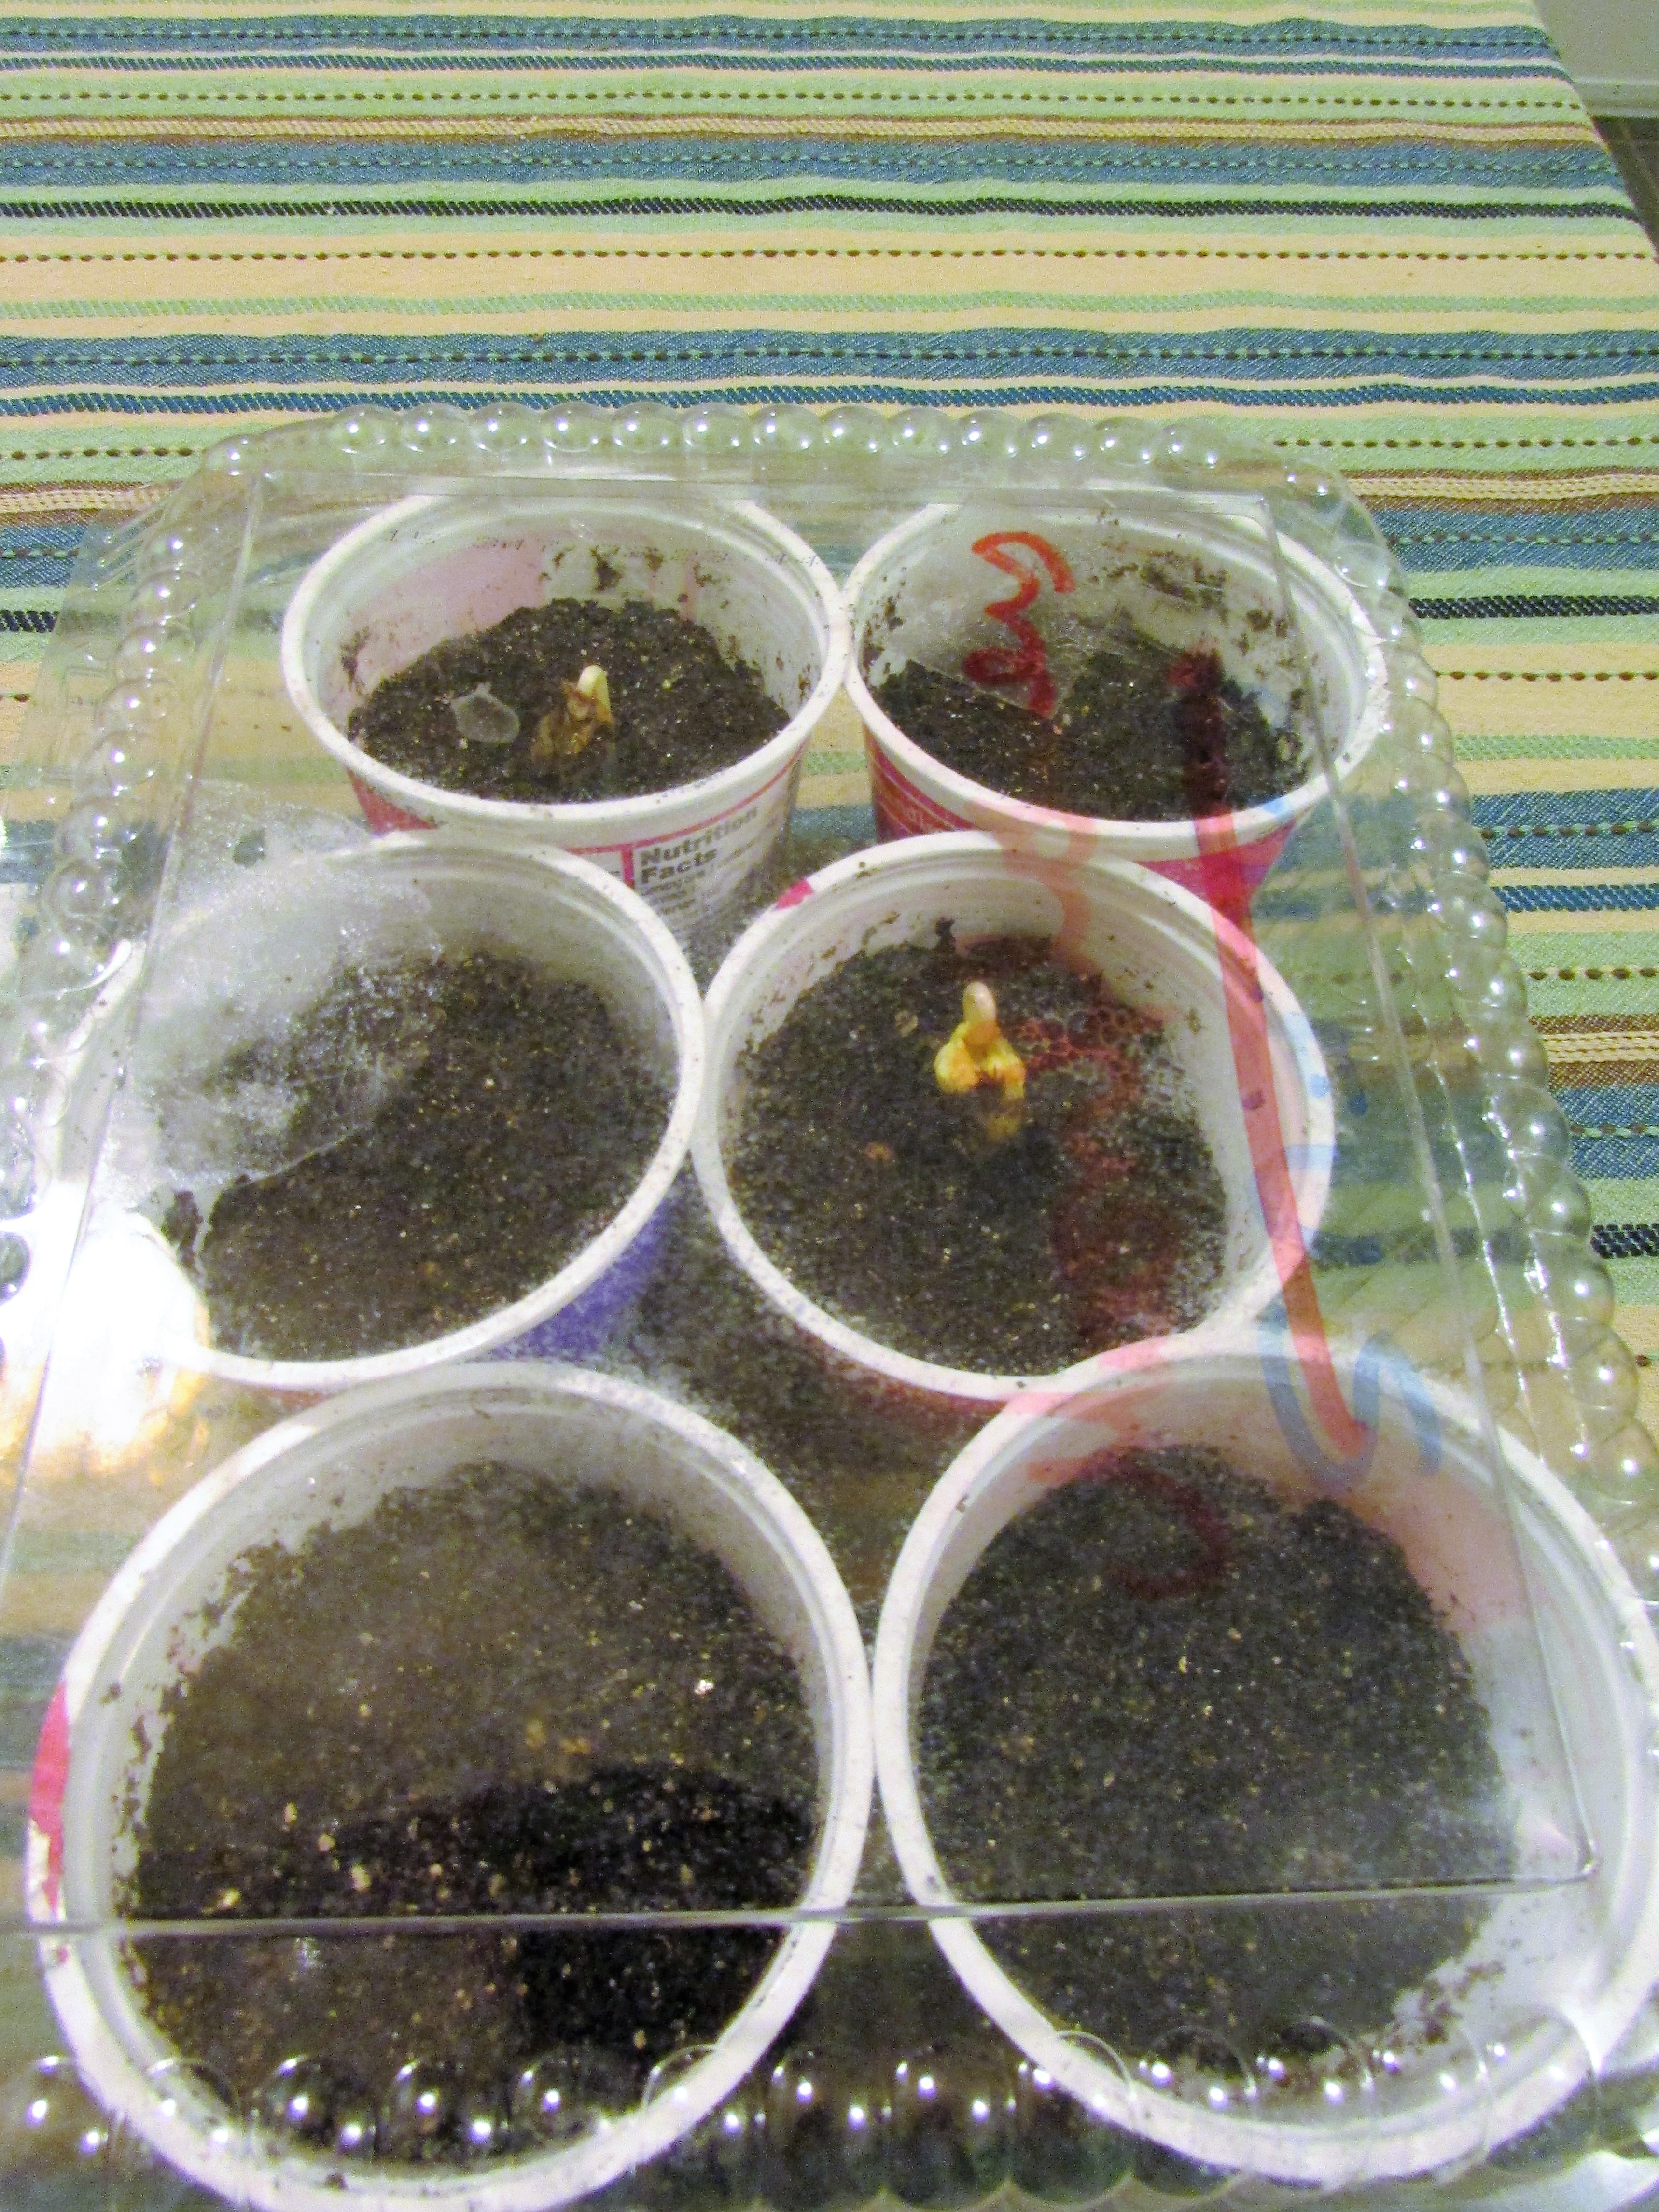
My best advice for growing Moonflowers…start much earlier than the package of seeds recommends. When the seeds first appear in nurseries buy a packet and plant them that same week. I soak the seeds for about 24 hours, I sometimes nick the outer shell, but this year did not take the time to do this. Plant the seeds about half an inch down in seed starter. I cover the pot with plastic wrap and place the container near a heat vent. Check for sprouting every day. If the seeds do not emerge within four weeks throw them out and try again. Many times the seeds I plant rot in the soil. I don’t know why, but they do…persevere and plant again.

blog 063