I love to force spring bulbs at this time of year. I gathered these ‘Antoinette’ tulips from the cold shelves of the garage and brought them into the house, planning to grow them in water.
I’ve grown this variety outdoors in previous years. It is low in height, compact in spread, and, hopefully, a perfect bulb to force. So far, everything is moving forward perfectly. The bulbs began to push up green stems in a matter of days.
To begin with, I filled the bottom of the goblet with a layer of stones. This addition is threefold: it gives the bulbs a foundation to sit upon, the rocks keep the bulbs out of the water, and the appearance is aesthetically pleasing. I place the bulbs on the stones, barely touching the water.
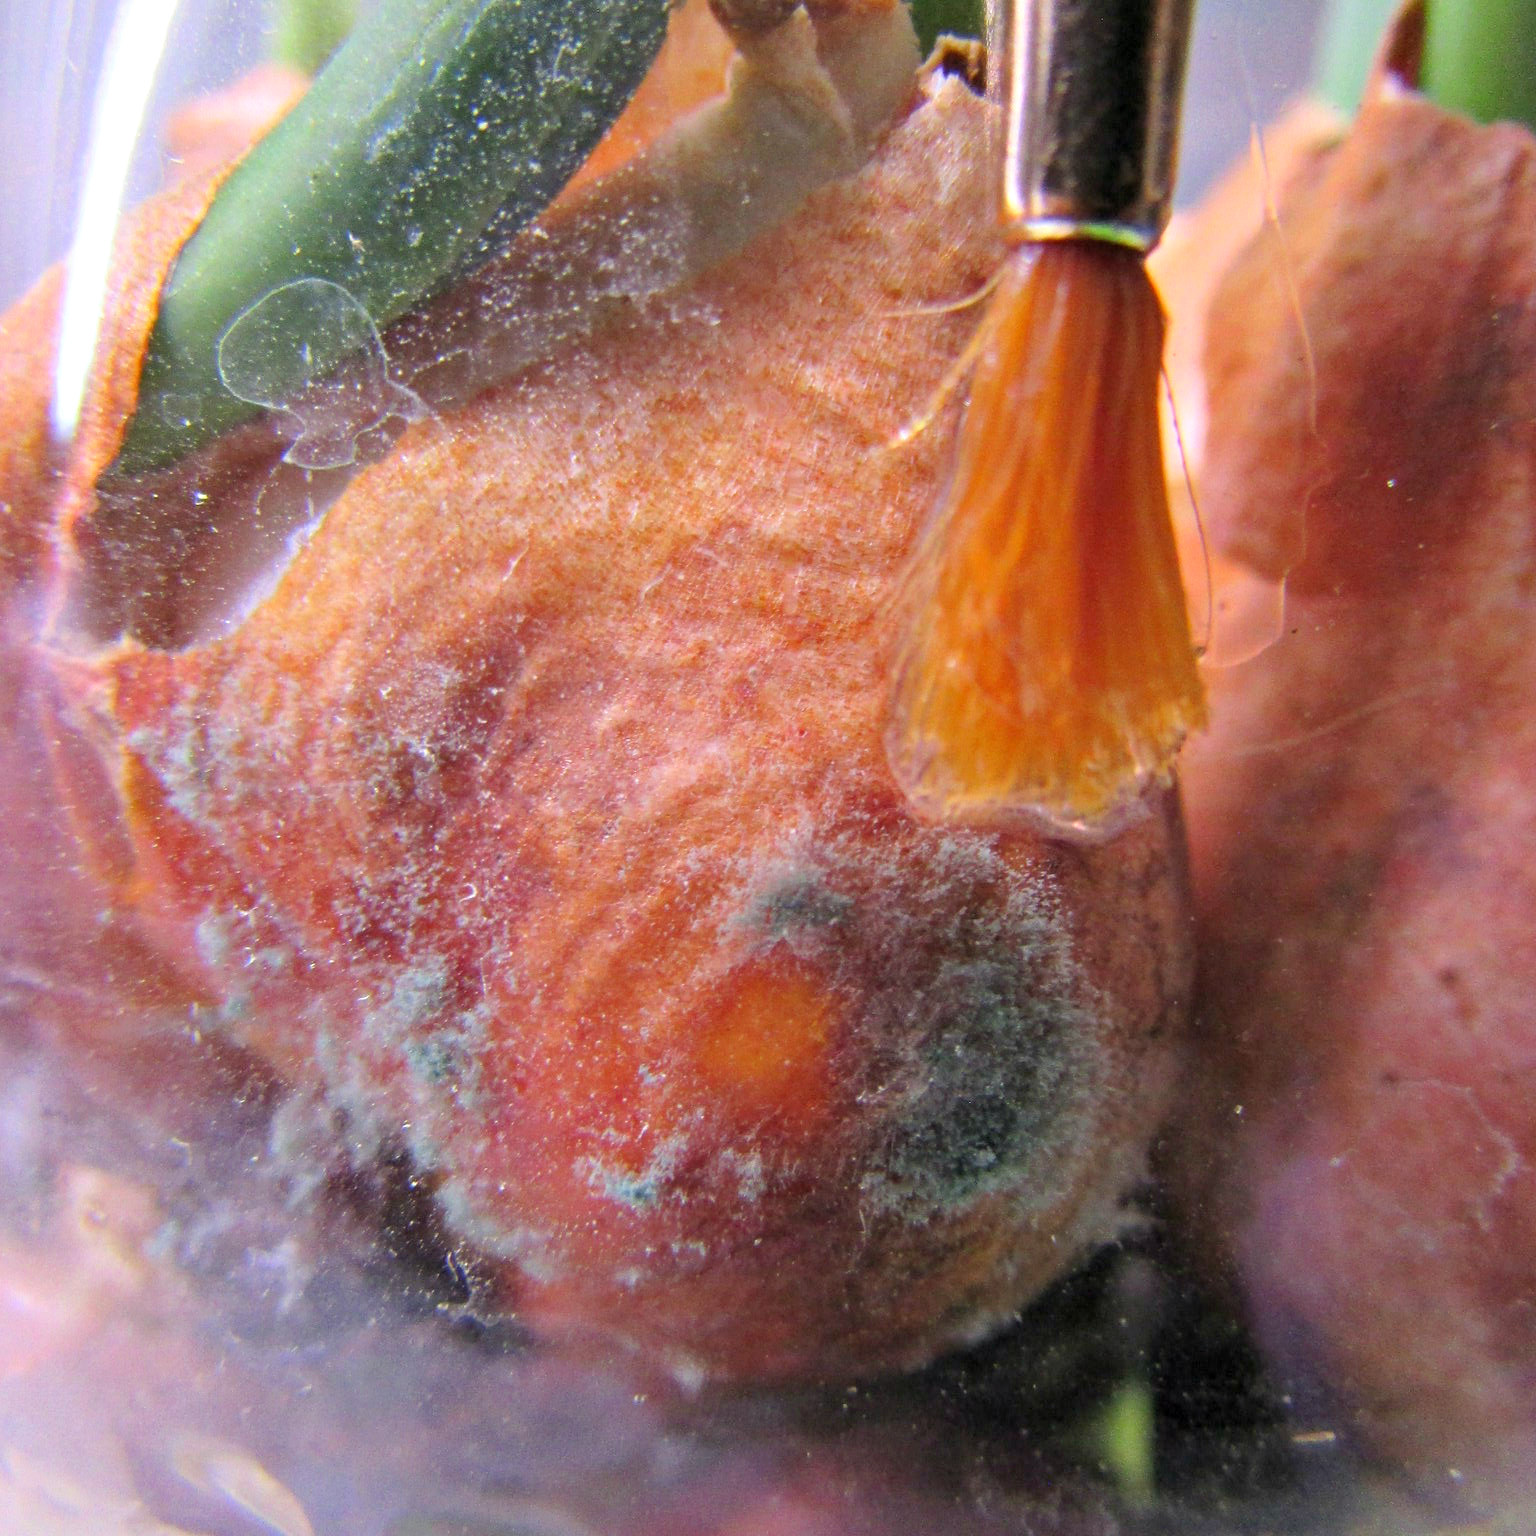
Every time I have forced bulbs, they have developed a bit of bluish-grey mold. The bulb company calls this mold transportation mold. To remove this, I dip a paintbrush in rubbing alcohol and swipe it over the ugly fluff. Hydrogen peroxide works as well. After I treat the mold, I change out the water.
I keep the potted bulbs in the basement under lights. A sunny but cold window would also work well.
We have a beautiful and very large Photinia planted beside our back porch. I am in love with this bush, although it has grown so large that it might be considered a tree.
I sit beside the bush on the opposite side of the porch screen and admire the foliage, gazing also at the gorgeous white blooms adorning it. Unfortunately, relaxing on the porch has been marred for several days by my search for the dead animal filling the air around me with the scent of rotting flesh.
Today, I suddenly remembered reading that Photinia blooms have an unpleasant smell. No! Could it be? I went outside and took a whiff of a lower blooming flower cluster, and oh my…instantly knew I had found what I had thought was a ‘dead’ animal. To say the flowers smell bad is an understatement. Thankfully, we are not having company in the next few weeks, and the flowers will drop off…but not soon enough.
Seeing them on the tree is glorious; however, the joke is on me. This Spring, we needed to fill in a spot close to the original, and since we like our Photinia so much, we purchased another one. Next year, the smell will be doubled. Still, the tree is beautiful, and I even use the evergreen branches for floral arrangements. Live and learn…and next time, do better research about the characteristics of the trees before I buy. Seriously, folks, the terrible smell fills the whole yard. I giggle a bit when I imagine the neighbors searching their yards for the dead animal.
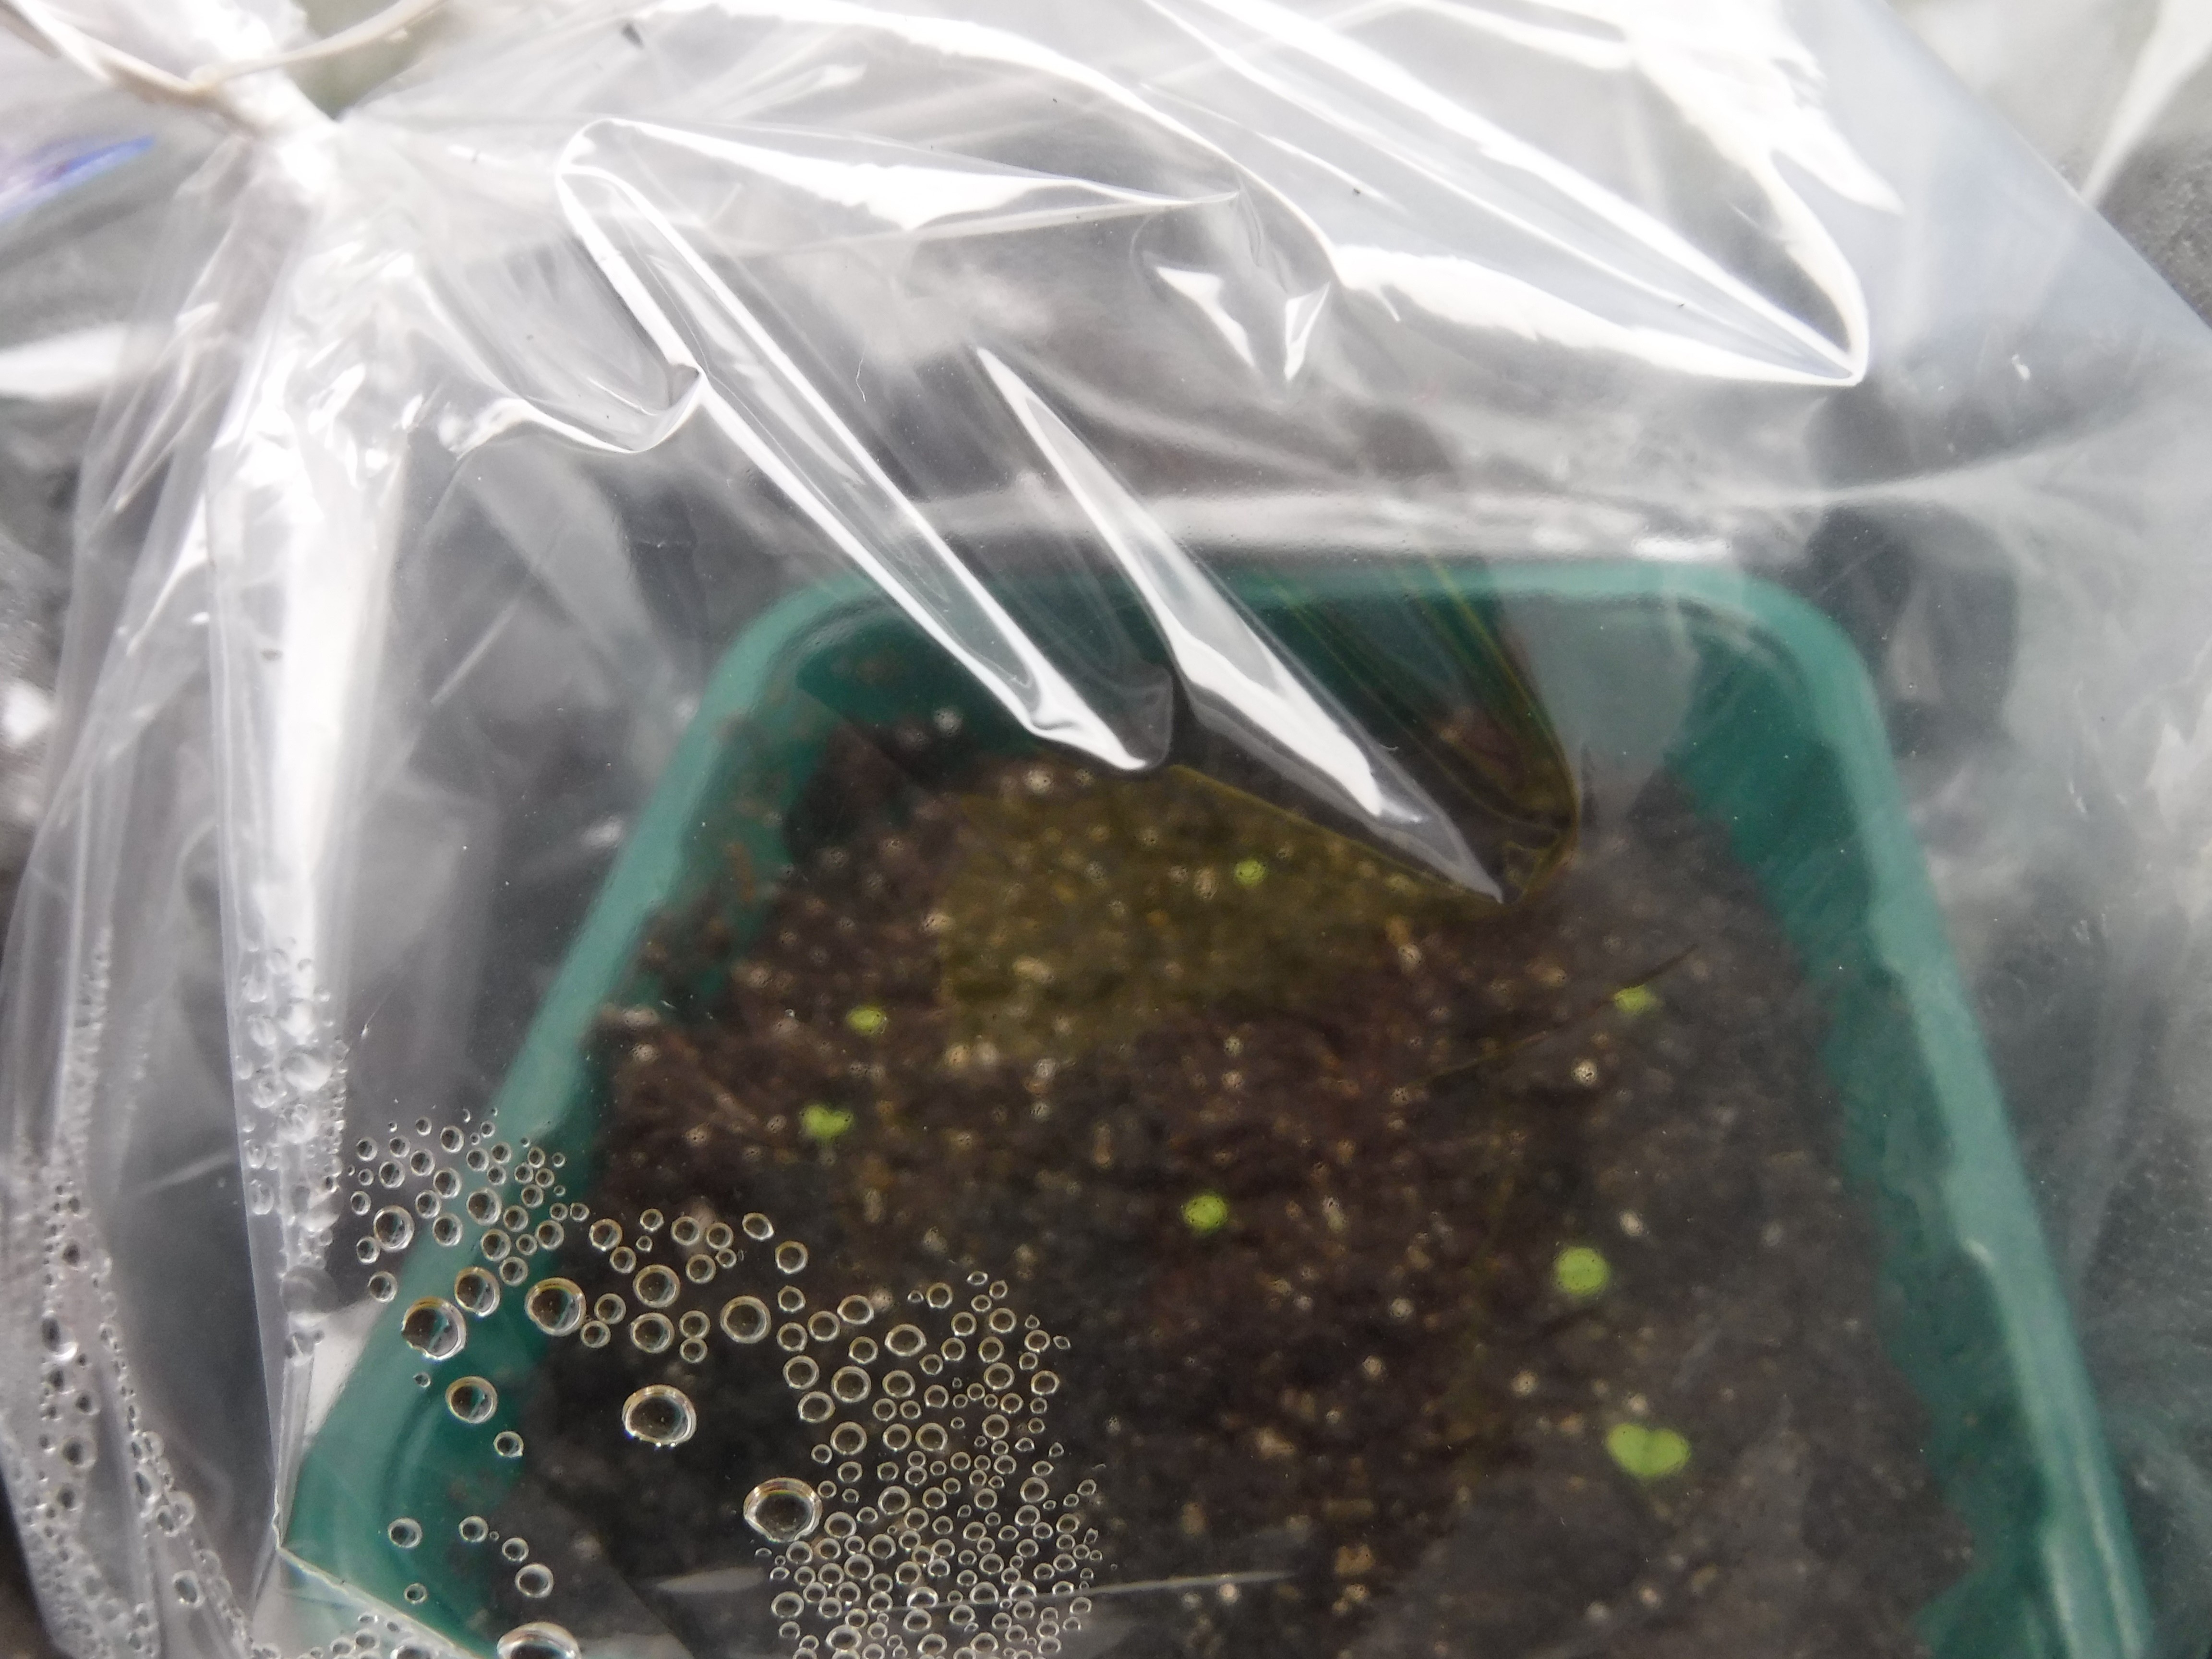
Yesterday, I was able to text my son a photo of this beautiful puff of salmon. I told him it was a cutting grown from a Geranium he gave me on Mother’s Day two years ago. Plants given as gifts are especially dear to me.
Before frost arrived last year, I dipped a cutting of the geranium in honey and placed it in loose soil with a Ziplock bag over the plant to keep it humid. Not every cutting works, so I usually grow three for every plant I want to save.
I also tried bagging/boxing up a few bare-root geraniums, and the photo shows what I found just an hour ago when I opened the bag. I will continue to grow cuttings and, in the future, leave bare root storage to the experts.
Moonflower Vines are one of my favorite night-blooming annuals. I grow them yearly and have found it best to start them earlier than the seed packet recommends. To ensure mid-season blooms, I start my seeds in mid-winter, which, for me, means today. I always soak the seeds first. The seeds soaking in water were gathered from last year’s plants.
If the seed is viable, it will sink to the bottom of the jar as it draws in the water. So far, only one has taken the plunge. Hopefully, many more will follow suit.
Gathering in the green is one way to crawl out of the brain sludge of dreary winter weather. By green, I mean plants, green dreams of gardens to come, and green thoughts of using what is usually thrown away.
Quite a few pieces of ginger you buy in the supermarket are sprayed with a sprouting inhibitor. I recently found, in Produce Junction, a large ginger rhizome with swollen joints. They looked like they wanted to grow. Of course, to me, the sight of that ginger was irresistible. I let it lay undisturbed in my basement, and the swelling grew larger.
Yesterday, I planted it in a large 10″ pot. I hope to see sprouting above the soil’s surface in just a few weeks. I will update on the progress.
Planting indoors in such a large pot might have created havoc with dirt and debris everywhere, but I recently read an excellent tip in Martha Stewart’s Very Good Things: use an under-the-bed storage bin for planting indoors. This tip worked great for me. So much easier to close the lid when I was through and roll it under my plant table until needed again.
The online Farmer’s Almanac has an in-depth article on growing ginger from supermarket rhizomes.
We had a hard freeze last night. The white frosting was still visible on the zinnias after the sun came up. It’s time to put the garden to bed.
The hardiest butterflies were cabbage whites and the skippers, but even those are gone now. Hopefully, the offspring they left behind are in their chrysalises over-wintering in sheltered spots.
Ten Black Swallowtail caterpillars, within the butterfly house, formed their chrysalis in late summer. We had a couple cold nights in August and this set off diapause, a state of hibernation, in the butterflies. Three of the caterpillars formed their chrysalis on objects within the butterfly house. Seven of them formed on the screening. Those who chose the screens were easy. I checked on them, tied a string to the top, and hung them from the garage ceiling, quite an exclusive high-rise to rest in for the winter. They are far enough up that they would be hard to find by a wandering rodent. When it rains I will climb a ladder and spray a little bit of misty water into the house to mimic what’s going on outdoors.
Three of the caterpillars formed their chrysalis on other items. Two of them on a piece of landscaping stone I had at the bottom of the house to keep it secure when storms struck.
The other formed on a stem. These also need to be in the garage but must have some kind of protective covering. Recently, in the grocery store, I picked up several mesh bags sold for fruit; the perfect solution. I placed them around the objects holding the chrysalis and put them on a garage shelf for the winter.
The raising of butterflies has never become commonplace to me. I enjoy seeing the butterfly house hanging in the garage. It reminds me Spring will come again and hopefully a bevy of butterflies will emerge.
“Butterflies that go through diapause enter into a hibernation-like state, where physiological processes are suspended. After adverse weather conditions clear, they will come out of this state of suspended animation and return to normal functioning.”
The tip might be a little late for this year’s gardens, but keep it in mind for Spring planting. The red zinnia below is my photo for Cee’s Flower of the Day.
It’s always fun to traipse around the garden beds eye-level to the zinnias. Their height presents a problem though; how to support them? If you’ve ever grown these beauties, the taller varieties, you most likely know a heavy rainstorm will drive them to the ground if they are not staked. This year, quite by accident, I grew a natural staking plant nearby.
In the patio garden I planted zinnias, the State Fair variety that grows near four feet tall for me. Beside it I planted blue salvia since both flowers are hummingbird favorites. As the zinnias grew tall, and the salvia spread out in width, the zinnia grew up between the branches of the salvia and rested upon the natural support. No staking required. The plants look lovely growing together. Their roots have plenty of room. I can’t extol this combination enough; the hummingbirds are happy and so am I.
The growing season is almost over. We have had heavy rain along the Atlantic coast for days. The zinnias are now as tall as I am, and still, despite the downpours they are held aloft by the salvia plants. What a beautiful combination.
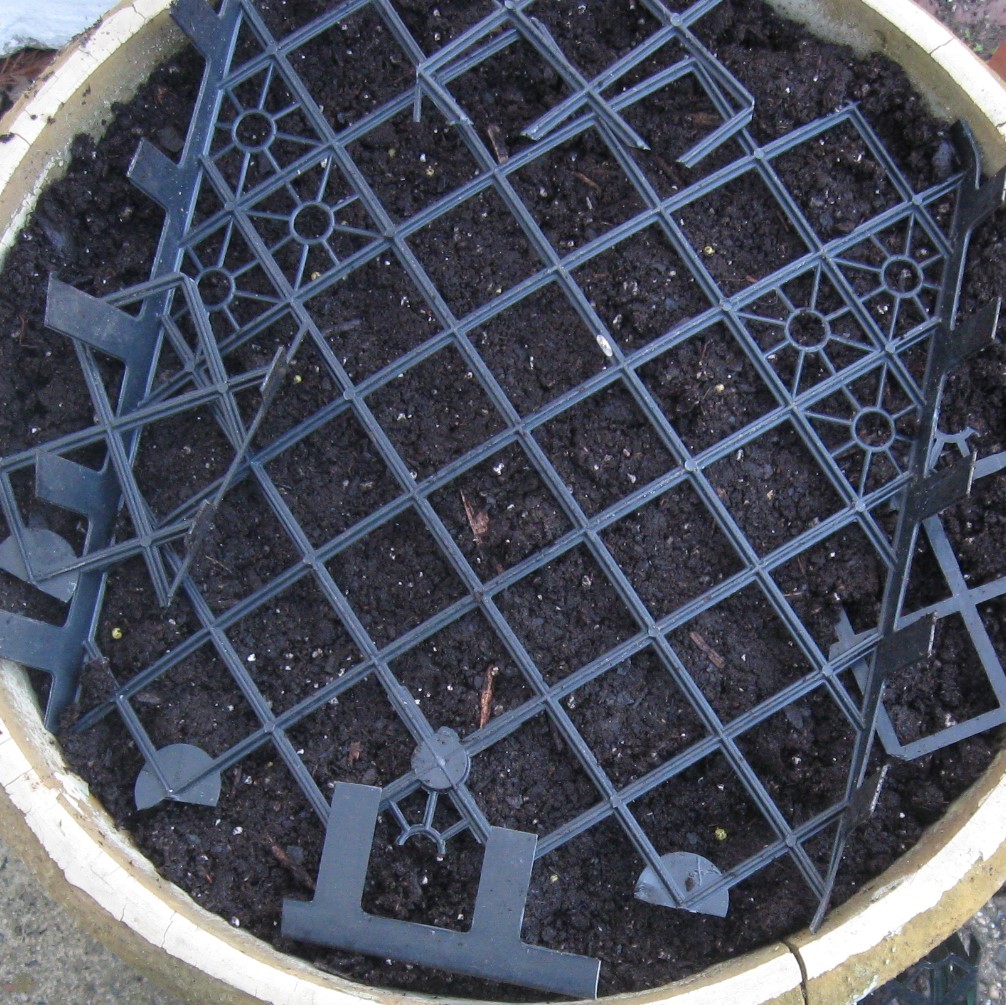
I found a packet of Butterfly friendly Spring bulbs this year. Since I am all about attracting butterflies to my gardens, I couldn’t resist. Of course, just one wasn’t enough, and I bought two. I had an instant dilemma when I opened the packages, the bulbs were all mixed up. I had no idea what was which, or which was what, and there were dozens of them. I gave up trying to identify variety and sorted them by sizes. Larger bulbs in the back of my pot, smaller sizes up front, and a row of a tulip I like in the middle.
They are planted way too close, but since they are a one season planting in garden pots, I will decide after they bloom if I am going to save and replant another year. The biggest problem I must solve is keeping the critters that munch on bulbs out of the pots. In soft dirt they will be easy pickings for rodents that dig.
I came up with a solution I hope will work for me. I used this tactic in my spring garden buckets and will try it with the bulb plantings. I cut the grates out of flat trays and secure them with large six inch anchor pins. When the bulbs begin to sprout I will remove the plastic grids and drape some netting over them. It gives me joy to think ahead to Springtime and butterflies.
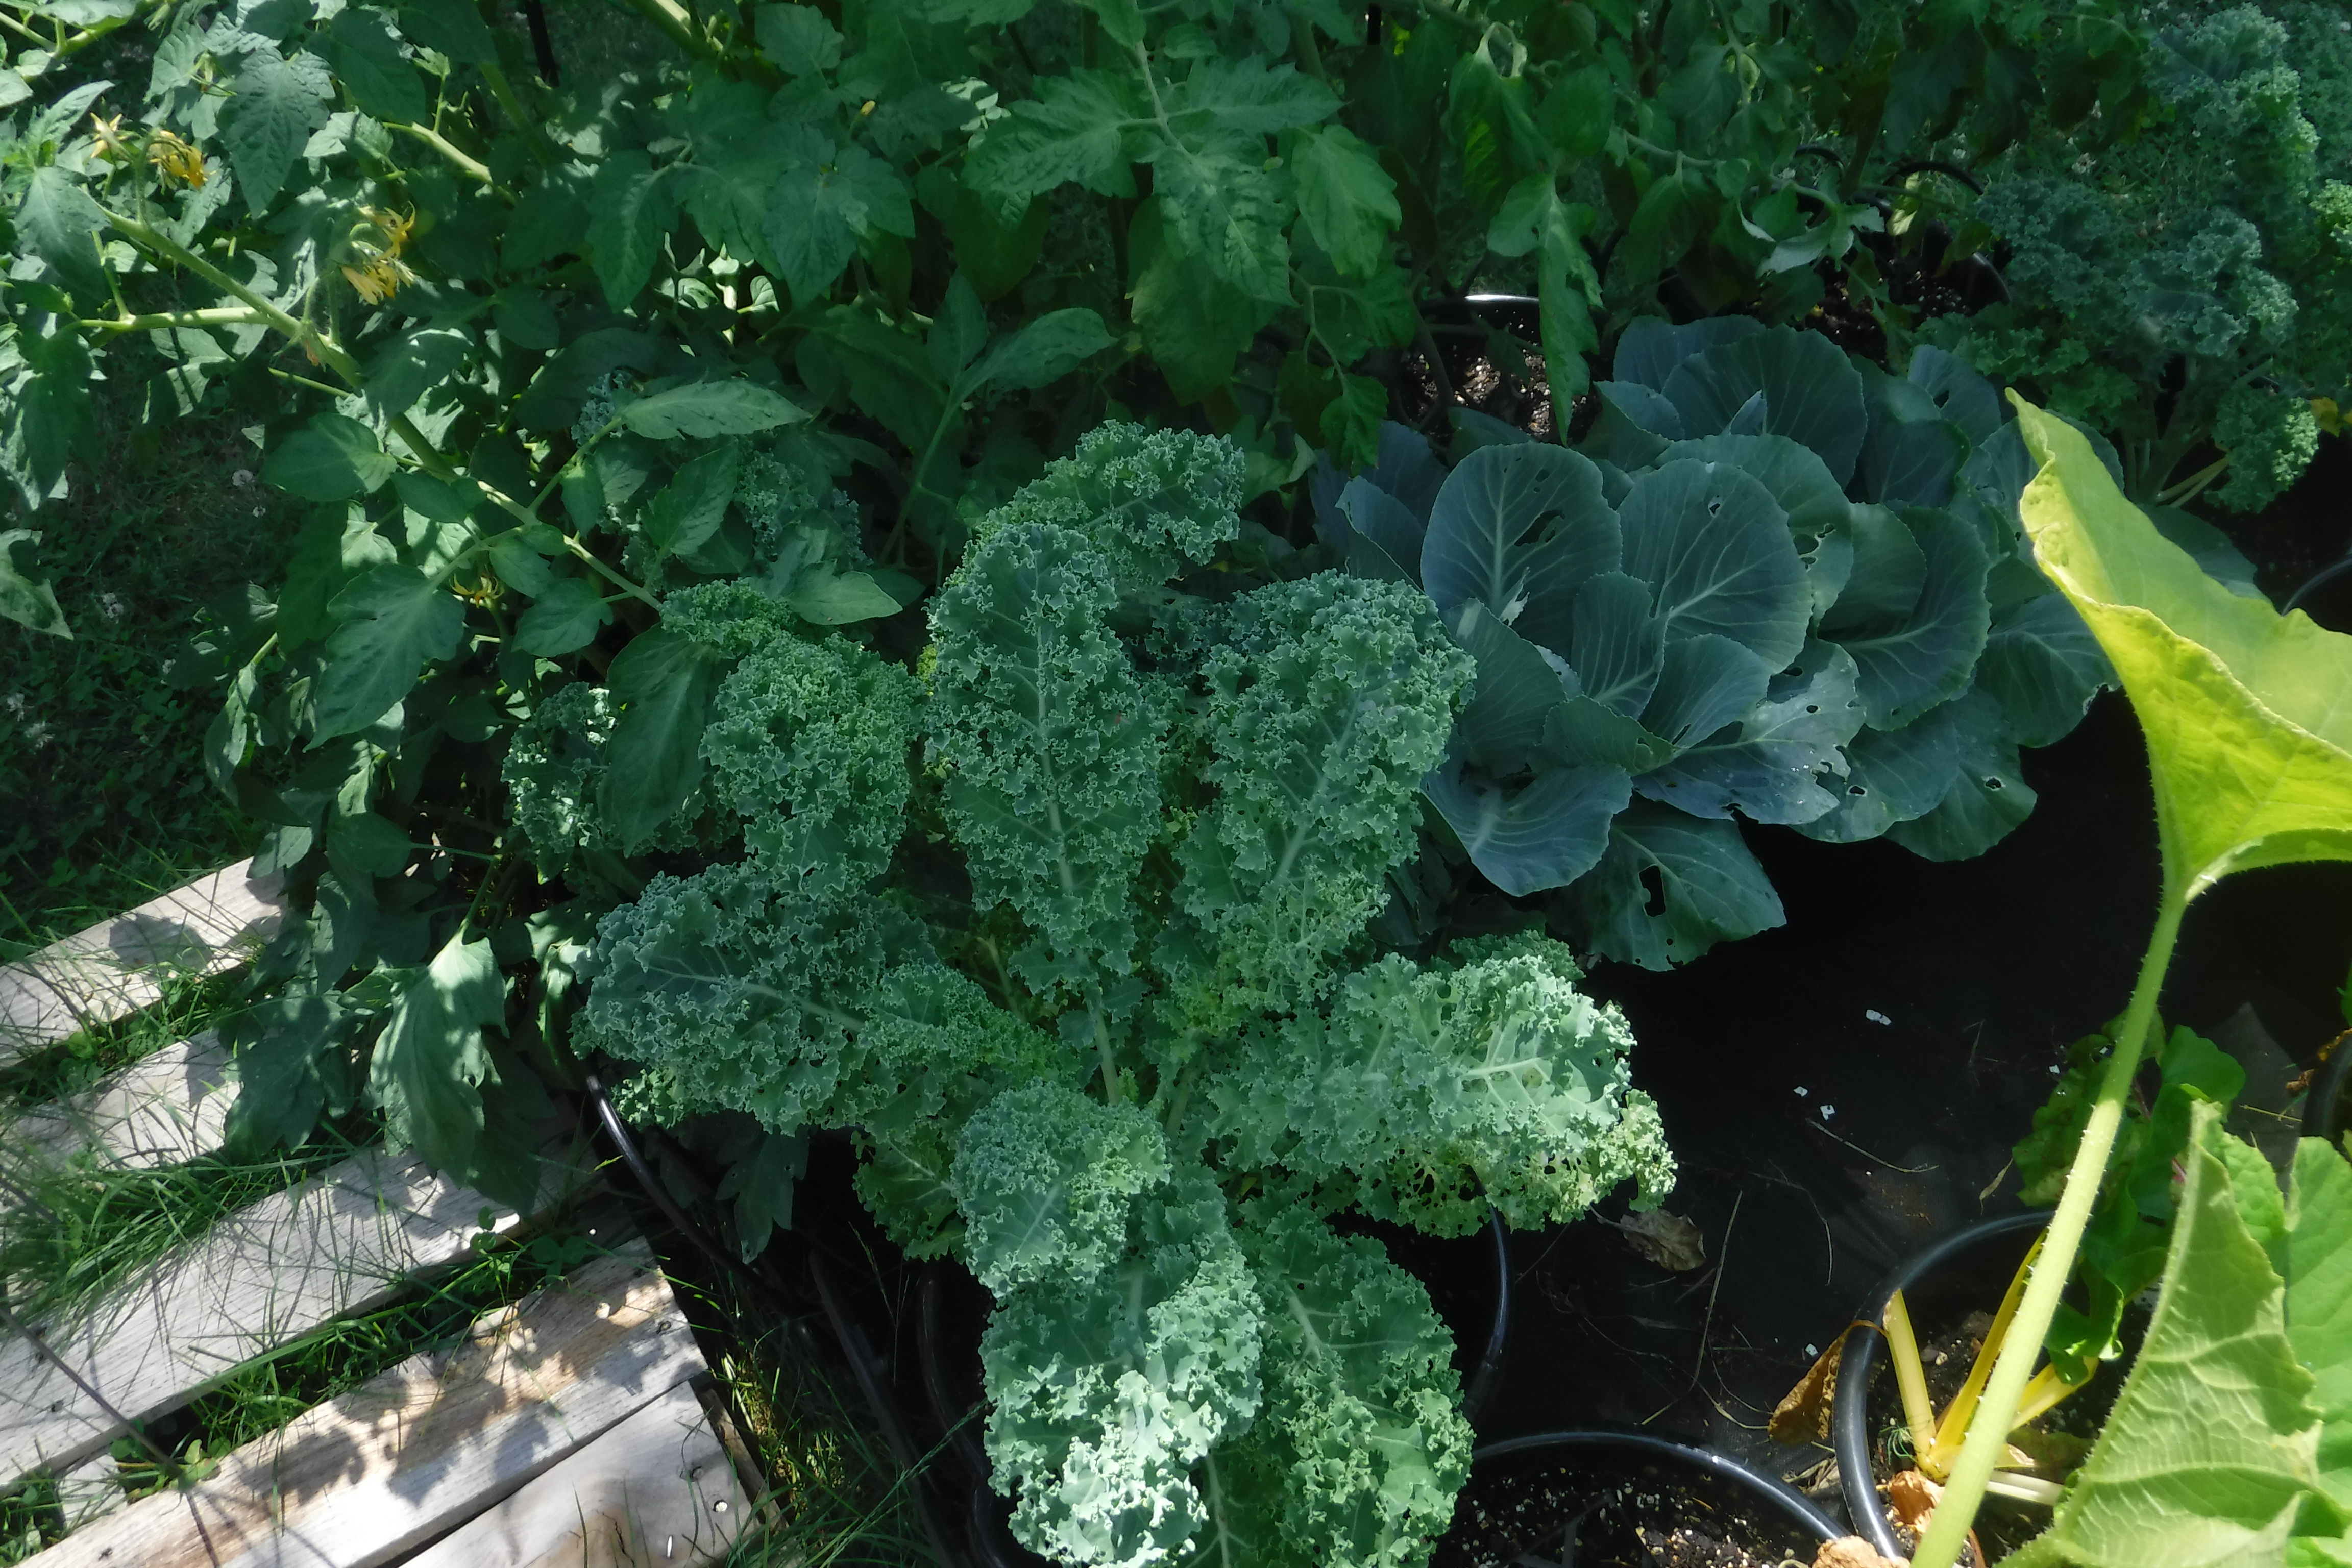
Gardening in buckets, square-foot style, has been successful. My favorite harvests were: tomatoes, Swiss chard, Tuscan Kale, Russian Kale, and bush green beans. In the past, I have had good luck with cucumbers, this year not so much, I will try again in the early Autumn or Spring, but will choose a different variety.
The million dollar question: Will I continue to plant this way in the future?
Early Spring Planting in the Square Foot Container Garden
Square Foot Gardens are a terrific choice for gardening in small spaces. After planting square-foot plots for several years, I gave them up to grow a beautiful rose garden. With food shortages looming and prices skyrocketing this Spring, I decided the time was right to grow a few vegetables again. I didn’t want to dig another garden into the yard, and wanted to try something temporary. I’ve combined Square Foot with container gardening, and it is growing well in the first days of June.e.
The Square Foot Container Garden at Present
The garden needed a border; the largest expense was the fencing. This keeps the area neat and helps lay out the proper measurements. Dollar-store buckets, two-and-a-half gallons, were an inexpensive choice for the containers. I created drainage holes by thrusting my spading fork once into the buckets as they sat on the grass. The holes were perfectly spaced, and my lawn aerated a bit too. Garden fabric cut large enough to cover the area keeps the grass from growing up between the pots. Filling the buckets with a mixture of organic container soil and vermiculite was easy using the wheelbarrow.
Twelve Tomato Plants Along Back/Trellis supportedSwiss Chard
Swiss Chard, Kale, and Bok Choy have been very plentiful. Steamed with carrots, mixed with a little butter, and ladled over Jasmine Rice, oh my, so delicious.
Kale
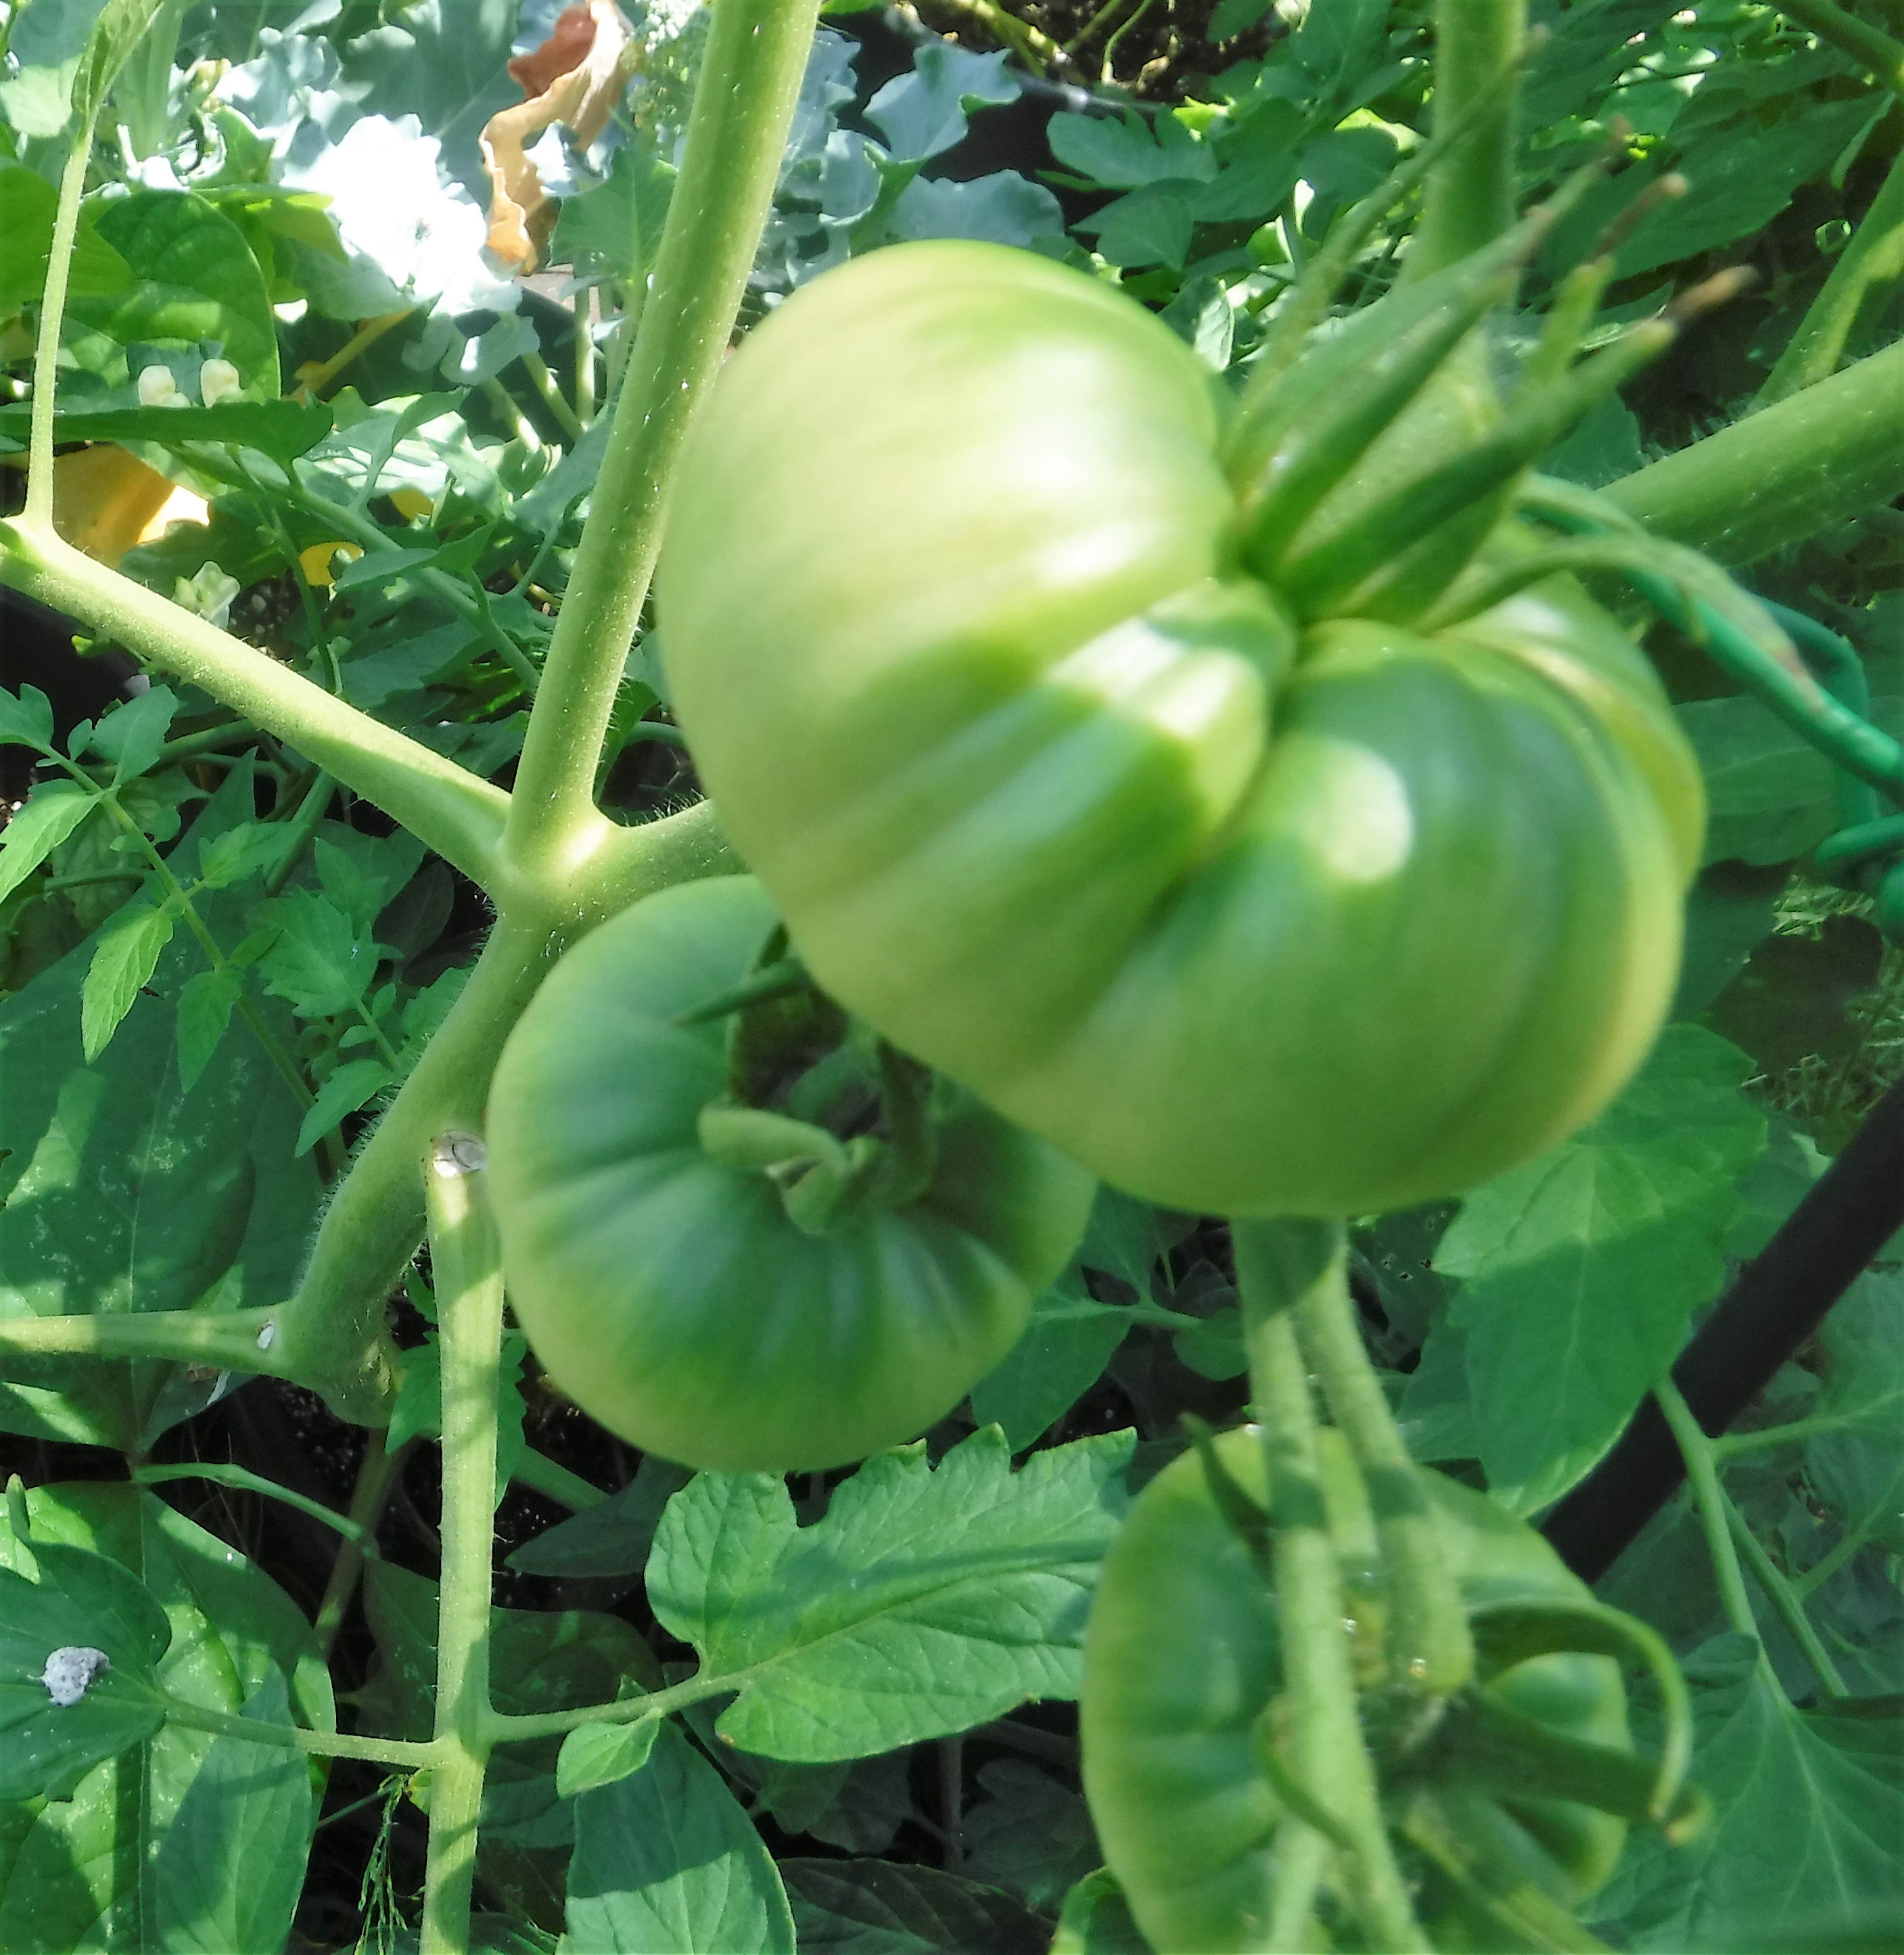
The tomatoes already need watering every day; their stems appear more like small tree trunks than normal-sized garden plants. I have them in the back of the gardens, braced against trellises for support. Small palettes between the plots keep the grass down also. I’m growing a wide variety of vegetables to note how each plant performs. Too early to know what will succeed as of now, but the green beans, four plants to a bucket, are getting small beans after flowering. I’ll update as the summer progresses.
White Squash
So far, the only antagonist to my garden joy is the yellow squash. There have been many flowers, and several small squash, but all developed blossom rot. I’ll read up on this problem and apply what might help. If I find a solution that works, I will post the results. Here’s a photo of another squash, a white squash. I am hoping it will perform better.
PS Between the time of writing the first draft of this post and now, the small green beans grew large enough for a first tasting. Delicious! Food grown in a dollar store bucket: an achievement that might come in handy if the world keeps spinning toward higher inflation and food shortages in the future.
One of my simple pleasures in life is sprouting seeds in the house under lights. I’ve started the large seeds of Moonflowers early. They grow quickly, but are slow to blossom outdoors. The moonflower sprouts are large now, and growing through the netting of their pots. This morning I transplanted them into large size cell packs saved from last year’s planting.
Lack of humidity in the house sometimes causes the sprouts of larger seeds to become trapped within the seed coat. When this problem occurs I give the seedling a chance by dribbling water over it several times through the day. If I try to remove the seed coat by hand, almost always, the plant inside is torn and ruined beyond saving. Keeping the seed coat wet gives the sprout a better chance of survival.
My close focus photograph of these coleus sprouts is rather blurry, but I only took the one shot, and it is a perfect example of the problem-solving tip I want to share today. When planting small seeds, even specially blended seed-starting soil can be full of lumps, small twigs, and other woodsy debris used to create the mix. Luckily for me, only one of my coleus seeds was placed on a ‘clod’ of dirt. The seed sprouted fine, the problem arose when the small root tried to reach the moisture beneath it. The hard clod of dirt it was planted on created a barrier and the sprout withered a day or two after emerging from the seed.
To give future seeds a better chance I filled the bottom of the container with about 1.5 inches of seed starter, then using an old sifter, I added about 1/4 inch of finely sifted seed starter mix. This makes a huge difference in the success of growing small seeds.
After sifting, place the container in a shallow pan of water and allow the mix to wick up more water. If the bottom layer of seed starter is sufficiently drenched, the sifted layer will absorb plenty of water for sprouting. Make sure and cover small seedlings with plastic wrap or another type of lid to ensure uniform moistness through the sprouting stage.
I’ve begun planting out seedlings and potted plants. After placing this pretty orange pansy in the ground I found it uprooted and wilted within twelve hours. I pushed it back into the soil, and it revived a bit, but it probably will not regain the vigor it might have had if its roots hadn’t been bitten half away.
The situation is a Catch-22 for sure. I enjoy the cute critters that populate my yard. I’ve even been known to throw them a nut or two, and I keep the bird feeders filled. To help with the hungry animal problem we let the back yard grow naturally, and this has really helped with the bunnies, since they love the dandelions and clover that grows in the lawn. The squirrels make use of the bird feeders in an entertaining fashion, but they also have a digging instinct that will cause them to uproot smaller plants in the garden and hanging baskets that show exposed earth. How to control the squirrels digging instinct is my biggest dilemma until the chipmunks emerge, which is a whole other story.
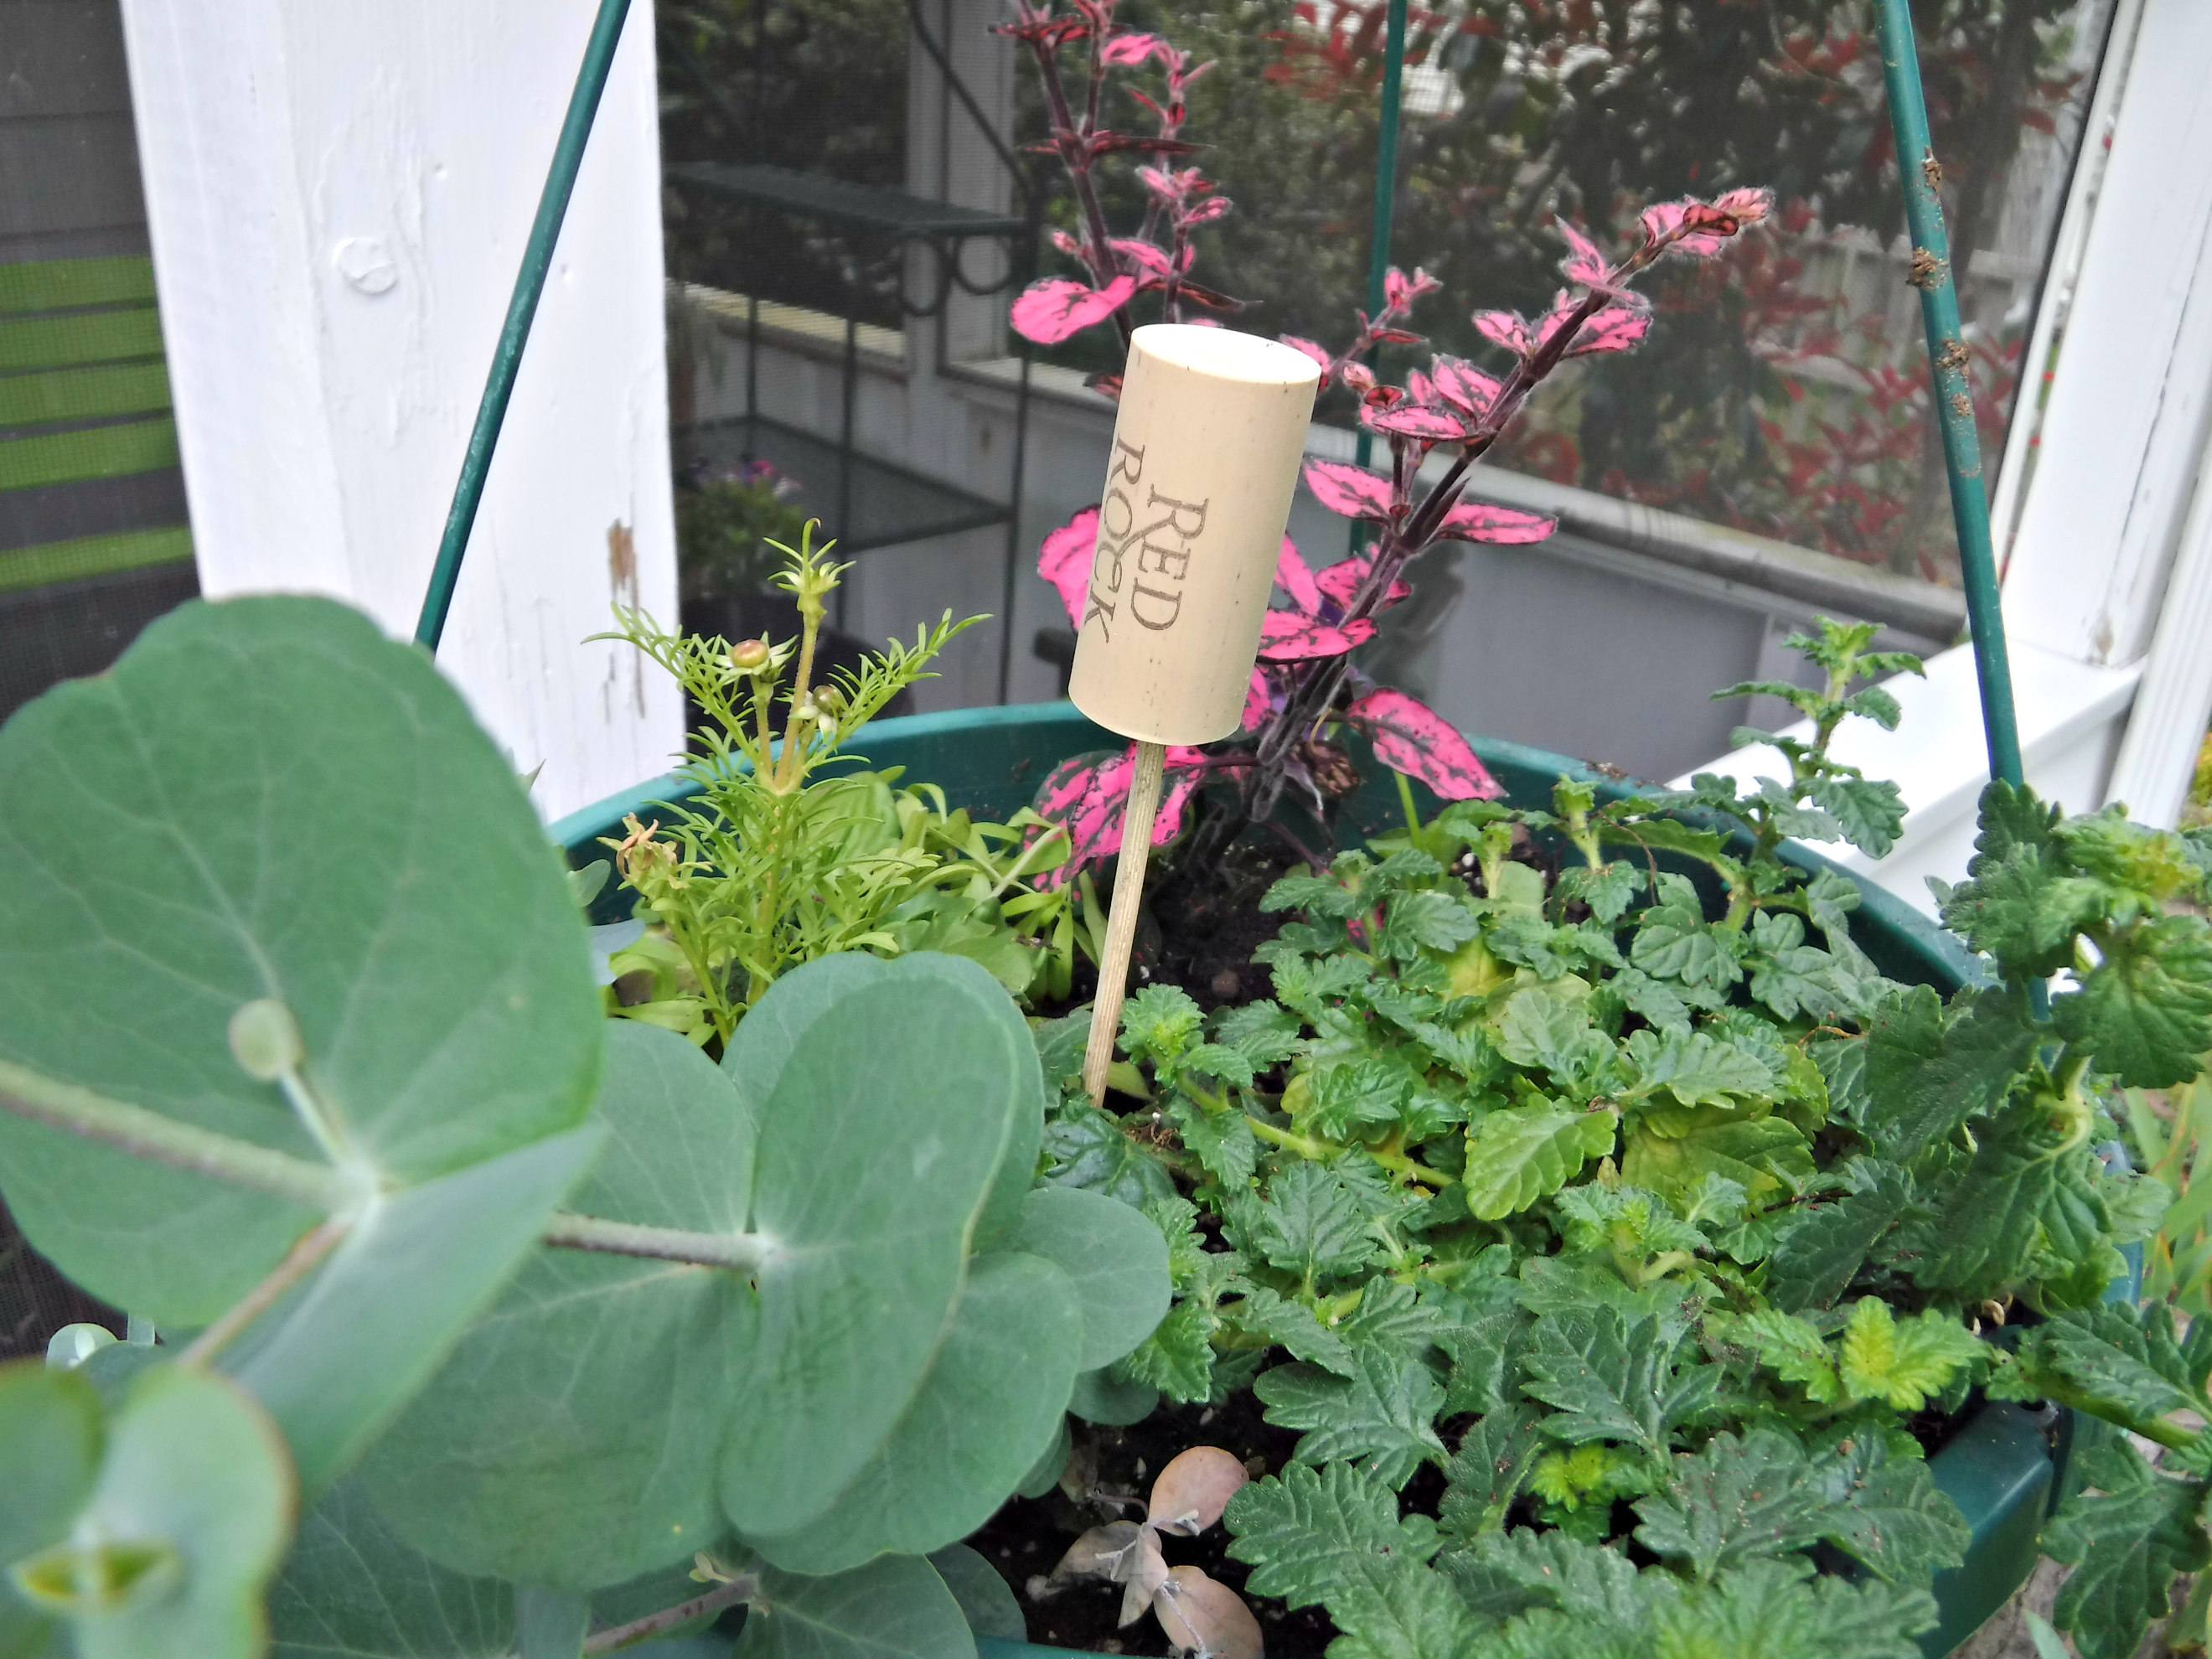
This year I marked my seeded plots with corks on short skewers. The skewers were purchased at the Christmas Tree Shop, 100 for about $2.00. The corks were a lucky find, dozens upon dozens in a bag at the local Thrift store.
A cork, stuck onto the sharp end of the skewer, with a drop of a ‘stinky’ essential oil on its top, is a great animal repellent. I started with pungent Eucalyptus oil. Because animals will adapt to a smell they begin to recognize I will rotate Eucalyptus with Tea Tree oil, Cinnamon, Peppermint, and other oils I’ve gathered through the years. The oils won’t poison me, nor the animals, and will last forever since I only use one small drop and it quickly sinks in. The corks do double duty of labeling and repelling.
Other items can be used in place of corks. I’ve used seashells turned upside down to hold drops of oil in the past. I will update on how my plants do during this initial stage of planting. Once they are bigger the plant itself is usually left alone, it’s the fruits and vegetables that become a draw at that time.
The photograph is a bit blurry, but I think you can see the small mango sprout in the center. I have sprouted and grown mango pits in the past, but the small trees didn’t grow quickly enough for me, and I didn’t continue on with them. I’m going to try once again, and this time start an earlier fertilizing schedule. I’ll update later in the season.
I first published this dahlia collage in September of 2018. The passing months have not diminished my desire to plant several large dahlias in this year’s garden.
I purchased a few tubers in local garden centers, and decided to give them a head start for growing. I found several large pots, filled them with potting soil, and placed the tubers inside. Oh Happy Day! All of the tubers sprouted and grew. It’s time to plant them in the sunniest of garden beds.
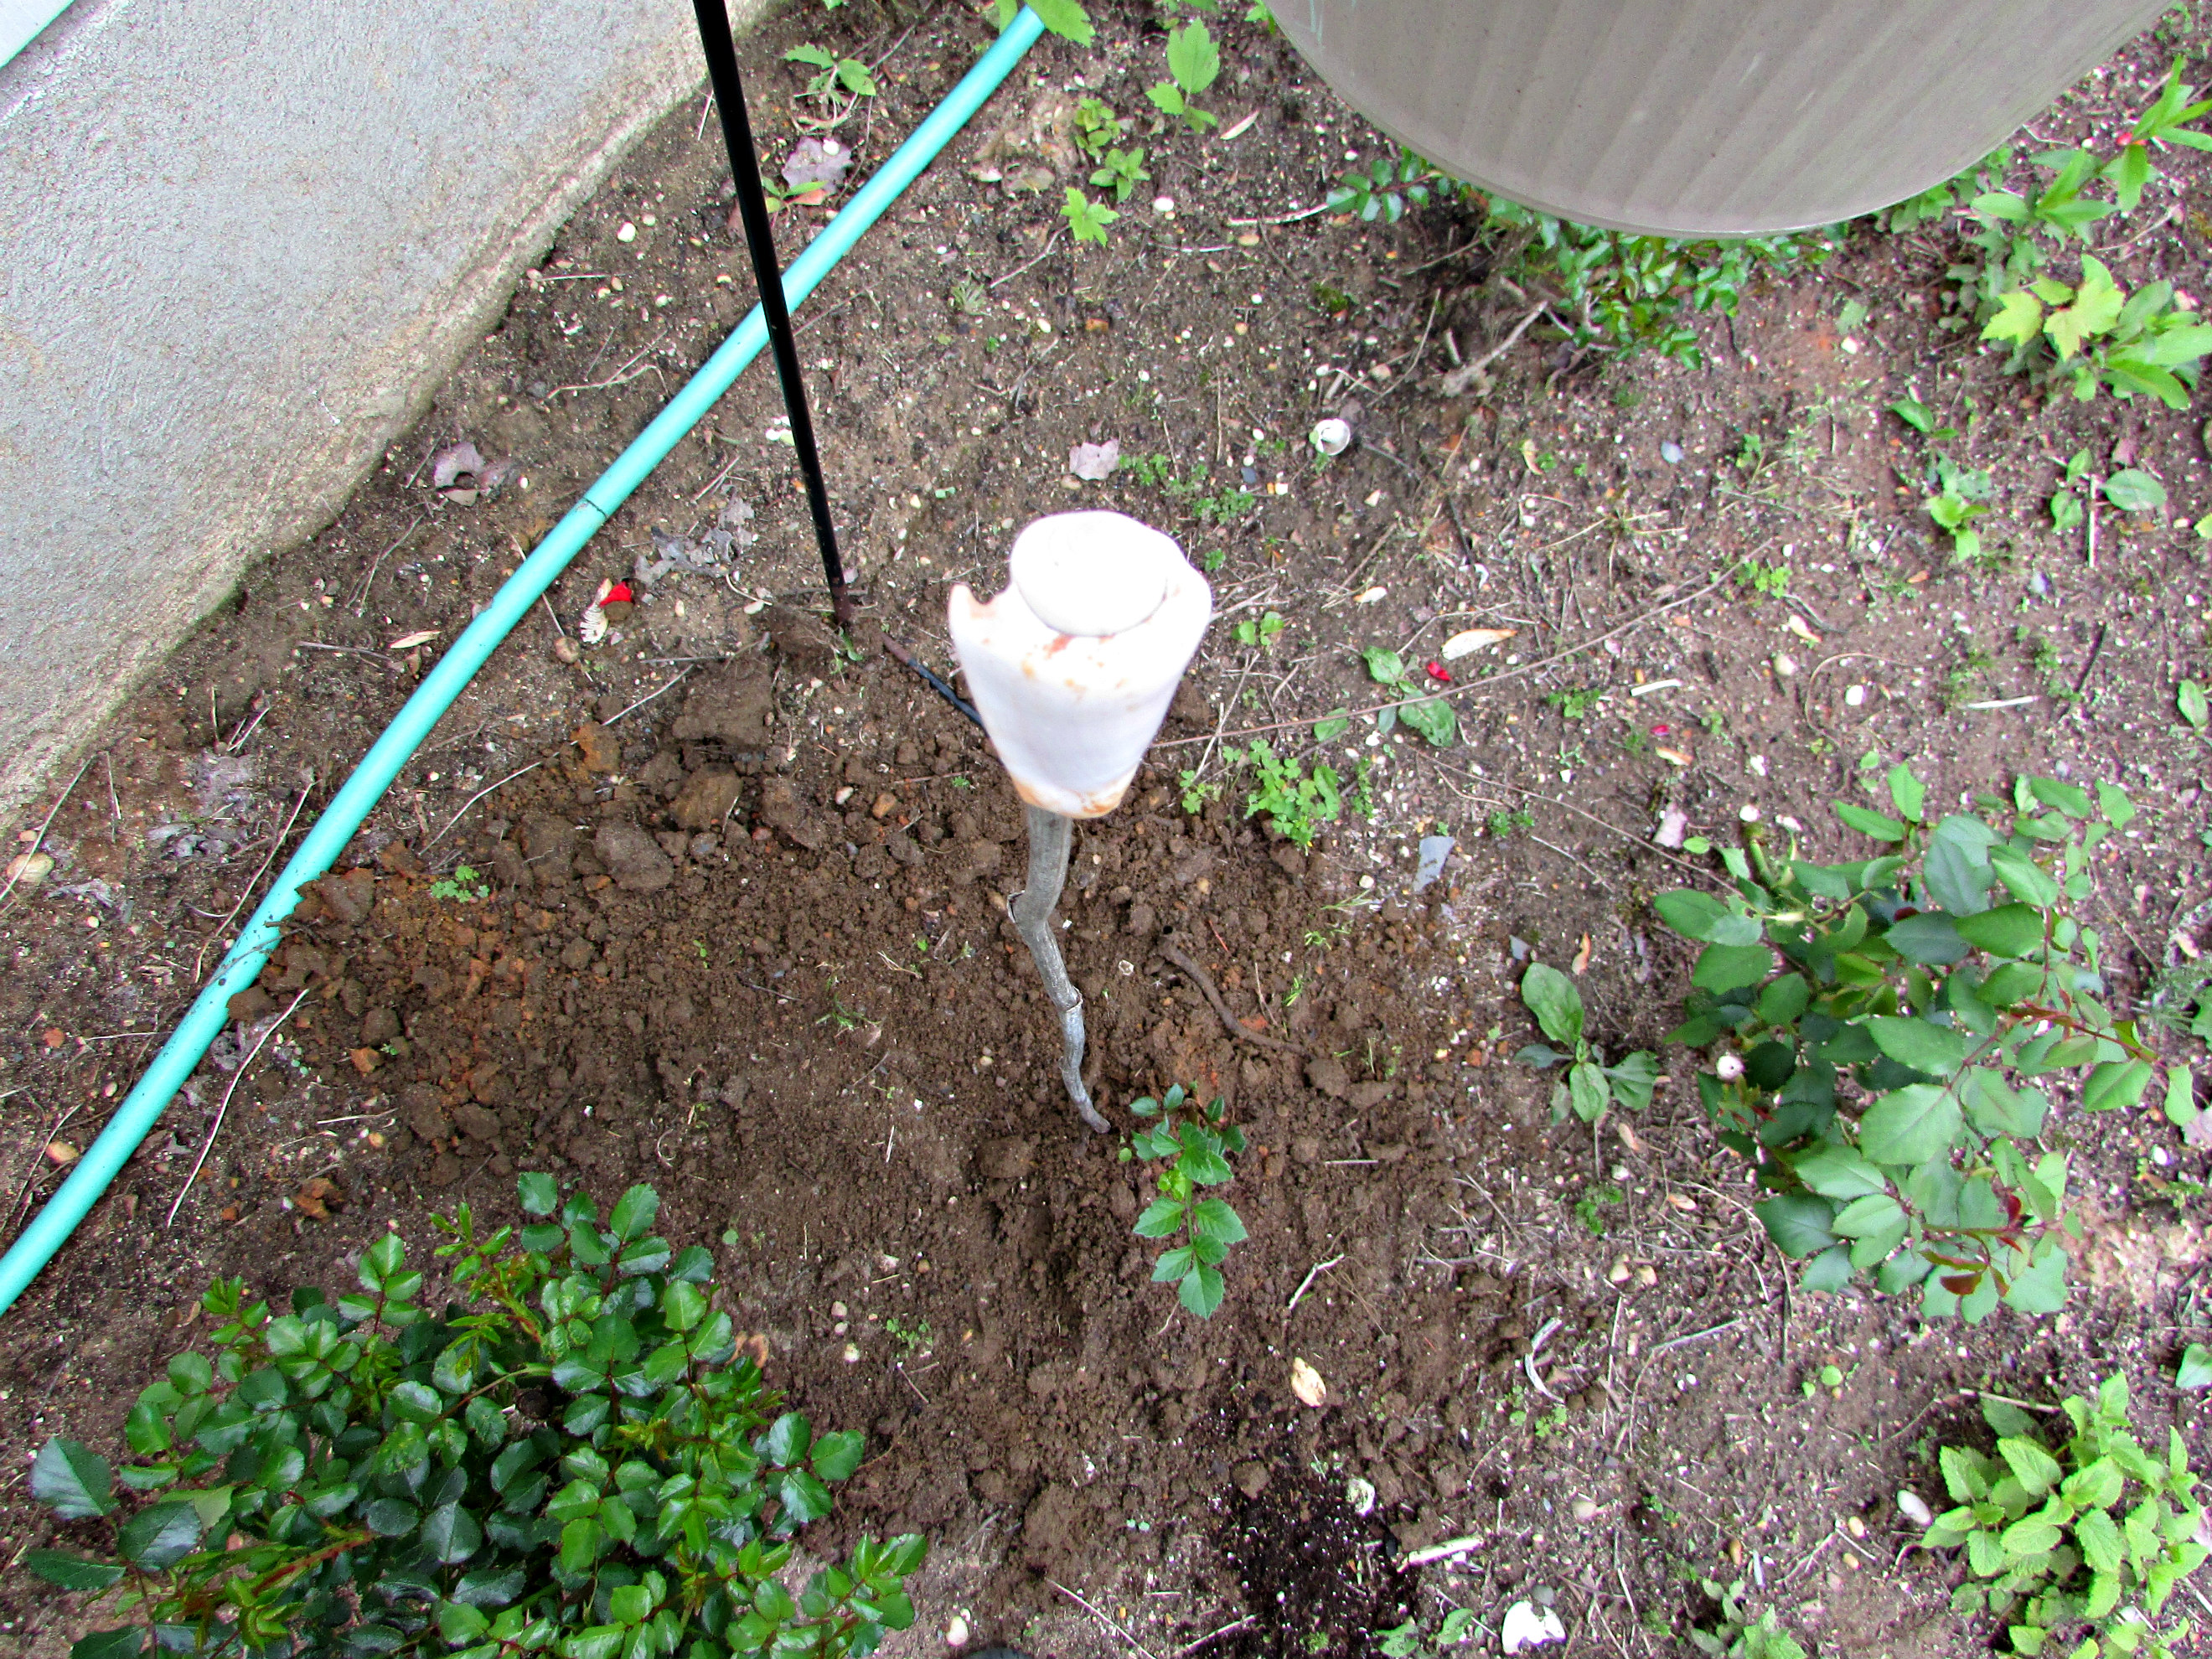
Tall dahlias need stakes to stay upright in heavy rain. I read a great tip years ago that suggested putting a stake in place when you first plant the tubers. If you insert a stake after the dahlia tubers are planted and covered with soil you risk puncturing/tearing the tubers and killing the plant.
After I planted my dahlia and had my stake in place, I also took a precaution to protect my eyes. It’s so easy to forget about stakes and sticks jutting out of the ground when I weed or plant. I’ve had several close calls with my eyes, and have had stakes badly scrape my arms when weeding. To remind myself of their presence, and to add a bit of protection to the ragged ends, I place a seashell on the top of the stake.
I use seashells because I have boxes of them stored in the garage. All types of articles could be used to mark the top of the stakes, acorn tops, nuts, windmills, small cans painted in bright colors. The list is as endless as your imagination. Please do be careful with all types of stakes in the ground; I will always carry a scar on my leg from running into stake marking out a building site when I was a child. Sixteen stitches to close a wound leaves an impression that lasts a lifetime. Happy (and safe) gardening my friends!
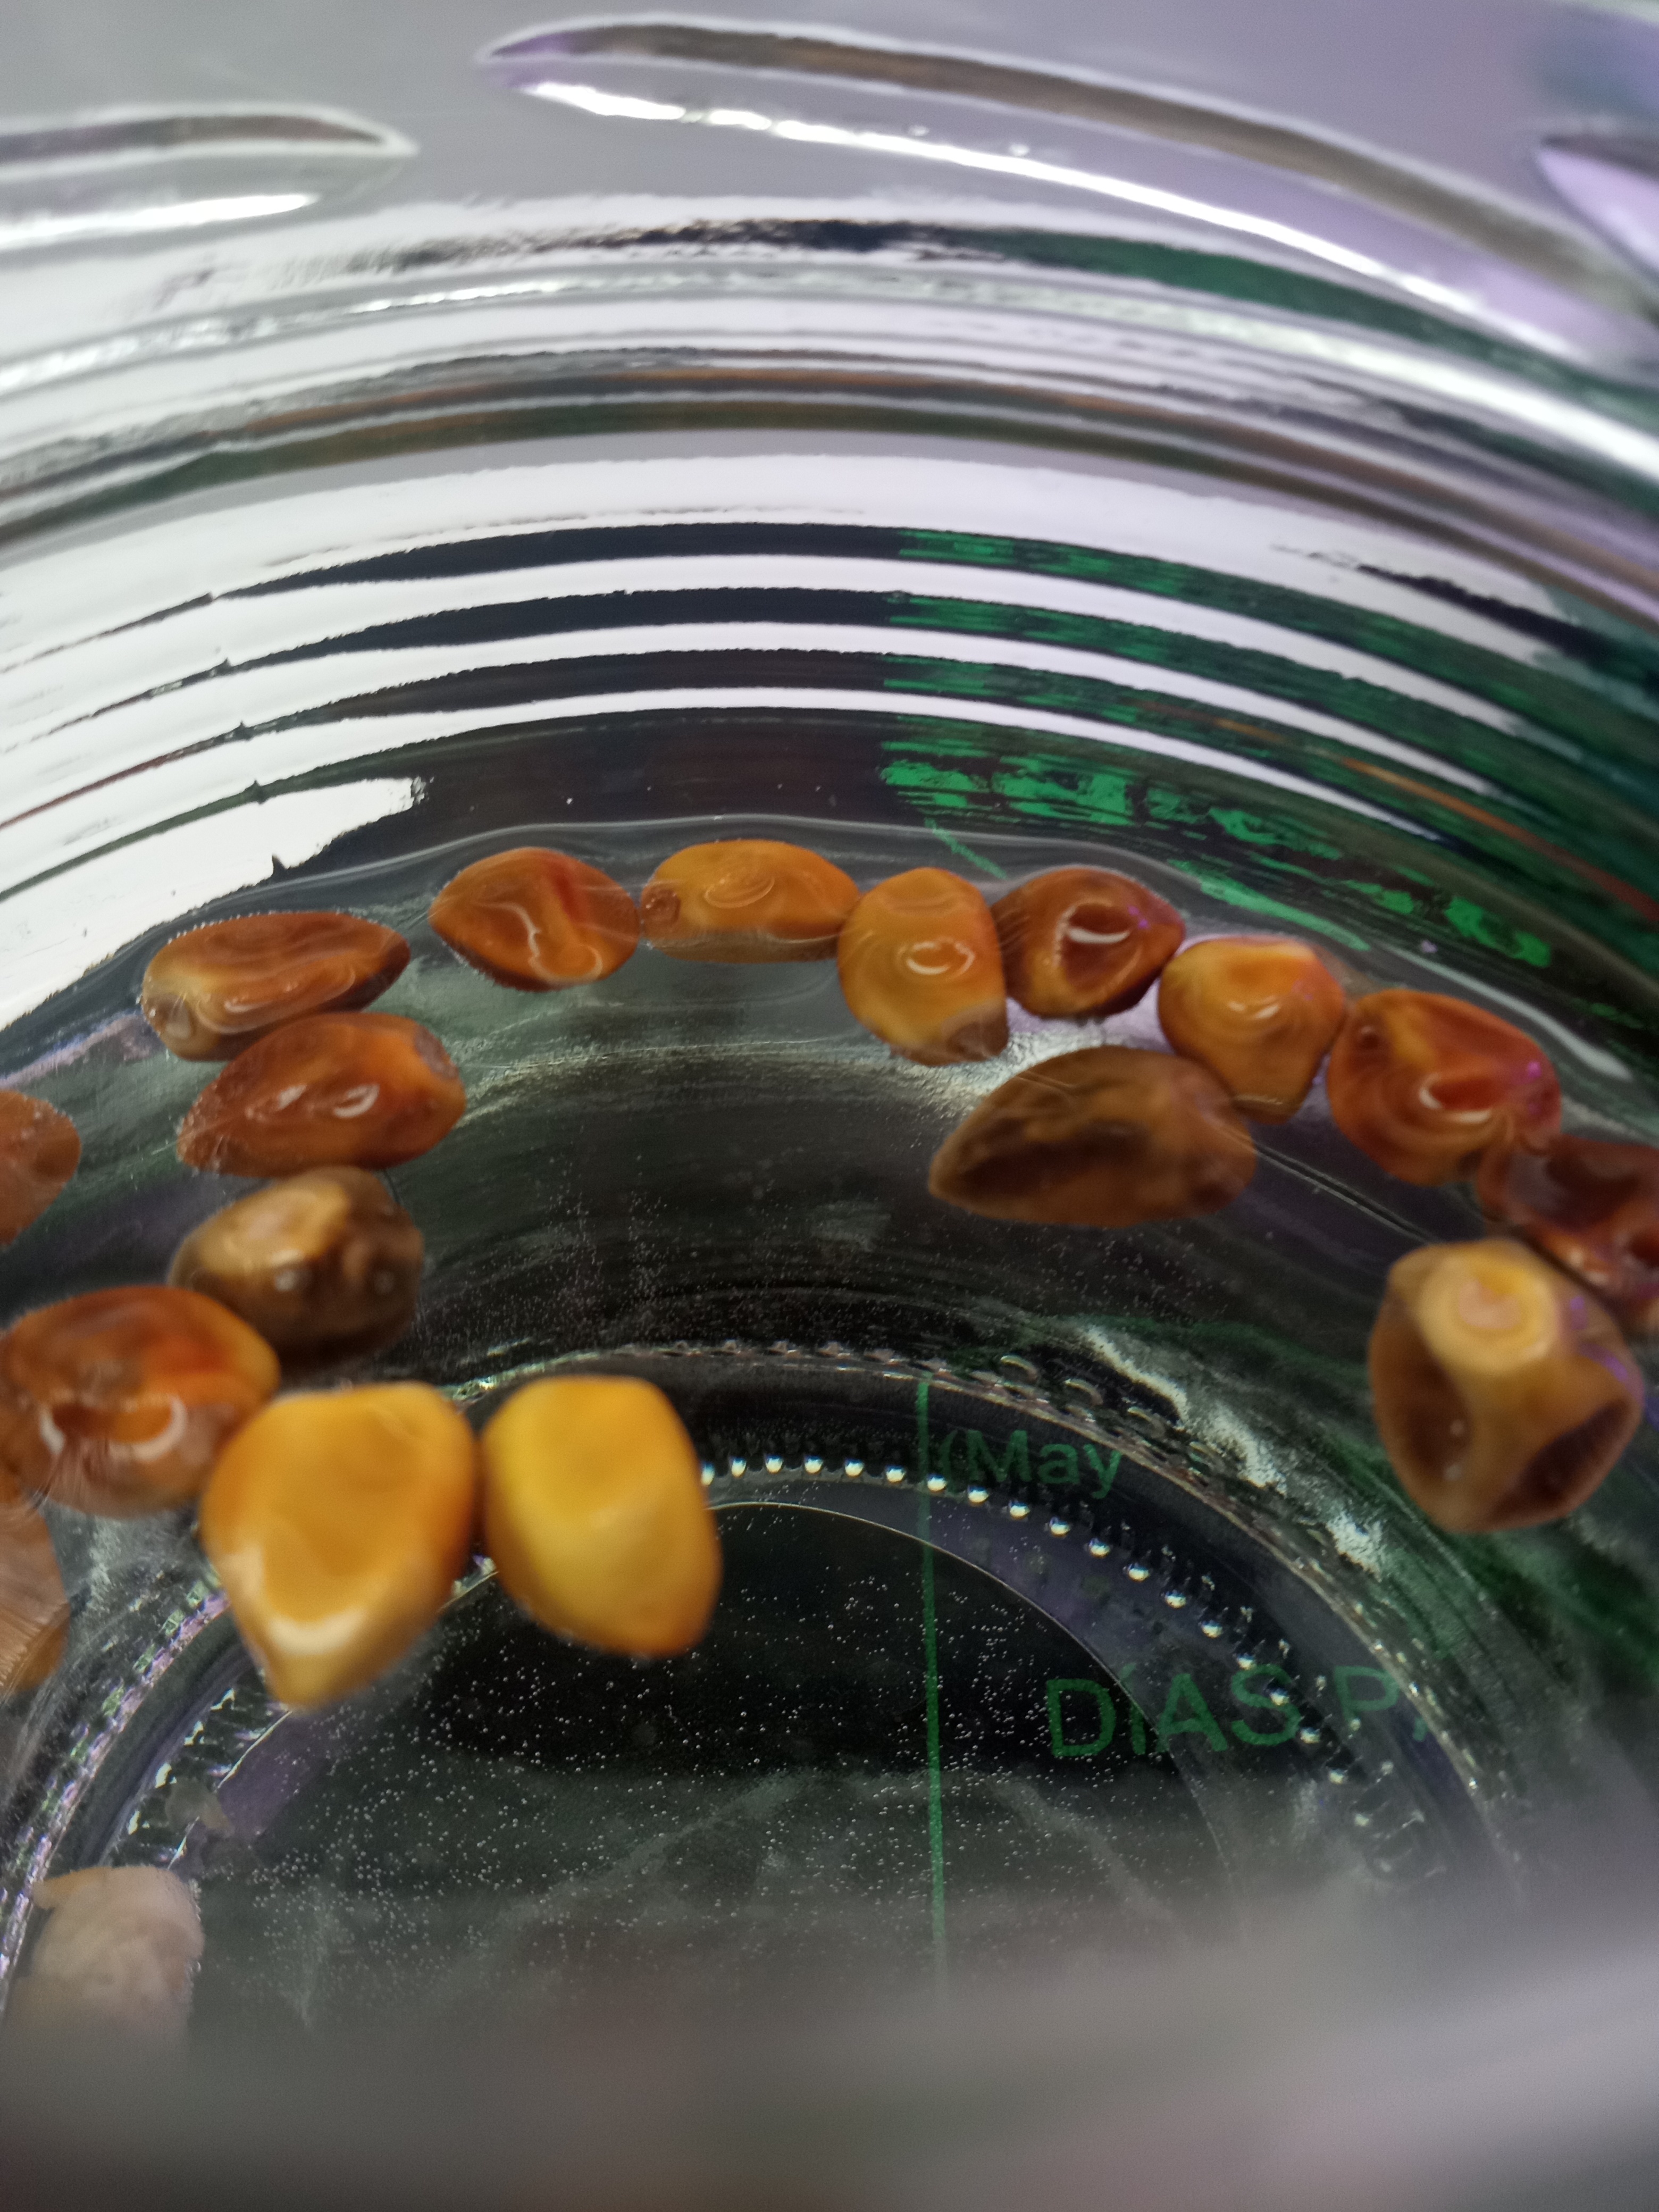
In November I posted on clearance aisle tulip bulbs stored in my refrigerator drawer among the carrots and other vegetables. This weekend, to break up another monotonous winter day with hopes of Spring, my youngest grandson helped me begin to force the bulbs. The tulips are in a mixed-colors package. Although we might speculate about which dreamy colors will unfurl, it’s totally a matter of chance as to color combination.
Forcing Tulip Bulbs for Spring
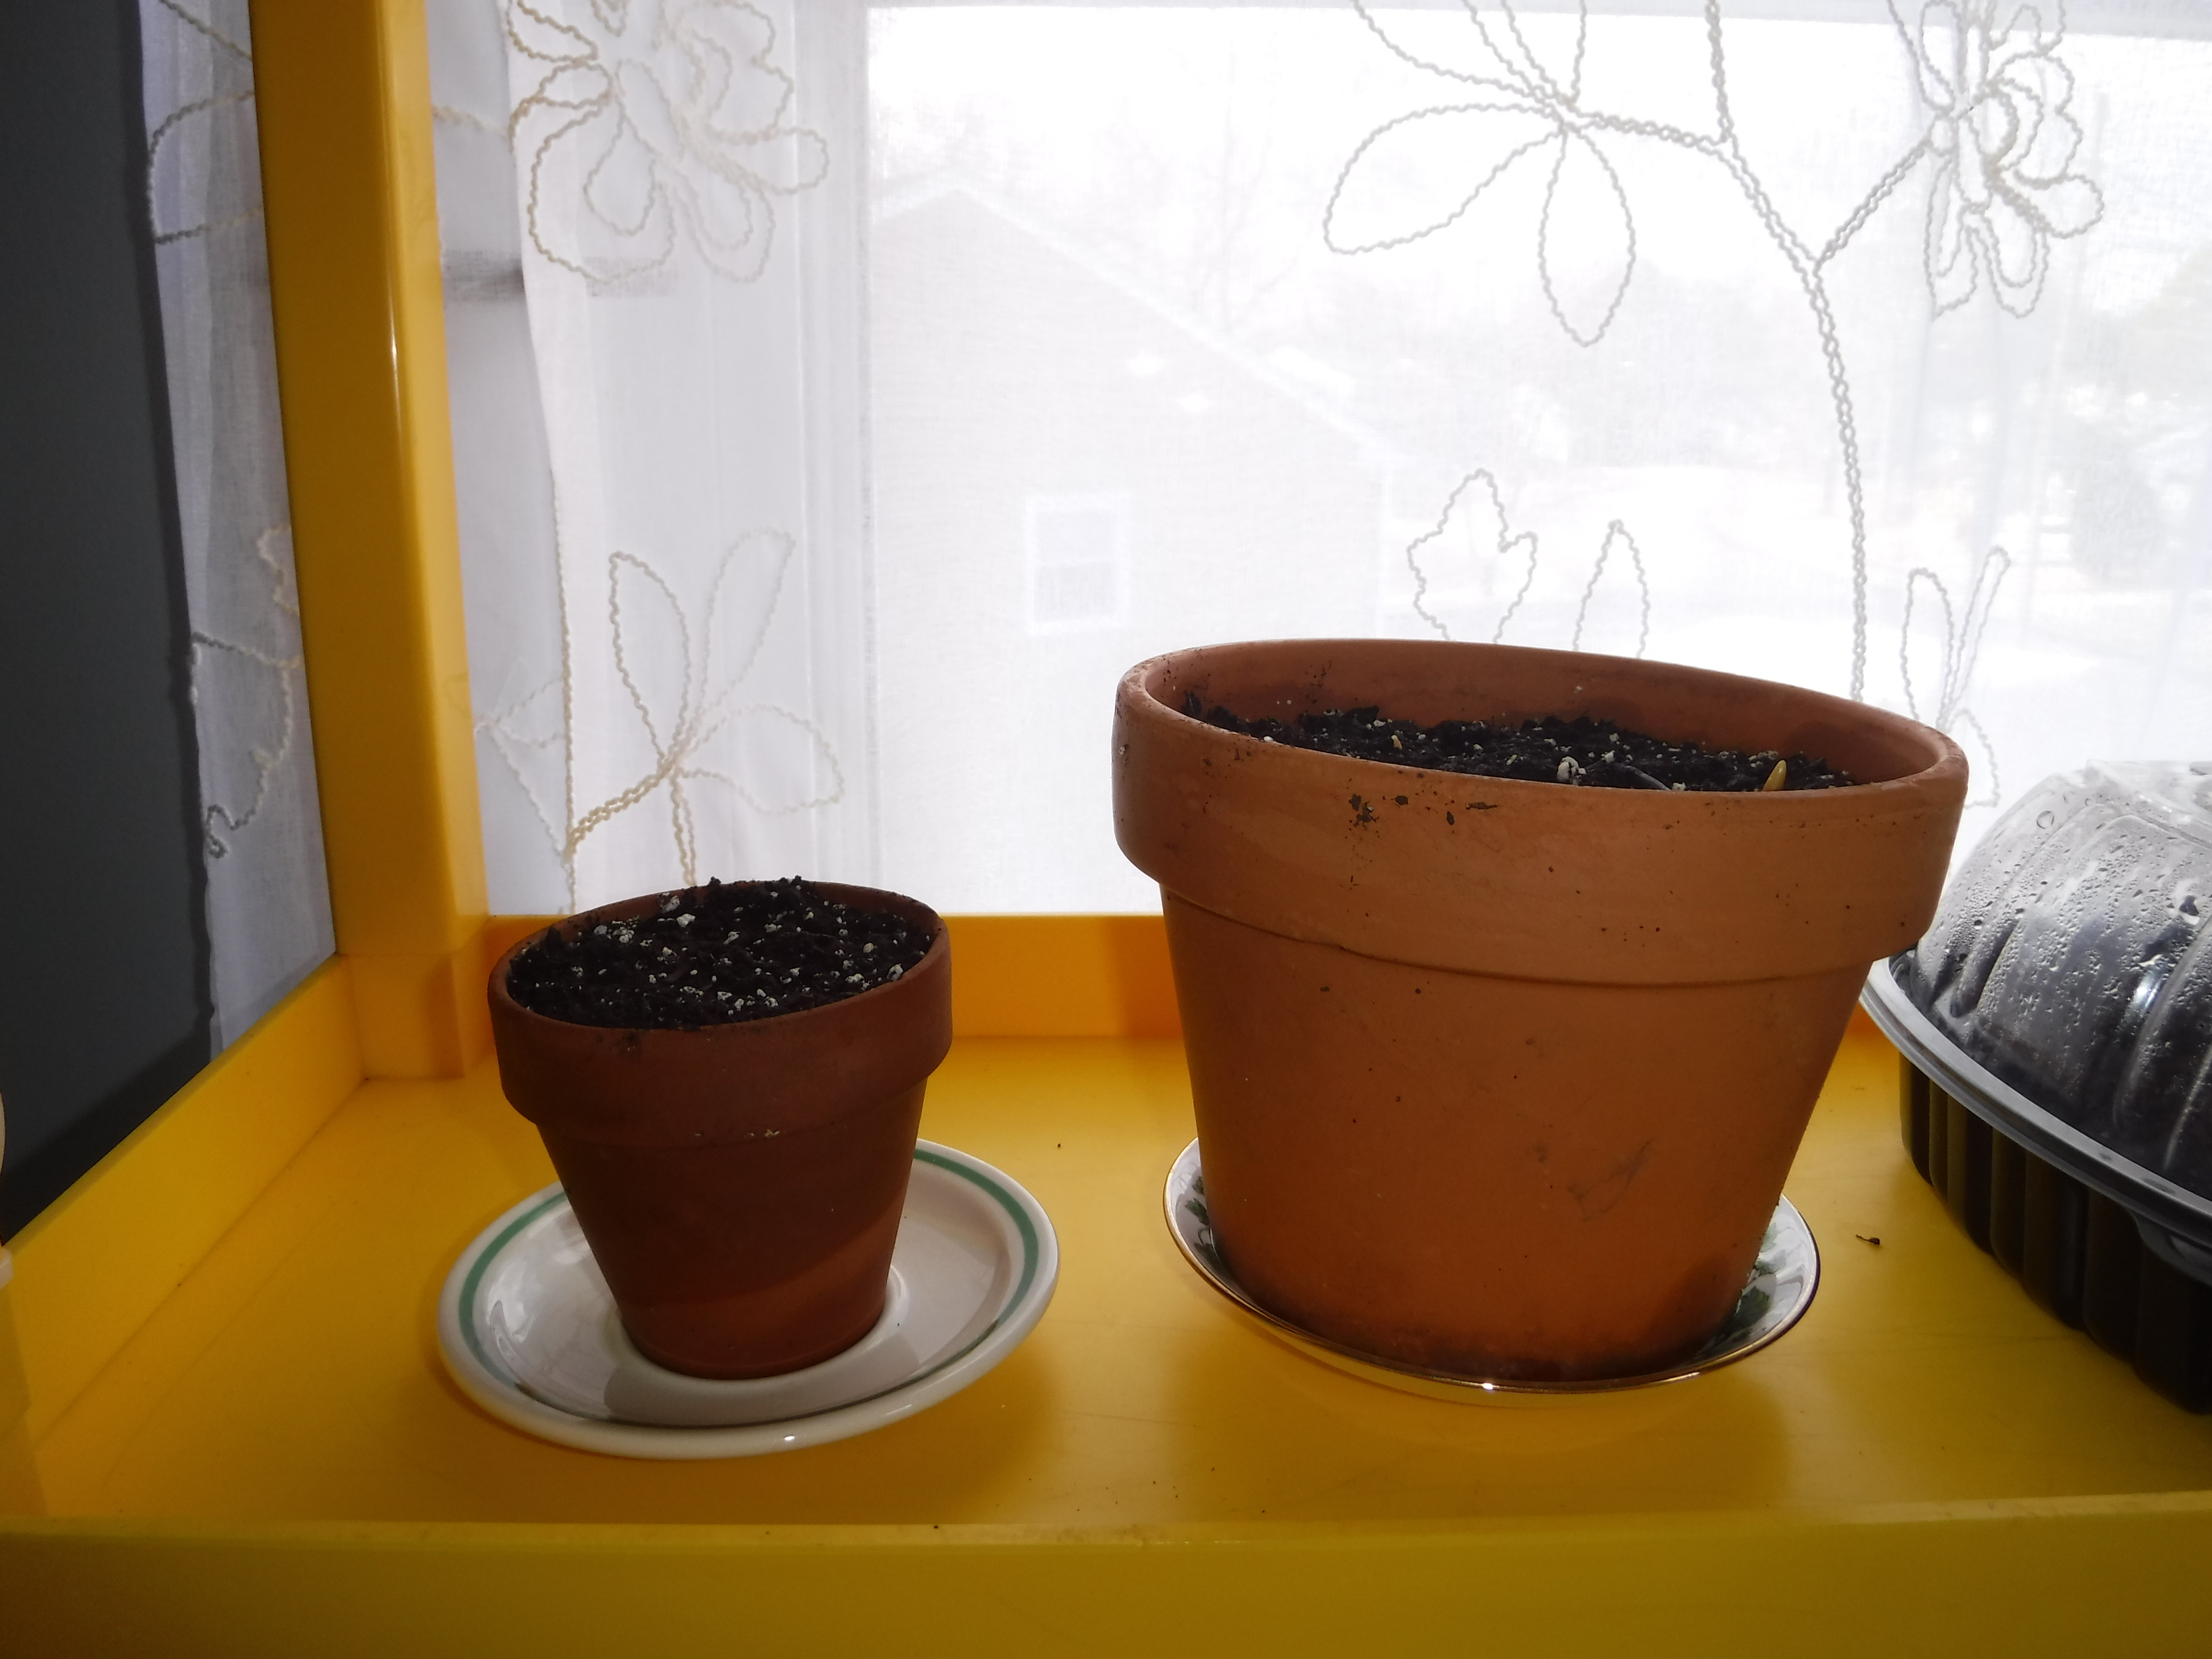
The health of a few of the bulbs was in question when we saw some greenish mold around the sprouting end. If the bulb also had a spongy feel I tossed it out. We were left with over two dozen to plant. Most of the bulbs already had about a half inch of stem growth. We planted some in soil in deep terracotta pots and others in shallow ceramics.
We covered plastic pots with moss to disguise their unnatural appearance and planted in those. My favorite display is the tall vase with black river rock on the bottom, filled with water to just over the top of the rocks, the tulip bulbs can be watched from start to finish as they develop. Since we did find a bit of mold we removed the brown covering of the bulbs that show through the glass. I learned something today, the outer layer of paper-like husk on a bulb is called a tunic.
“Tunicate bulbs, like tulips, daffodils, hyacinths and ornamental alliums, have a paper-like covering called a tunic that protects the fleshy scales from drying out. “~ Delaware Online
While researching the properties of a tulip bulb I discovered a week-long Tulip Celebration in Lewes, Delaware, April 5th – 14th. Lewes is about a three hour drive from our home. It is also accessible from the Cape May/Lewes Ferry. If you love tulips and are near Delaware at this time, perhaps you’ll find time to celebrate in Lewes and welcome Spring.
Do you remember the sea bean pod I found on Cape May’s beaches a few weeks ago? I culled out four of the small trees that sprouted and potted one up to grow to a larger size. The seedling is most likely a black locust tree, but my daydreams find me still wondering if the pod might have made a seaward journey from the tropics via the Gulf stream to Cape May.
The sea bean seeds are a good example of garden wisdom: nick and soak large seeds before planting. The sweet pea seeds I soaked, and also nicked with a nail clipper, have already sprouted outdoors in the winter sown containers, while those not treated are only beginning to swell a bit.
Here’s an inside peek at one of the milk jugs. The arugula seeds are already growing. Also sprouting outdoors is broccoli, mustard spinach and the sweet peas.
For plants that will only grow in warm conditions, such as coleus, I’m having good luck in the basement. A small heater inside a plastic covered light table mimics a greenhouse and the seeds are sprouting well. They will not need to be thinned since I sowed them with the small seed sowing method.
Every year one of my gardening goals is to try one new and unique vegetable or flower. This year I chose pink celery from Baker Creek Heirloom Seeds.
I won’t be at fault if the celery doesn’t grow. Although I’ve never grown celery before, I’m planning to start it three ways. The package says to begin 8 – 12 weeks before the last frost. That time is now. Last night I planted the celery in a milk carton for winter sowing. Tonight I will plant it in flats to grow under lights inside. Lastly, when the soil warms, I will try a few seeds directly in the soil.
Pink Celery…I think it odd enough to be part of Kammie’s Oddball Challenge this week. I can’t wait to show this oddball vegetable to my grand-daughters and their mother…they all love pink!
Oh WOW! It’s truly how I felt when I checked on my sea-bean sowing a day or two ago. They were sprouting! In about a week’s time the seeds I nicked before soaking have swelled and sprouted and given me JOY! How can I not be happy when new life emerges from a dried out seed, a seed found in a pod among sea drift? I still have no idea if the pod is from a local tree or if it rode the Gulf Stream on it’s path from Caribbean to East Coast. Cape May juts out a bit from the coast so I am hoping this could be a tropical plant. Whatever it might be, it’s quick sprouting has filled me with plans to search out more sea beans for my ocean sprout collection!
“Sea beans come our way from the Caribbean, South America, Central America and the southernmost Florida Keys thanks largely to the Gulf Stream, the north-flowing river within the Atlantic off the East Coast. The beans turn up as far north as Cape Cod, though they become increasingly rare north of Cape Hatteras. Southeastern Florida beaches, on the other hand, are a collector’s paradise, given the proximity to the sources.”
~ Naturalist’s Notebook: Knowing Beans About the Beach
One technique I will continue to use is nicking the shell of very hard seeds before planting. Only the seeds I nicked sprouted. The others are still laying beneath the surface of the soil.
Imagine growing hundreds of seedlings for your garden without the need to tend them indoors. It’s almost like magic! Winter Sowing is the answer to hands-off seedling success. I’m illustrating my steps to winter sowing with step by step photos. You can find amazing articles throughout the web and videos on Youtube if you need more information. I noticed there is even a Facebook group for Winter Sowing now. Today, I sowed and put my first container outdoors for the 2019 growing season. I planted beets from a dollar store packet that only cost 25 cents. I thickly sowed the seeds to take advantage of both greens and beets. Today in the supermarket one large beet was considered a bunch and was selling for $3.49. Outrageous! Winter Sowing is the brainchild of Trudi Davidoff. Detailed information and links on beginning winter sowing can be found here: Winter Sown
I’ve saved milk cartons in the basement for months.
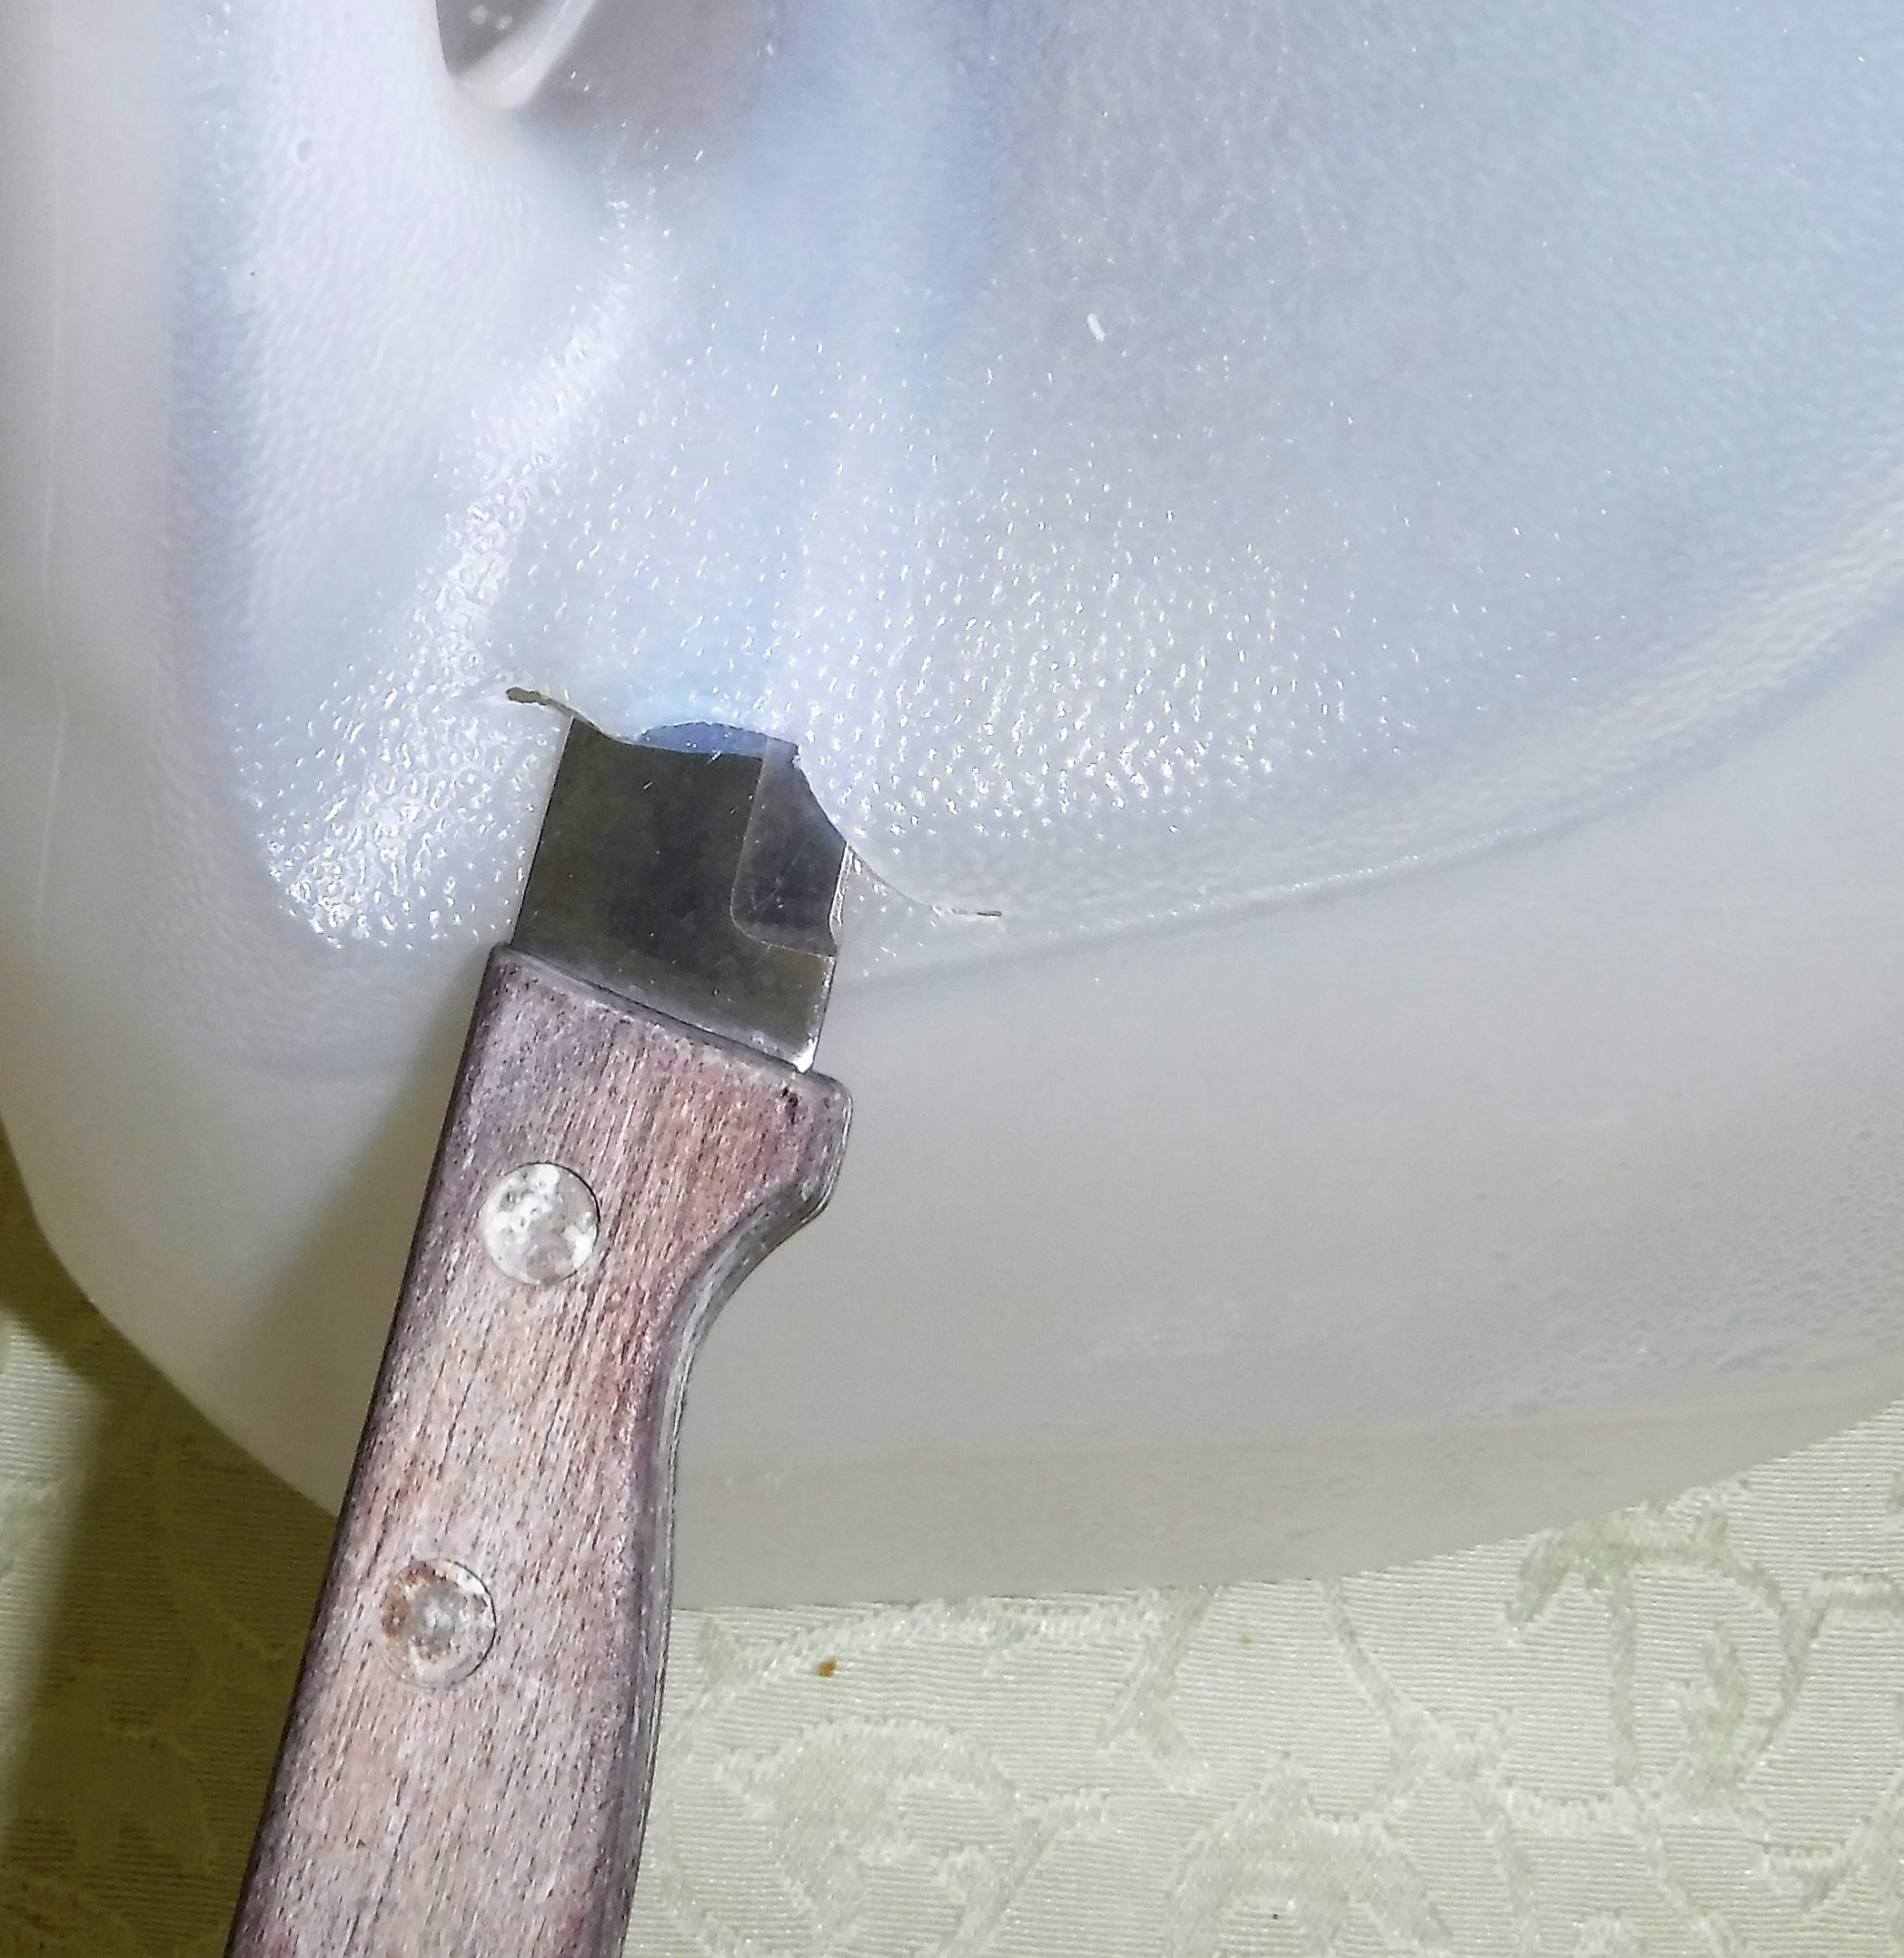
Begin by inserting a paring knife into the carton 3-4 inches from the bottom, near the handle.
After I make a small slit with the paring knife I cut around the bottom with scissors.
Stop before you cut all the way through, leaving a bit of carton near the handle to join the top and bottom. This makes taping the carton shut easier.
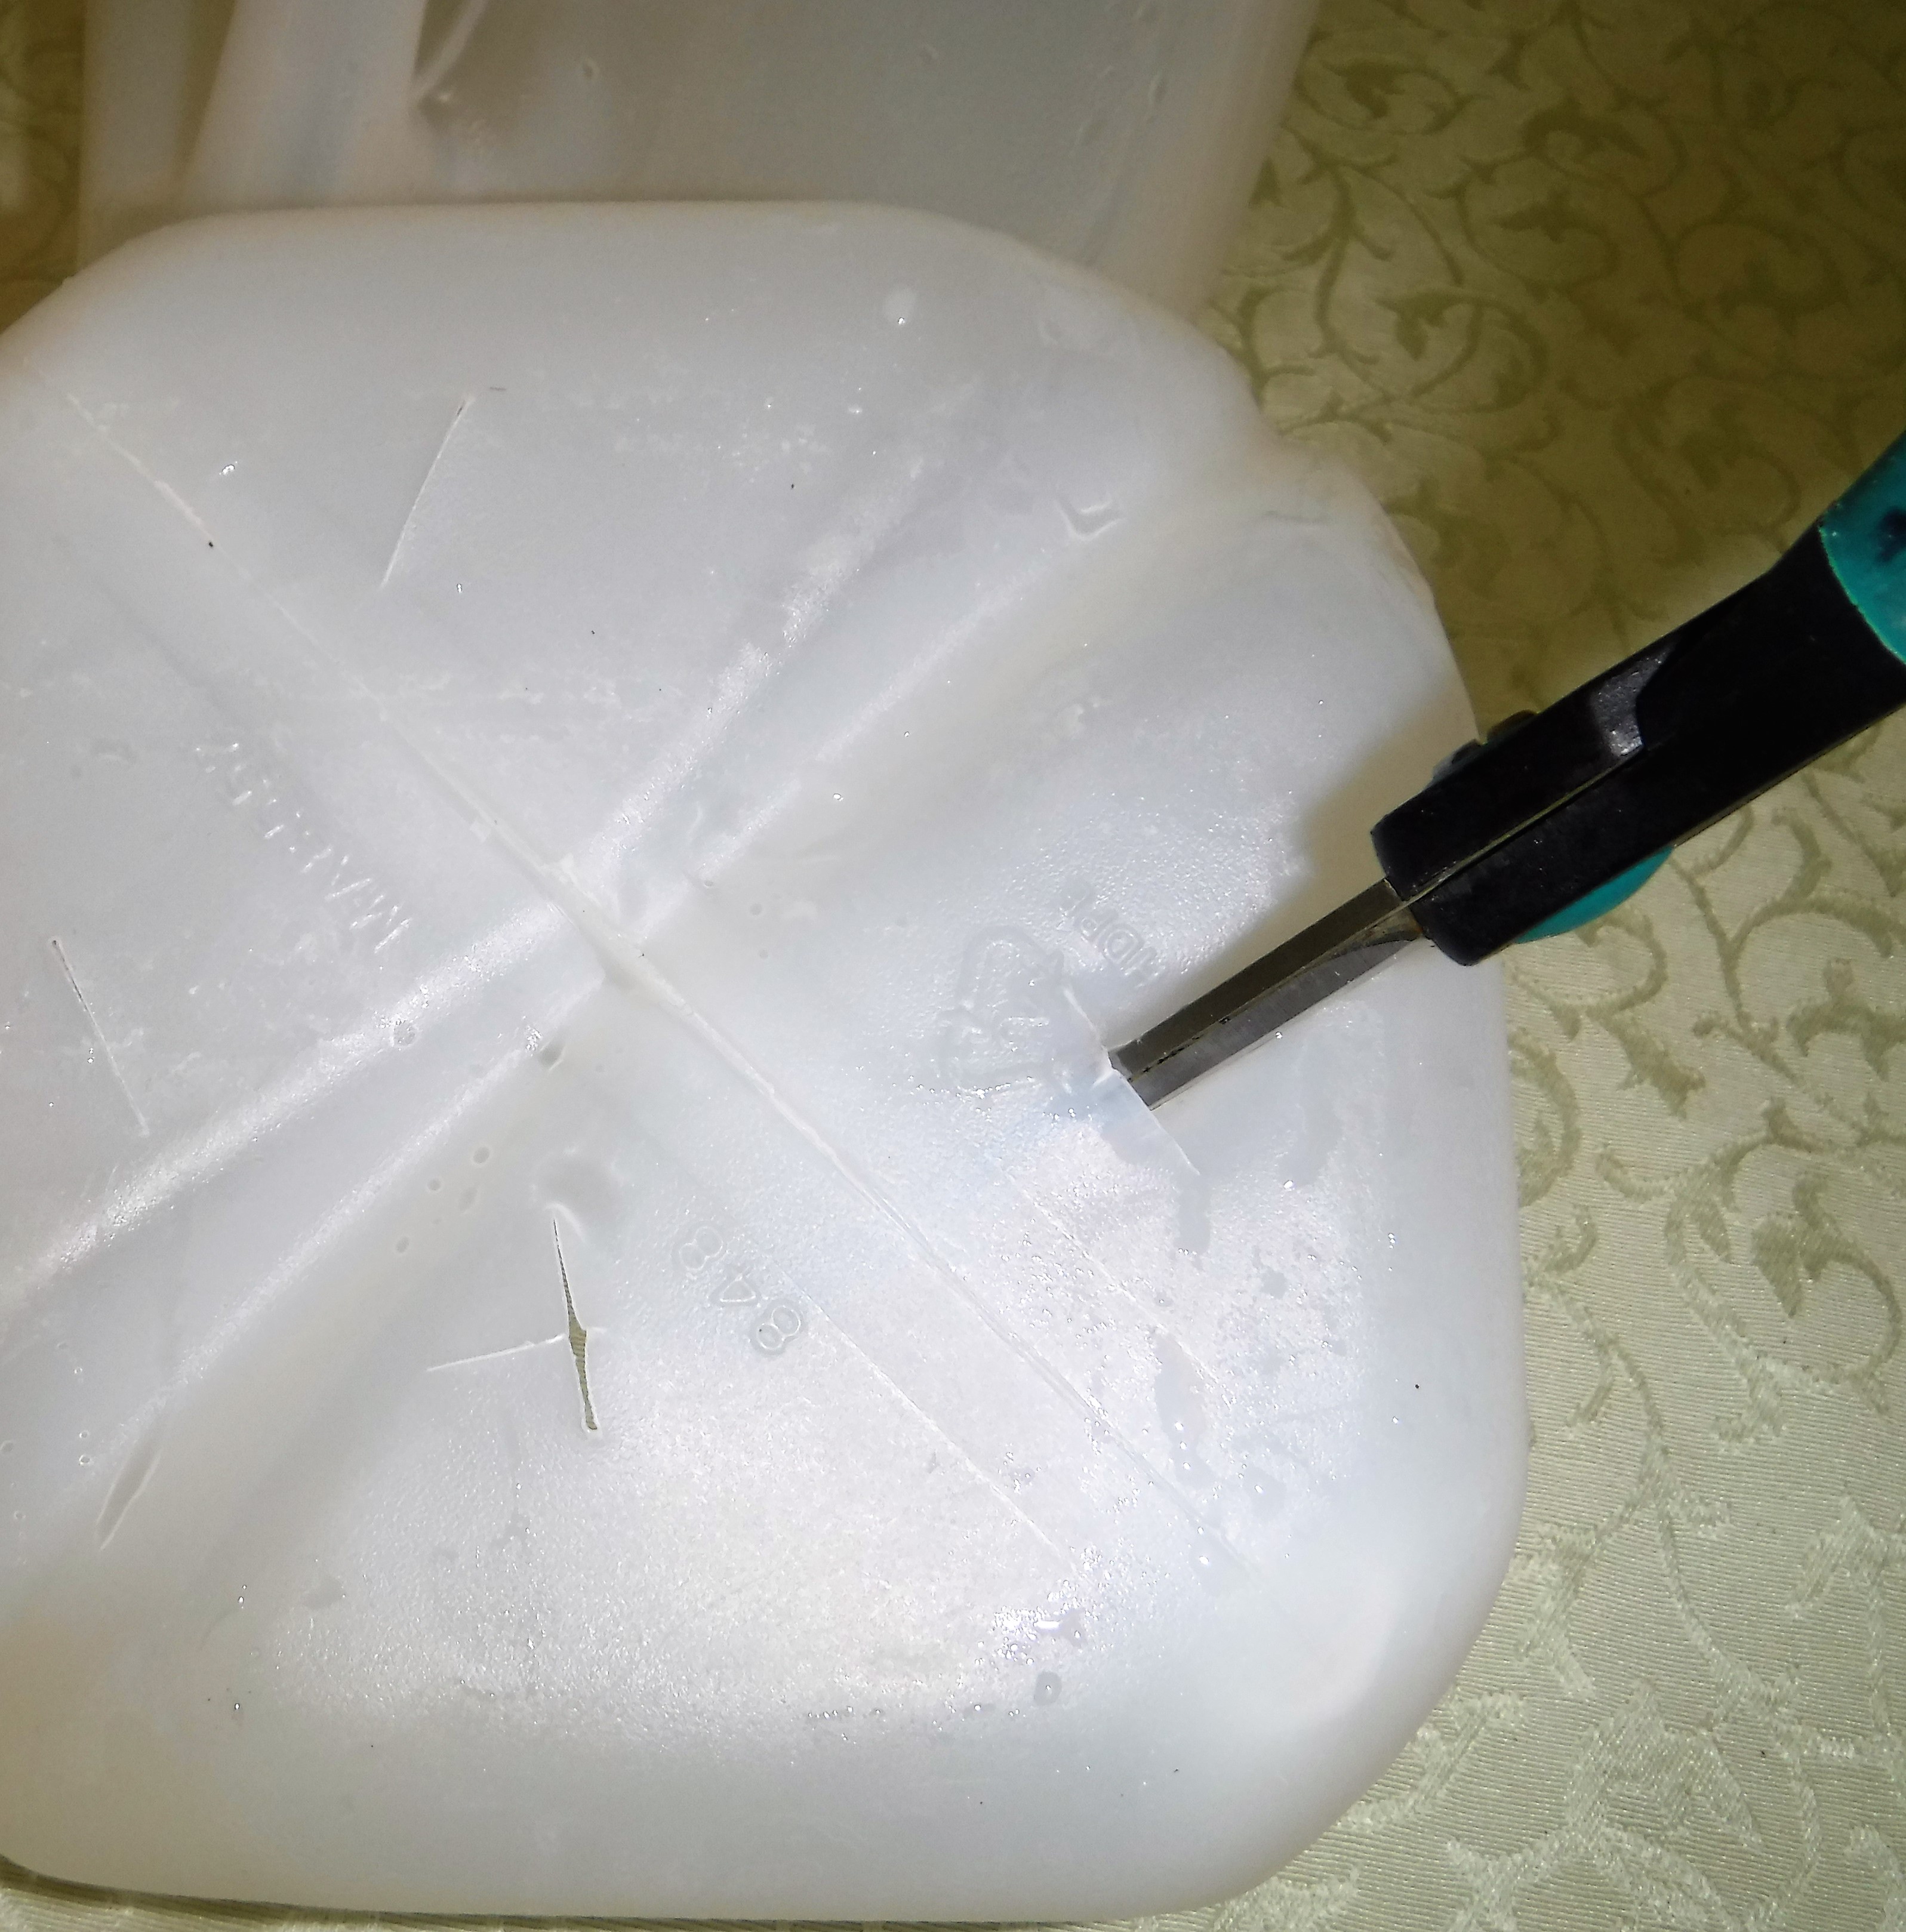
I place the bottom of the carton in my kitchen sink over the drain. I push my paring knife through the carton bottom in four spaced out spots.
I insert the scissors in the slits and twist. This creates four large drainage holes. In the past I used a hot screw driver to make holes, but this process is easier and you don’t inhale toxic fumes from the melting plastic.
I fill the bottom of the carton with 1 1/2 inches of sterile organic potting soil. On top of the potting soil I add an equal amount of organic seed starter soil.
I water this until it is soaked and then let it fully drain.
I sow my seeds and cover with a thin layer of seed starter. If I keep the top layer very thin it will usually wick up water from the layer of seed starter soil beneath it.
I label the top with permanent marker. I have to keep a close eye on the labeling. The letters will fade in just weeks. It’s vital to reapply the marker when the letters lighten or I’ll be guessing as to which seedling is what. Tape the edges together with duct tape and place outside in a sunny spot. The wet soil in the carton bottom has always kept my cartons grounded, even in windy winter weather. I will remove the cap later today or the seeds might become too hot in warmer weather. I usually don’t quit my winter sowing madness until every spare milk carton is filled. You can find lists of which plants do best started this way on the Winter Sowing site. Happy Gardening!