


Sometimes you have to do something just for fun. This nubbly tomato presented the perfect possiblity, and so…with a pair of googly eyes, and a felt heart for a mouth, we created a tomato lady with a lot of personality.

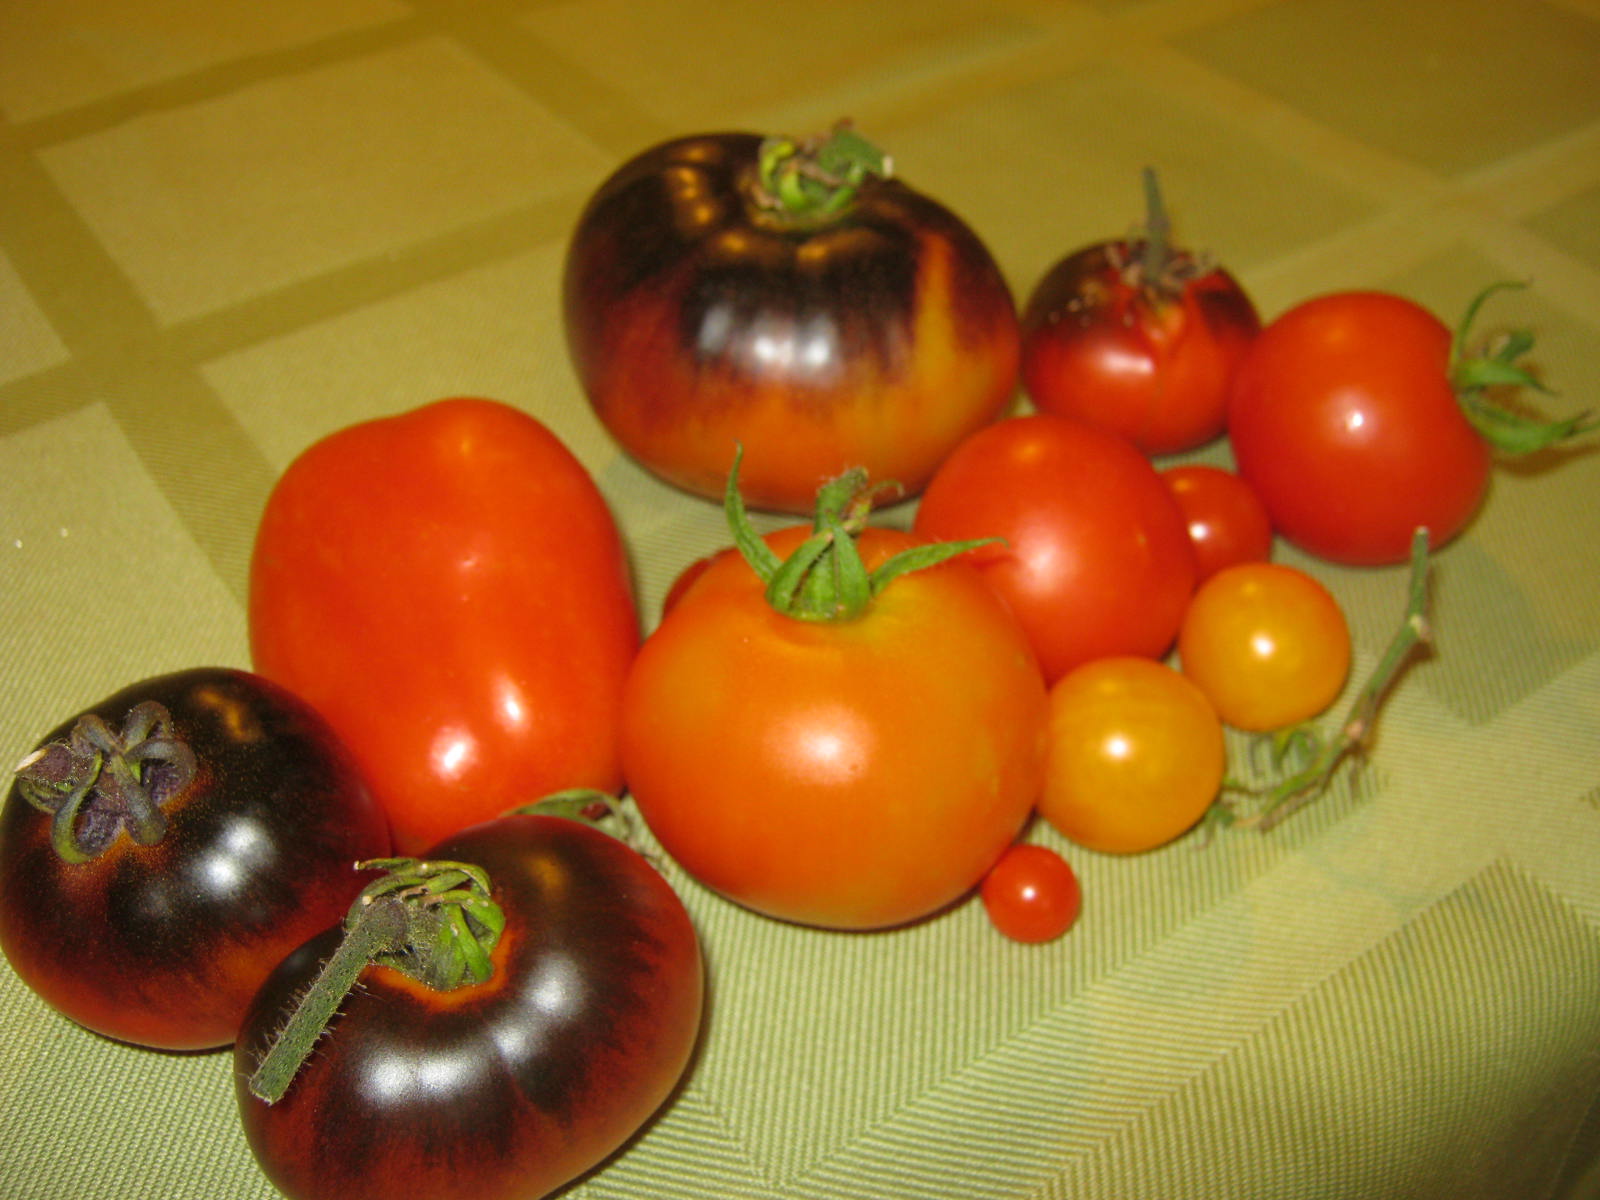
My tomato plants have thrived this year. I have been diligent in removing suckers on the indeterminate plants, and now I am reaping the rewards of the time spent caring for them. I am pleased with the heirloom varieties and also the varieties I planted that are said to contain high amounts of the antioxidant anthocyanin. Indigo Apple, along with Gypsy (another dark tomato) have been welcome additions to the garden.

I’ve had a few problems, this stem at one point in time had several leaves, now it is bare. I never found the culprit, but I am pretty sure it was a tomato hornworm. I am crossing my fingers that he fell victim to a predatory wasp. Hopefully, he is the only one of his kind to visit my plants this summer, and I won’t feel compelled to whip up an organic spray. I’d much rather hand-pick the pests away or let nature’s predators help me out.

This is the largest tomato I have ever grown. To protect if from squirrels eager to sample its lushness I surrounded it with hair from my cats. I know it looks ugly, but it worked. Here is the harvested tomato, finishing its ripening process in my kitchen. Success!

If you don’t have cats or dogs, I’ve read that human hair will also repel critters. Happy Gardening!


I have over a dozen tomatoes planted in my Square Foot Garden. I started them from seed in the house this year. The tomatoes are doing okay, but not producing growth to rave about.
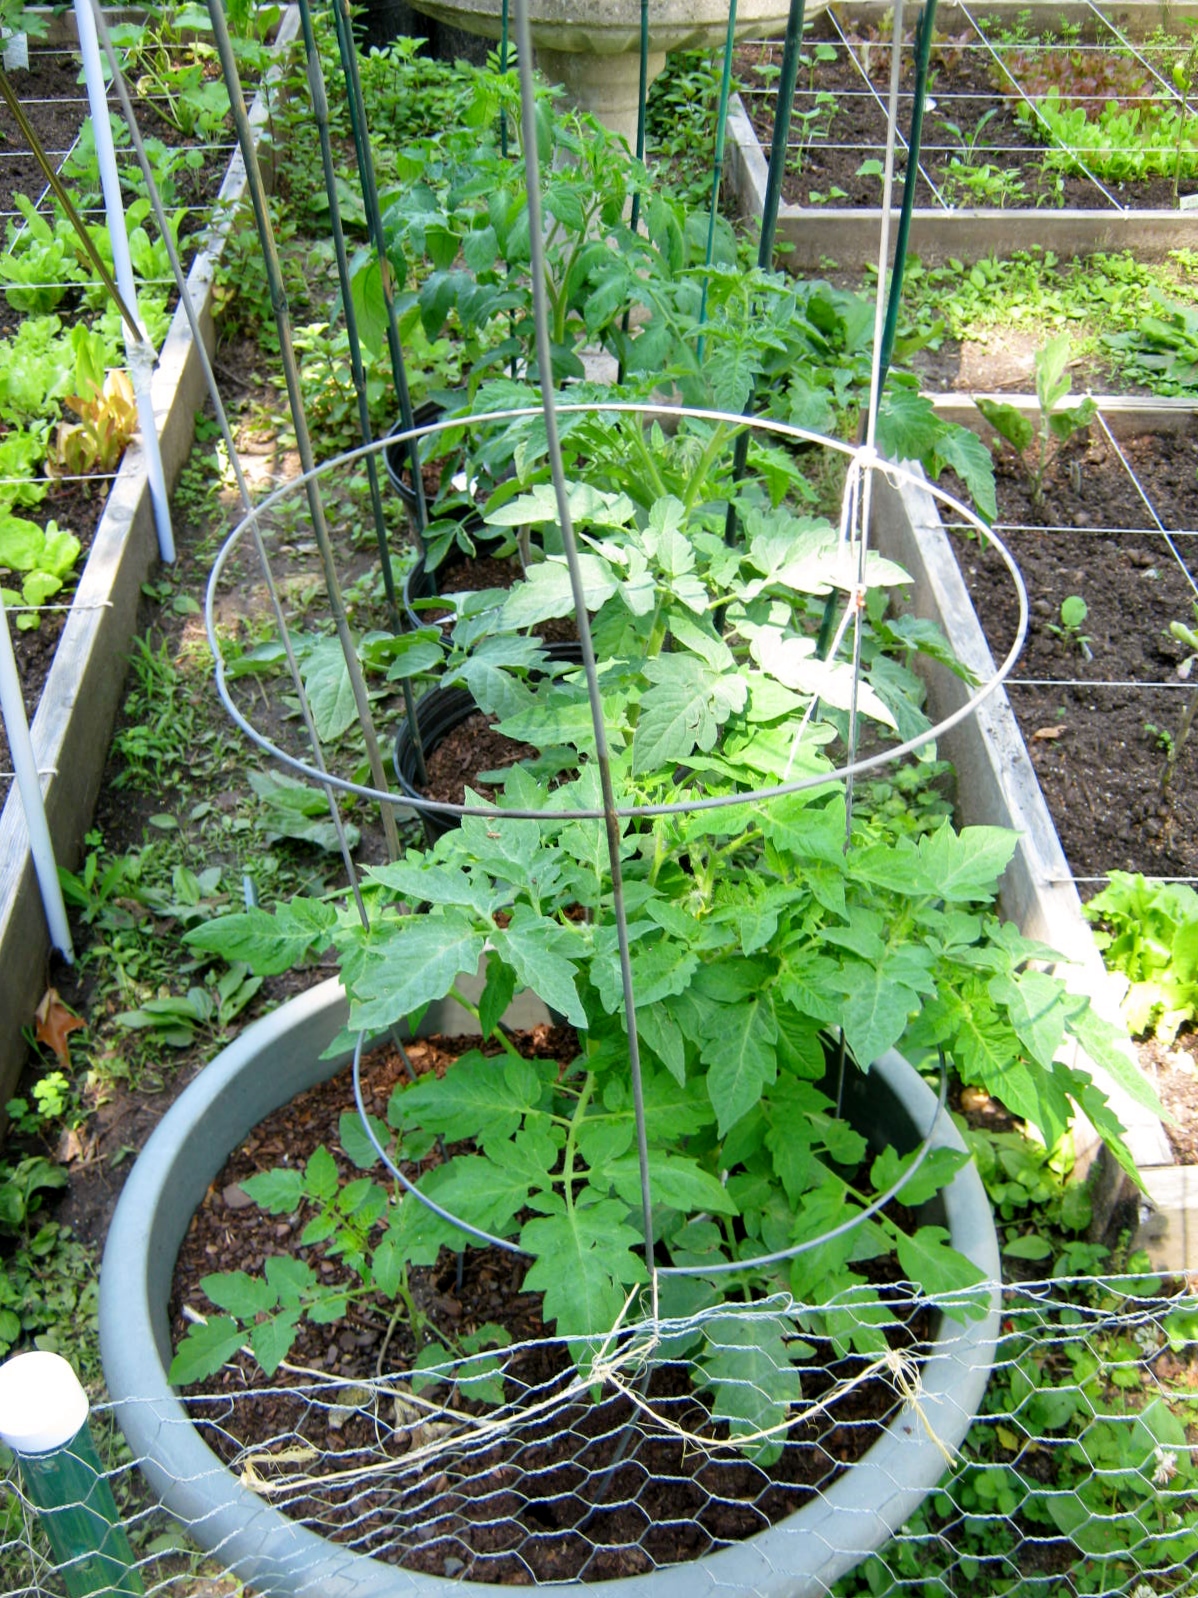
The potted tomatoes were sown from the same seed packets, and grown in exactly the same conditions. The only difference is that these tomatoes are planted in pots of Whitney Farms Organic Potting Soil. This is a terrific soil loaded with natural fertilizers. OH MY! Compare the color of the leaves to the first photograph, and take a look at the size of the plants. The tomatoes in the pots are much greener and in some cases more than double the size. The potted plants are already setting blossoms. In hopes of helping them catch them up, I side-dressed the Square Foot Garden plants with organic fertilizer. I think in the case of the tomatoes I need to do a little bit more than the manual recommends. I’ll update in a few weeks.

I was inspired by the video I posted yesterday on suckering and stringing tomatoes. Over the weekend I decided I MUST try stringing, suckering and fertilizing my tomatoes more diligently this year. The fertilizing was easy. I already had an organic tomato and vegetable fertilizer from Whitney Farms on hand. I side-dressed the tomatoes with the fertilizer, tilled the soil a little, and the first part of my goal was complete.
Suckering turned out to be pretty easy too. After watching the video I easily suckered every plant in only a matter of minutes. Figuring out how to string them for growing…hmmm…not so easy.
I didn’t want to spend a lot of money on creating/building a permanent trellis. I gave the problem some thought and remembered the mop handles I had saved from another project for garden stakes. Would these work? No, when driven into the ground they would be too short. What if I attached two together? I’d have plenty of height if this solution worked. How to attach them together though? Aha…DUCT TAPE!

I went to the dollar store in search of more mop handles. I couldn’t find them, but I did find brooms that would unscrew easily leaving a handle for me to use. I also purchased some plastic spoons and two packets of thin little screwdrivers. This all cost me less than $20.00. The duct tape I had on hand.

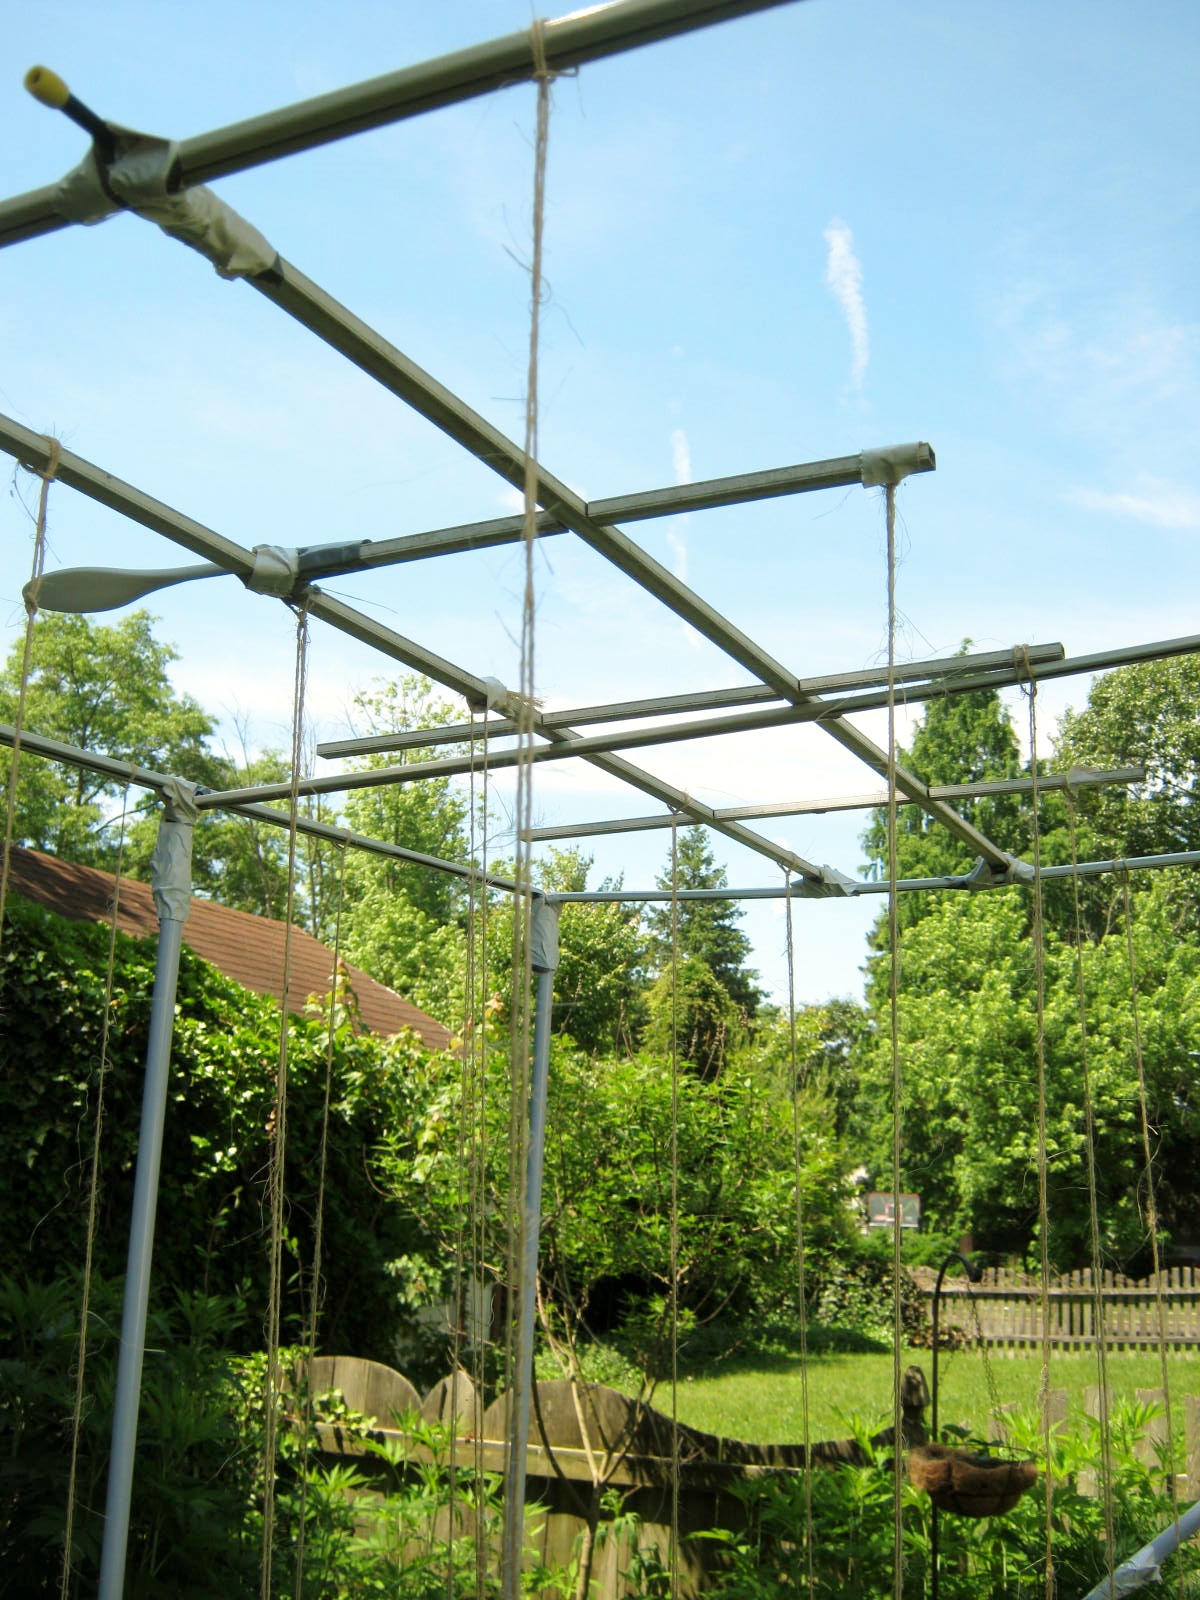
I constructed the trellis piece by piece from the ground up. I had no plan to follow, the process was a little bit like putting together Tinker Toys. (Oh my, I’m giving away my age) To strengthen the structure I added some old curtain rods taped on at the diagonal. My son, who is a builder, told me I needed to do this to keep the base steady. I also used curtain rods across the tops of the handles. Duct-taped again! An old sectional window frame was taped on top of the structure for stringing the tomatoes.
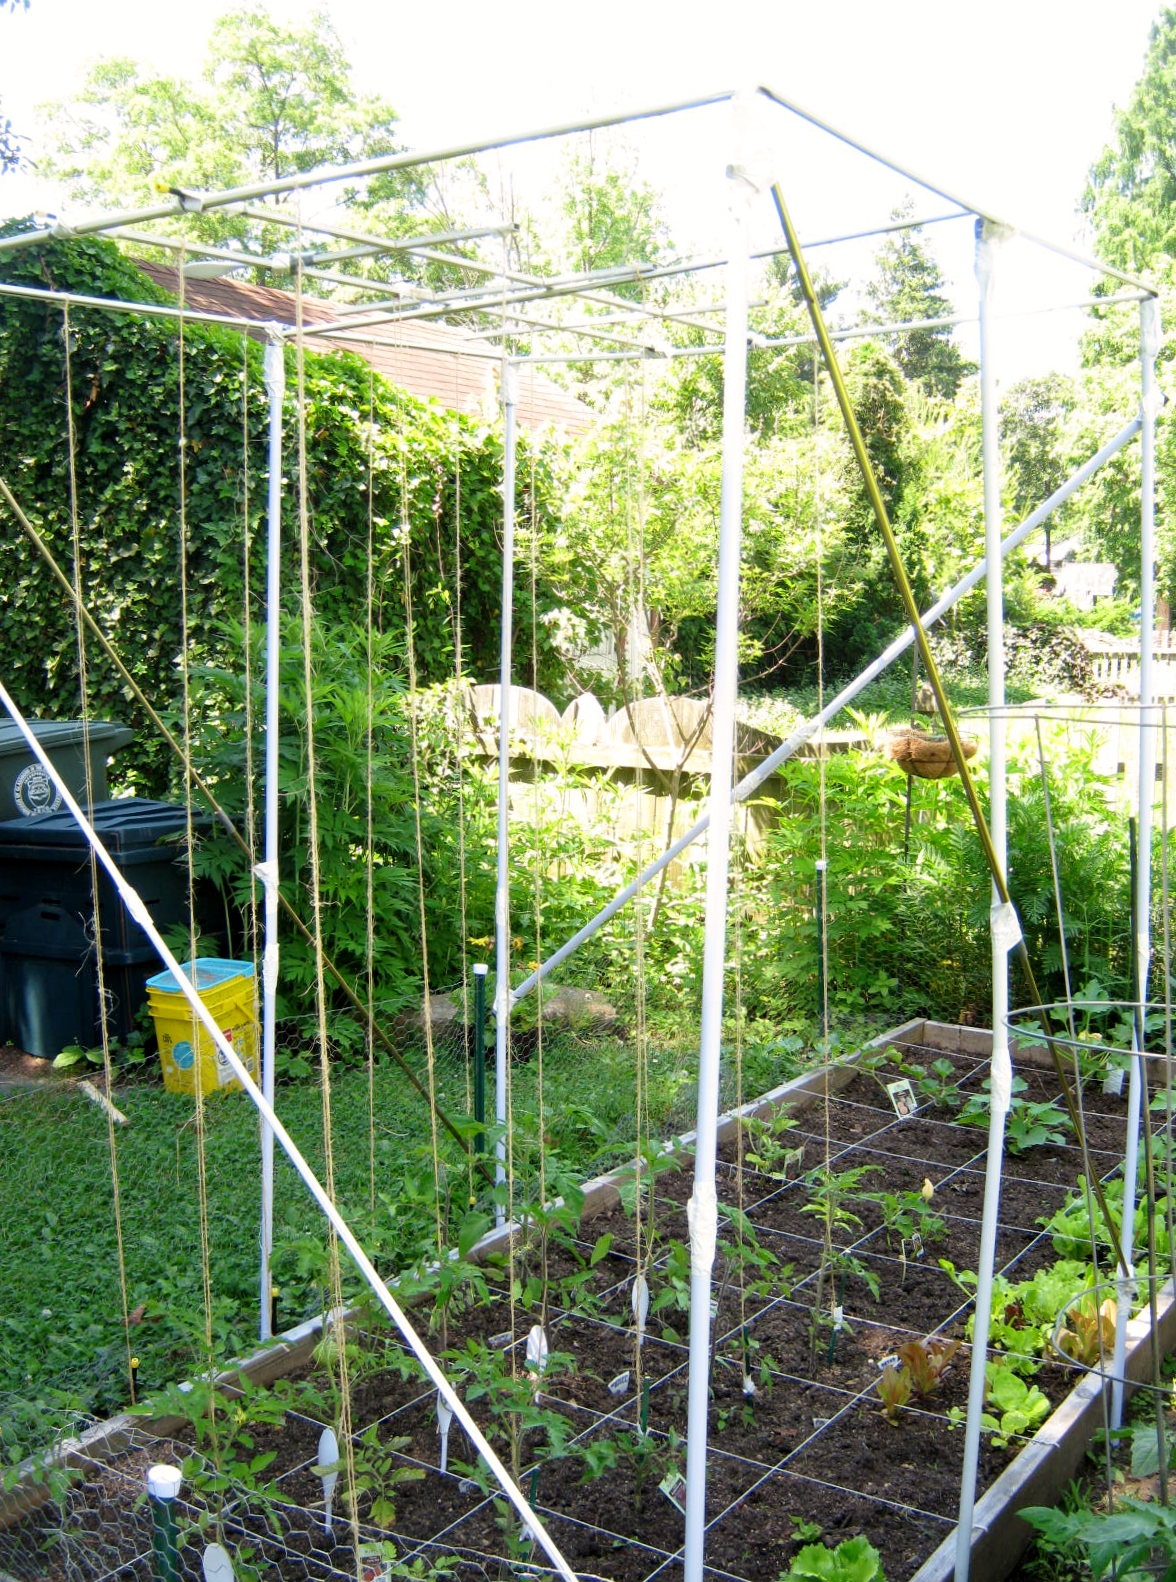
My junque trellis is not pretty, but oh my, it is interesting! Best of all, the basic concept works perfectly. We have already had heavy rains and not a curtain rod or handle has budged a millimeter. I LOVE DUCT TAPE!
How to anchor the sisal string beside each tomato plant was my next problem. I used spoons for the soil. I looped string onto the window frame first with a type of slip-knot then let the free ends dangle down and tied them to a spoon. I pushed the spoon into the soil beside the tomato and the string was anchored. I used small screwdrivers driven into the wooden slats for the tomatoes near the border of the garden.
I’m hoping for hundreds of tomatoes. I want to give them away to everyone I know. If this one-season fix works for me then I will consider spending a larger amount of money for a more aesthetically appealing structure. Something portable, but also permanent in durability. I know that what I’ve built for this season will not last forever. Happy Gardening!
![]()
Gardening Tip: Dollar stores are terrific places to find unusual items to use in gardening. Take a look around your home too…you’ll be surprised at some of the “stuff” you have stashed away that will work as trellises, etc., in the garden.


Seedlings, Seedlings, Seedlings! They are EVERYWHERE! Last night I had to bring them into the house instead of overnighting in the garage…it is going to be very cold during the next twelve hours or so. I also covered the spinach and the kale I planted Sunday with overturned terracotta pots. They would probably be fine without the protection, but why risk it?
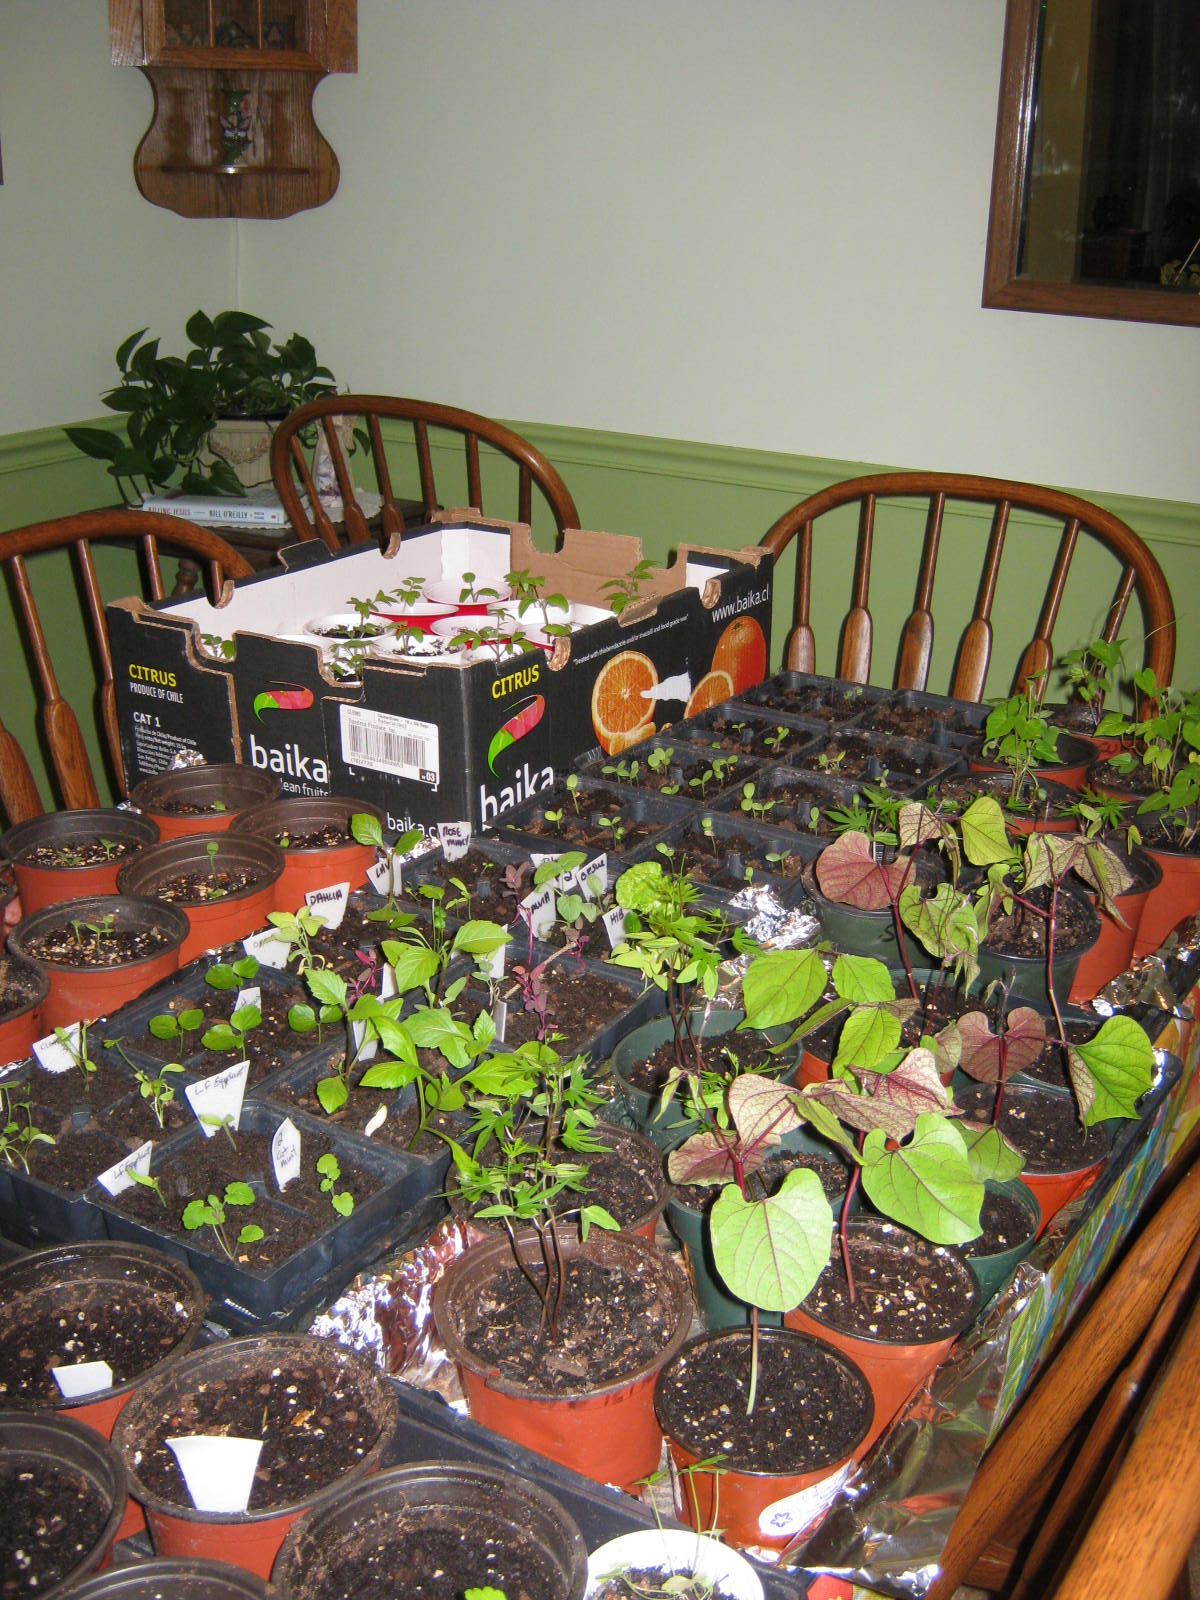
My dining room table
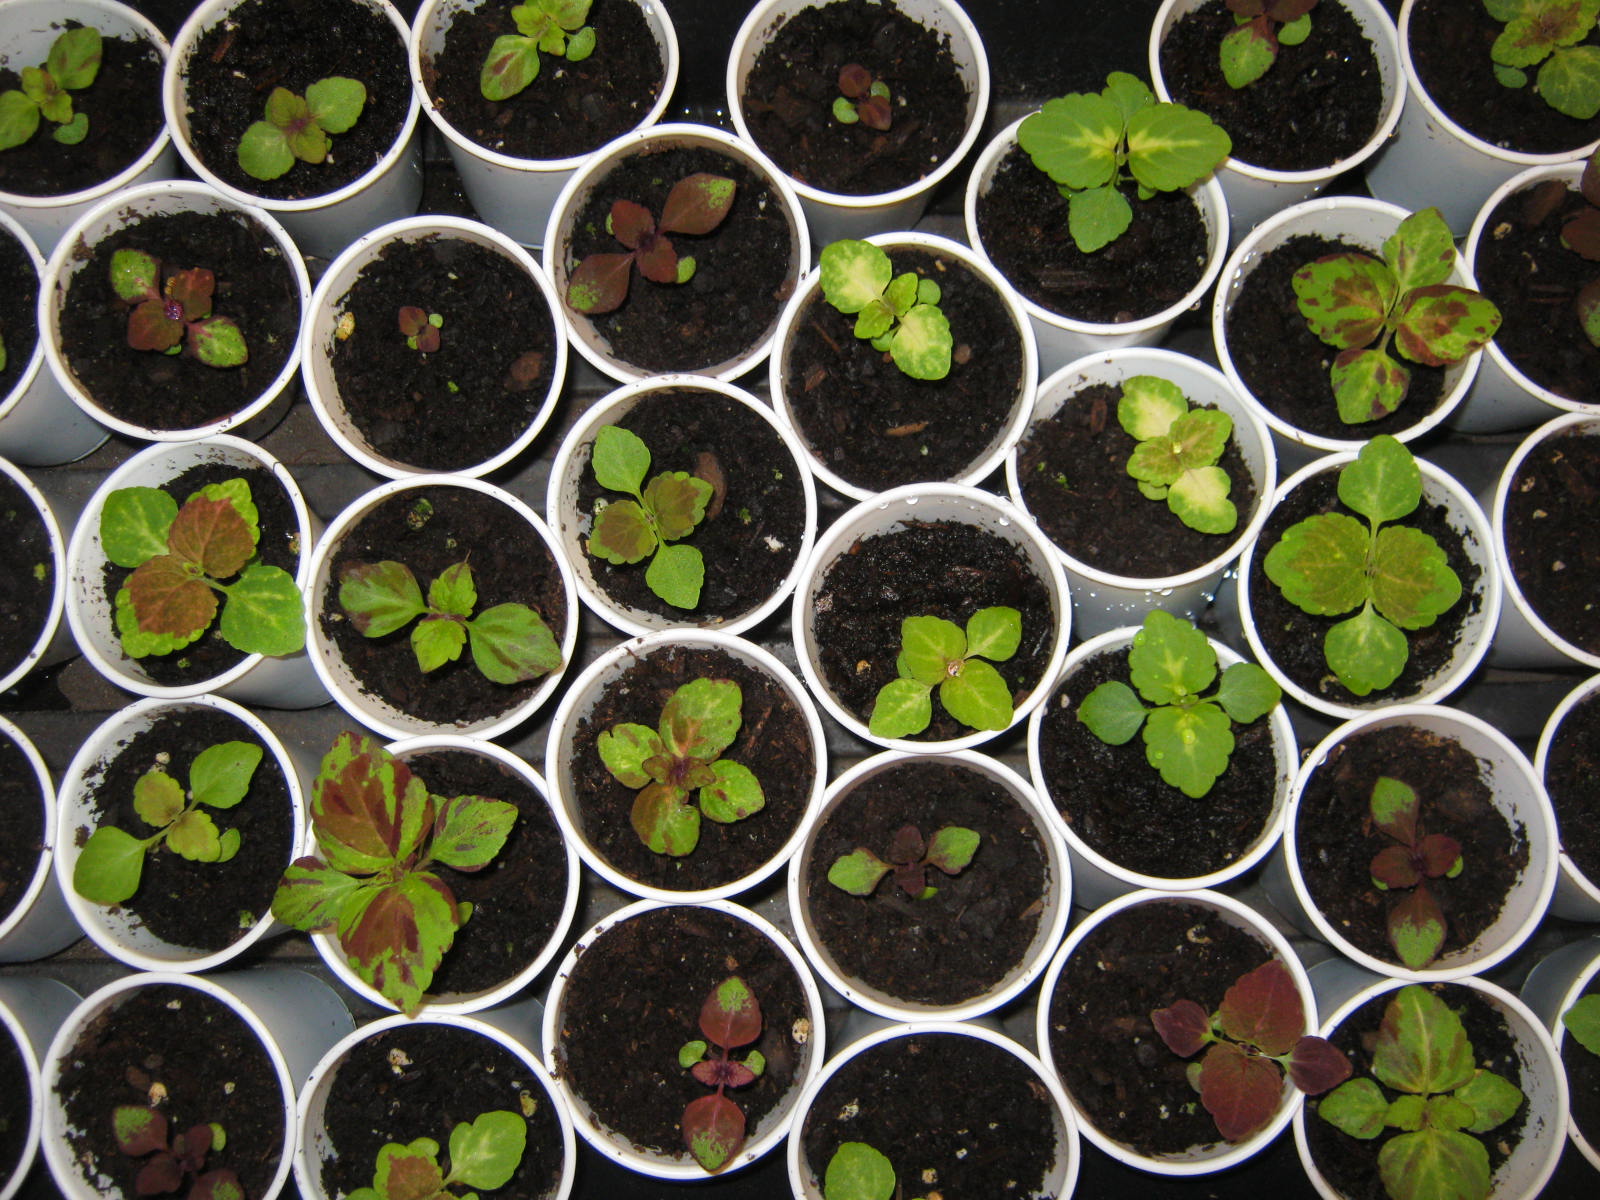
Coleus galore! I have more in other rooms, and I started another batch a few weeks later for those bare spots left by poppies, bleeding heart, spring bulbs and other plants that die away near the end of June.
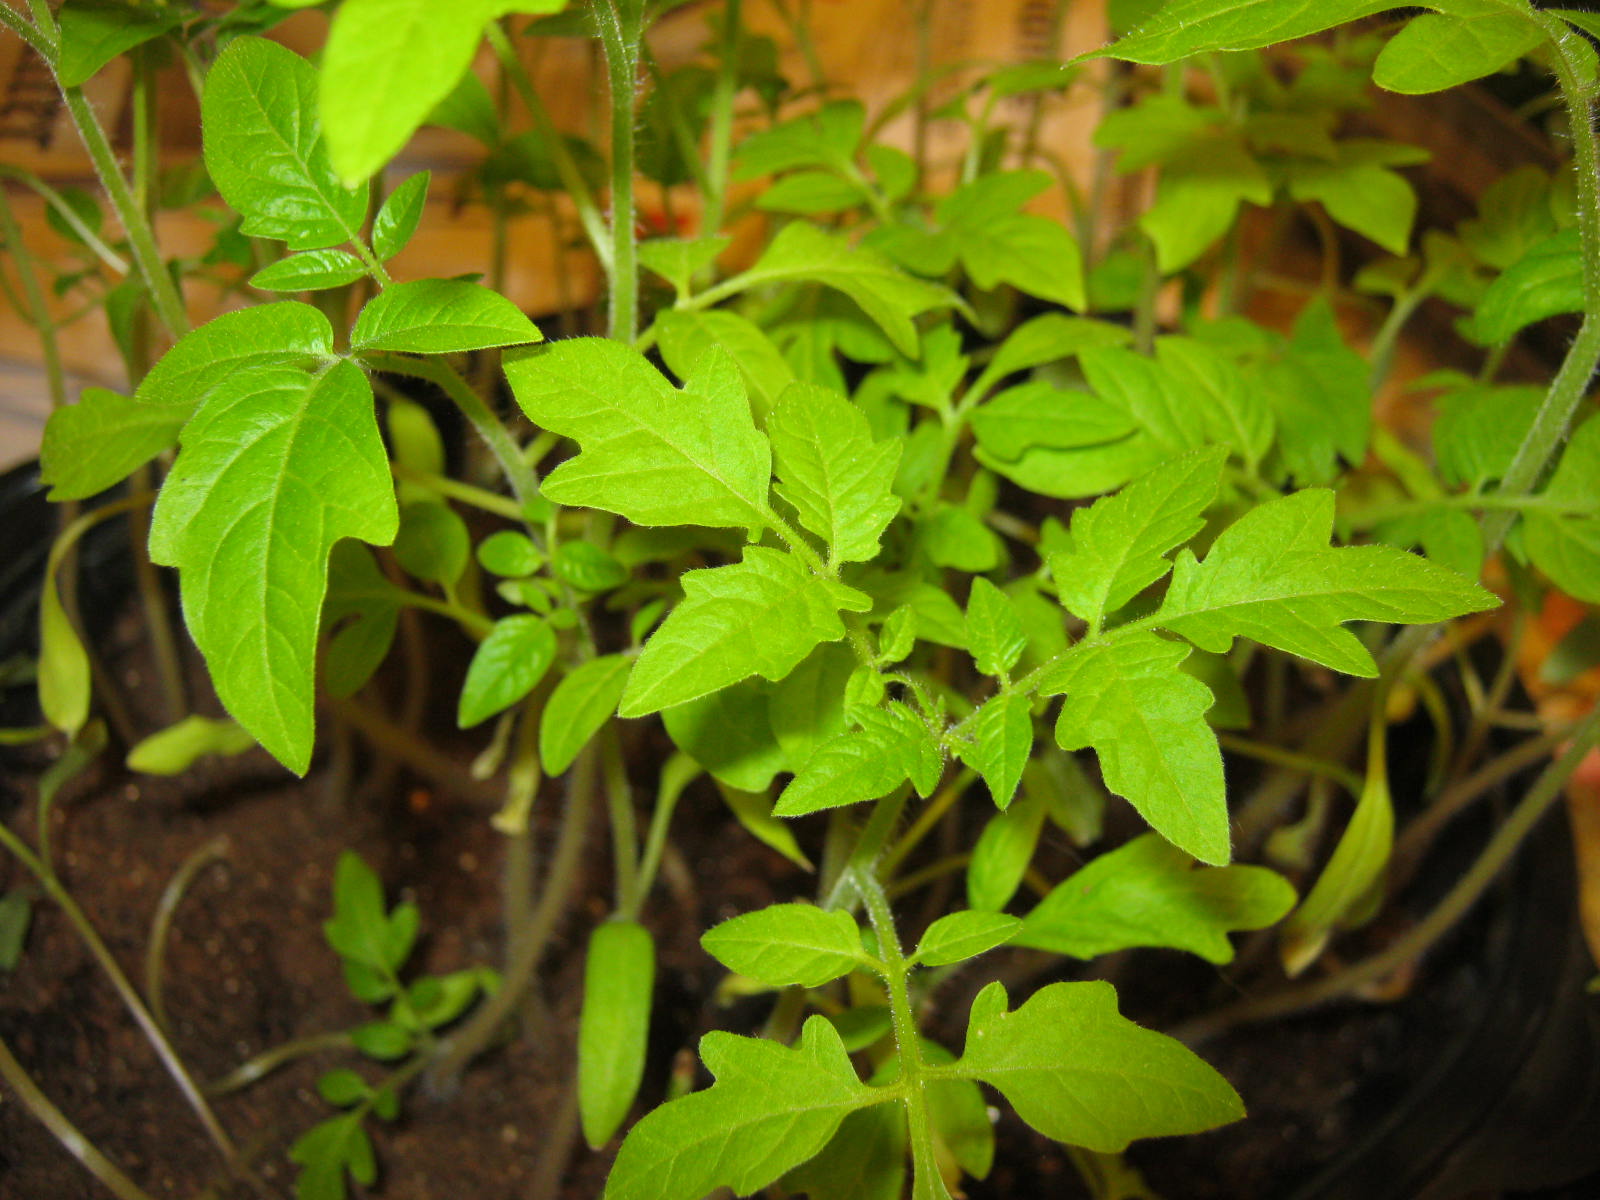
Gorgeous tomato seedlings…I tried many varieties this year.


My tomatoes are loaded with green fruit. They are just beginning to show deepening yellow, orange and red tones. Unfortunately, the squirrels have noticed too, and to my great “phrustration” I have realized I waited too long to thwart their voracious appetites for fresh tomatoes. I am annoyed with myself for I was prepared in advance for this problem. This past Christmas season I remembered the gardens of summer and bought what I had read was a preventative for hungry squirrels stealing tomatoes…cherry red Christmas Ornaments. I bought three packs at the Dollar Store and set them aside ready to be put to good use.

The trick: Before your tomatoes set fruit place “Decoy” tomatoes on the branches. The squirrels supposedly will try to bite them and learn they are inedible. It’s a great idea, but I blew it…I waited to put the balls in place until the fruit was already showing red color and unfortunately had already been sampled several times.

I used up all my pungeant spices and baited the Christmas balls with a peanut butter glue coated with garlic, salt, onion powder and Adobo spice. For good measure I pounded a clove of garlic with a hammer and strew it in between all the tomato plants.

I hung my decoys near the lushest and best looking tomatoes. The variety above are Amish Paste. The next day to my dismay I found one of the decoys on the grass, torn off the plant and tossed around as if the squirrels had a late night soccer game.

Adding insult to injury, later in the day…

I spied this cheeky fellow on my lavender adirondack, eating one of my cherry tomatoes with another one waiting at his feet.
Perhaps my ploy might have worked if I had “followed the directions,” something I’ve always had a hard time doing, and placed the decoy tomatoes on the branches of the plants a few weeks earlier in the season.


This is an early morning photograph of my Square Foot Garden. I have to say, hopefully without sounding like I’m bragging, this method of gardening has been a major success for me. I have lettuce daily, my broccoli and bread seed poppies are ready to begin budding. I have cooked and eaten my kale and swiss chard, and though I have always loved fresh greens cooked in various ways, I can now feel a “fresh greens fanatic” point of view taking me over.
The Square Foot Gardening Website can be found here: Square Foot Gardens. Take a look and browse the information and photographs. Better yet, buy the book and create your own little area of vegetable heaven.

This is a view of the back of my Square Foot Garden. I know my pea trellis leaves a lot to be desired, but the peas come and go quickly, and I will be replacing them in a few weeks.

Because I didn’t want to give up too many of my squares to the dozen tomato plants I am growing I planted half in containers. These are doing very well too, the stems are beginning to look like tree saplings. I already have some flower buds on a few plants. O Happy Day…tomatoes in a month or two. Hooray!
I was honored to see one of my Square Foot Garden photographs was featured in a Mel Bartholomew Blog Post. Take a look: My Square Foot Garden Squares On Mel Barthlomew’s Website.


