Pots and Pans with Plants – Pickled Eggs with Microgreen Garnish

blog 040

Last night we had homemade potpie, the Amish type, not the pie crust variety. One of these days I will remember to take pictures start to finish and post the recipe to the blog. Potpie is delicious, but rather heavy, and can be a bit bland, I like to add a side dish with a little pop. Last night I decided to serve pickled eggs alongside the potpie. Red beet pickled eggs are another Pennsylvania Dutch delicacy. They are so much more appetizing in appearance than plain pickled eggs. The history of pickled eggs can be found here: Red Beet Eggs. Garnishing my pickled eggs are tiny pea sprouts called “Microgreens.” I love the appearance and taste of my pea sprouts. They add a taste of springtime to a winter meal.

Microgreen Blog Links can be found here:

Microgreens Part I
Microgreens Part II
Microgreens Part III

I am including my recipe for pickled eggs. Try not to use a brand new carton of fresh eggs. Peeling the shells off of very fresh eggs can be frustrating. To best boil eggs for pickling, place eggs that are a week or two old in a saucepan of cold water, add a dash of salt or vinegar to the water, bring to a rolling boil. As soon as the water reaches a full boil, cover the pan with a tightly fitting lid. Leave eggs in covered pan until the water cools to room temperature. Peel eggs. I’ve found the best way is to lightly crack the shell against the cabinet top on all sides, top and bottom too. I then gently roll the egg between my palms and the shell usually separates and slips off. (It is a good idea make sure the thin membrane that sometimes sticks to a boiled eggs is removed. This membrane will mar the surface of the pickled egg if left in place.)

RED BEET EGGS

1 14 -15 oz can sliced beets (Second can on hand for adding color later in week)

1 Cup vinegar (1/4 cup extra on hand for adding later in week)

1/3 Cup sugar

1/2 Cup water

Sliced Onions

Peppercorns if desired (I use plain old pepper out of the shaker, as much as you like)

Bring to a boil and let sit for an hour or gently simmer all ingredients together for one hour.  Strain.

I find a large mason jar works great for making my pickled eggs. I put about 8-10 eggs, more if they will fit, into the jar. I then pour the strained juice into the jar. Make sure all surfaces of the eggs are covered. Put a lid on jar, cool down, and place in the fridge. You can use any type of container, but I like glass, plastic has too chemicals that can leach into your finished eggs.

In about two days I check the color of the eggs. Often, I decide they are too pale, and I pour about two inches of the original liquid out and add fresh beet juice right out of the can, and an inch or two of fresh vinegar. This seems to boost the color absorption of the eggs.

In a week the eggs are ready.  Cut in half or slice in thin wedges as a garnish. For those who love vinegar, do as some in our family do, pop out the yolk, fill the empty space with vinegar and pop in your mouth. ZING go the taste buds! This technique isn’t for the faint of heart or appetite.

blog 003

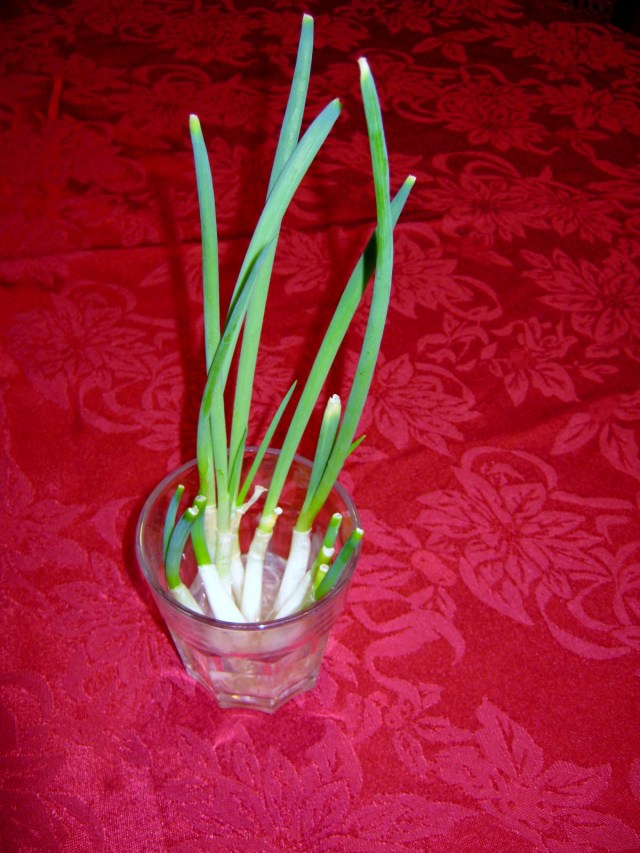
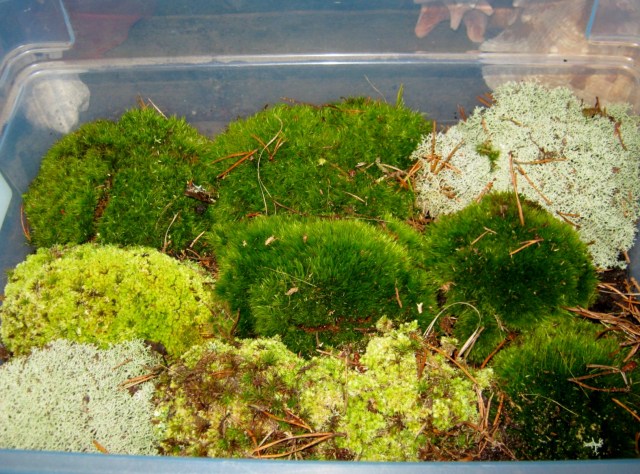
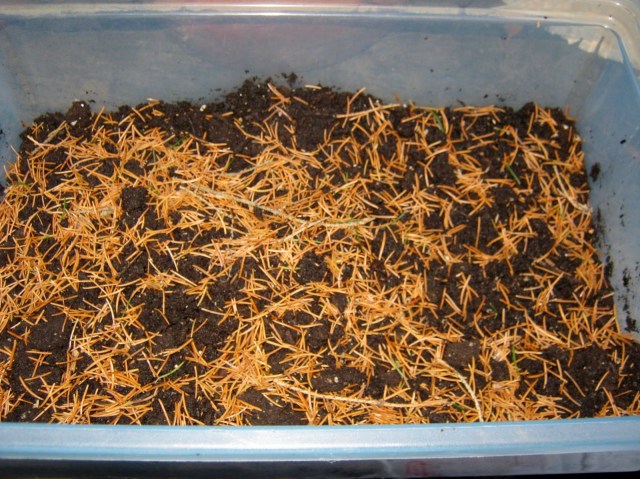
Microgreens growing in winter.

Purpose, Perspective and People – Doing Good

church 4

I have been studying the book of Hebrews this past year. I am about two thirds of the way through this amazing book of the Bible. In recent weeks I have come upon a verse that I decided would be a verse of purpose for me in the coming year.

“In response to all he has done for us, let us outdo each other in being helpful and kind to each other and in doing good.” Hebrews 10:24. (TLB)

I like the way this verse is worded, and it seems to go hand in hand with what Jesus told us in Matthew.

Jesus replied, “Love the Lord your God with all your heart, soul, and mind. This is the first and greatest commandment. The second most important is similar: ‘Love your neighbor as much as you love yourself.’ All the other commandments and all the demands of the prophets stem from these two laws and are fulfilled if you obey them. Keep only these and you will find you are obeying all the others.” Matthew 22:37-40 (TLB)

Two members of my family are a good example of fulfilling the commandments and purpose expressed in these verses. In towns in Panama, Nicaragua and Peru there are now beautiful and structurally sound churches for worshipping God due to their commitment to doing good and using their strengths and resources to further God’s Kingdom. The churches they build stand in the place of lean-tos and sheds or no building at all. When the new church buildings are complete there is room for up to three hundred people. Congregations of 28 have grown to 200 or more people praising and worshipping God. There is room in the churches for the congregation to grow, lives are changed, people are saved. Children grow up worshipping God in a structure that is sound and secure. I can’t help but add an “Amen” and “Praise God.”

church 2

I might not be able to build churches, but I can use the resources I have to build good things in the lives of those my life touches. Every day usually brings an opportunity of some kind to us all. Whether it is a large thing, a small thing, a public work, or a work done in secret, all of us have the opportunity to fulfill the purpose in Hebrews 10:24. I am committed to “doing good” in the New Year of 2013.

Here are a few more pictures of the new churches going up and their congregations. God bless us all in this New Year.

church 7

church 6

church 5

church 3

church 1

Peculiarities – Most Popular Post in 2012/Growing Romaine From a Stump

onions 001

No, you aren’t seeing things, this is not a stump of Romaine Lettuce growing in water, but it is a group of green onions regrowing. This is an idea I found in the comment section of my original post that spoke of regrowing Romaine Lettuce from a stump.

The original Romaine post was written and published in December of 2011. Since then it has been viewed hundreds, even thousands of times according to my site stats, and commented upon dozens of times. The original post can be found here: Original Romaine Regrowth Post

This year I wrote a recap of the post and gave a day to day view of a new stump growing on my windowsill. You can find the recap here: Recap Romaine Regrowth

Many of the people who commented on the original post also added a few tips of their own. Here are a few of my favorites:

From Alikina on 12/8/12

For those concerned about transplanting – most plants that do well with this re-rooting method (which is what you’re doing – the plant had roots at one point, the grower or the store cut them off, and it’s still living (if it weren’t the whole thing would either be very slimy or paper-dry), so it’s ready to re-grow roots. If you want to transplant to dirt, start it first in a dish of sand, potting moss, or vermiculite (from a garden-supply store), or a ‘rooting medium’, which is a mix of those ingredients, and keep it very moist. Then when you see leaves start to grow, transplant to your garden or to a pot of dirt. I haven’t tried this with lettuce yet (although I will now that I’ve read this!!), but I have with other plants. Some will grow, some won’t, depending on how recently they were picked.

For those worried about nutrients, the main nutrients in lettuce are formed by the plant from water and sunlight. If you keep growing the lettuce (or any plant) in water and want to be sure it’s getting all the nutrients it needs, or all the ones you’d want to eat, you can either make a fertilizing solution or buy one from a hydroponic gardening store. Google terms like ‘home-made hydroponic fertilizer’ or ‘hydroponic nutrients’. You can also just put safe, mineral-rich things in the growing water. A clean eggshell, for example, will slowly release calcium. A few coffee grounds or a used tea bag will have a lot of nutrients that didn’t make it into the brew – just don’t add too much or you’ll overwhelm your poor baby plant!

Amy 9/16/1

Great tip! We do the same with the bottom white part of a green onion with the roots still on. Stick it in the ground and the green part shoots up for another crop!


onions 002

Shannon 8/31/12

That’s really cool. If you are growing romaine in the garden you can also just harvest the outer leaves when you need salad greens and leave the plant intact in the ground to continue growing.

Libby 7/15/12

I am growing mine in a raised bed outside. I did nothing to them, just stuck them into the ground so that the root sections was firmly seated and within 2 days I had new leaves coming up. I have found it works with red cabbage, onions and celery also so far. I am going to be trying more “2nd” helpings as I get them.

onions 003

Barbielea 2/5/12

Thanks for this helpful tip. We keep tortoises and guinea pigs, and get through at least four romaine lettuces a week (its a nutritious staple for both). Will definitely try this out.

Davis 5/16/12

This is such a clever idea. Thanks for posting this! I’d heard about it with celery, but never with lettuce. I gave it a try, and it worked! My household has been completely entertained watching this little lettuce grow. (Okay, I’ll admit it…apparently we need to get out more.)

Thanks to everyone who has commented this year, those above, and the many who I did not have space to include. I appreciate each and every addition to my original post, and as you see from the photographs above, I have put into practice some of the advice in the comments too. Happy 2013 to all. Kathy

People – My Long Lost Pen Pal

Image (3)

In the late 1970’s I entered my name and address in a publication for International Penpals. I was newly married, in my early 20’s, and very interested in exchanging letters with someone in another country. I contacted someone from England, a country where many of my ancestors emigrated from, and had a reply from a young woman near my own age by the name of Linda. We conversed for a few years. I know she lived in Birmingham, I think her last name was Hamilton or Hampton, and when she married I think her name was changed to Smith. I remember she liked to “caravan.” A word alien to me, but in Britain-speak it means to camp, at least I think so. The photograph above was taken in Coleshill Park, and the dog’s name was Skip. Sadly, after we both had children, and became busy, we lost touch. I would love to find her again. If anyone resides in this area of England, and knows an auburn-haired pretty lady, in her fifties, called Linda, please forward her this blog. Thanks!

In this age of technology we are living in writing with pen and paper and having penpals must seem alien to at least half the population. Email does make it easier, but it’s great to have a hard copy of someone’s thoughts. If the picture above had been sent to me through email, I doubt I would still have it. Here’s hoping in 2013 I’ll be able to reconnect with Linda again.

Project – Sock Puppets/Fun for Kids

sleepover and sock puppets 021

I love this book from Sesame Street. It is full of ideas to craft with young children. My grandsons and I have enjoyed making several of the projects, and last night, a sleepover night, we were able to complete another one.

sleepover and sock puppets 018

Using a pair of my old socks that had lost their elasticity we cut a piece of heavy cardboard into a long rectangular shape and inserted it into the sock. This kept the two layers of the sock from touching as we glued bits and pieces to both sides. Next we glued on a red foam tongue in the area right under the heel, facing toward the toe of the sock.

sleepover and sock puppets 024

The next step was the fun part…using more tacky glue we added googly eyes, a pompom nose and felt ears on the edges, facing outward. We made sure that the felt ears extended beyond the sides of the sock so that when the puppet was on a hand the ears would droop downward.  Everything was left to dry for several hours, then we removed the cardboard, tied a ribbon around the neck of the puppet and added a heart dog tag.

SO MUCH FUN!!!

sleepover and sock puppets 020

puppet

Posies – Rose Centerpiece


roses 002

Local supermarkets are a terrific source of fresh flowers. Roses are often sold by the dozen in their display cases. To be assured of freshness, look for petals that are still buds, furled in a graceful urn shape. Gently squeeze the rose petals above the calyx; they should have a sense of firmness, and not feel too smooshy. Check to be sure the petal edges do not have a curled or brown tinge. If the roses are fully blown open, limp, or if the rose buds have the look of a pointy bullet, buy your flowers somewhere else. The fully open flowers will only last a day or two before dropping their petals, the limp buds will promptly droop and die, and the tight, pointy buds will never open correctly. Remember: look for a firm urn-shaped bud.

When you arrive home with your roses, recut the bottom of the stems at an angle. This technique keeps the stem from adhering to the bottom of the vase and forming a seal that might keep water from wicking up the stem. All purchased flowers benefit from being re-cut at an angle. To give your roses even longer life, fill a bowl with water before you cut the stem and cut about an inch off under water. This keeps an air bubble from forming in the stem, further insuring a rose with long life.

The roses in the arrangement above were bought at my local grocery store. They were cut and arranged in floral oasis on Sunday afternoon. I took the picture above this morning (Thursday)  the roses are still lovely after five days in a 70 degree home.

Creating a Christmas or winter arrangement is easy. Fill a vase or container with water or oasis, add a mass of fir greens and insert your roses or other flowers. Remember different levels of height add interest to the arrangement. You don’t want all the flowers at the same level as if they are numbers on a clock, place a few high, a few low, and some in between. A few catkins or other “wild” looking, frondy pieces of foliage or twigs give a look of the natural to the arrangement and are a resting place for the eye. Most of all have fun and enjoy your creation and the beautiful flowers.

Catkins and twigs in the photograph above are from a Harry Lauder’s Walking Stick bush.

Pinterest, Pots and Pans – Penguin Appetizers

022

These adorable penguin appetizers were a big hit at Christmas dinner yesterday. Peel and cut carrots into medallions, cut a notch out of each medallion for the feet which automatically creates a beak to place in the large end of a small pitted black olive. Using a large pitted black olive, cut a small slit in the front, open and place about a quarter teaspoon of cream cheese inside. (I used the already softened variety of cream cheese in a tub)  It helps if you shape the cream cheese a bit on a plate or wax paper before you place it inside the olive. Take a toothpick, insert through head, into the larger cream cheese body and into the feet with the notch pointing frontwards. So easy, not expensive, and so much fun!!!

I found this idea on Pinterest. Click here to visit Pinterest

I wish I had taken a photograph of my little flock,  but in the busyness of the day became distracted and forgot. They are even cuter when you have a dozen or more standing at attention on a serving plate.

Follow Me on Pinterest

Project – Easy Semi-homemade Christmas Ornament/Butterflies

butterfly ornaments 006

I have a miniature Christmas tree in my living room that I am trying to keep outdoorsy in appearance. I wanted to have several butterflies adorn the branches, but didn’t want to spend a fortune buying more decorations. A good solution was this border of butterflies. I separated them by cutting with small manicure scissors. I then used some wired silk leaves I had on hand, and cut most of the leaf away leaving a nub of silk on the wire. I encased this nub within two of the butterflies, glued together back to back.

butterfly ornaments 001

butterfly ornaments 008

This was very easy to do and even easier to twist onto the tree by twirling the wire around the end of the branches a few times. I like the natural look of this Christmas tree.

butterfly ornaments 010

Posies – Friday Florals/Christmas Wreath

wreath 004

I enjoyed creating this Christmas wreath for my dining room wall. The colors are not traditionally Christmas, but they perfectly match the decor in the room. There are so many beautiful Christmas silks on the market now; I had a hard time making a choice.

A hot glue gun is the perfect tool for crafting wreaths. The silk flowers, after you cut away most of the stems with wire cutters, are very light and easy to attach with just a drop or two of glue in the recesses of the grapevine wreath. The Christmas ornaments are even easier, add a little glue to the top hanger and hide that portion within the leaves or wreath.

Special tip: If you don’t have wire cutters, raid your husband or boyfriend’s tool box. Many cutting or stripping tools have an additional area below the blades that are made for cutting wire. I can never seem to keep track of my wire cutters and these are a perfect stand-in tool. 

Pets and Plants – Impromptu Cat Toy

catnip and rusty 005

Rusty, our Maine Coon Cat, has been featured in other posts. Today I am adding a photograph of Rusty with a very impromptu cat toy I made for him. I had a few cardboard spools left over from wire-edged ribbon, so I rolled those on the floor hoping he would chase them. I only received a look of disdain for my efforts, but then…aha… I had a brilliant idea.

catnip and rusty 010

I went outside and pulled a sprig of catnip from the almost dormant plant and placed it inside the cardboard spool. You can just see the tip of the plant in the photograph below.  Ecstasy! Rusty had a patch of sun and a beautiful fragrance to loll in all at the same time. This small bit of recycled cardboard and a hardy piece of catnip made for a blissful afternoon for the cat.

catnip and rusty 009

Perspective – Wednesday Wisdom/Sharing Who You Are

Blog posts 12-18 033

A friend gave me magnetic frames for my birthday. They are specially made to hold the drawings of children on the refrigerator. Yesterday I asked my oldest grandson to create a Christmas tree for me so that I could fill the frame.

“I don’t know how to make a Christmas tree,” he said.

A quick remembrance came to me of how I drew Christmas trees as a child. “It’s easy,” I told him, “Just draw triangles, top of the paper to bottom, and make each one just a little bit bigger.”

He grasped the concept instantly, and created this sweet Christmas tree. I love it.

Looking back on the moment I feel joy that I was able to share that small creative memory with him. I have been imagining him in his 50’s someday, saying to his small grandchild, “It’s easy…”

I was blessed to have four amazing grandparents, and doubly blessed to have parents who recognized the importance of them in their children’s lives. We spent holidays and summers with our grandparents, and the person I am now is very much influenced by their presence in my life. I thank God today for all the wonderful people, family and friends both, who have shared their lives and experiences with me. God bless us all in this wonderful season of giving.

Perspective – Mike Huckabee on Sandy Hook Elementary Shooting

I don’t often, if ever, post twice in a day, but Mike Huckabee’s words are powerful and true. I do apologize to those who feel overwhelmed and saturated by all the talking points surrounding this tragedy. I am right there with you. I have turned off all television news concerning the tragedy. I am becoming more and more appalled at the way mainstream media spins and titles tragedy as a form of macabre entertainment. I am making an exception in posting this short clip. I feel Mr. Huckabee says what I feel in my heart about the matter.

Postcards – An Unexpected Gift

I recently received a Christmas Card from a dear cousin who lives in Nevada. Inside I found a surprise, three postcards from her collection to mine. They are beautiful. Postmarked 1909 – 1911, they are from the era I most enjoy. Happily, they had interesting messages on the backs. I like postcards that were mailed with messages, not for me are pristine postals (see note)  that were never sent. The photographs below show the postcards with their back sides beneath the fronts, and a translation of their messages. I transcribe them as I see them, with or without proper punctuation, spelling or phrasing.

Sometimes the messages contain just a quick greeting, at times they speak of bad news, and every now and then they might have a quick scolding or request.

Note: Click here for the history of postcards or “postals” as they were first called. History of Postcards

postcard 1

postcard 1w

Dear Willie how are you getting a long I am Fine and dandy. From you cousin Fred Dilkmeyer ans soon. February 1911

postcard 2

postcard 2w

Dear Barb Mother was buried yesterday eve we got to U.S. at 11 am We will be home Fri if nothing happens on 12.8 8 PM But if we happen not to be there Fri will sure be there Sat I will have to rest a few hours before I am able to come. How are you. will see you soon as I can. As ever W.R.W

postcard 3

(I love the beautiful embossing on the front of this postcard)

postcard 3w

Dear Sister I am well how are you and Hollis what is Hazzel Eastern address.  tell Hollis that I did not receive his xmas Postal he sent me. so give him my address right and send me his address from Sister Lutie. give my regards to Minnie and all.

Thanks Myrna…I love them all. 🙂

Project – Making a Perfect Floral Bow

bow and tree 010

A perfect holiday floral bow is easy to make. Below you will find a video tutorial and step by step picture instructions on how to make a bow with 3 yards of ribbon.

1. I often find beautiful wire-edged ribbon at my local dollar store. You will need 3 – 4 yards of ribbon to make an oblong blow.
bow and tree 014
2. I use chenille stems instead of thin wire. They come in pretty colors, are easier on the hands than floral wire, and are very simple to use. Always bend your chenille stem into a hairpin or paperclip shape before you begin and have it nearby at the ready for twisting.
bow and tree 001
3. Make a loop a bit shorter than your index finger, this uses about five inches of ribbon. Use your right hand to do the looping and twisting, and the left hand to gather together and hold the loops firmly. If you are left handed reverse the process.
bow and tree 002
4. The most important step is TWISTING the ribbon after each loop is made. Holding the loop in your right hand, grab the dangling ribbon, not the short tail, and firmly twist it so that the right side of the ribbon is facing you once again. Fashion another loop pointing downward exactly the same size as the first loop. You MUST twist the ribbon into an upward facing position after each loop is made.
bow and tree 003
5. The next four loops are created pointing to the right, up and down, and then to the left, up and down. You can switch this order around if you desire, but remember, the most important rule, twist, twist, twist after each loop is made and hold the centers firmly together with your non-working hand. Make these next four loops about an inch beyond the edge of the first two loops. Check photograph to get an idea of how the bow loops should look as they graduate in size.
bow and tree 004
bow and tree 006
6. At this time you will be holding six loops in your hand. Don’t let go! The next four loops are also made about an inch longer than the previous four loops. These loops will once again point more toward the center rather than to the right and left as the middle level loops do.
bow and tree 007
7. Your bow is ready to secure with the previously bent chenille stem at this point. Point the free ends down around both sides of the middle of the bow. Flip the bow over and using your right hand twist the stem two to three times tightly. Don’t be tempted to twist the stem too many times. It will crack and your bow will unfurl all over the floor. This does happen. If you do lose the grip on your bow, start again, and make an attempt to twist in exactly the same spots as you did when you initially made the bow. This will keep the creases created by twisting from showing in your second attempt.
bow and tree 008
bow and tree 009
And there you have a perfect bow. To make the bow completely round make all the loops the same size. Have fun and happy decorating!
bow and tree 010

Phavorite Photographs – Quack Up

petunias 064

Today I needed a picture to make me smile…so here it is…one of my favorite ducks at the park. Happy Friday to you.

Plants – Collecting and Keeping Moss Thriving

IMG_3504

I recently collected some mosses on a warm day. To keep them thriving I have them in a low basin filled with about an inch and a half of moist soil. Topping the soil I have a layer of pine needles. I spray the moss with water daily, and so far, even the reindeer moss, which is really a lichen, is soft and green. I plan to create a naturescape with them and use them on my Christmas dinner tables as the centerpiece.

IMG_3503

I collect moss in areas where there is a chance it will destroyed by construction or gravel pits. I also like to save pieces in areas that are torn up by dirt bikers. If I take any from the nearby woods I do not collect near paths where people walk, instead I enter deeper into the woods to collect from areas only the squirrels can view.

pics 063

After a storm I often am able to collect scraps of lichen that fall with the dead branches brought down by heavy rains. These pieces of lichen laden bark look nice in terrariums or nature settings. I am hoping to make some fairy furniture in the winter and bring a little magic and light into the darker months of the year.

Peculiarities – Update/The Bat

bat and decor 002

This past summer I related the story of the bat in the house. You can read all about it here: Bat in the House. Last week he showed up again. This time we found him in his bat den.

My son is a builder and was replacing some capping on our outside woodwork. As he tore off a piece of the corner eave little bits of grass and acorns fell to the ground. Suddenly he saw a flash of small teeth and heard an angry hiss. Our bat was found at last, in his roost, in the eave of our house. He could not stay. The aluminum flashing would have sealed him within the eave and been certain doom. My son gingerly pushed him out with a soft brush. The bat flew a bit wobbily after being awakened from a sound sleep and rudely swooshed out of his home. He landed on the grass about thirty feet away from the house. He seemed quite stunned for about a half hour, then disappeared. We are hoping that since it was a warm day, he found a new place to roost and had time to pad his new home with acorns and grass. I hope that is the last encounter we have with the bat.