Quick Tip – Tip on Tuesday/The Miracle of Sharpies

I love Easter Chicks. Show me a small, feathery, fluffy, bright yellow baby bird with beady black eyes and I will definitely say, “Aw…”

I’ve had the chick in the photograph above for years. Over many seasons of packing and unpacking, the tissue paper covering his beak on one side tore away.

Sharpies to the rescue! These permanent markers are great for repairing loss of color. I use the black and blue most often. When I use bleach for cleaning or laundry, no matter how careful I am, if I don’t cover up with an ancient bathrobe while I pour the bleach, I tend to ruin my clothing. Sharpies to the rescue for bleach spots too! I’ve filled in many a spot on blue jeans and black jeans with a sharpie marker. It isn’t perfect, but it extends the life of the garment.

Look how well the Sharpie Marker filled in the torn area. Best of all, I bought this pack of Sharpies in the Autumn when they were almost giving them away during school supply sales.

My Tuesday Quick Tip: Always have an assortment of Sharpie Markers at the ready for small color loss repairs.

Pressed Flower – Tissue Paper Easter Egg Card

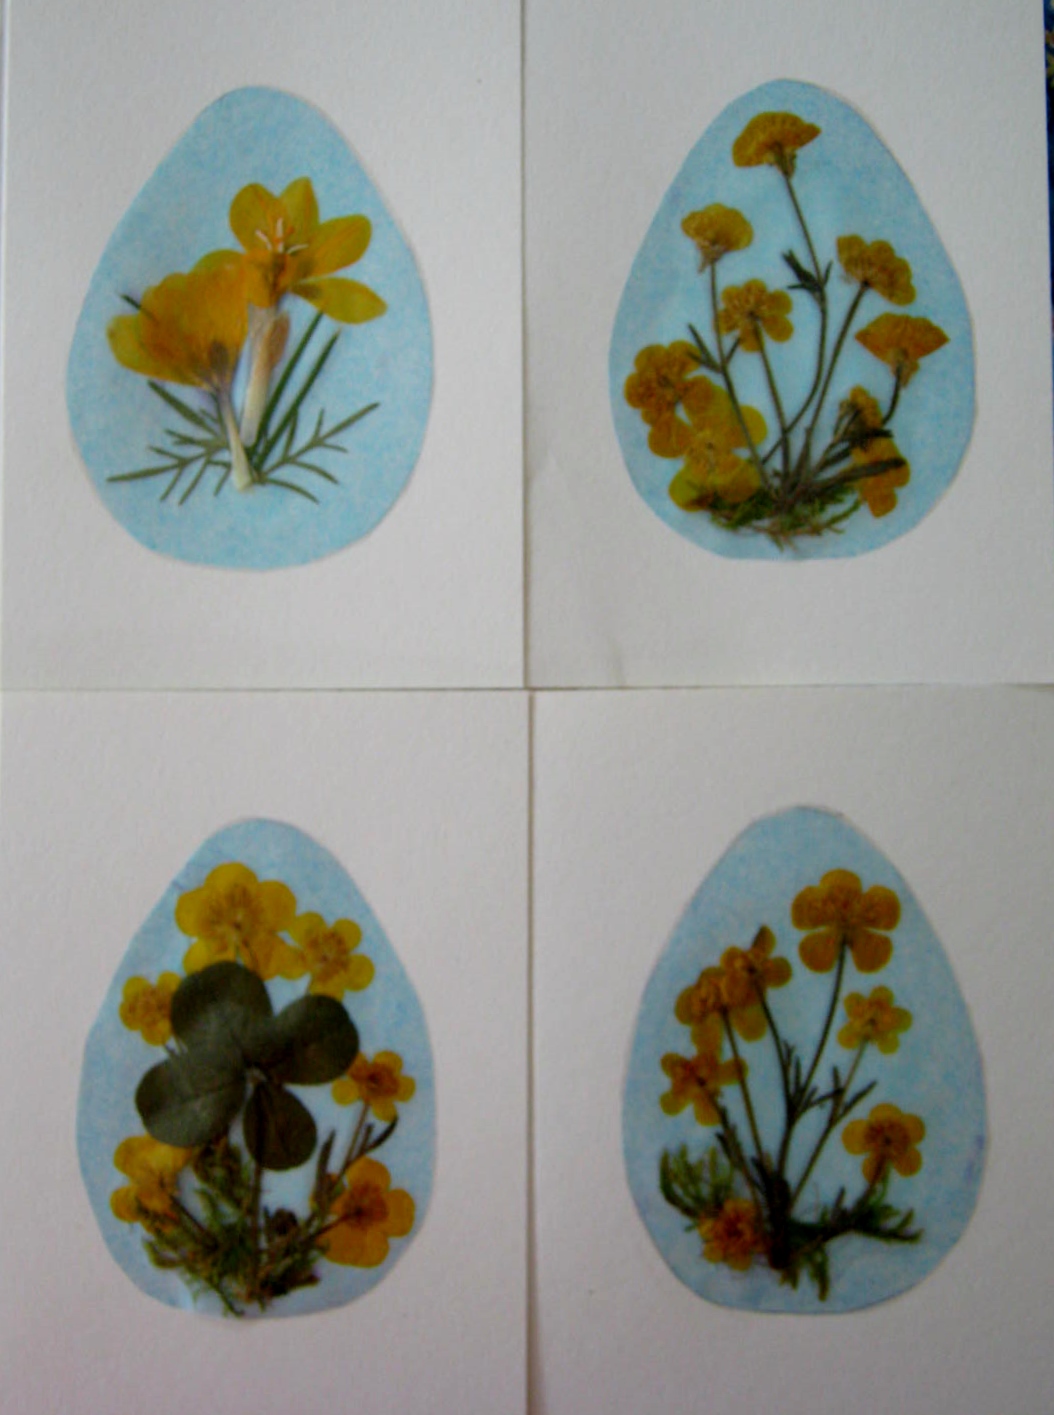
I blogged on February 24th of this year about pressing an early season crocus. This week I created an Easter greeting card with the flower and leaves, and also created a few cards with buttercups and a four leaf clover. The cards were quick and easy and turned out very pretty.

IMG_0501

* Tip for finding four leaf clovers at bottom of post.

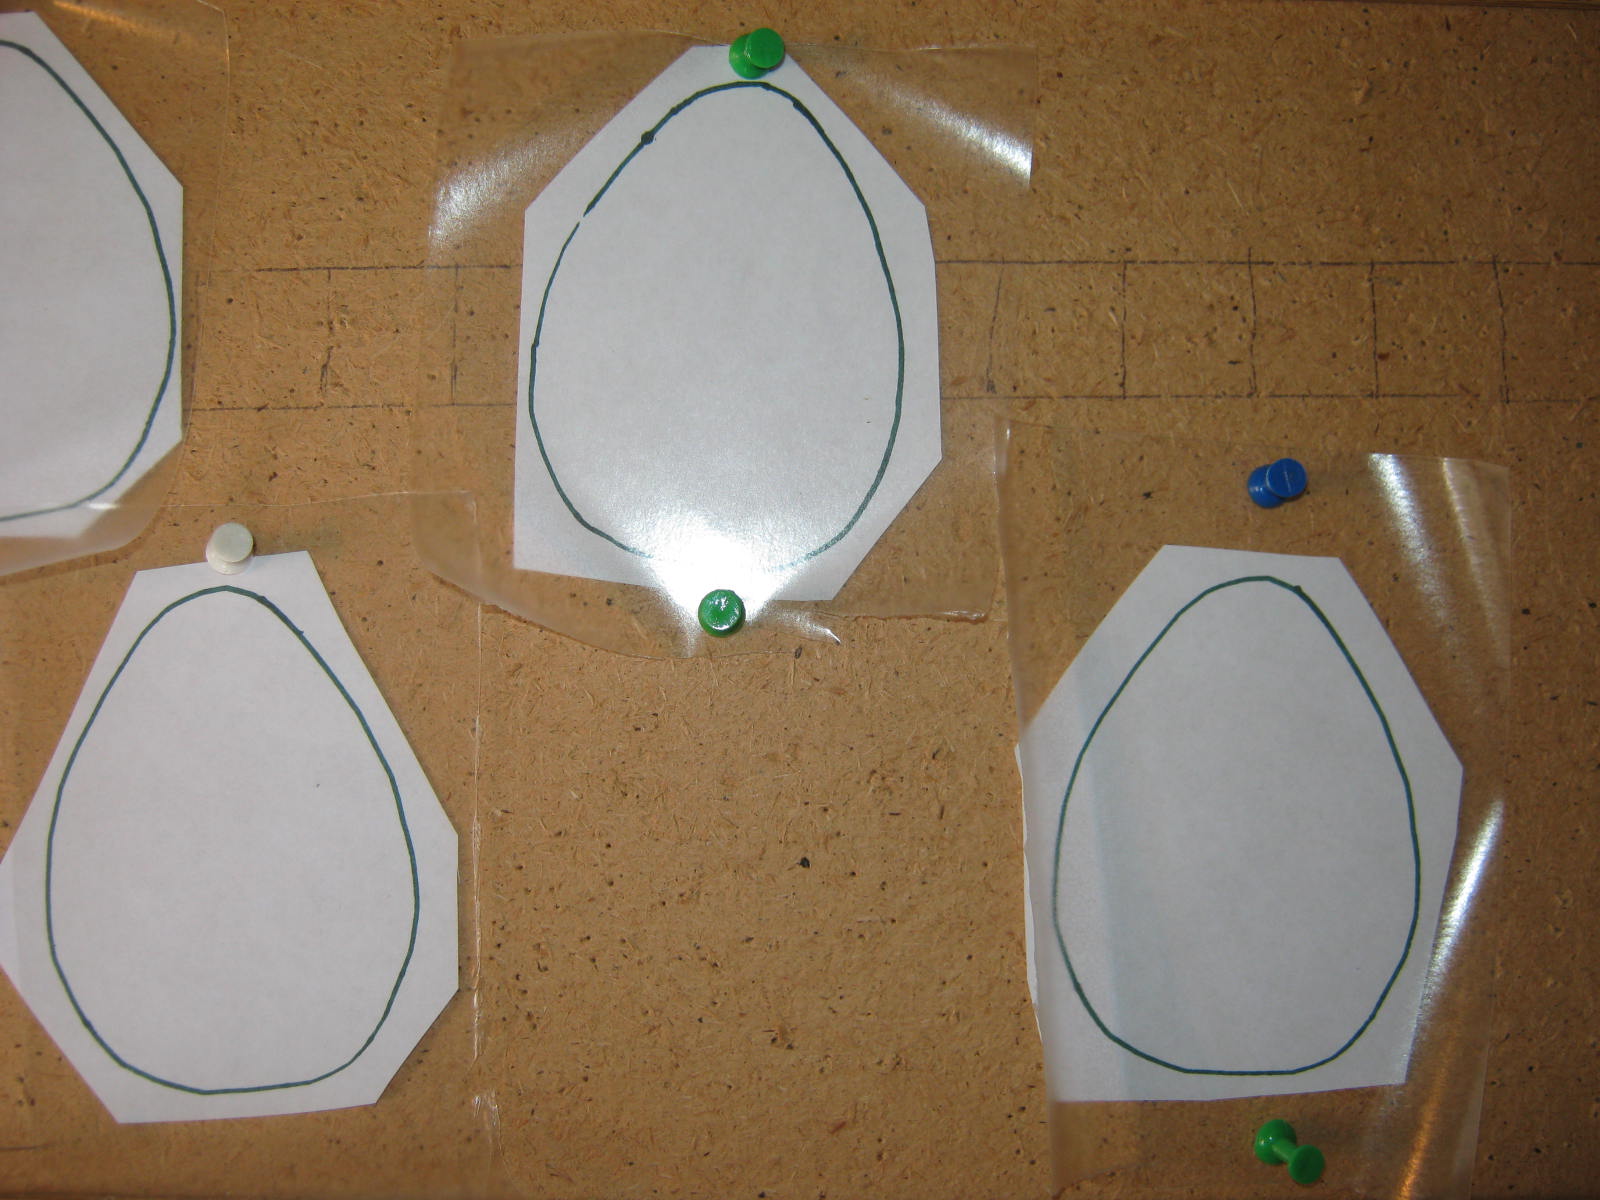
To begin, I found an egg-shape on the web in Google Images and traced it with tracing paper. An egg-shape seems easy to draw free-hand until you attempt to have both sides perfectly even…not easy! After I found and traced an egg-shape, I cut it out and then traced the shape onto cardboard. I traced the shape onto a piece of Coverseal, a very clear type of contact paper, made four outlines on plain white computer paper, and then traced yet again onto robin’s egg blue tissue paper. I cut the tissue paper eggs out around the outline.

I removed the backing from the Coverseal and placed it, tacky side up over the computer paper outline. I placed each of these onto a cork bulletin board and tacked the outer edges down with push pins to hold it steady.

IMG_0494

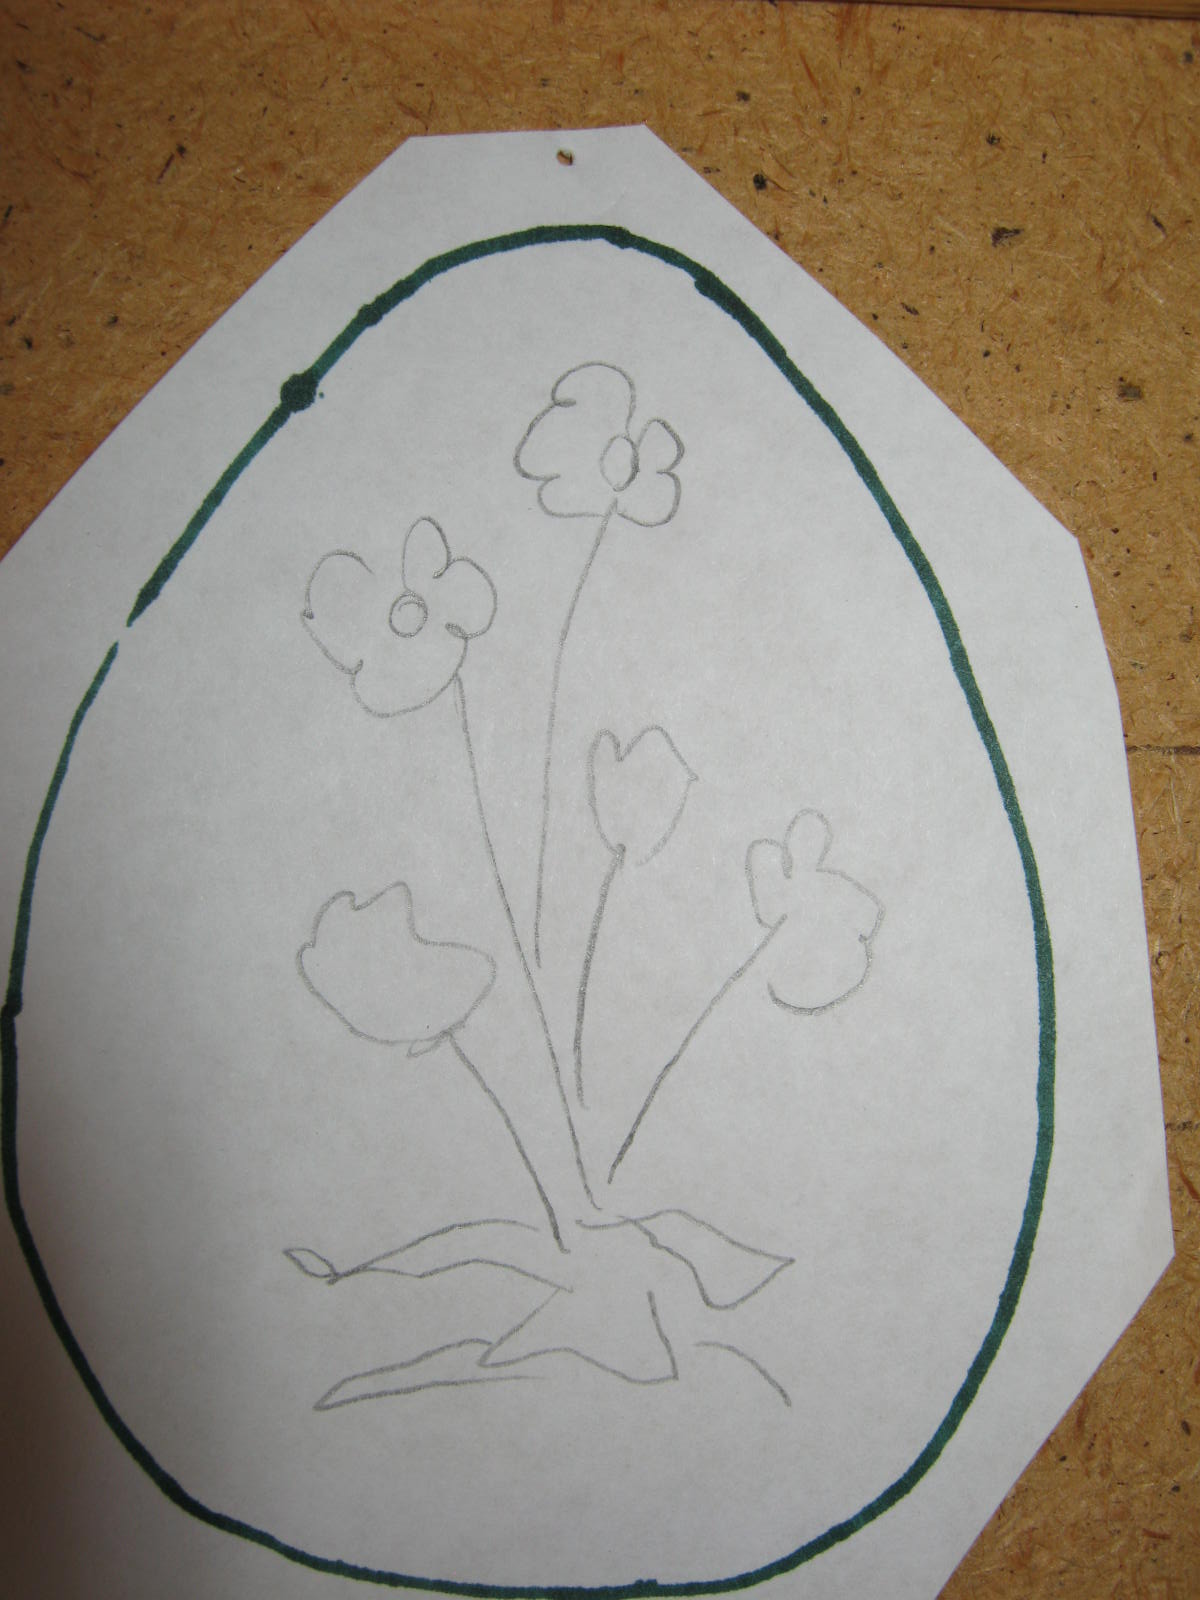
Now you can wing it and compose your card without a pattern, or you can sketch out a quick little design to follow. Be aware, your finished design will reverse itself when you place the Coverseal onto the card.

IMG_0500

Place the flowers  onto the Coverseal within the egg shape. BE VERY CAREFUL TO PLACE THEM FRONT SIDE DOWN. Start with the flowers first, the foliage second, unless your foliage takes center stage as the four leaf clover does in one of the card designs.

IMG_0495

IMG_0497

When you are finished designing, place the tissue paper egg over the design, and cut out the excess Coverseal directly around the outer edges of the tissue paper. You will now have a beautiful pressed flower egg in your hand.

IMG_0498

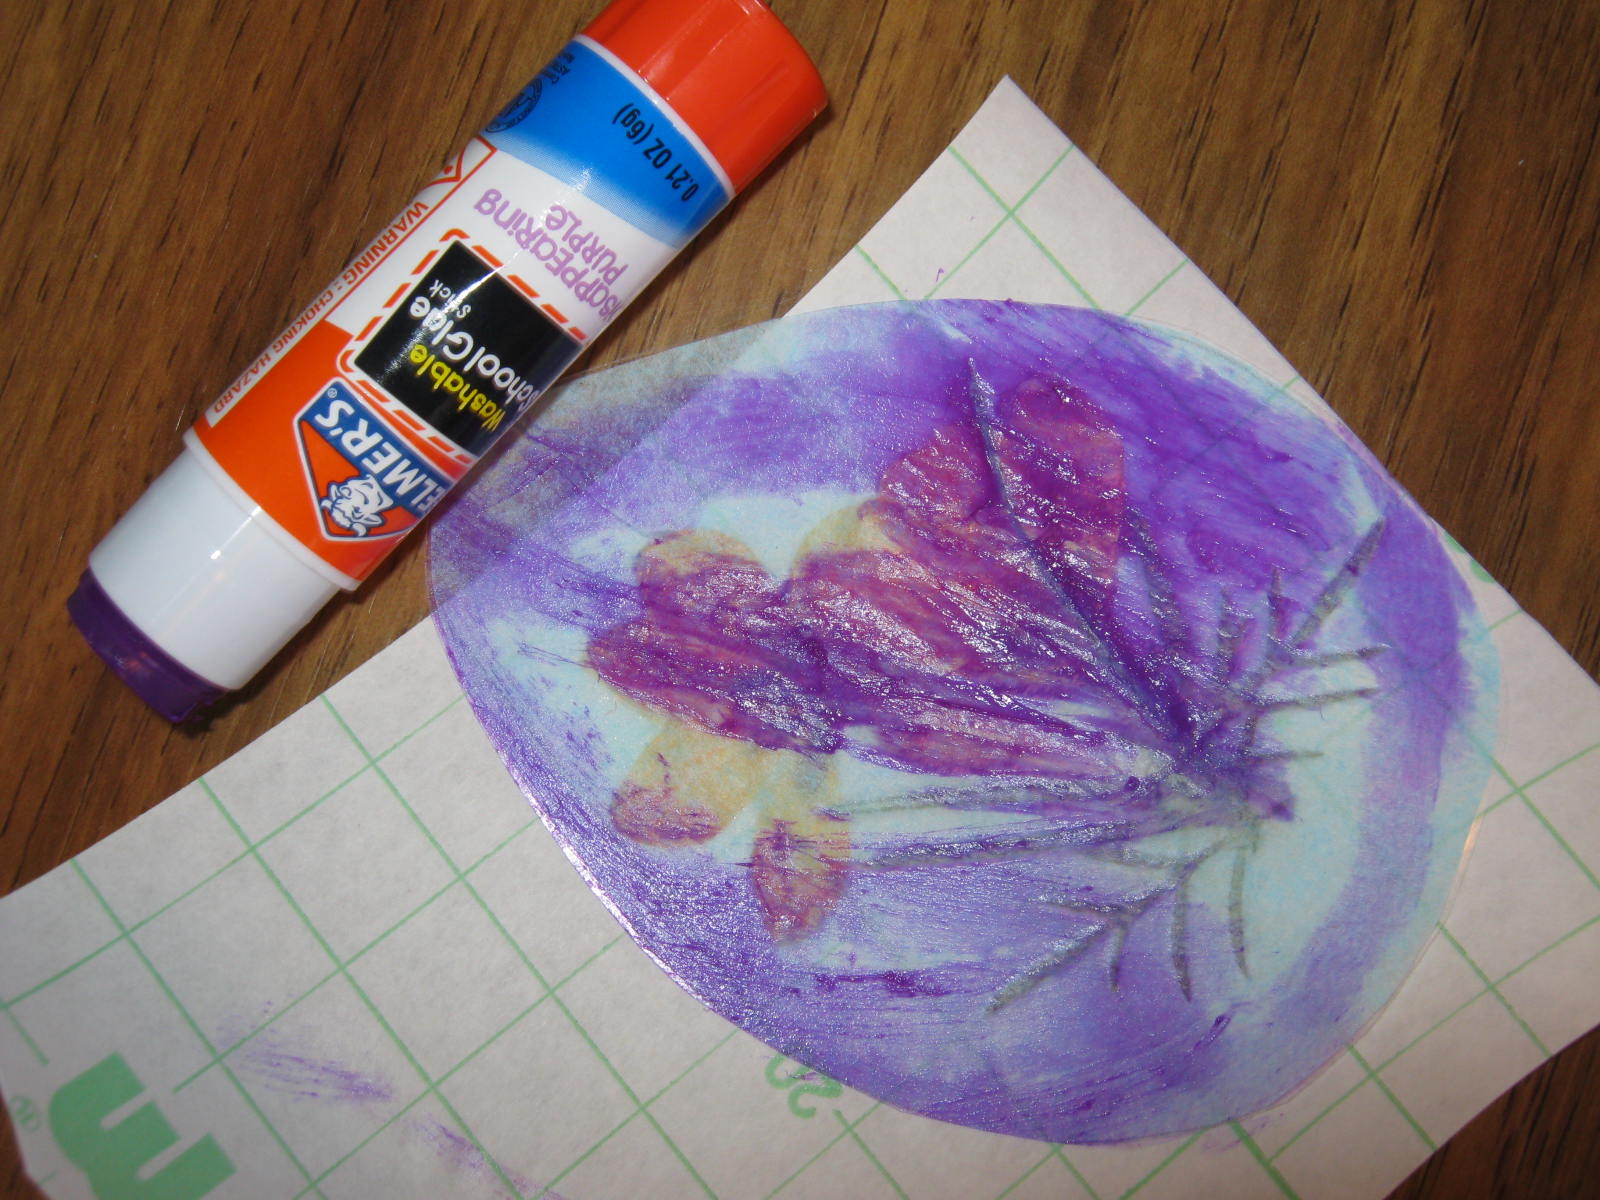
Turn the egg over and cover most of it, especially the edges, with glue stick. I use a glue stick that goes on purple and turns clear. The purple makes it very easy to make sure you have all the edges covered. Place egg on waiting greeting card and let dry. Voila`…a beautiful handcrafted Easter greeting card.

IMG_0499

I was very happy with my finished eggs. Happy crafting!

*Pressed Flower Tip – Finding four leaf clovers. It is easier to find a four leaf clover if you stand and scan a patch of clover with your eyes. The human eye will spot differences in patterns. If you see something that looks different in the patch, take a closer look and perhaps you will spot a four leaf clover. If you find one four leaf clover look for more. The mutation that caused one will most likely have created a whole patch of four leaf clovers. Here’s a terrific article on how to find four leaf clovers: How to find a Four Leaf Clover

Postcards – Spring and Easter

I’ve been looking through my postcard selection and setting aside some Easter and Springtime postals to place into tri-folded paper once again. Check out my Valentine’s Post on how to make these simple display pieces.

Displaying your Postcards

I’ve also included a close-up look at a few of the postcards with a translation of their endearing messages. Happy Spring!

Image (31)a

Image (32)a

“We got home after a fashion. Fred was car sick but lays it to your beans. We were dead tired all three kids slept all the way. We were scattered all over the car. Robert is nearly well. I shall look for all of you a week from Sunday. Good by, Ida”
 

(Postcard does not have a date but according the appearance and the stamp I would guess it was sent between 1909 and 1914.)

Image (31)b

Image (32)b

The postcard above was sent in 1912. It reads as follows:

(? ?) “Dear Mabel, This is a beautiful day but cold yet and we have plenty of snow yet they say it is ten feet deep on the side of the road between here and Madrid now. I had a letter from Maud and (?) yesterday and one from your mama this is all I will write this week. Danah Anne has not got so she can sew any yet. Grandma”
 

Image (31)c

Image (33)c

This Easter Postcard was sent in 1908. I love to read the words, enjoy the lack of grammar, and take delight in the phrasing which is so different than the way we speak now. Enjoy the Easter message:

“How do you like your new home by this time? We don’t have no school for a few days not until they fumigate the measles all out. We are all well and hoping you’s are all the same. Stella (?)”

Plants – Lily

The first of my lily plants are beginning to bloom. The Stargazers will be along later in the season, but this beautiful pink variety is one of my all-time best performers.

I love the anticipation of bloom when the buds begin to show color through the green.

The white lily I bought at the end of last year’s Easter Season has done well. It is blooming long after Easter, but I don’t mind, the purity of its petals reminds me again of the glory of the resurrection.

Last, but certainly not least, are my orange lilies. They are amazing, bright and vibrant, they capture the heat of the sun and reflect it back for a few short weeks.