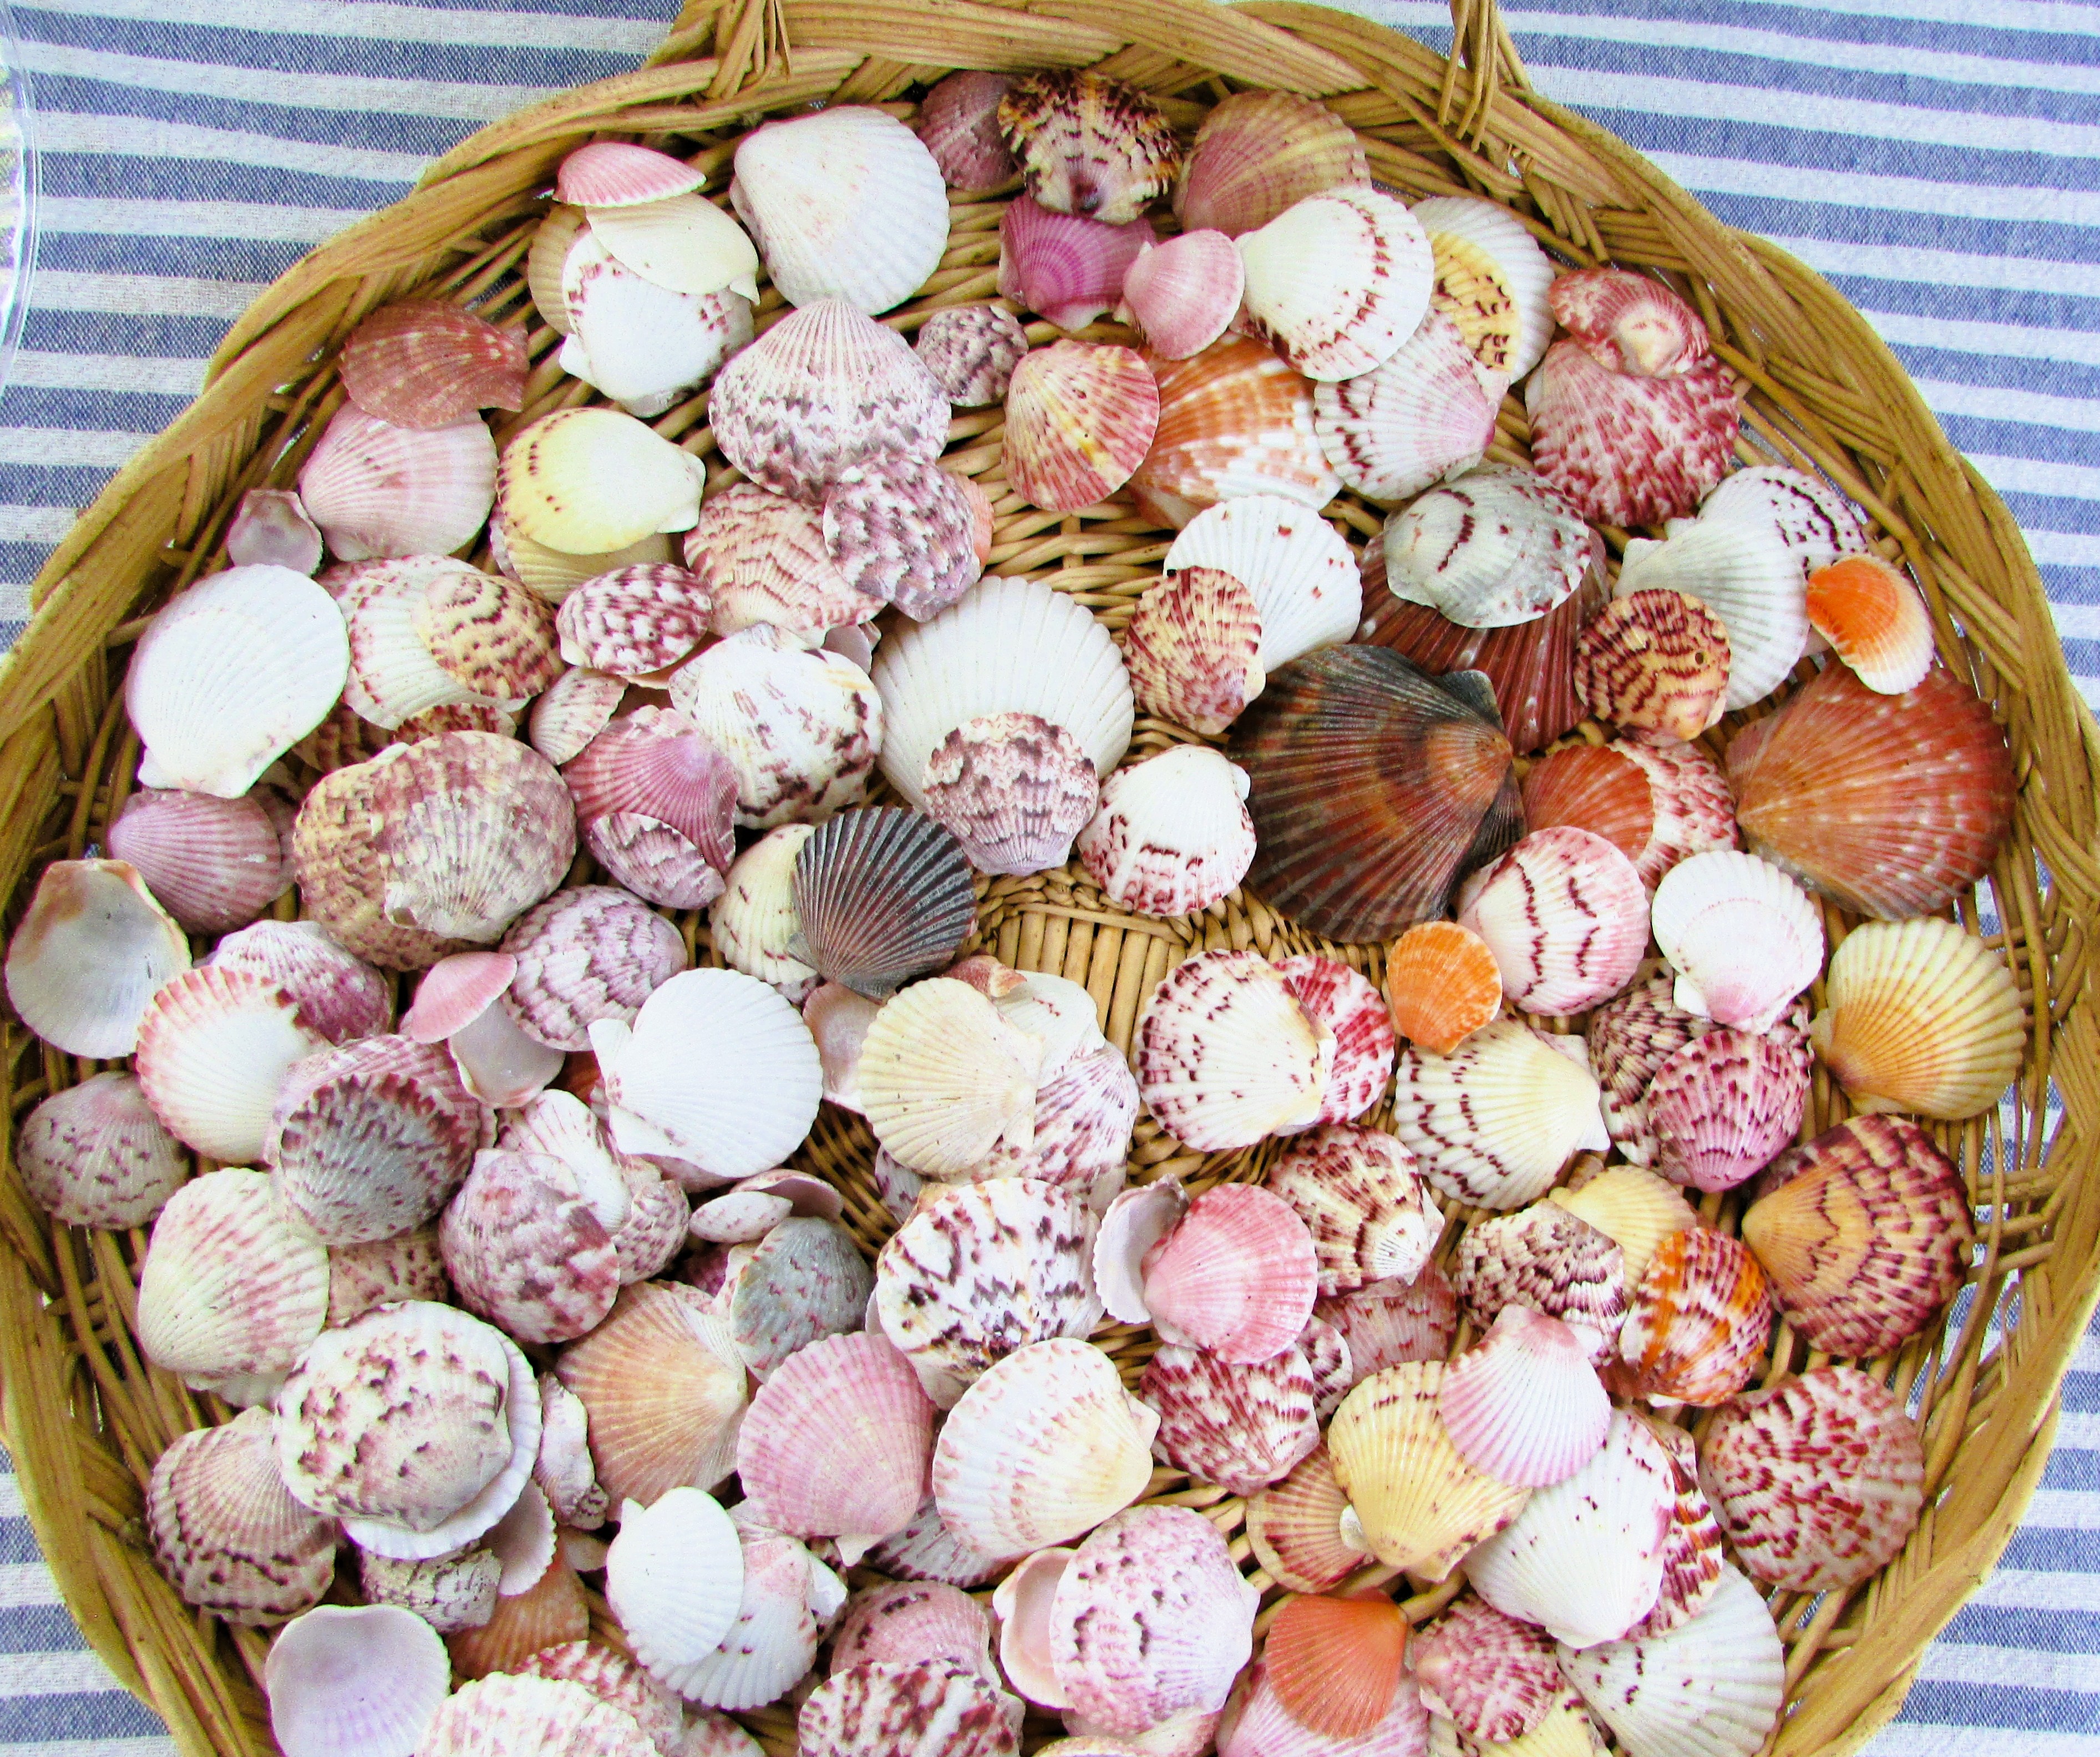
I love collecting scallop shells from Sanibel. The colors are lovely, and even better, they come in many sizes. After they are removed from the water, the brilliant colors dim when dry. A way to restore the luster is to apply a light coat of mineral oil to the shells, let them sit for a few days to soak it in, and then, if they are still oily, wipe off the excess with a soft, lint-free cloth. The difference between the right and left sides is easily discerned in the photograph. The mineral oil I used came from Ace Hardware and is called Bayes, Wood and Bamboo Conditioner and Protectant. This product is a 100% food-grade mineral oil.
I’ve shared this before, but it is worth mentioning again for those who plant seeds whose sprouts are irresistible to chipmunks, squirrels, and rabbits. I have planted sunflower seeds from packets many times. I usually have some success, but it’s often mediocre. I have found that the seeds that have sprouted from the birdfeeder are superior in performance.
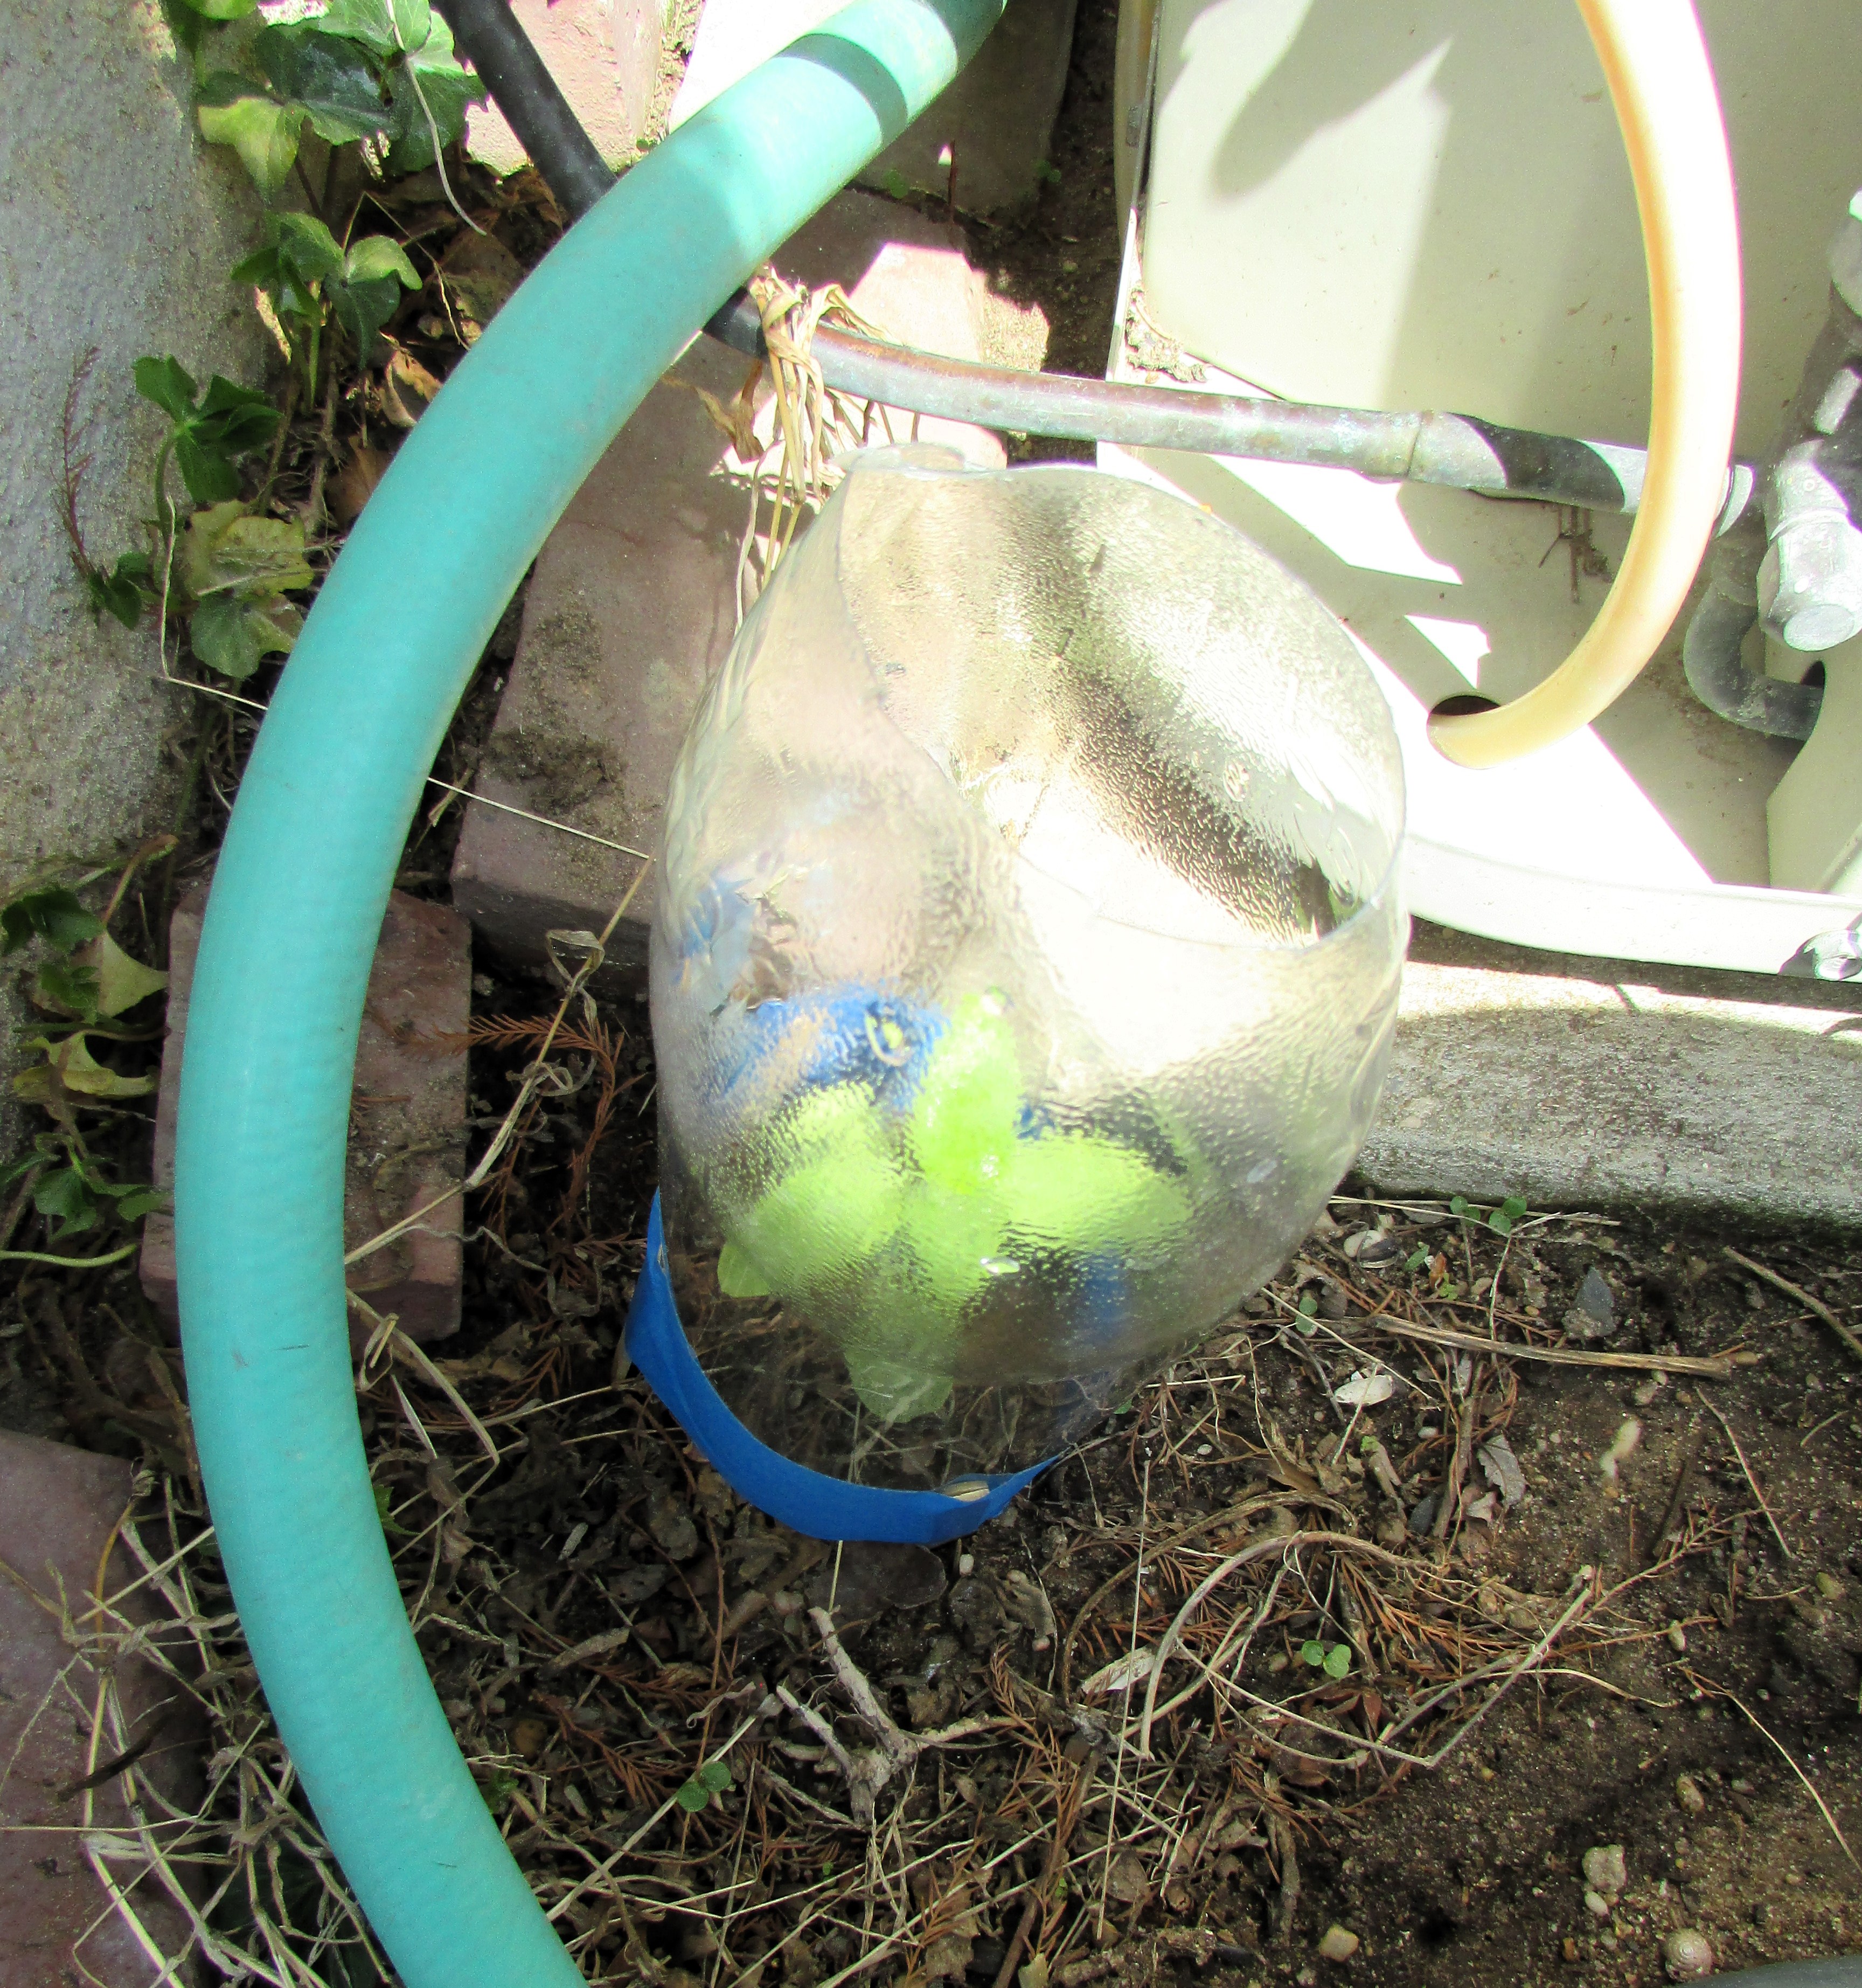
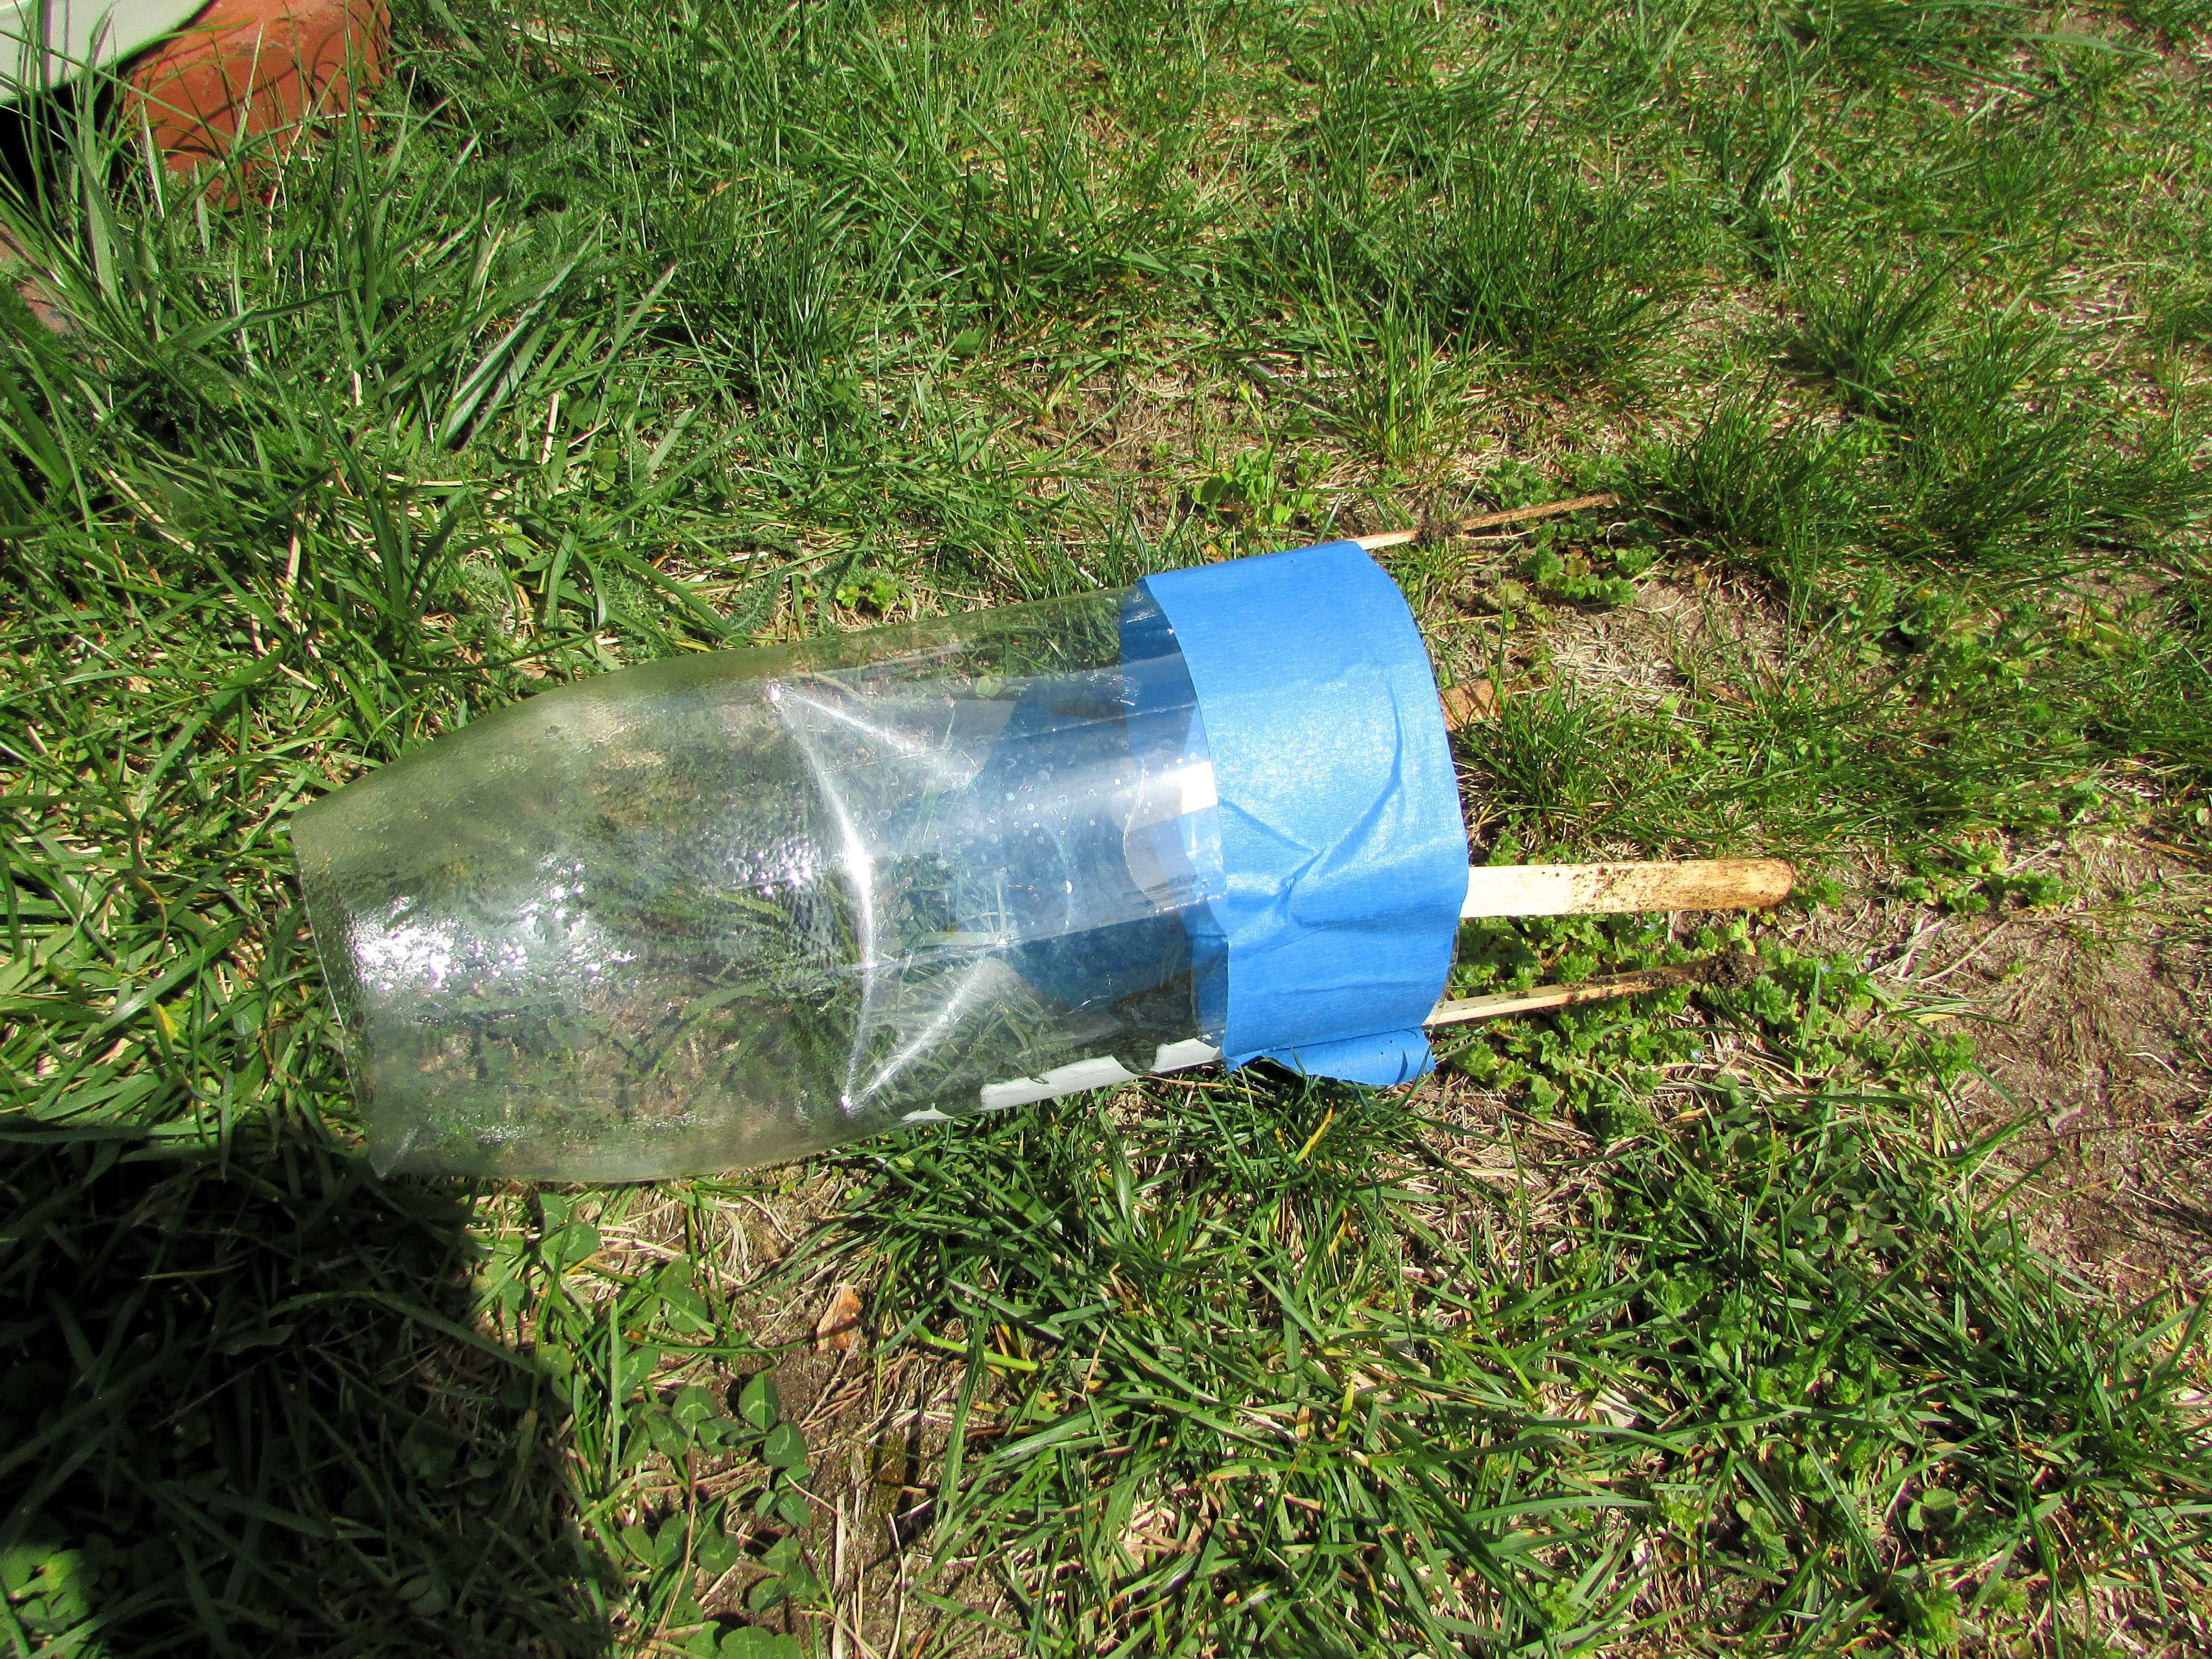
I found just such a specimen a few weeks ago, hidden alongside my air conditioner. I knew once it was spotted, it would be bitten off and have no chance of reaching the flowering stage. To the rescue was an empty liter soda bottle (two liters work just as well, as do clear plastic juice containers). I cut off the bottom, remove the top, and place a popsicle stick or skewer alongside the bottom to anchor the protective shield in place. This has worked for me in the past. It’s not a pretty fix, but it is quick and economical. If your sunflower sprouts get devoured before they can reach a size where the leaves can’t be reached, give this tip a try.
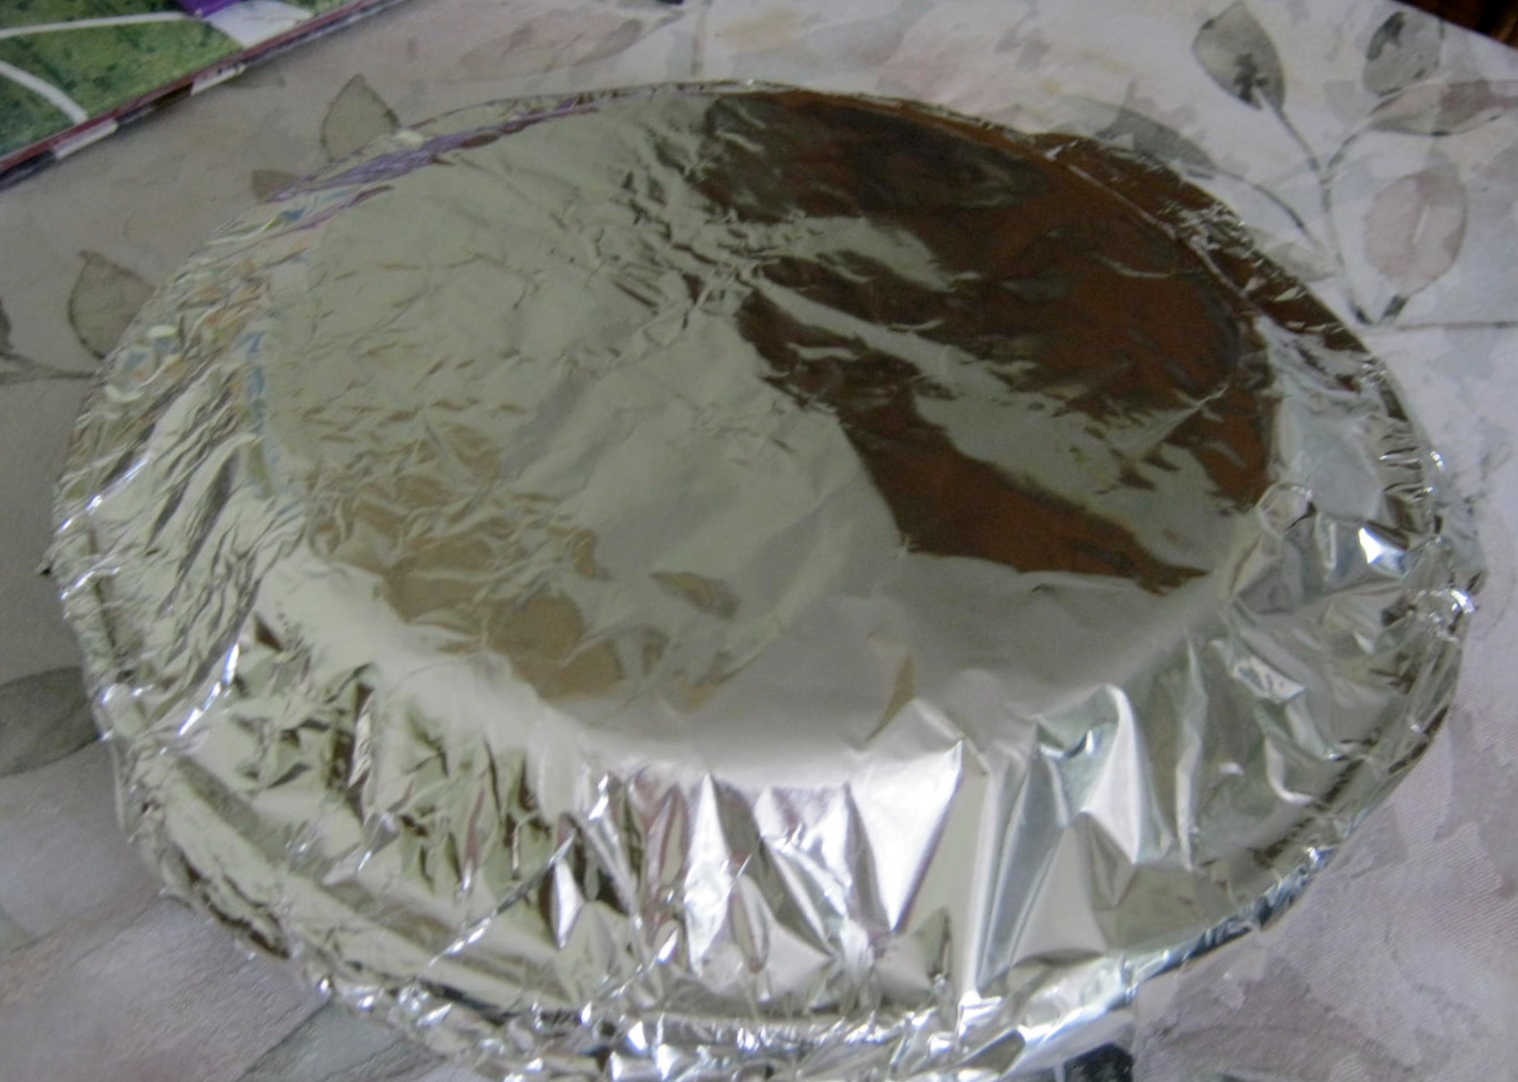
This post is one to pull back to the top of the blog for Throwback Thursday-a timely tip for the holiday. To keep a pudding, pumpkin, or any other pie without a top crust fresh, cover first with an overturned paper plate.
The paper plate protects the top of the pie from damage when covering with foil or plastic wrap. The plate has enough substance to protect the pie, but not enough weight to break the fragile crust.
I have some lavender plants on a windowsill near my desk. I love to stop what I am doing and brush them with my hands. The lovely, fresh scent of lavender fills the air and gives me a boost of energy amid mid-winter doldrums.
You can imagine my outcry when, out of the corner of my eye, I spotted movement on my lavender—spider mites. The tiny pests were fearless and having a marvelous time, creating webbing, feasting on the juices, and multiplying by the minute.
Running the plant under a heavy stream of water is always my first course of action. The spider mites are small and are quickly swept away by the deluge. So far, my initial treatment is working, and I’ve only seen one or two stray mites.
One of the problems with diagnosing spider mites on a houseplant is their size. The webbing and drying leaves are a clue to an infestation. Sometimes, as in my case, you can see them moving along their webs. To be sure I was aware of all the infested spots, I sprayed the lavender with water before washing the mites away. The side-by-side photo shows how much easier it is to see an infestation after spraying.
Unfortunately, I must be realistic; removing every spider mite from the lavender will most likely take several sessions under the faucet. This pest spreads quickly in the dry air of a heated house. I will check all my houseplants for infestation with water sprays throughout the week.
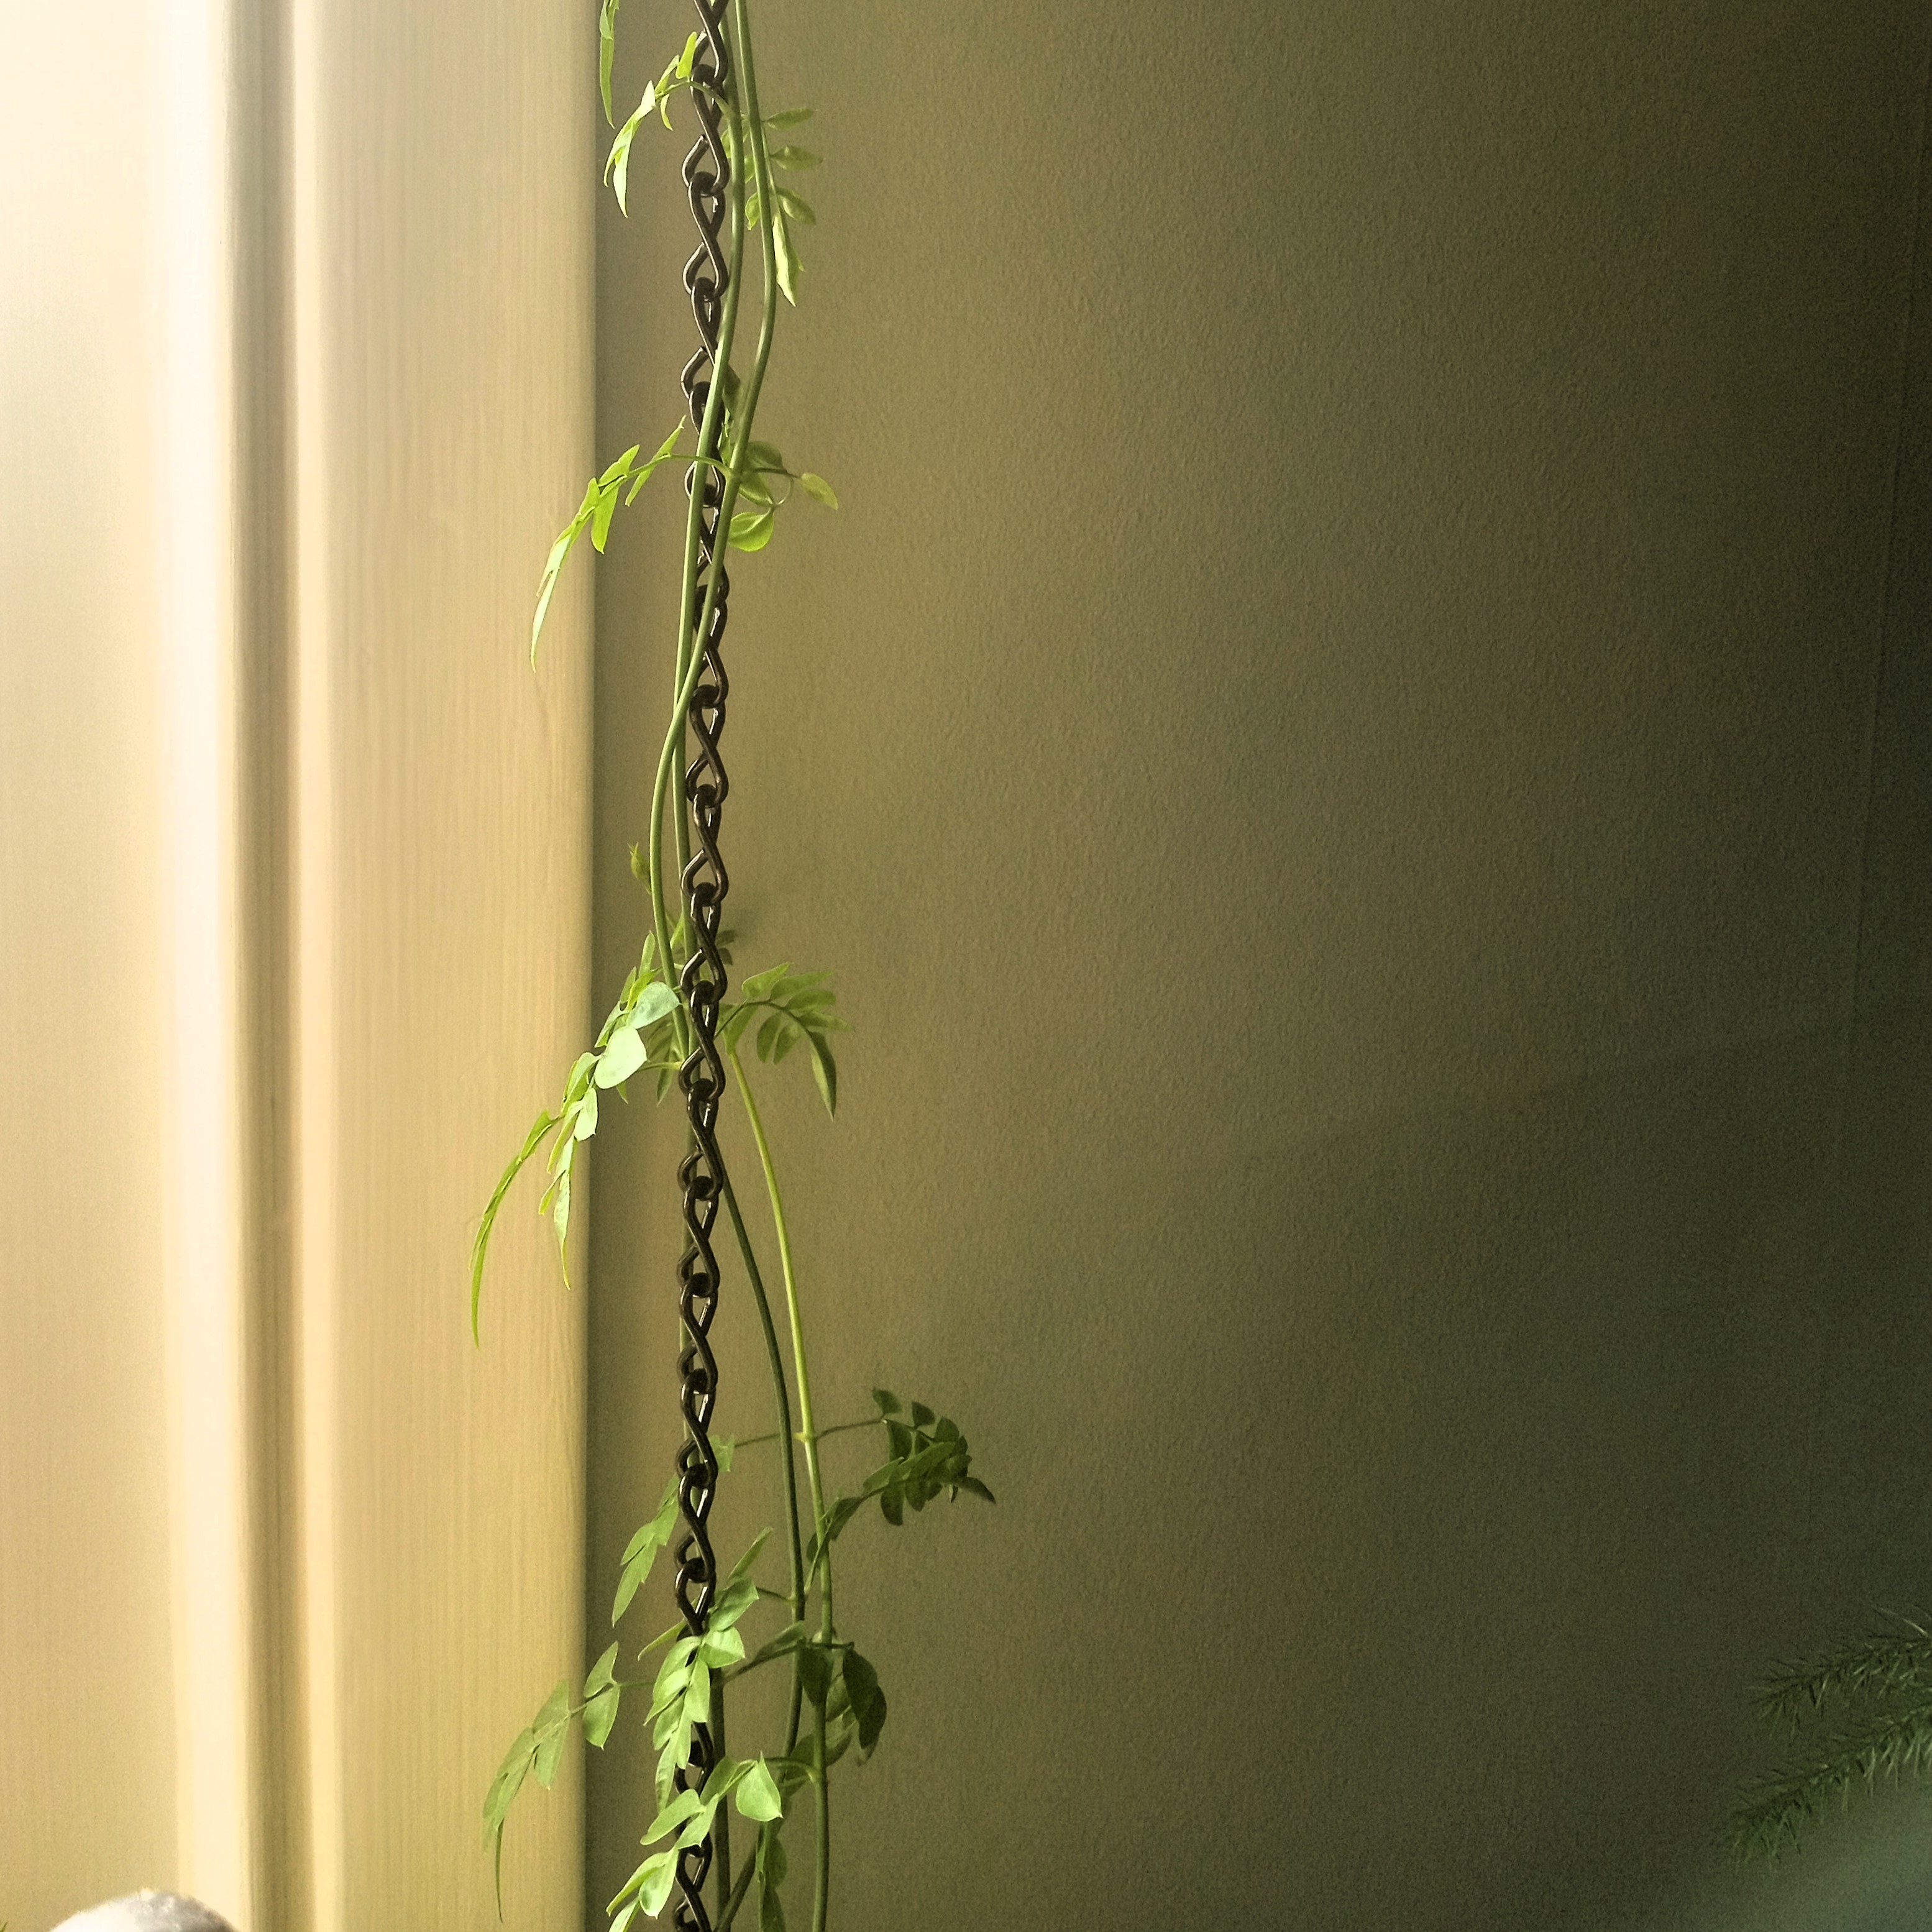
The smell of Jasmine is terrific. I love growing the plant indoors in the winter and outdoors on the porch in the summertime. I found a vining variety a few months ago, and it quickly thrived and outgrew its pot. After transplanting, the vines took off, sometimes appearing to grow an inch or two a day. I am hoping for a lot of bloom in the Spring, so I didn’t want to cut it back, but I needed portable support.
What I chose as support was inexpensive and light, and it works great with a shower curtain hook. A length of delicate chain cut the height of the window frame and attached with any hook allows the Jasmine vines to twine and grow upward. It hangs loose; attaching it to the pot or plant is unnecessary. Thigmotropism is the growth process that causes the Jasmine to twine and climb.
In plant biology, thigmotropism is a directional growth movement which occurs as a mechanosensory response to a touch stimulus. Thigmotropism is typically found in twining plants and tendrils
One of my simple pleasures in life is sprouting seeds in the house under lights. I’ve started the large seeds of Moonflowers early. They grow quickly, but are slow to blossom outdoors. The moonflower sprouts are large now, and growing through the netting of their pots. This morning I transplanted them into large size cell packs saved from last year’s planting.
Lack of humidity in the house sometimes causes the sprouts of larger seeds to become trapped within the seed coat. When this problem occurs I give the seedling a chance by dribbling water over it several times through the day. If I try to remove the seed coat by hand, almost always, the plant inside is torn and ruined beyond saving. Keeping the seed coat wet gives the sprout a better chance of survival.
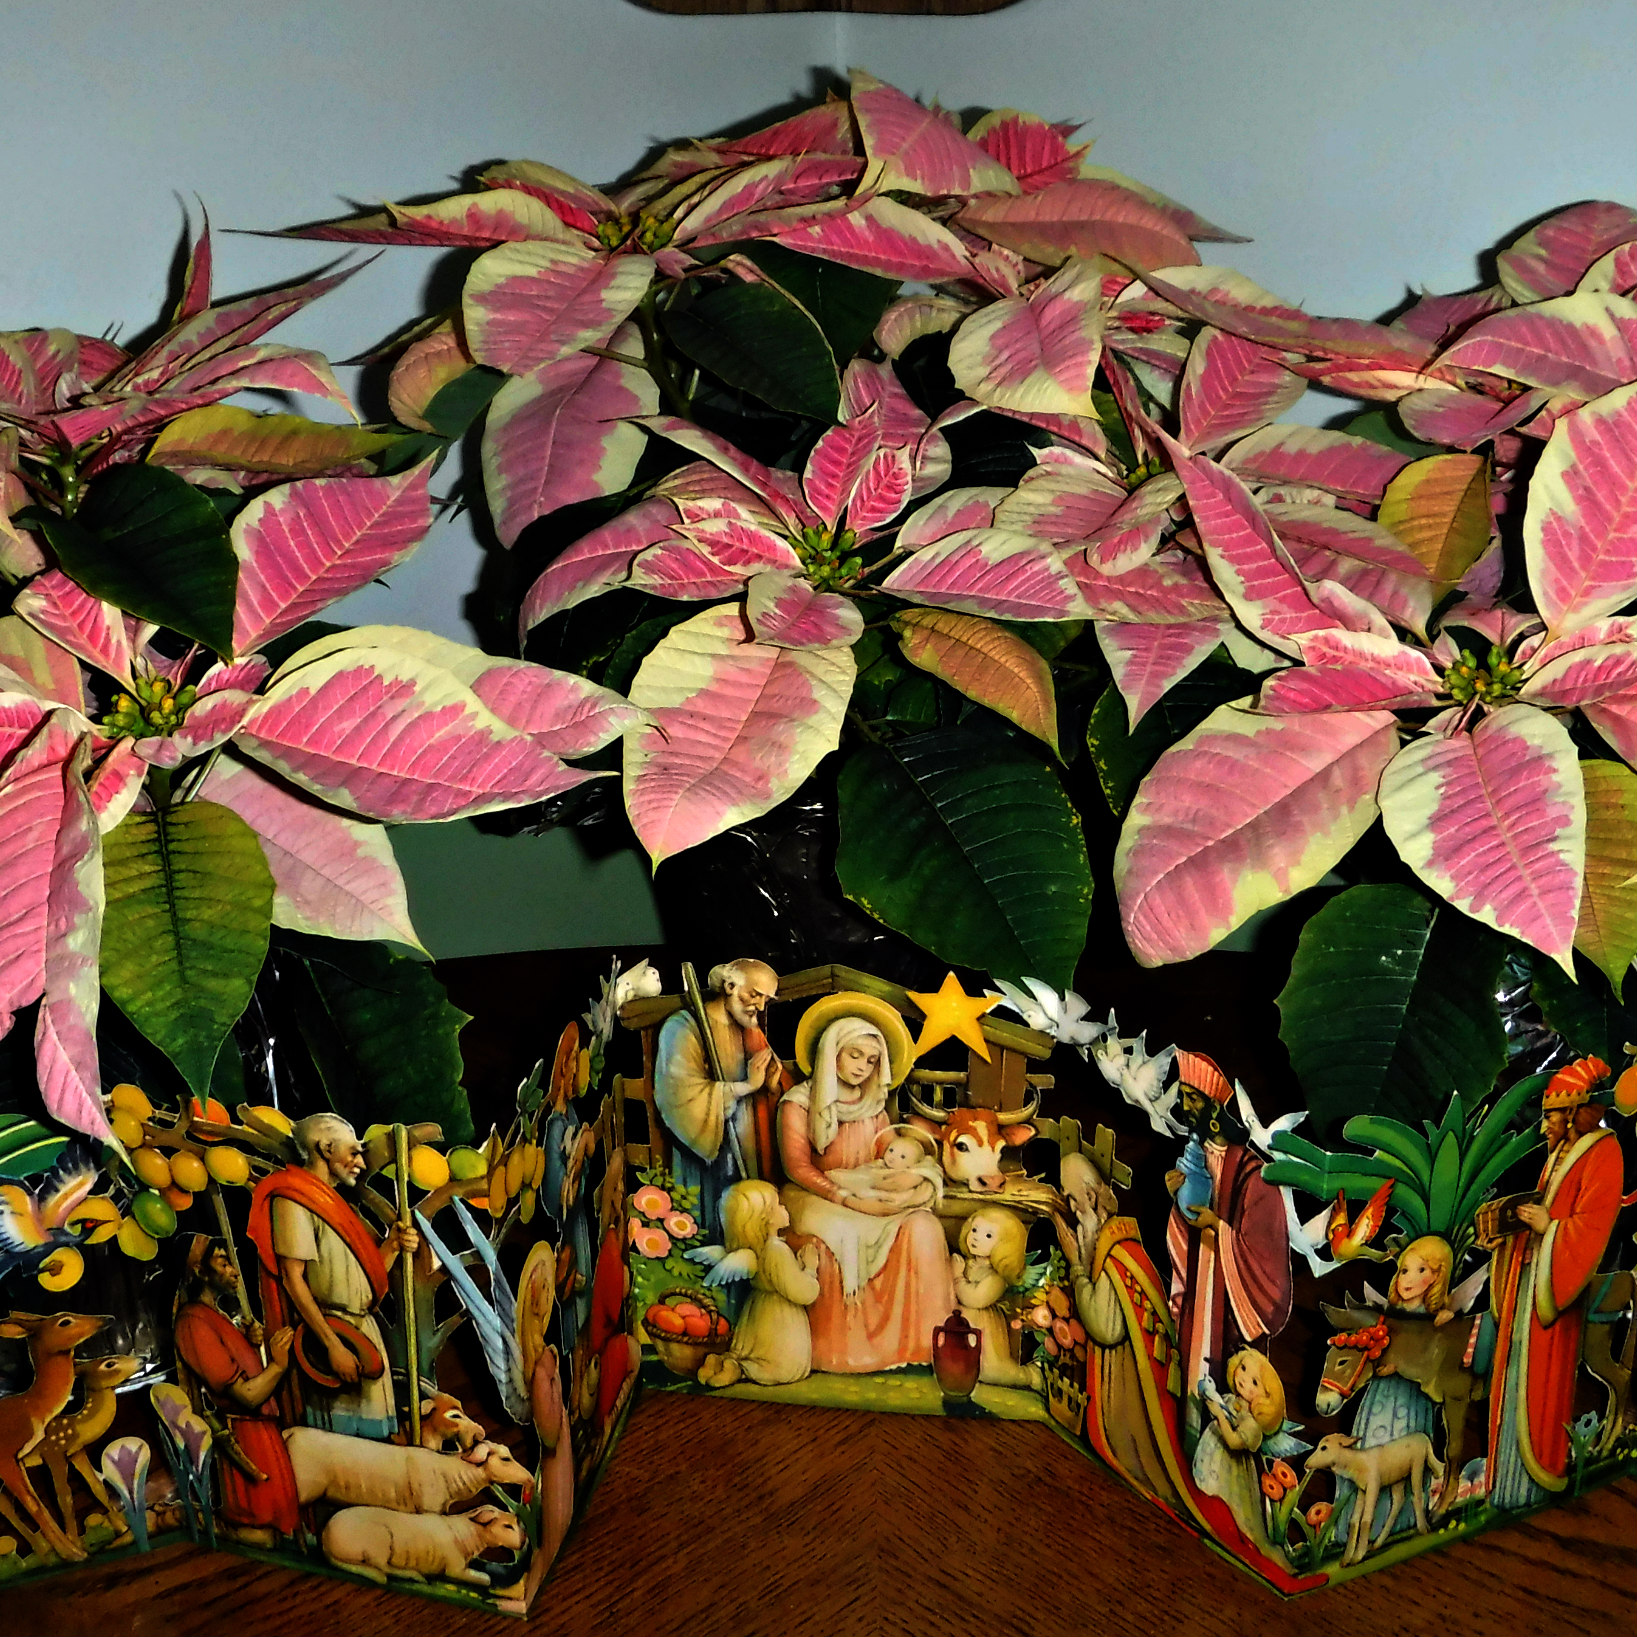
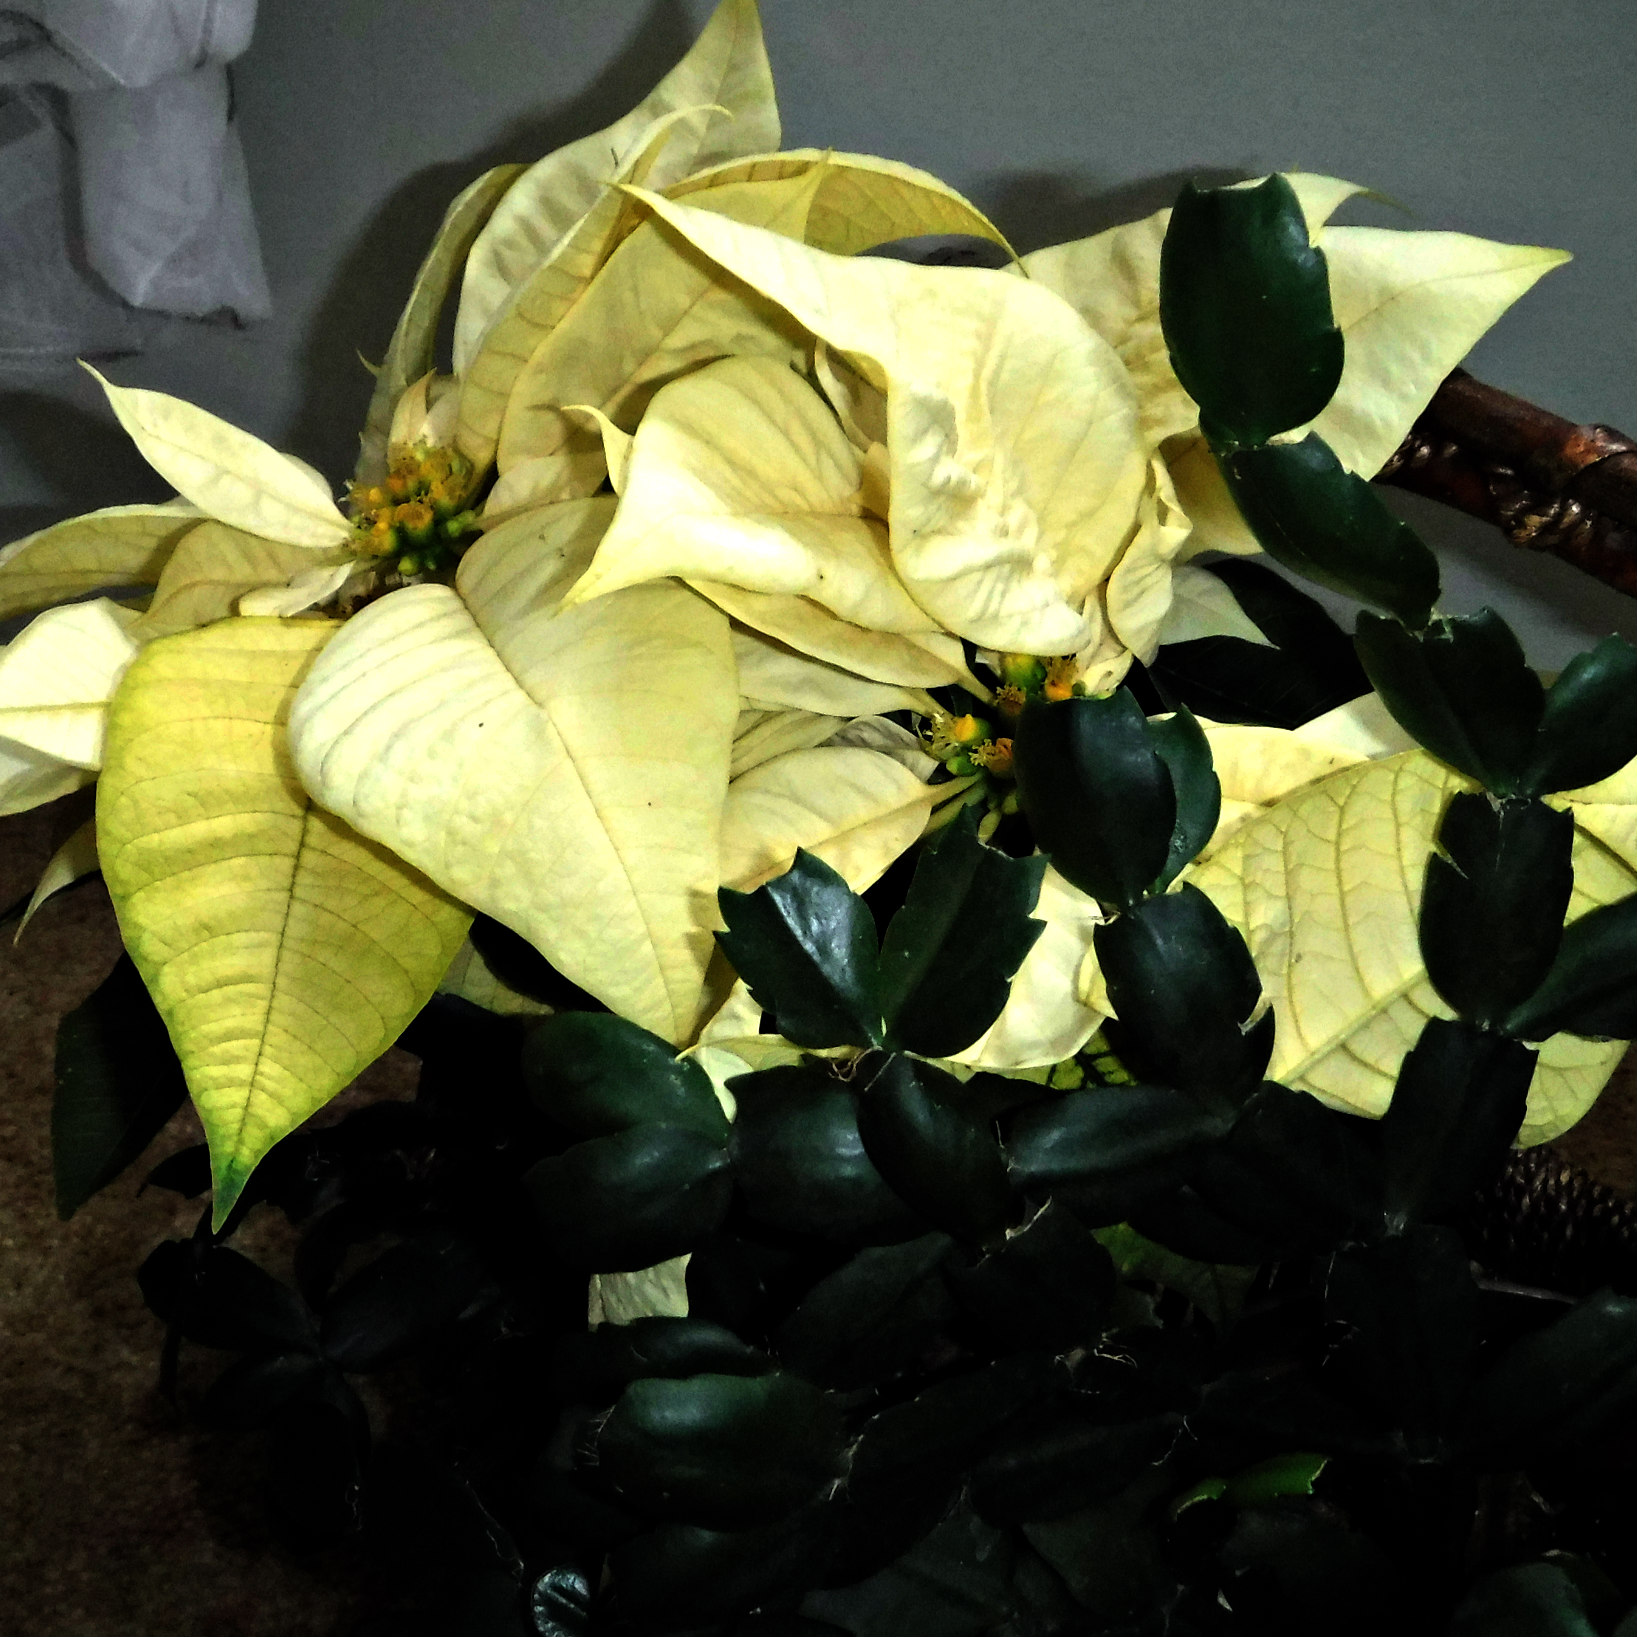
Poinsettias—I bought several this year to brighten up the house for Christmas. The variety of colors and easy availability of these holiday plants causes me to pause when passing a pallet of the bright flowers. I usually give into temptation and bring one, or more, home.
The ‘Six on Saturday’ Challenge was a perfect foil for my lack of willpower, and I have four types of poinsettias to display as part of my six, with an additional two as a Quick Christmas Tip. The flowers are also a good choice for Cee’s Flower of the Day Challenge.
A common problem I encounter with Poinsettias, no matter how carefully packed inside their cellophane sleeves, is the broken stems from overcrowded displays, a rough ride down the cashier’s conveyor belt, or a bumpy trip home. Taken out of their protective plastic it is almost inevitable one or two stems will be cracked or broken, revealing a dying flower.
Years ago I read a blog post on using these broken stems in vases. It seemed a hopeless experiment, but I gave it a try. Oh my, success was achieved within an hour. The broken stems filled with water, the limp bracts spread out and were almost more beautiful than the stems still in the pot.
If you don’t find a broken stem you can always harvest one from the back of your plant for a vased arrangement. My Poinsettia cuttings are over a week old, and I am hoping they will eventually develop roots. Oh the JOY, another experiment to try. Keeps me going. Merry Christmas to you.
Although I read you need to singe the ends of poinsettias to use them in arrangements, I did nothing but cut and pop my broken stems in water. Perhaps singeing the stems is needed only if you use them in floral foam.
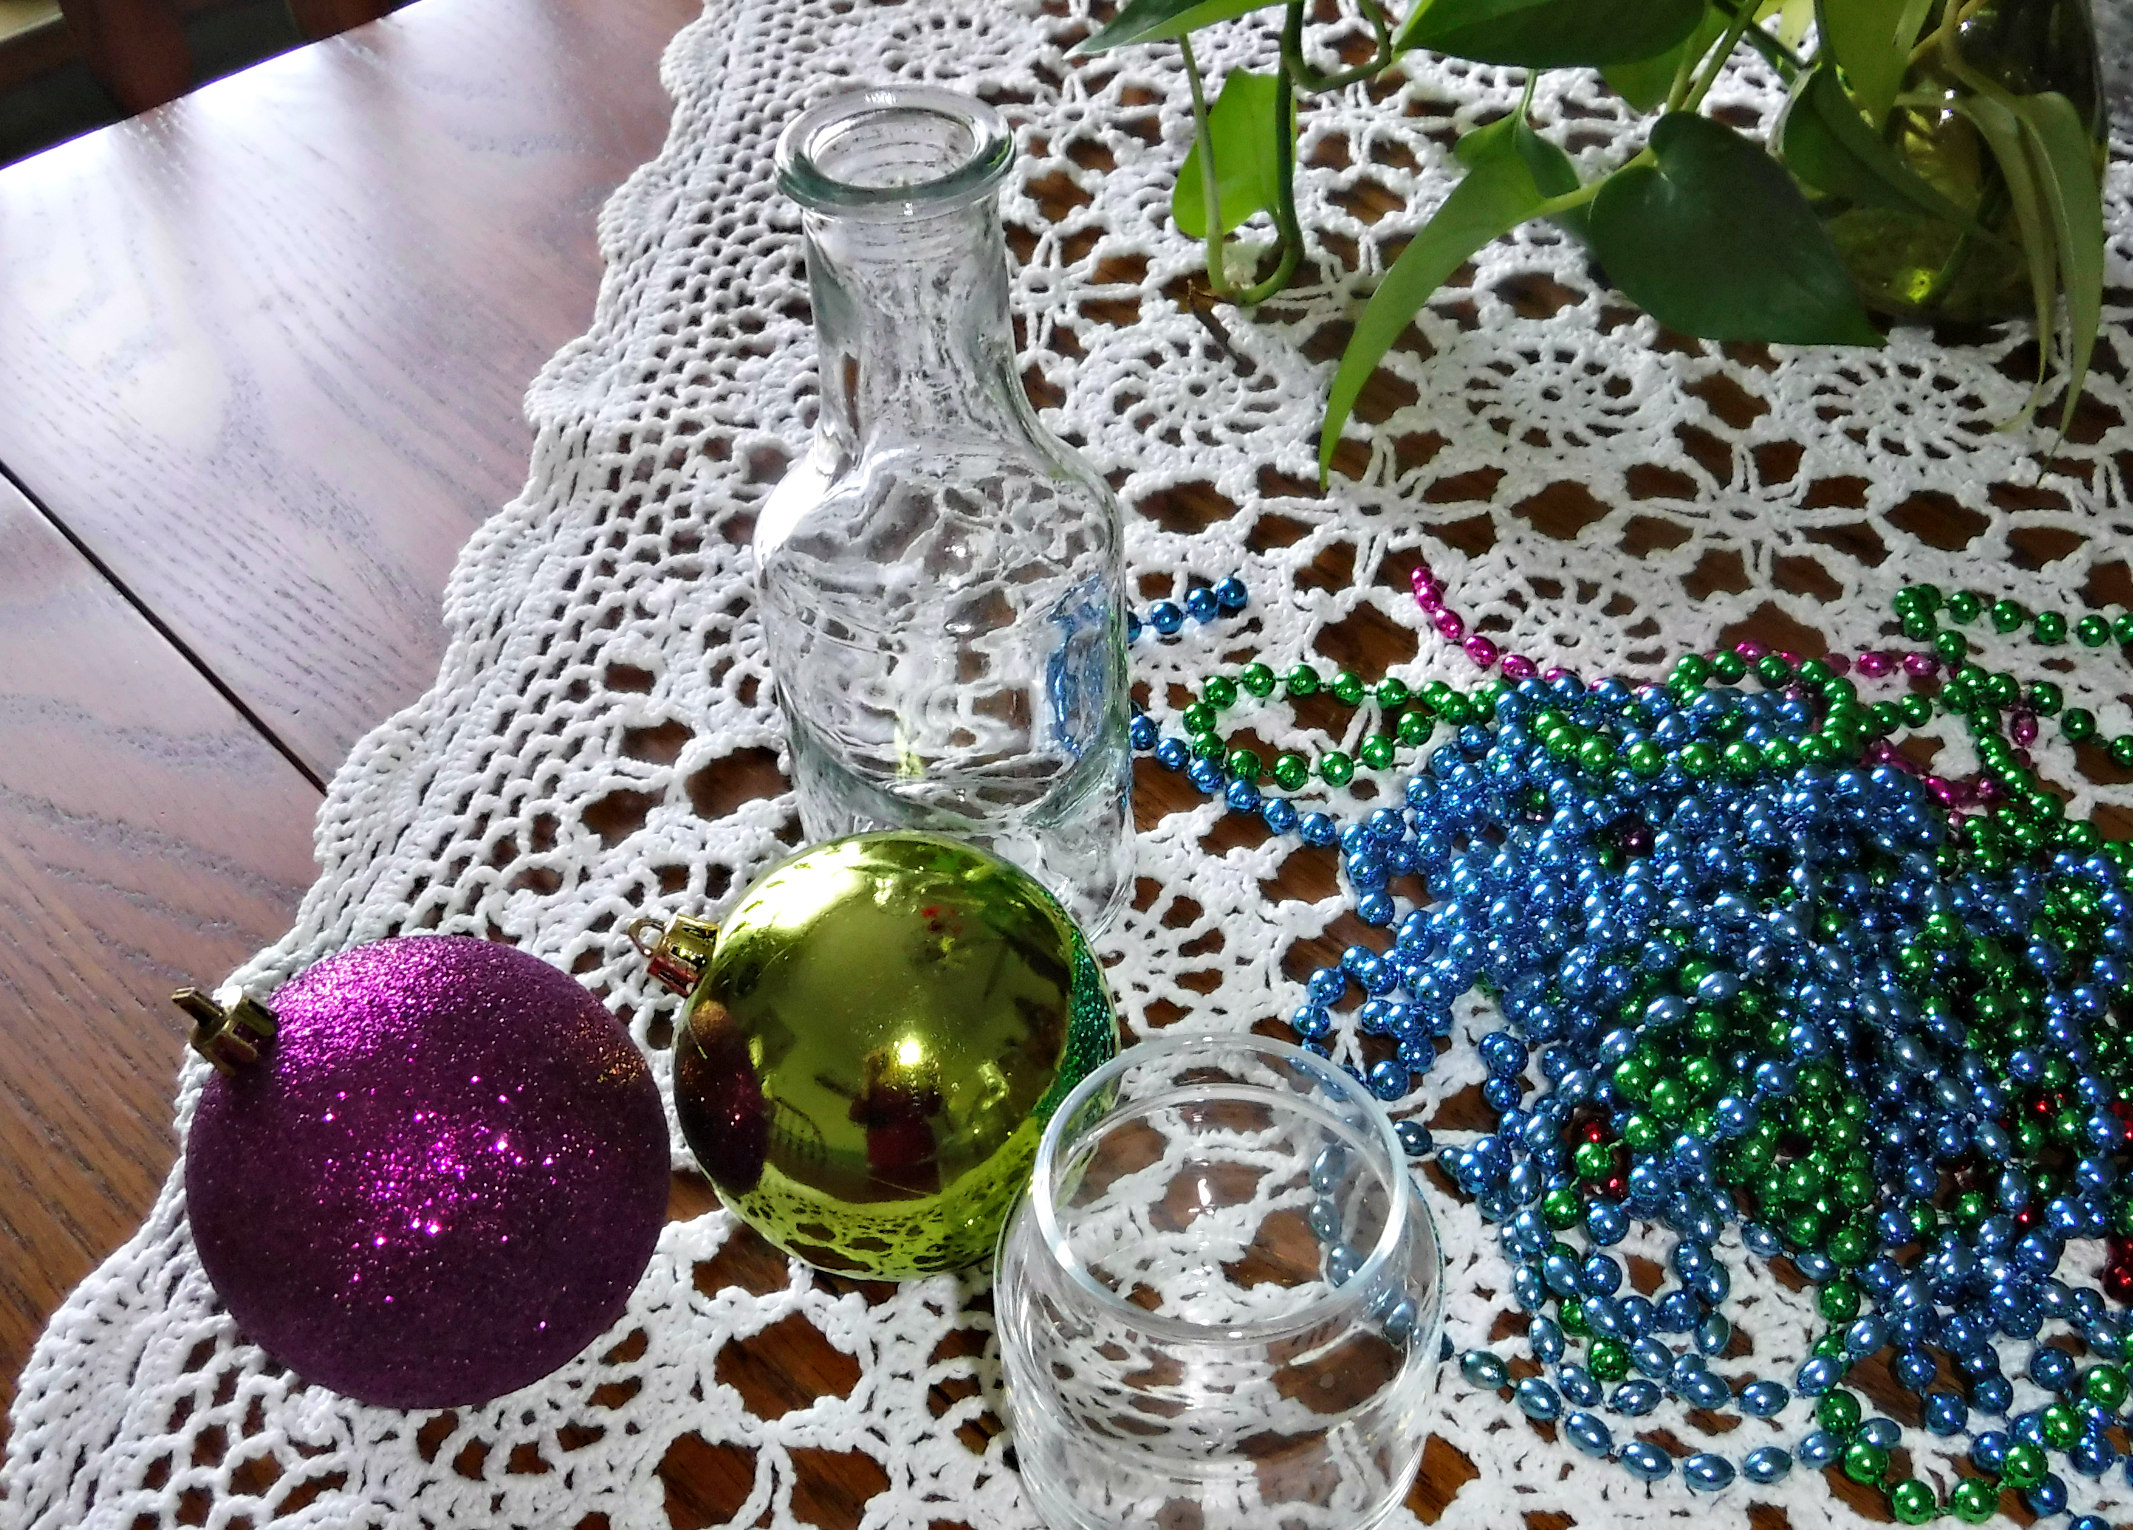
I had extra Christmas beads lying around after I finished decorating this year. Hmmm-what to do with them?
The craft project I used them for reminded me of sand art. It is quick and inexpensive to create with children. Glass bottles aren’t necessary, a plastic one will do just as well. This craft has the potential to be as fancy as you choose to make it, glued on stickers and jewels, etc., or it can be super simple, like mine, and take about five minutes time. Unless you glue the large ornament to the top, I recommend you use something plastic in case it gets jostled and rolls off.
No instructions necessary. Even a toddler can figure out how to make this pretty and festive decoration.
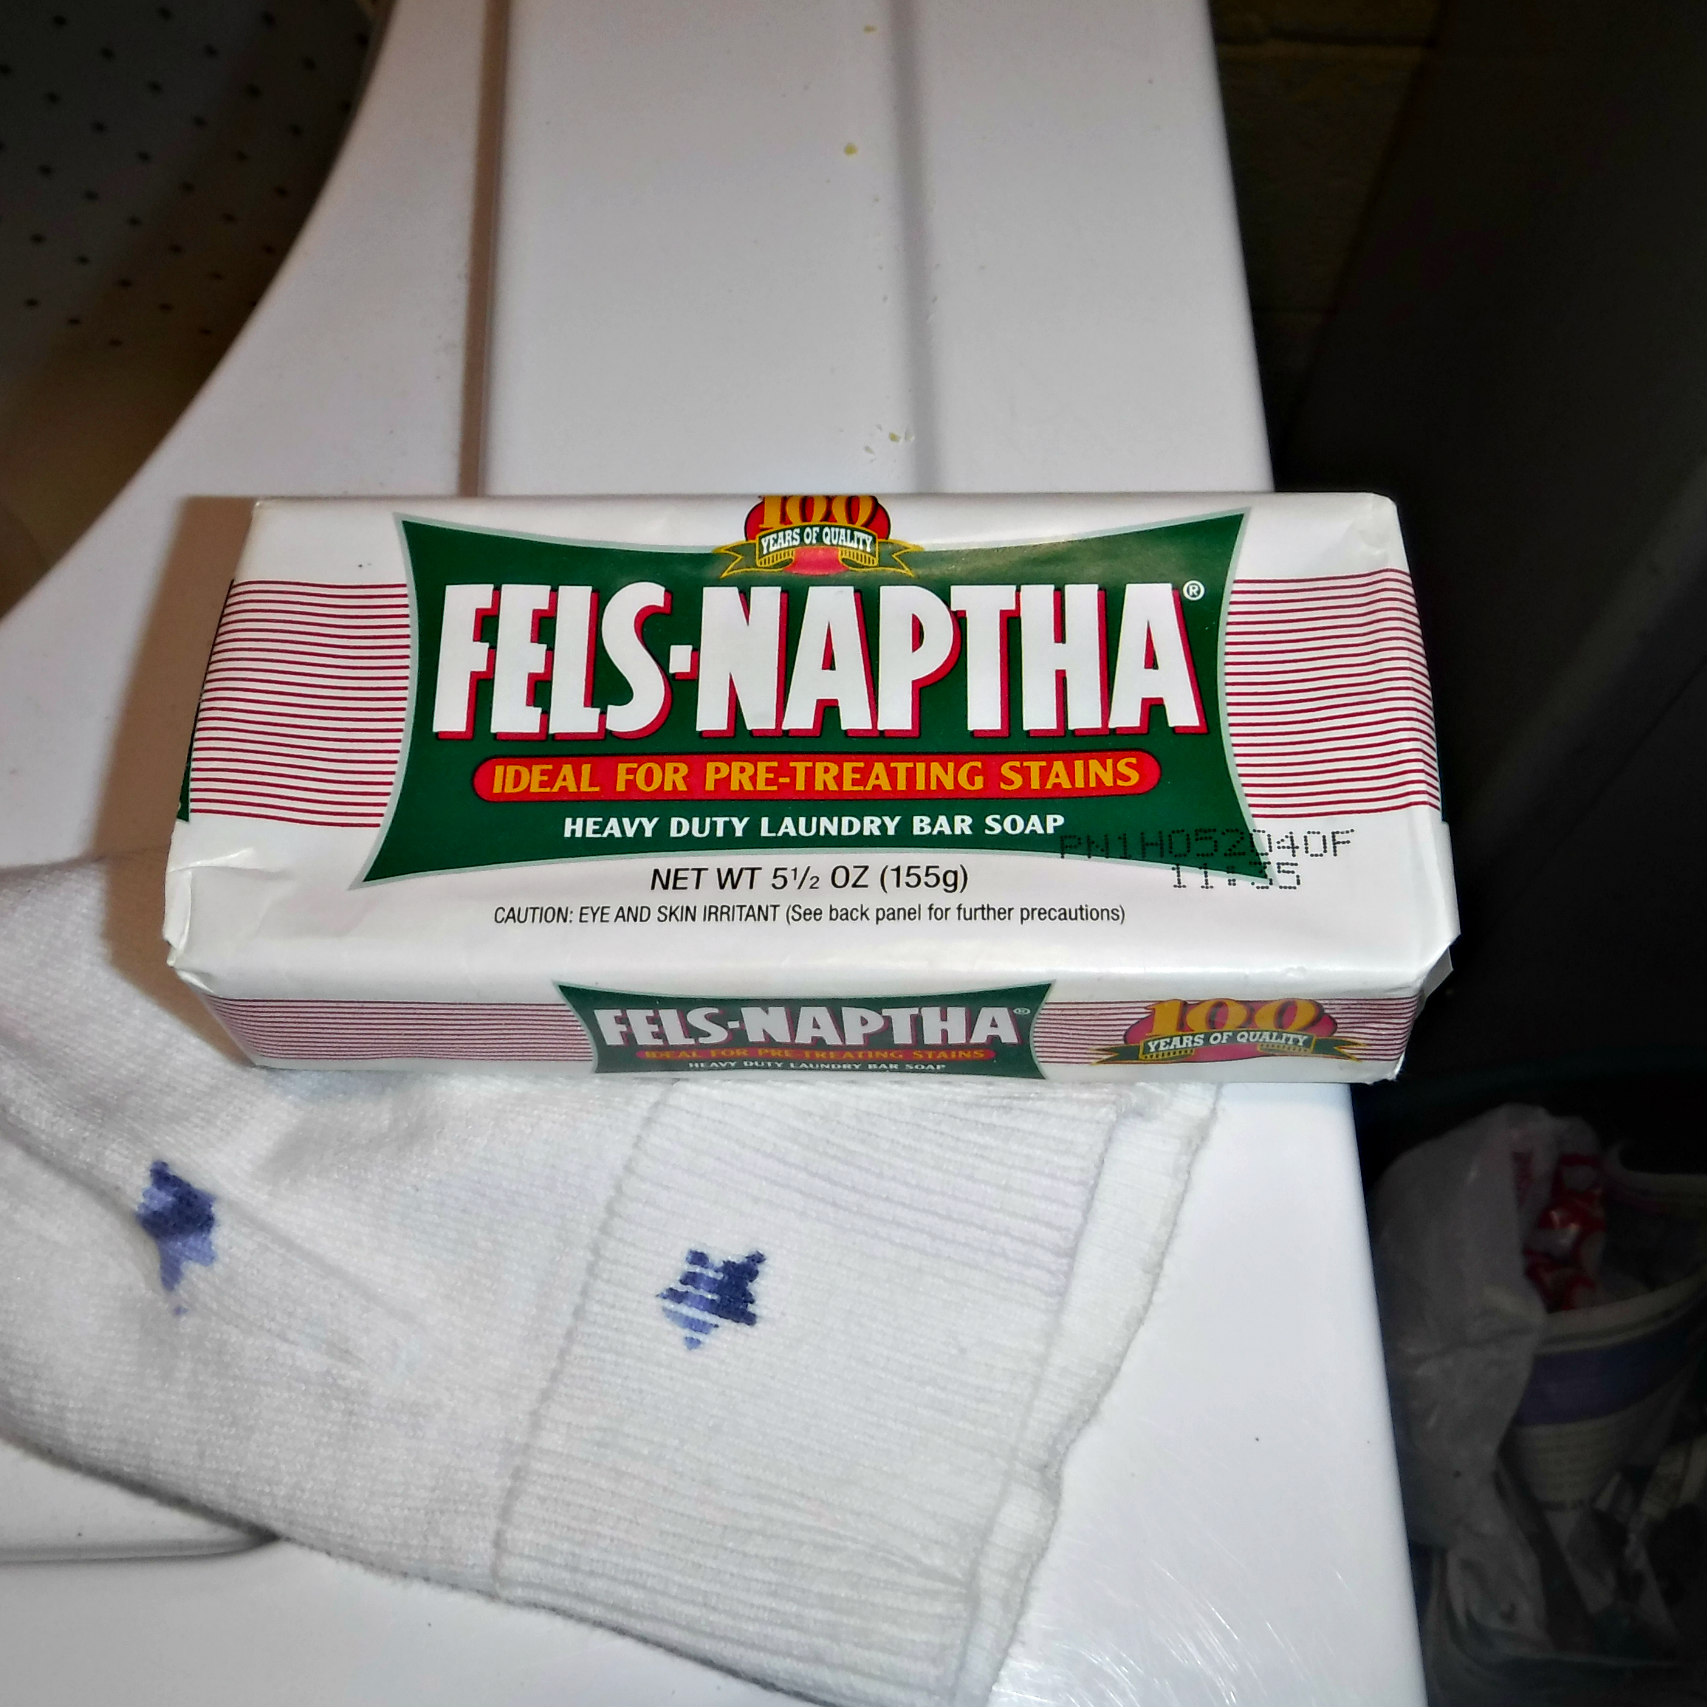
I like Fels-Naptha soap because it works at removing stains and has been around a lot longer than me. Invented in 1893, the original soap actually contained Naptha, but it was removed due to a risk it could cause cancer. I use Fels-Naptha soap in the laundry room. In the winter, my light-colored shirts get filthy around the cuffs. Before laundering, I run the Fels-Naptha bar along the grimy edges. It works great breaking up the ground in dirt.
You can see from the condition of this very old piece of soap that I really do use it quite a bit. It lasts forever. The Frugal Navy Wife Blog has quite a few tips I hadn’t heard before. Check it out for some new uses for this versatile soap.
It’s been quite awhile since I came up with a new category, or re-blogged an old, but still timely post. My new category is titled “Percolated.” In short, it means the post is still a good one, but over time I tweaked techniques, or found new uses for what I’ve blogged about. It’s all a matter of percolation.
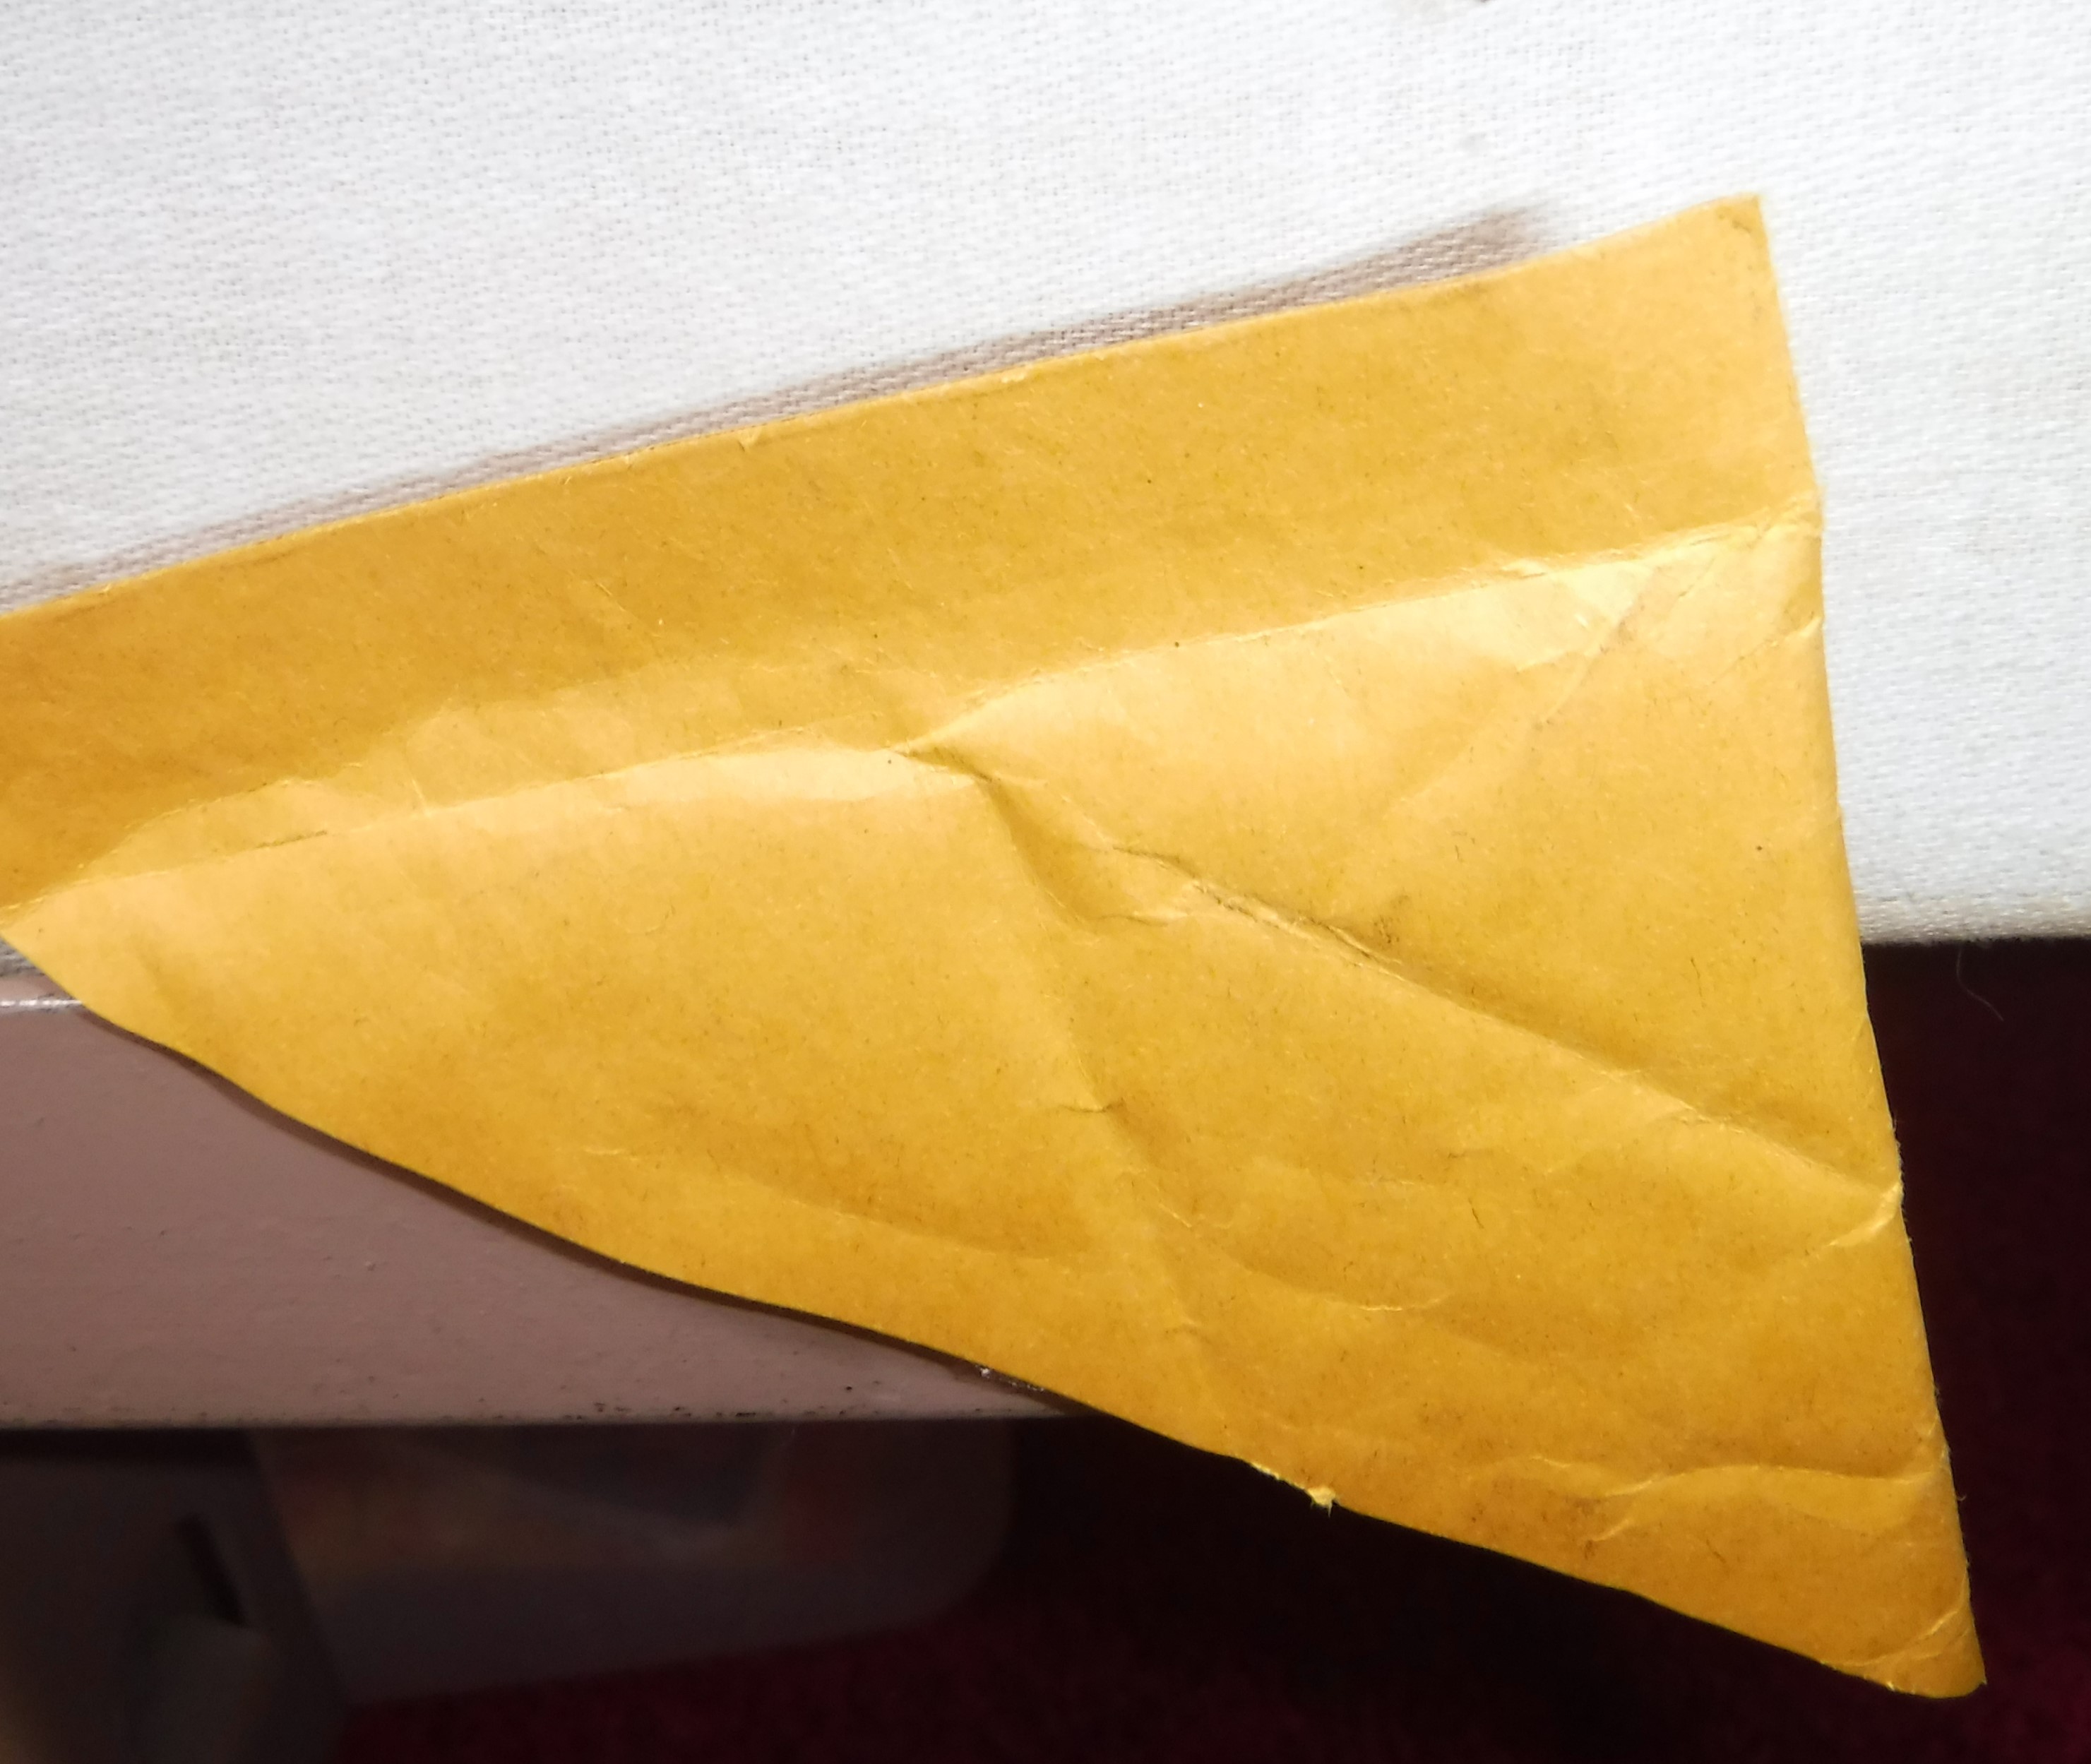
My original post now includes extra uses I found over the years for padded envelopes I can’t bring myself to throw away.
Cut off envelope corners create a perfect piece of roundabout padding to protect the corners of picture or fine art frames you want to move or store.
Another way to use these cut off corners is on the edges of steel bed frames. Anyone who has cracked or gouged their shin on the sharp edges will appreciate this tip. A bit of double-sided tape holds the padding firmly in place.
Original Post: In the Autumn of the year, I hang this sweet welcome sign on my front door. The scarecrow and greeting are painted with acrylics on a heavy piece of slate making the piece very durable. My problem over the years is the racket the plaque makes by banging to and fro when the door is opened or shut. At some point, after years of bouncing around, I’m concerned the slate will crack and be ruined.
Bubble wrap to the rescue! Cut out cushioning strips and put them on the back of items that might be broken by movement. To safeguard the plaque, I cut a few bubble wrap envelope strips and glued them to the back with my glue gun. The whole process took about five minutes, and the strips work great. The racket is diminished and the plaque is protected.
Inspired by my success, I googled recycling bubble wrap. The Secret Yumiverse: 9 Poppin’ Uses for Bubble Wrap gave me two additional ideas. One was practical: put bubble wrap inside empty handbags/purses to help them keep their shape. The second just made me laugh: make a primitive burglar alarm by putting bubble wrap under the doormat/rugs near your front door. Funny, but hey, it just might work!
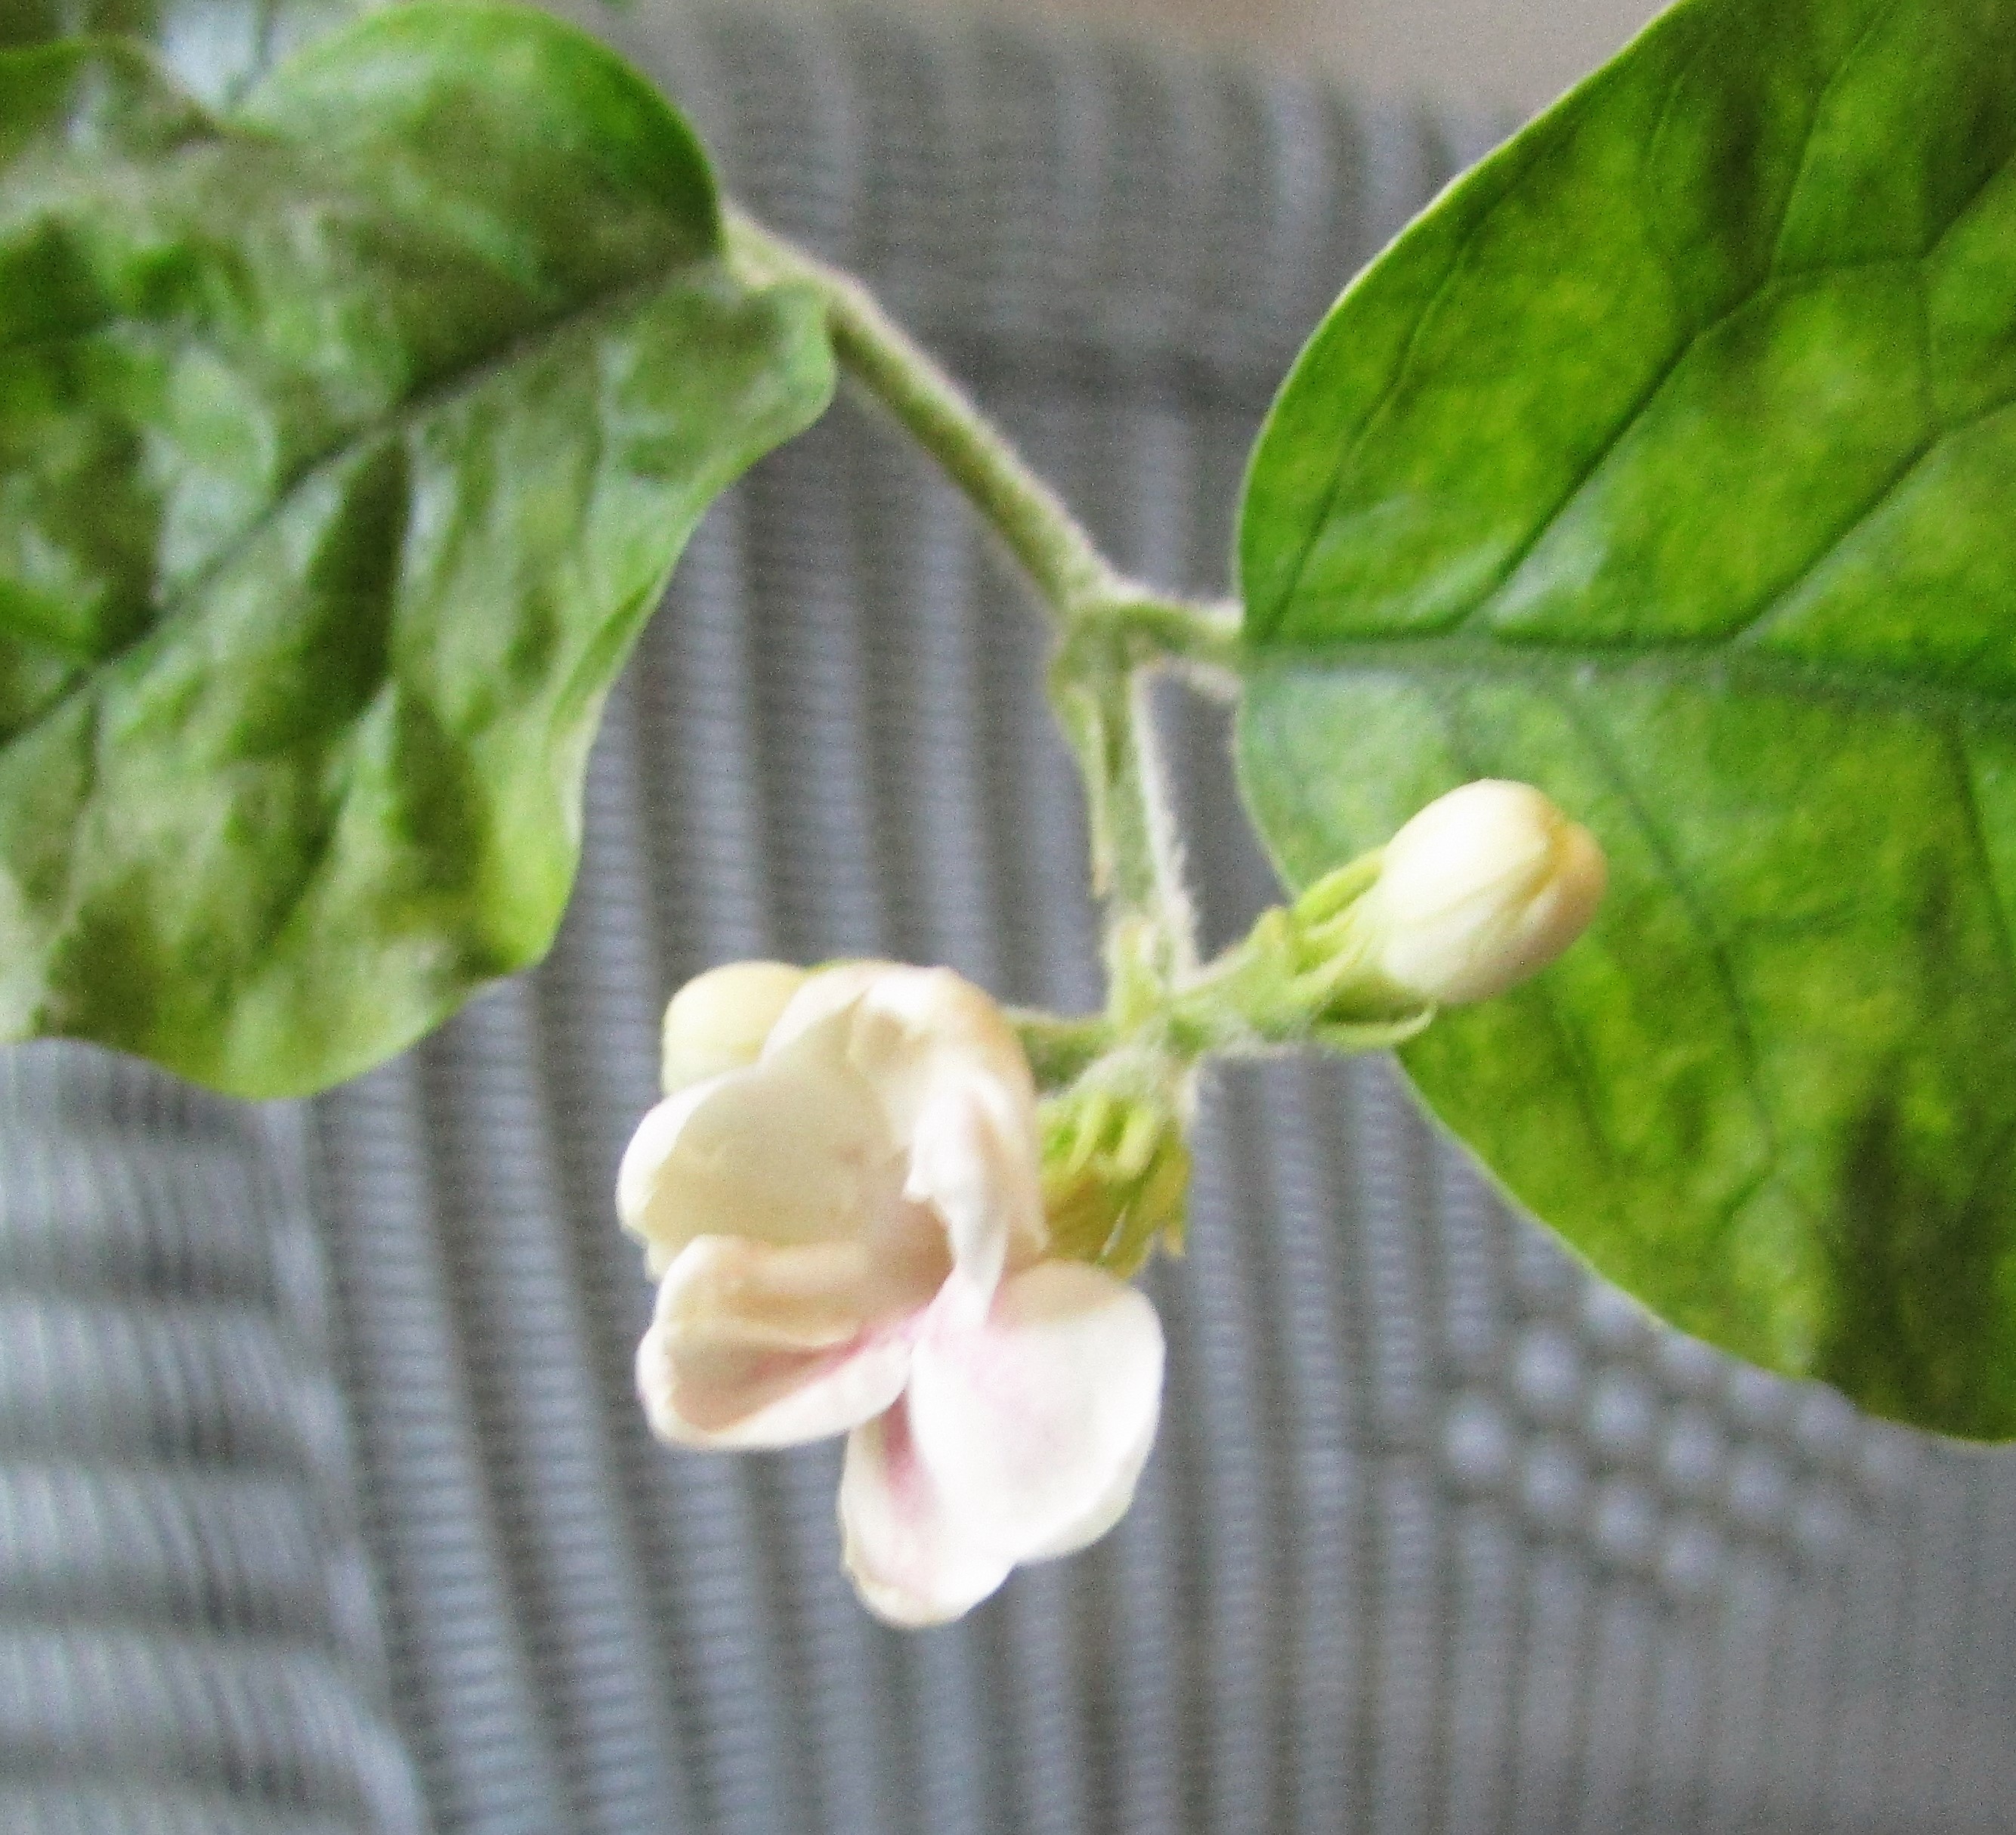
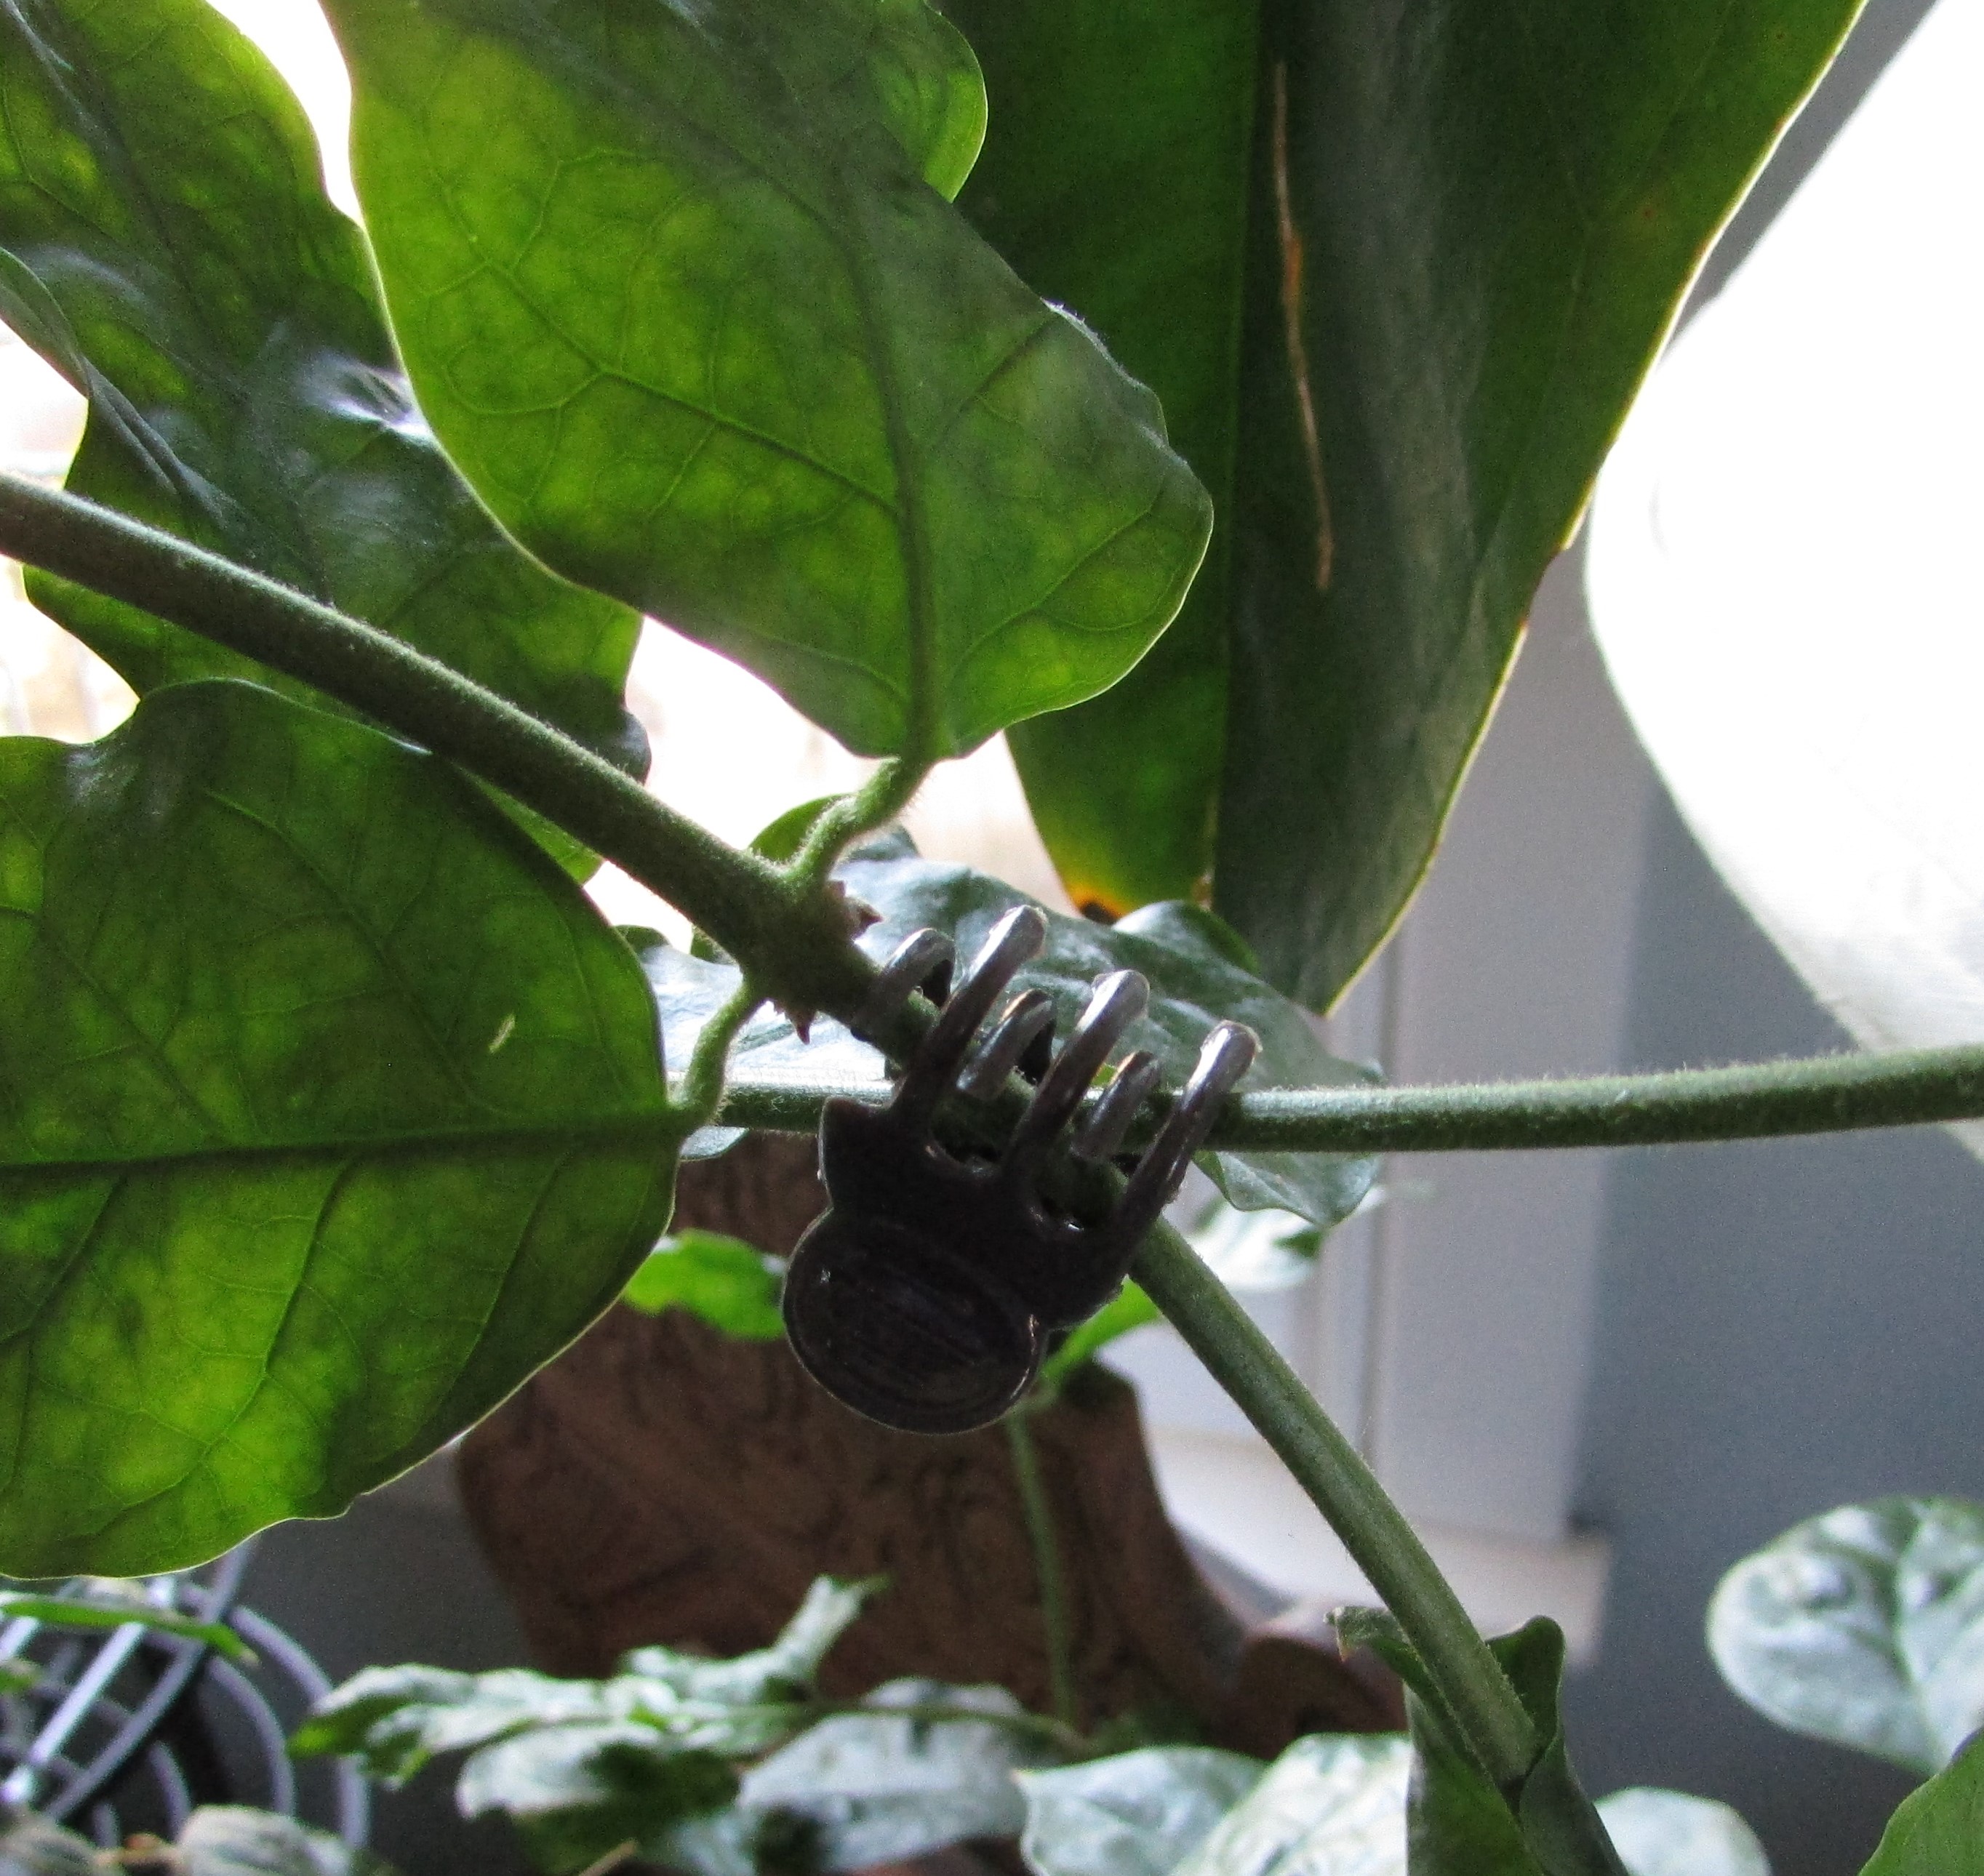
This rather blurry photo is of a jasmine vine, blooming at this time in my home. The small blossom, about the size of a dime, emits a powerful fragrance. When the plant has several blooms the scent can fill the entire upstairs.
This variety of jasmine is a vining plant. I believe the variety is probably Jasminum sambac, possibly Maid of Orleans cultivar. The older branching vines turn woody with age, making them very sturdy. The new growth of the vines is green and supple and needs a bit of support. I use small 3/4 inch hair clips, easily found at a dollar store, to hold up the new growth until it hardens a bit.
The clips are easy to attach and remove, don’t bind the stems, and are surprisingly strong.
I love chicken tetrazzini. Yesterday it was my planned dinner before I stopped by the new Lidl store in our town. Inside the freezer case my eyes fell upon a bag of frozen cheese tortellini. I had to have that tortellini for dinner too, but already had a pasta ingredient in my tetrazzini menu. I decided to combine the pastas. I halved the spaghetti amount, added in about half the bag of tortellini when the spaghetti was in it’s final minute of boiling, and mixed up all the tetrazzini ingredients. Oh my! I doubt I will ever go back to the old way of making this dish. The cheese tortellini complemented the grated asiago cheese in the recipe. I can’t wait to eat the leftovers as a side dish tonight. Give this a try if you like tortellini.
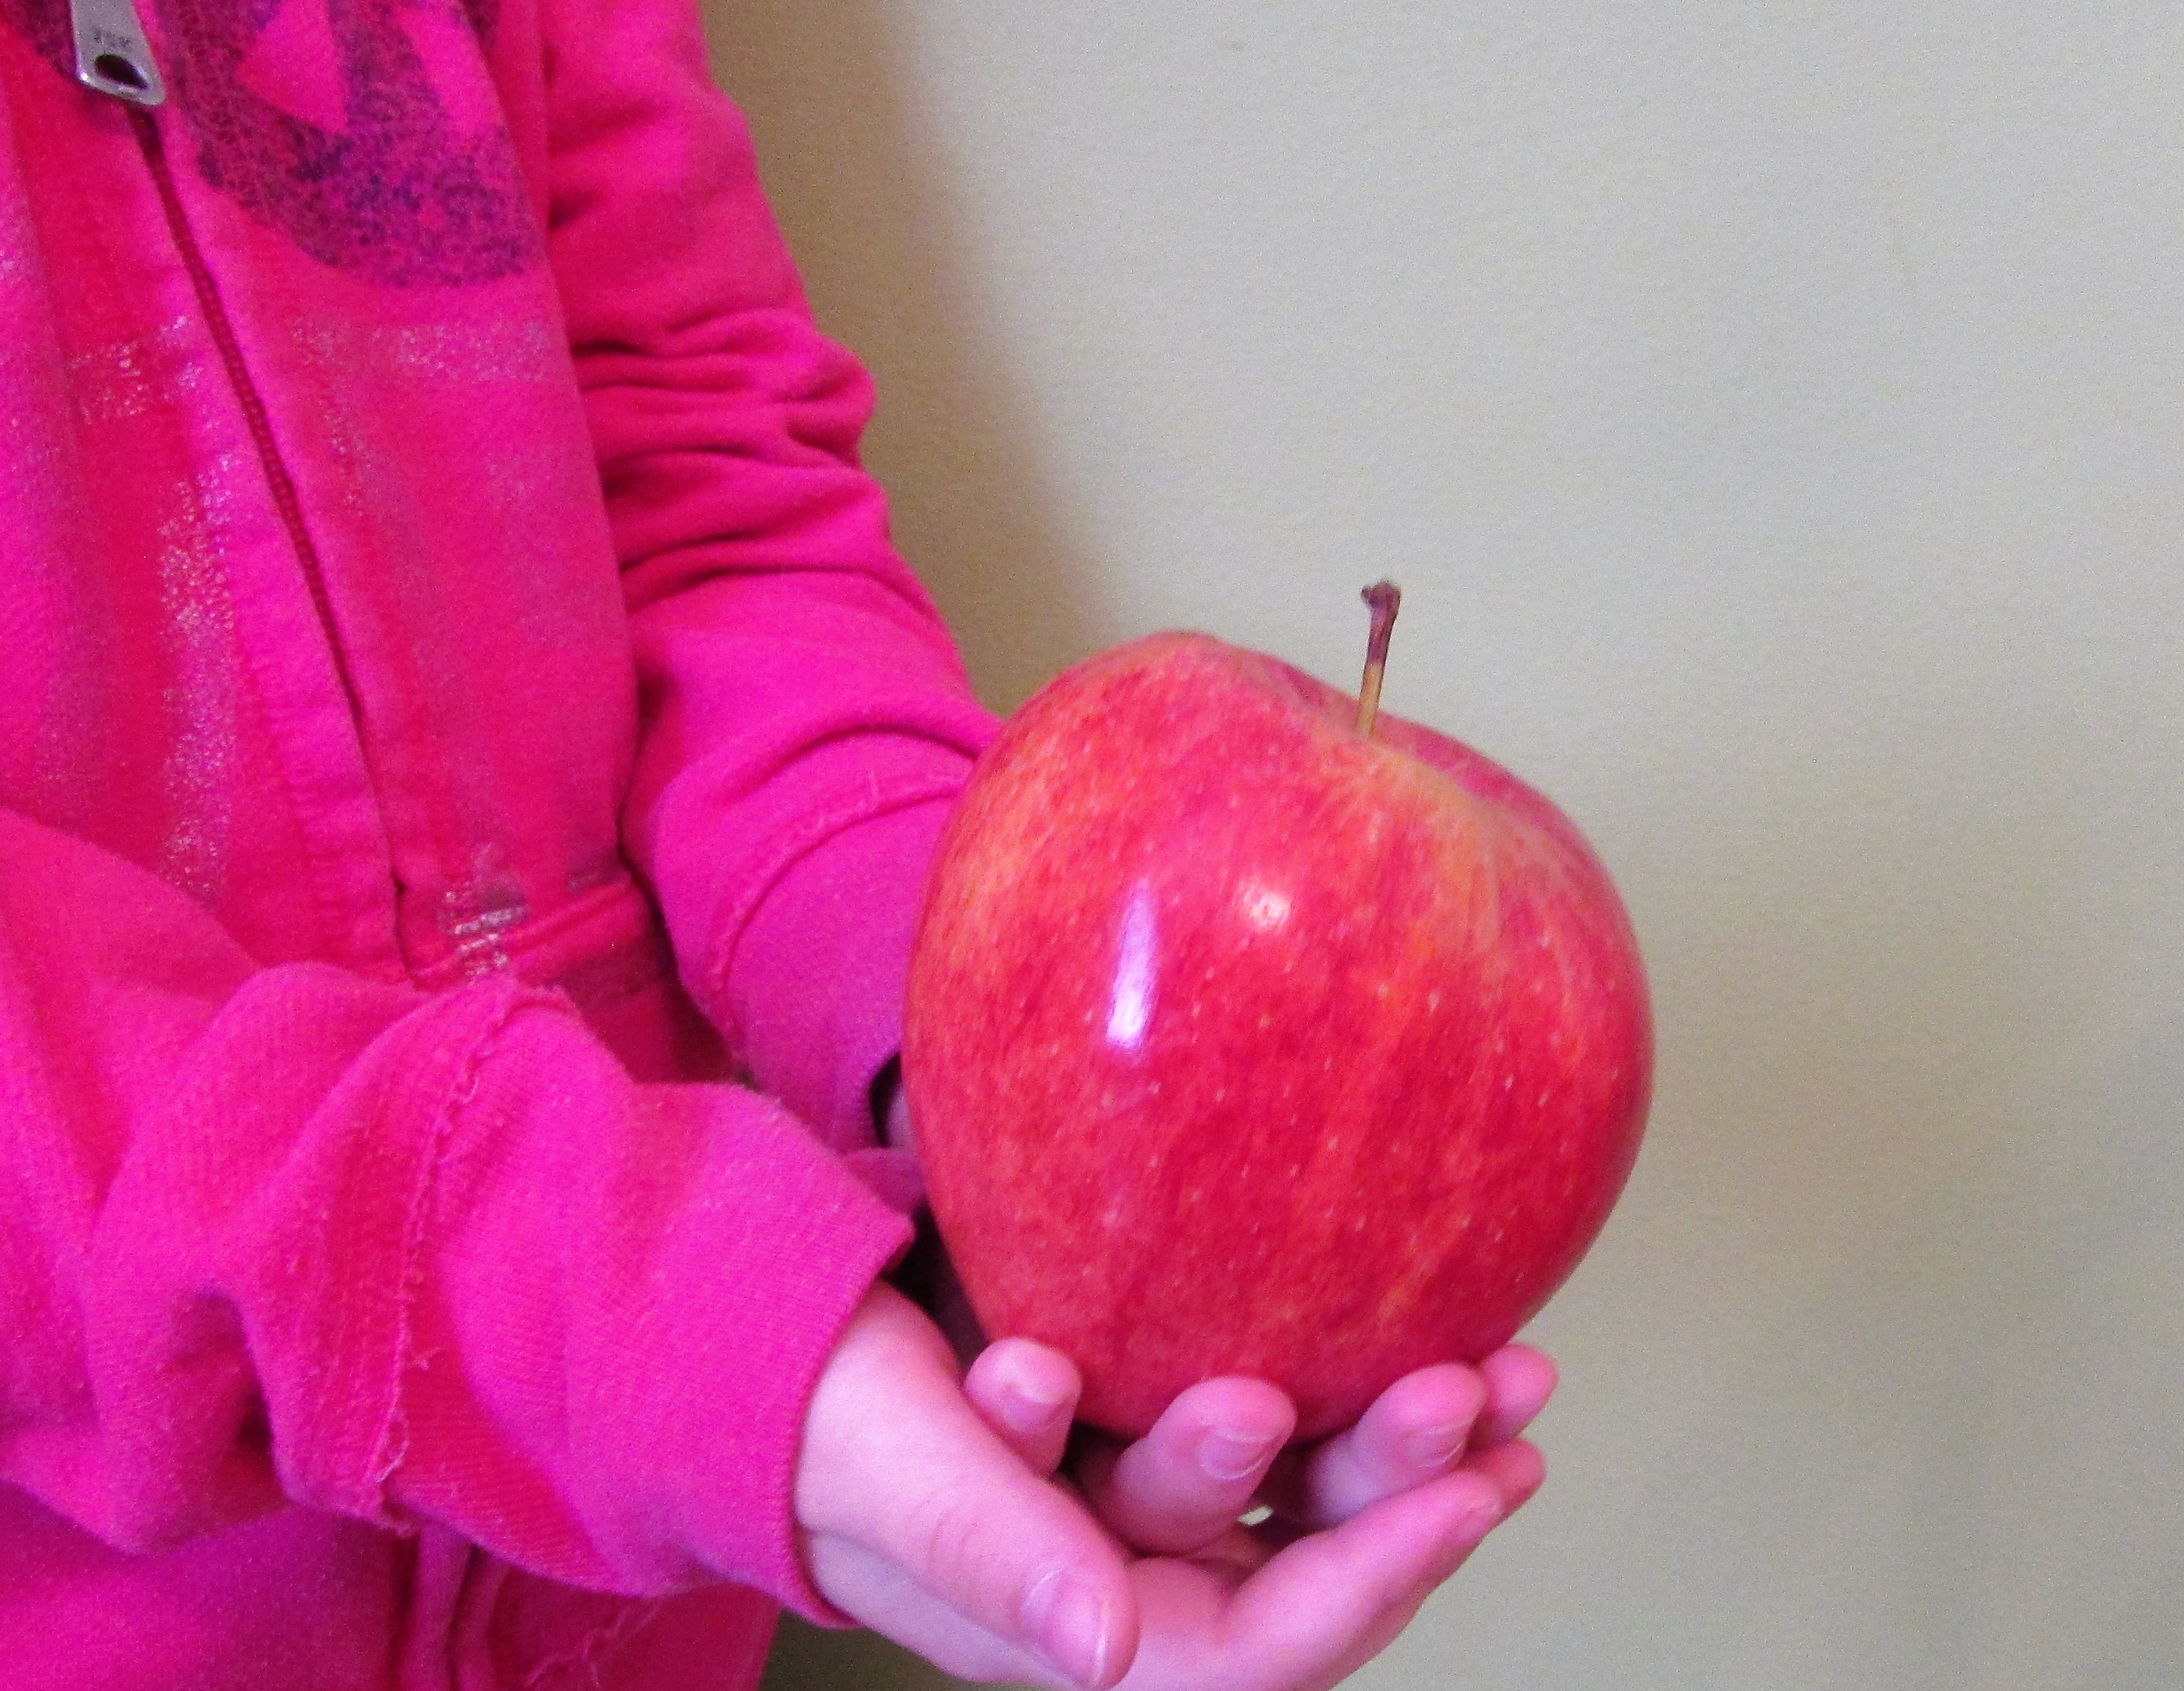
My grandchildren love apples cut into wedges for snacking. Unfortunately, apples are on the list for ‘dirty’ fruits due to pesticide residue. The apple my youngest grand-daughter is holding in the photograph is an organic Gala apple. If it was not grown organically I could remove most of the outer pesticides by a baking soda soak. Washing away what has been absorbed by the inner fruit is pretty much impossible.
“The longer pesticides sit on fruits and vegetables, the deeper they’re absorbed, and the harder it is to remove them, he says…consider submerging your produce in a solution of one teaspoon of baking soda and two cups of water for two minutes or more (the longer you soak, the more chemicals you get rid of). Rinse in tap water again before eating.” ~ Consumer Reports/Easy Way to Remove Pesticides.
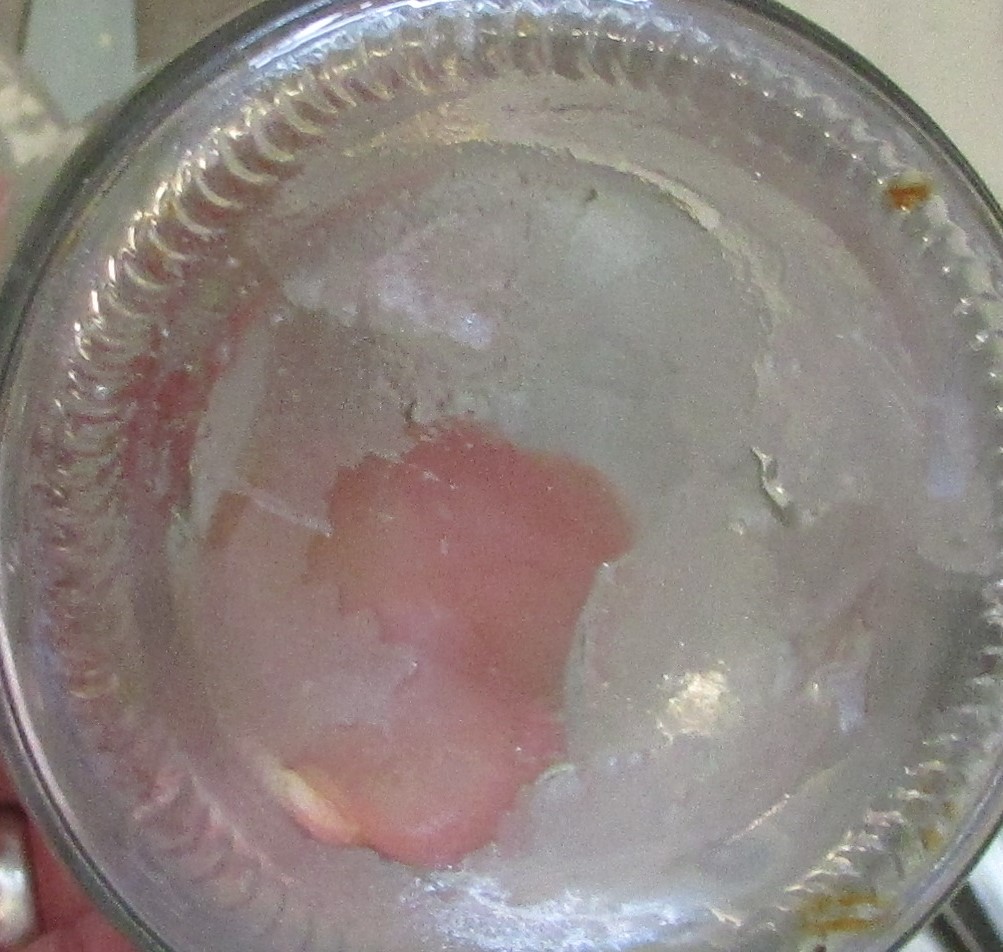
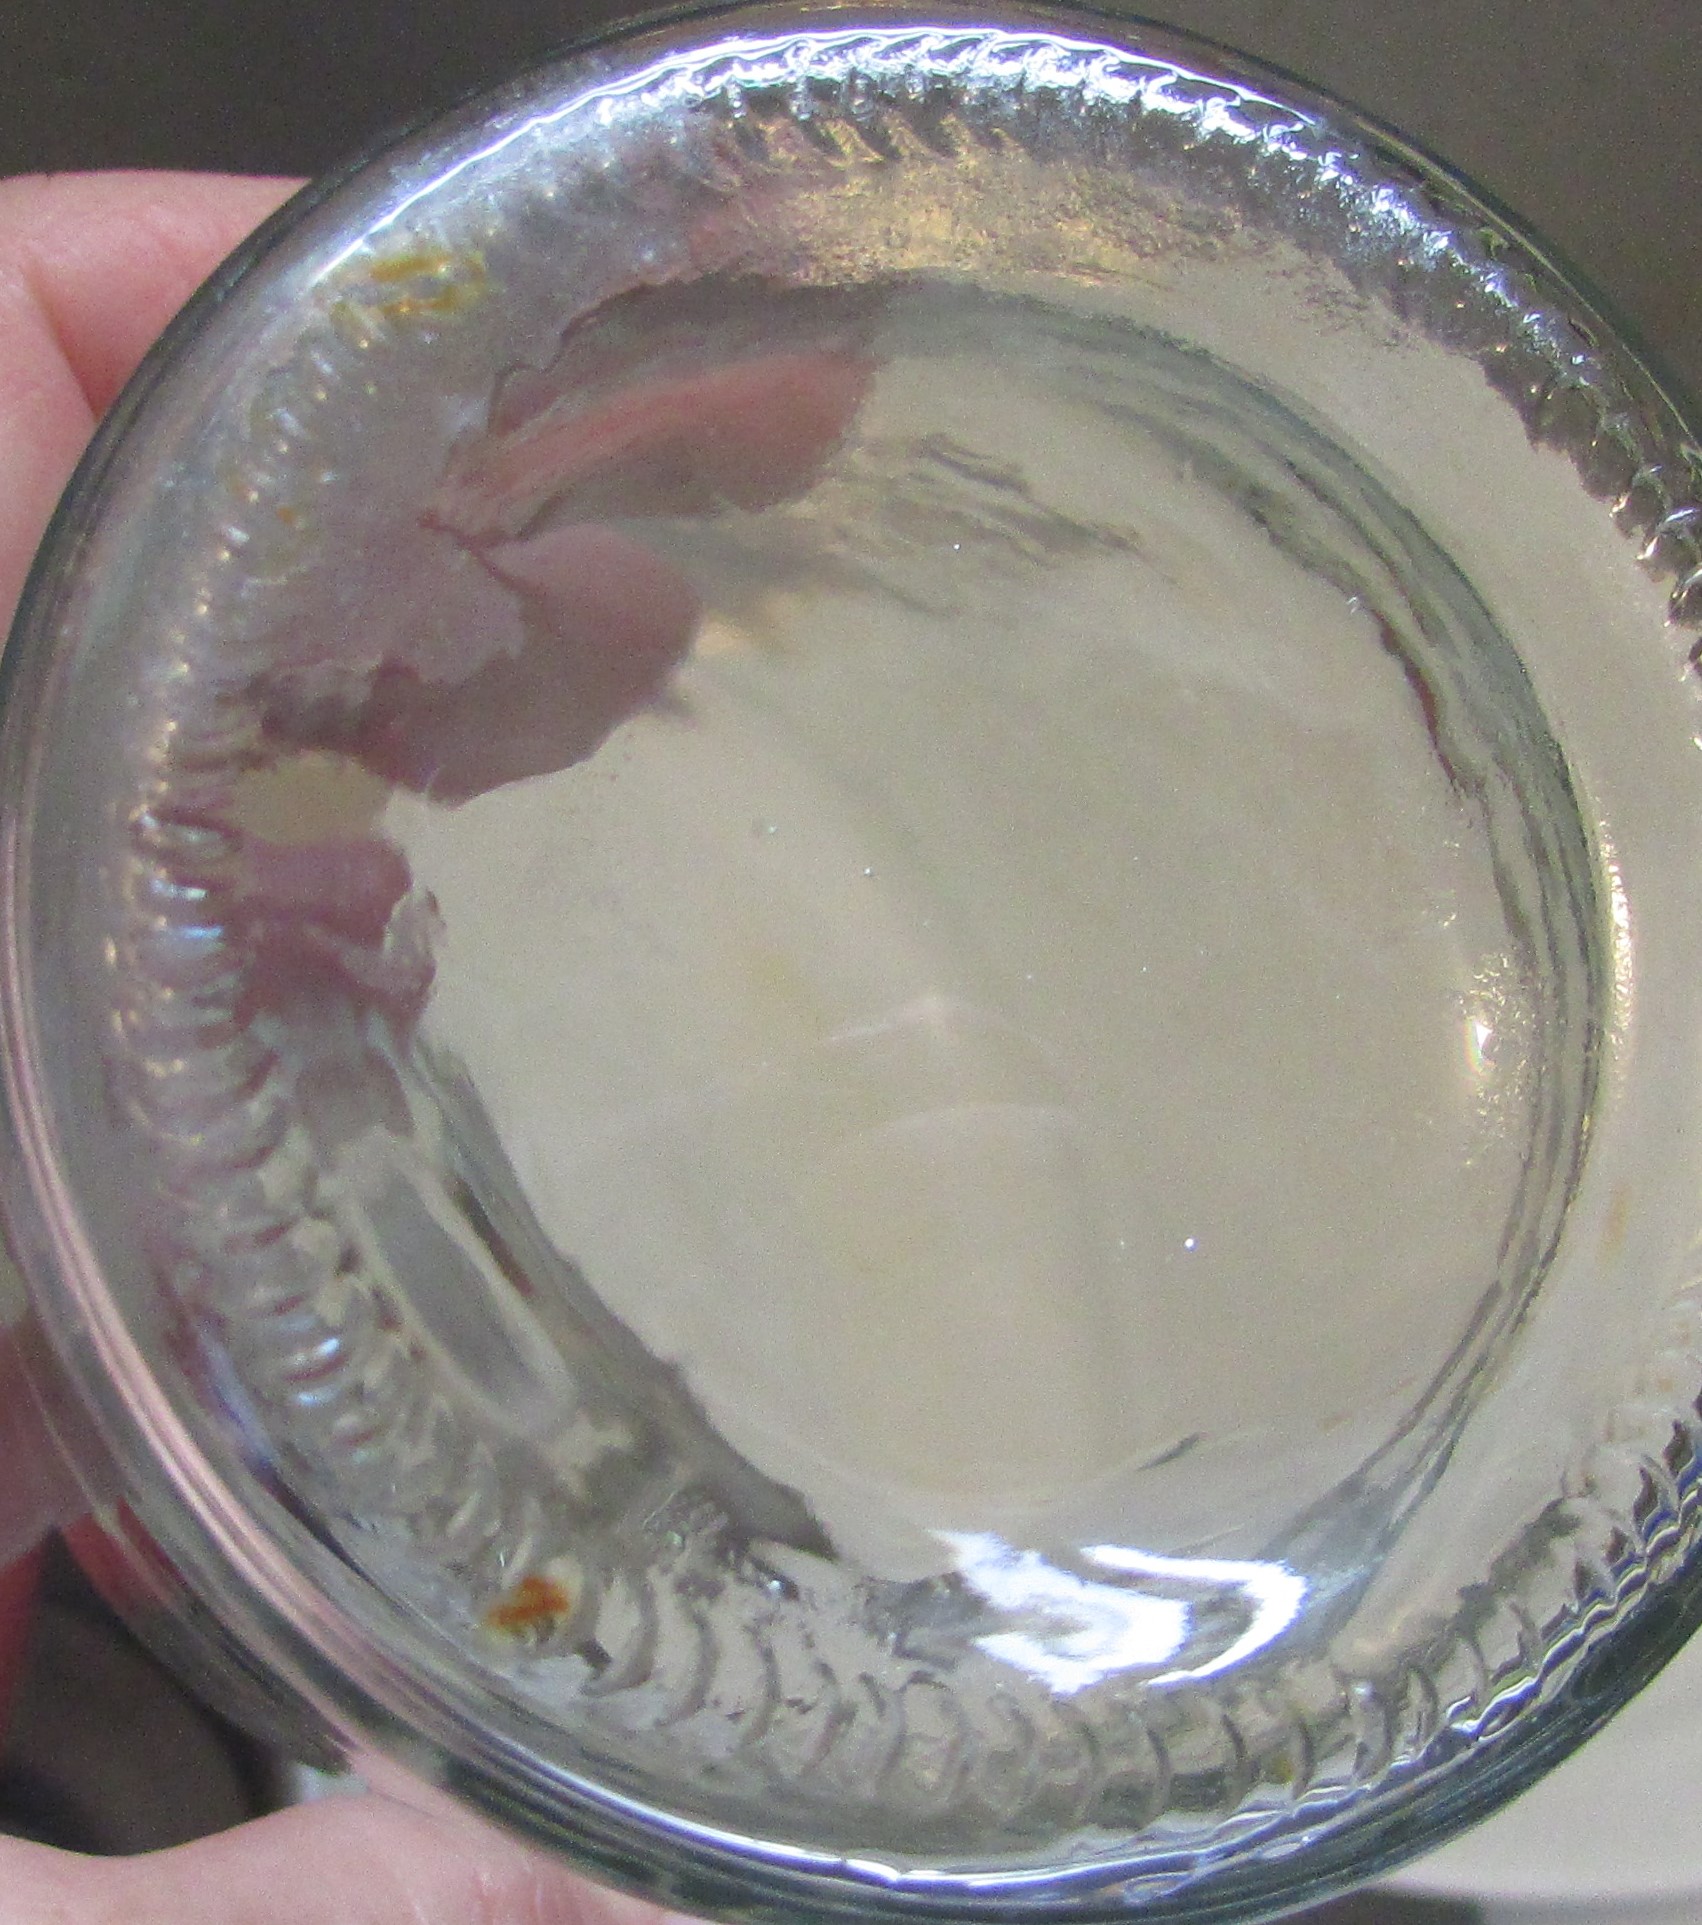
I also put baking soda to use when removing soap scum from vases. I try soaking first in bleach, but if that doesn’t work I sprinkle in a little baking soda and add straight white vinegar. Be prepared for some quick foaming action.
This is a good trick if you misplace your bottle brush. (Mine is hiding from me right now.) If needed, I will repeat the steps until the scum is gone.
Monday’s Yard Walkabout had me cringing as I checked all my garden beds. We had a spring rainstorm last night that rivaled a mid-summer downpour. I found my top-heavy hyacinths lying on their sides.
To the rescue, twigs from last year’s Rudbeckia daisies.
I rarely cut these tall stems down in Autumn. They retain seeds on the spent flower heads for a good part of the winter, a food source for birds, and in the spring and summer their tall stems, turned wood-like in the winter weather, are perfect stakes for zinnias and other tall border plants. I usually break off the smaller twigs and discard, this year they will come in handy; I’ll poke the end in the ground and let the branches hold the hyacinth up until time to cut the faded flower away.
My Scrub Pine Christmas tree is now doing its triple tour of duty as a holiday tree. First it was decorated for Christmas, then Valentine’s Day, and now I have covered it with Malted Robin Eggs for Easter.
Once again I made good use of leftover Christmas ornament hooks. (Next year I intend to buy several packages to have on hand for projects.)
I created a small indentation with a miniature Phillips Head screwdriver, then pushed one straightened end of the hook, dabbed with a spot of glue, into the malt. Voilá! The hooks work perfectly to hang the small eggs on the tree. A few of the eggs did crack while I attempted to insert the hook, but I confess, the evidence of their demise was quickly eaten.
A chill is still in the air, but I know that as the temperature rises the pesky critters will wake up too. Right about the time I plant out small sprouts and plant seeds they will be roaming about with voracious appetites. This year I am prepared in advance with a new idea: Stinky Scare Sticks.
I gathered some good repellents: eucalyptus essential oil, cayenne or chili pepper, crushed red pepper flakes, and garlic powder. Organic coconut oil mixed with the eucalyptus oil was my glue. A toothpick dipped into the oil, and then into the spice mix, made the perfect stinky stick. Placed in garden pots and beds, the haze of pungent smells will hopefully hinder the munchies of the chipmunks and other pests.
I made quite a few and stored them at the ready on a garage shelf.
Another idea I’ve used in the past has been rocks and shells with a drop of eucalyptus, peppermint, cinnamon or other essential oil loathsome to small critters placed somewhere on their surface. This also works as an unobtrusive repellent.
This post wouldn’t be complete without a bit of a giggle. I also wrapped some of my kitty-cat’s fur (rodents recognize the smell of a predator in the fur) around a toothpick, added some googly eyes, and placed it in the same pot for added scare appeal. I wonder if the chipmunks will run or just laugh at my silly creation.
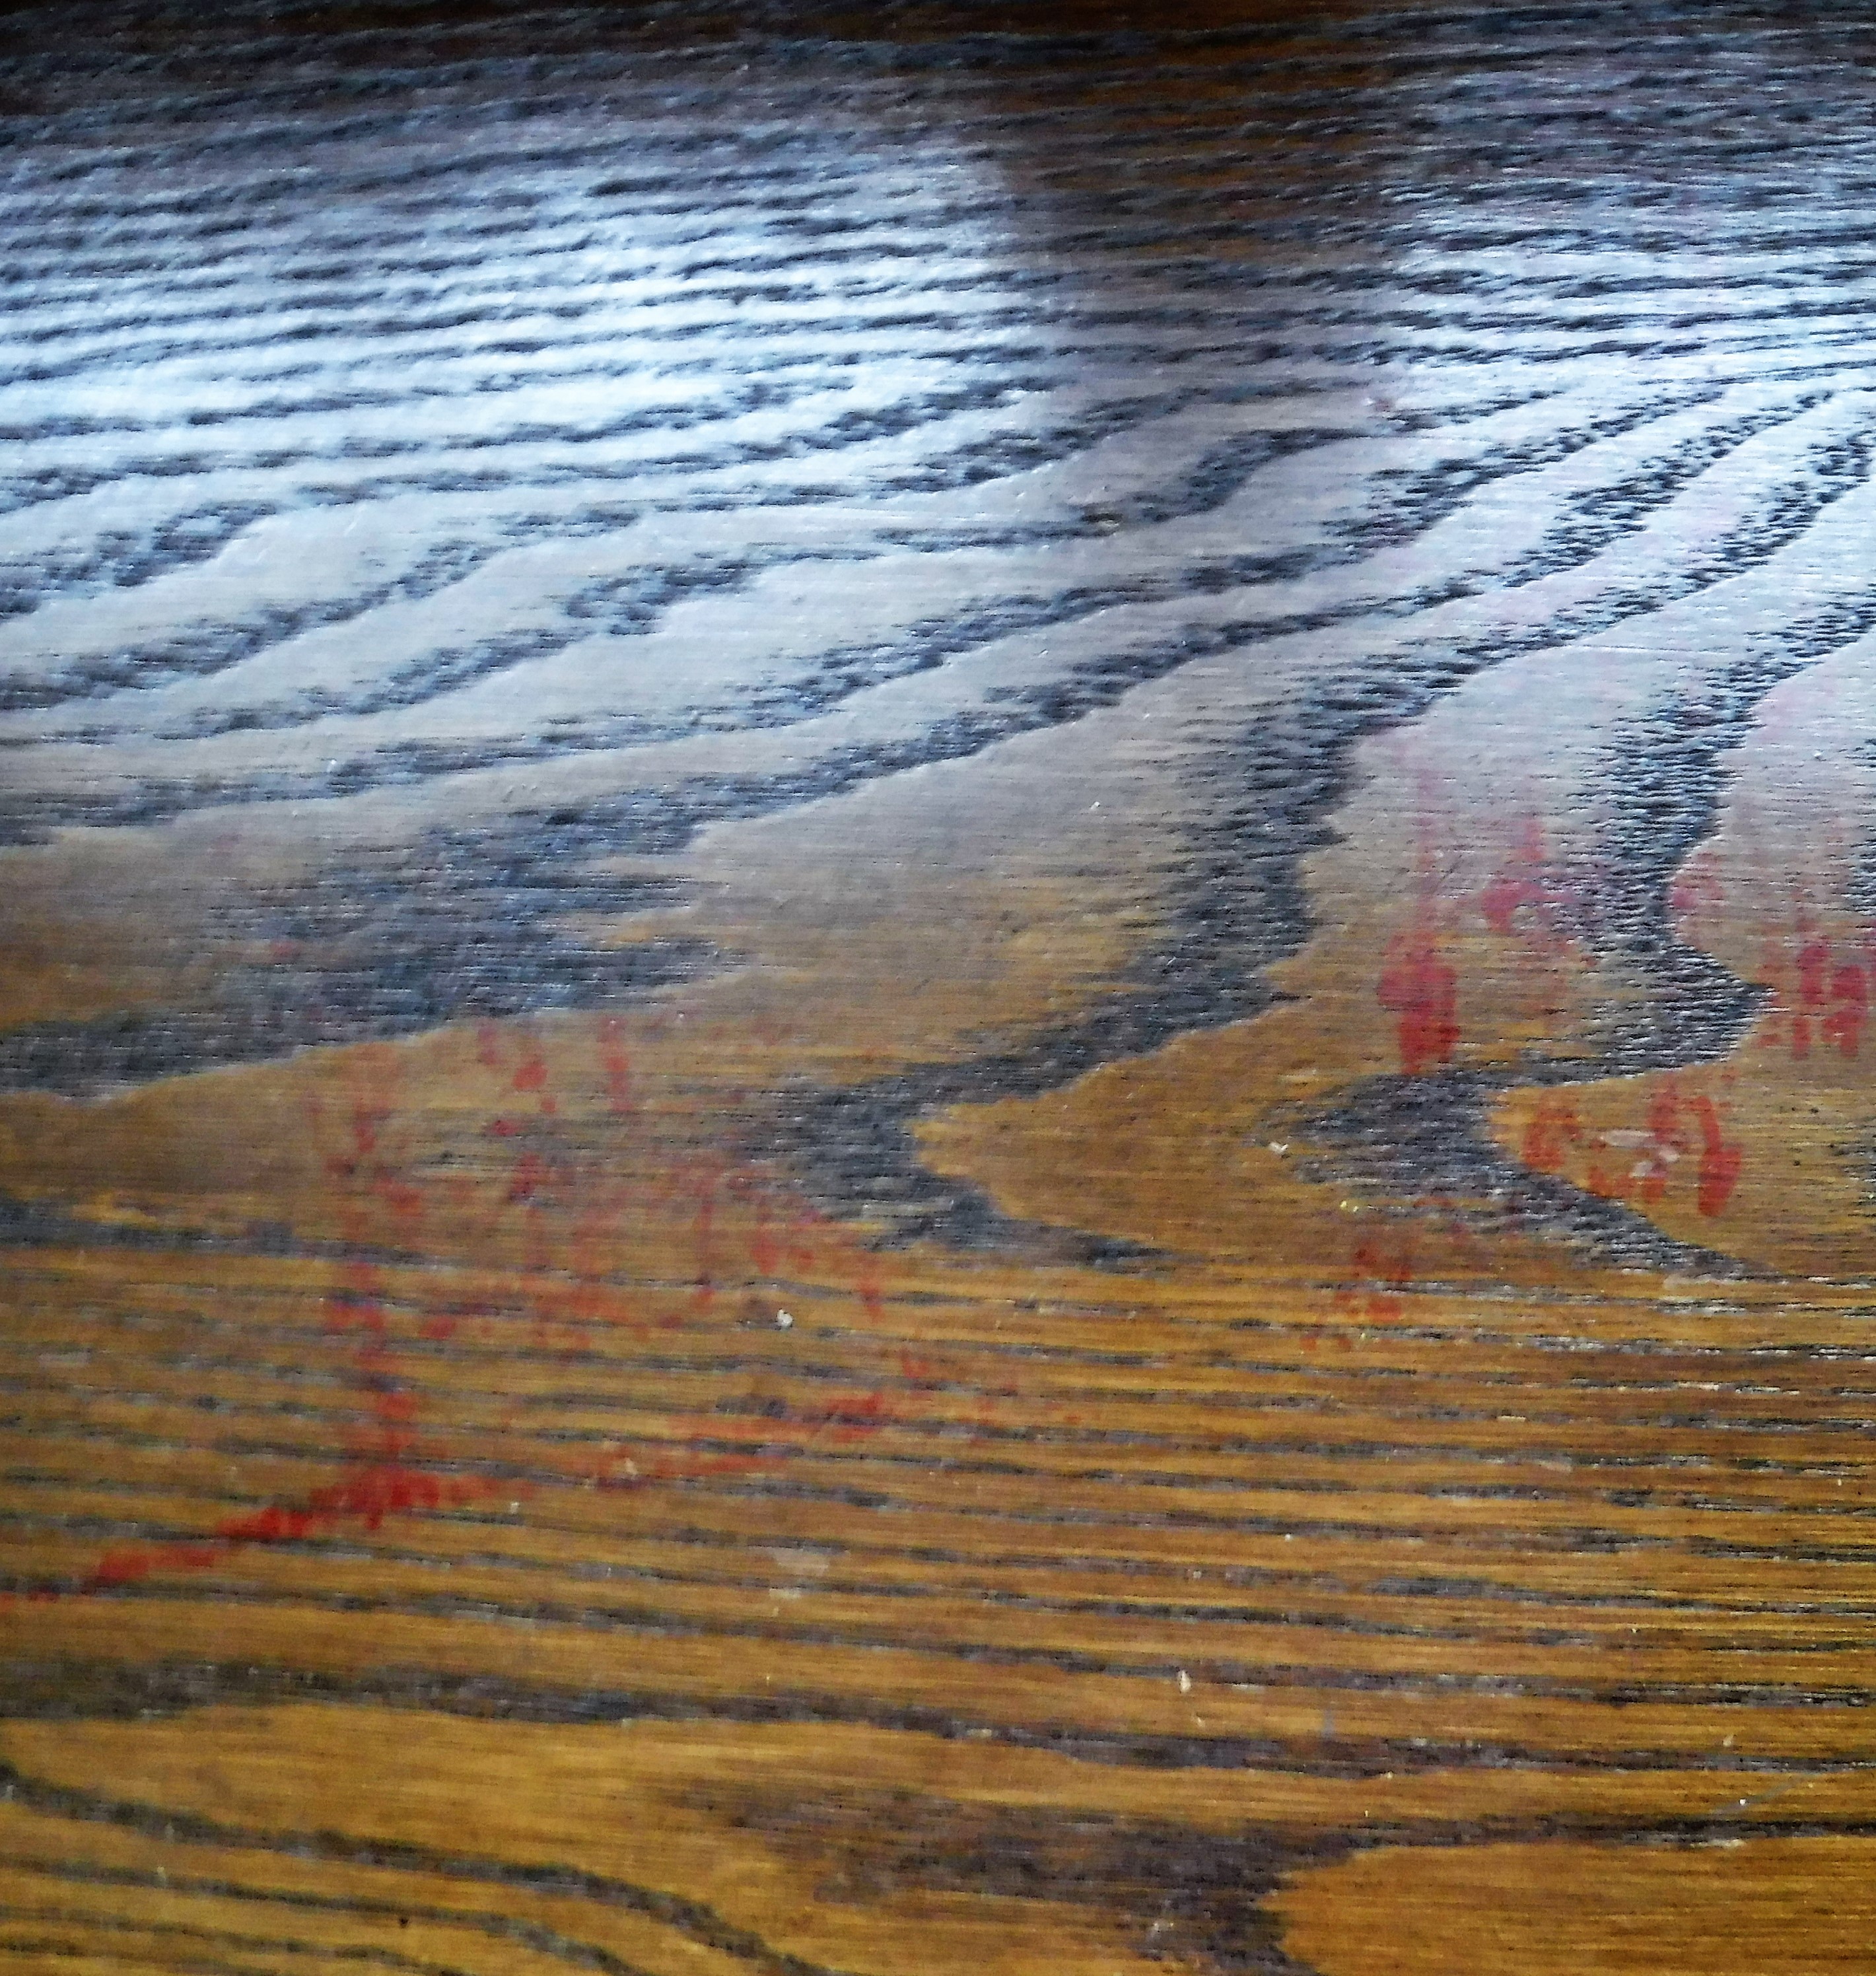
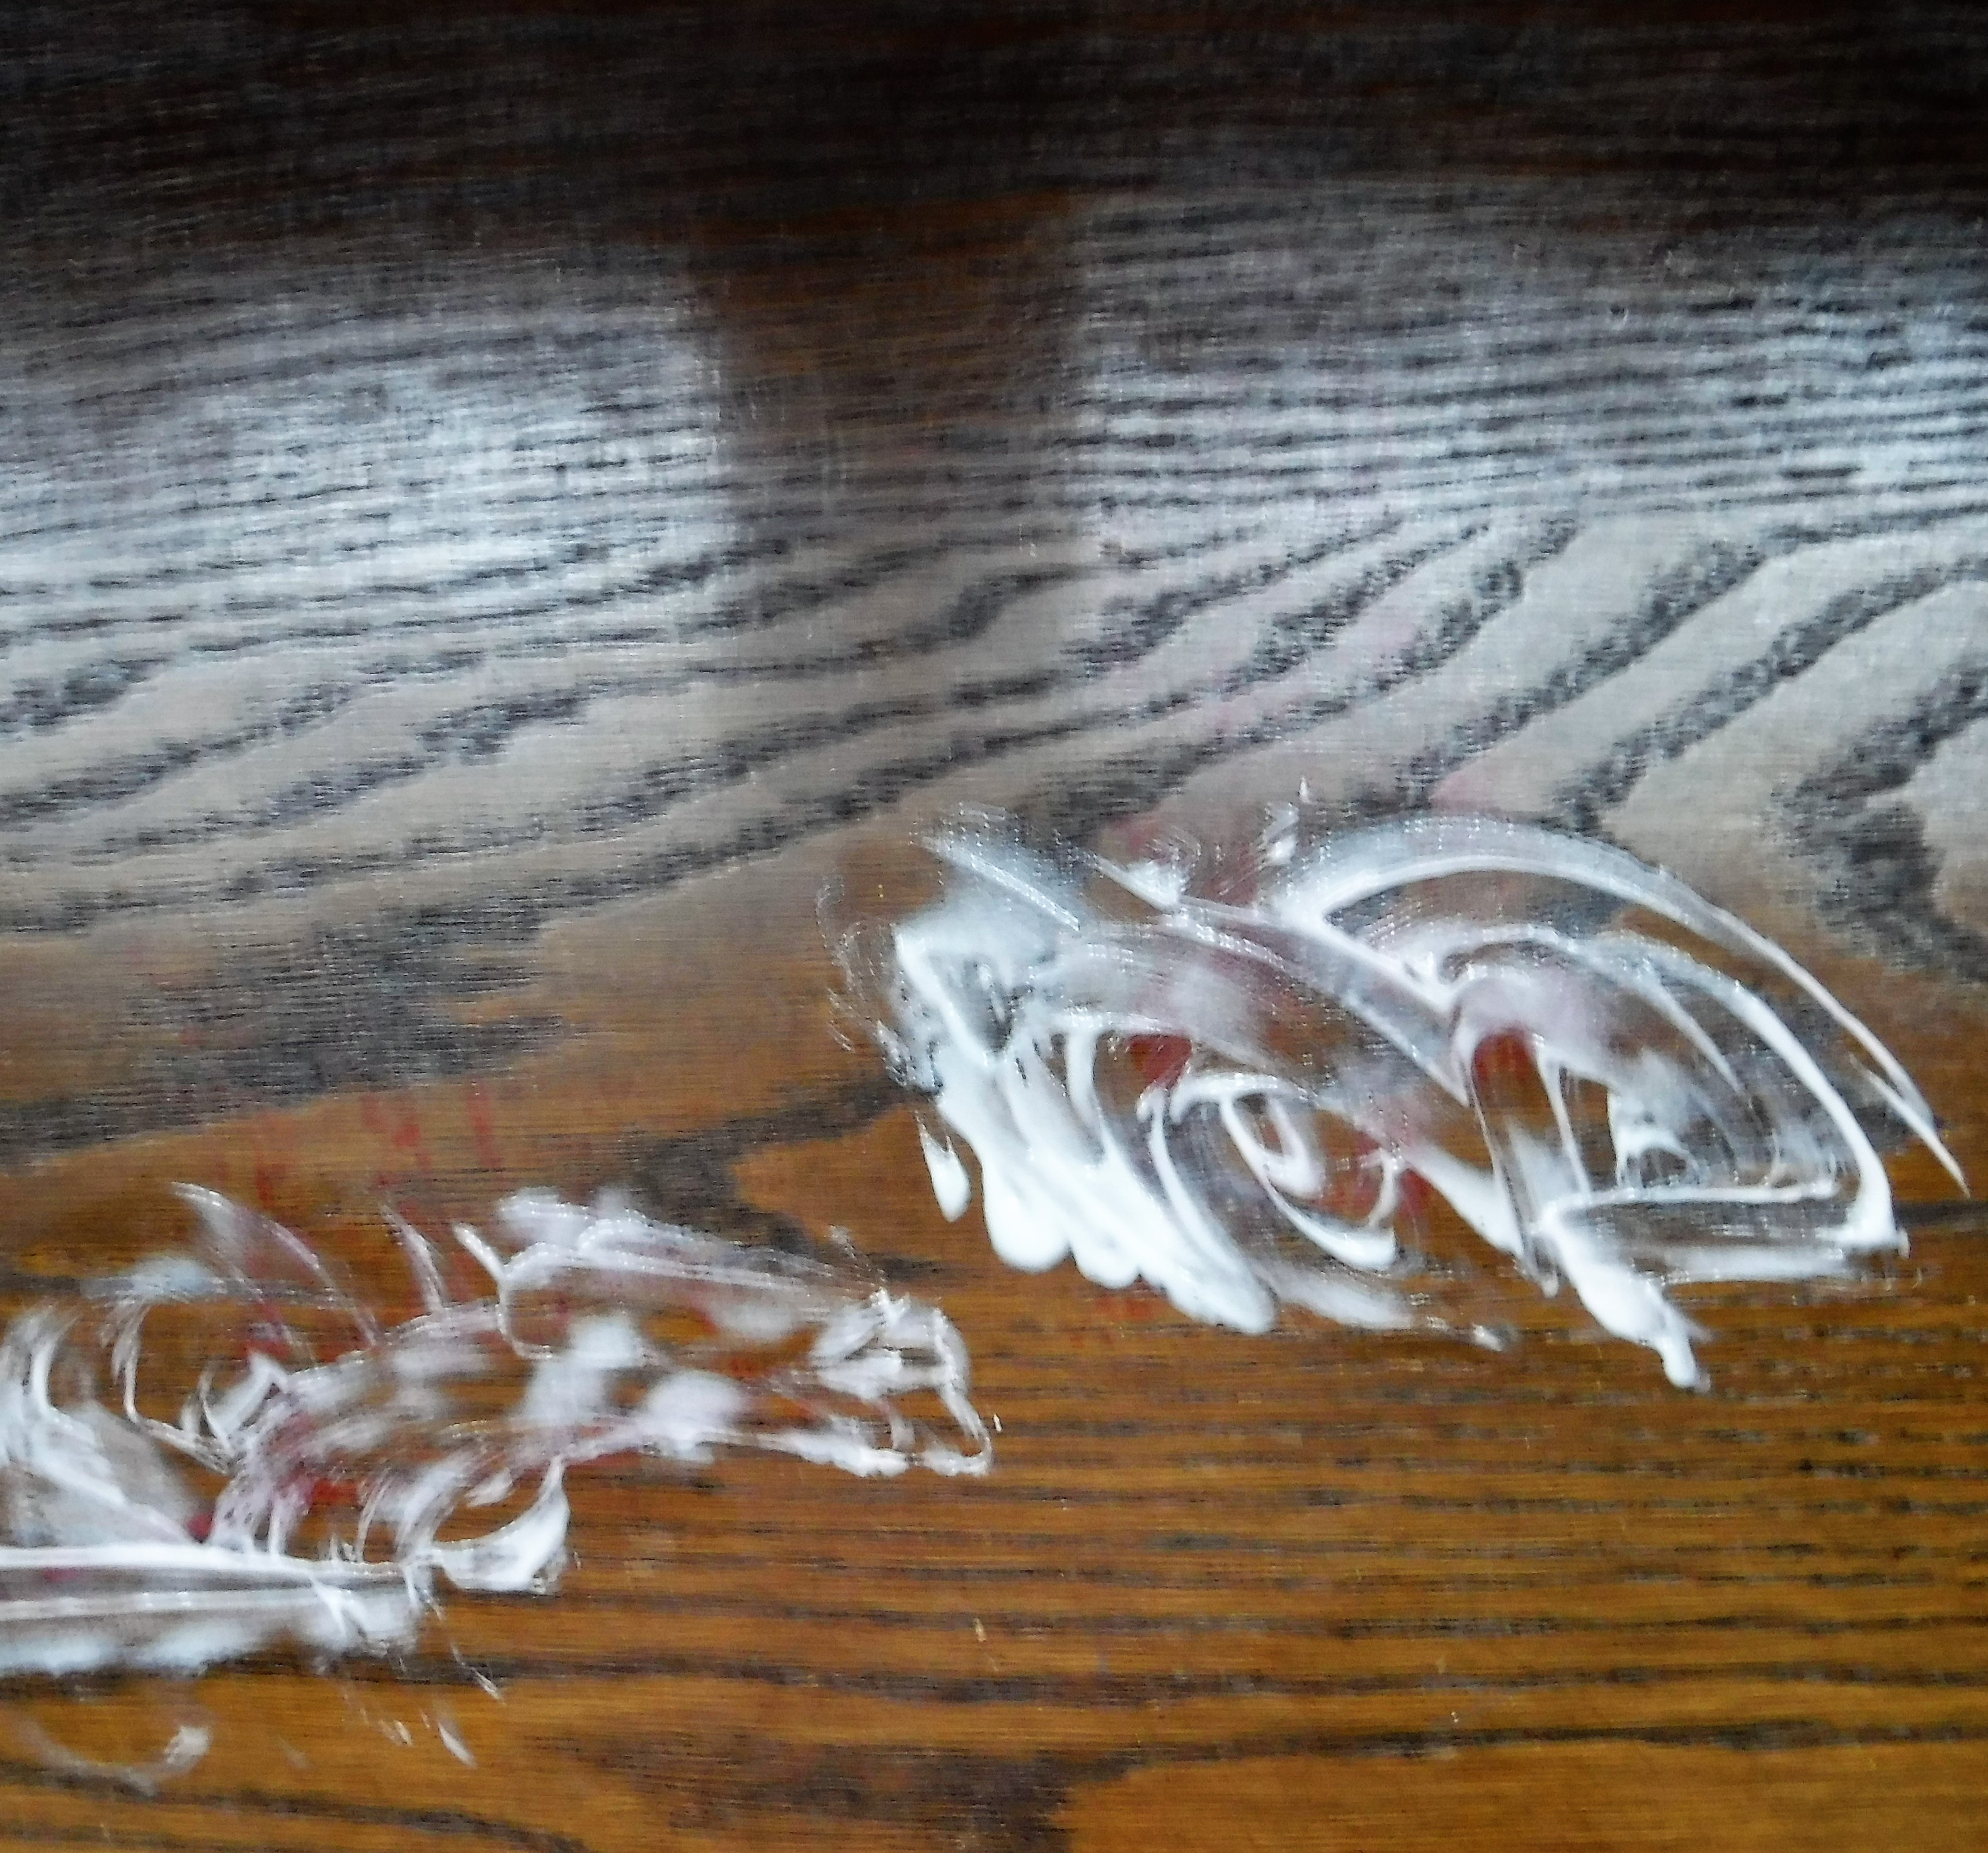
This week on the Home & Family show on the Hallmark Channel, I found a timely tip on how to remove markers from wood floors. In my case the markers bled through thin paper onto the wooden bench beneath the masterpiece-in-the-making.
Ordinary toothpaste, not the gel types, rubbed gently into the marker with a soft rag, will remove markers of all types, even the permanent variety. I needed to add a bit of dampness to my rag in order to remove all the pigment.
It worked! I buffed the area with a soft cloth to remove any excess moisture or toothpaste.
Hallmark’s Home & Family show has a good mix of recipes, household tips, home improvements, garden segments, pet rescue highlights, and craft projects. In my area the show is aired twice a day and is also available On Demand.
“It’s largely accepted that the original version of the familiar smiley face was first created 50 years ago in Worcester, Massachusetts by the late Harvey Ross Ball, an American graphic artist and ad man.” ~ Smithsonian Magazine
I’ve always loved smiley faces, they remind me of cartoon characters. Created in 1963, they’ve been around for most of my lifetime. The current emojis, especially the smiling face, have always reminded me of the smiley faces of my childhood.
FYI – “The first emoji was created in 1999 in Japan by Shigetaka Kurita.” ~Wikipedia
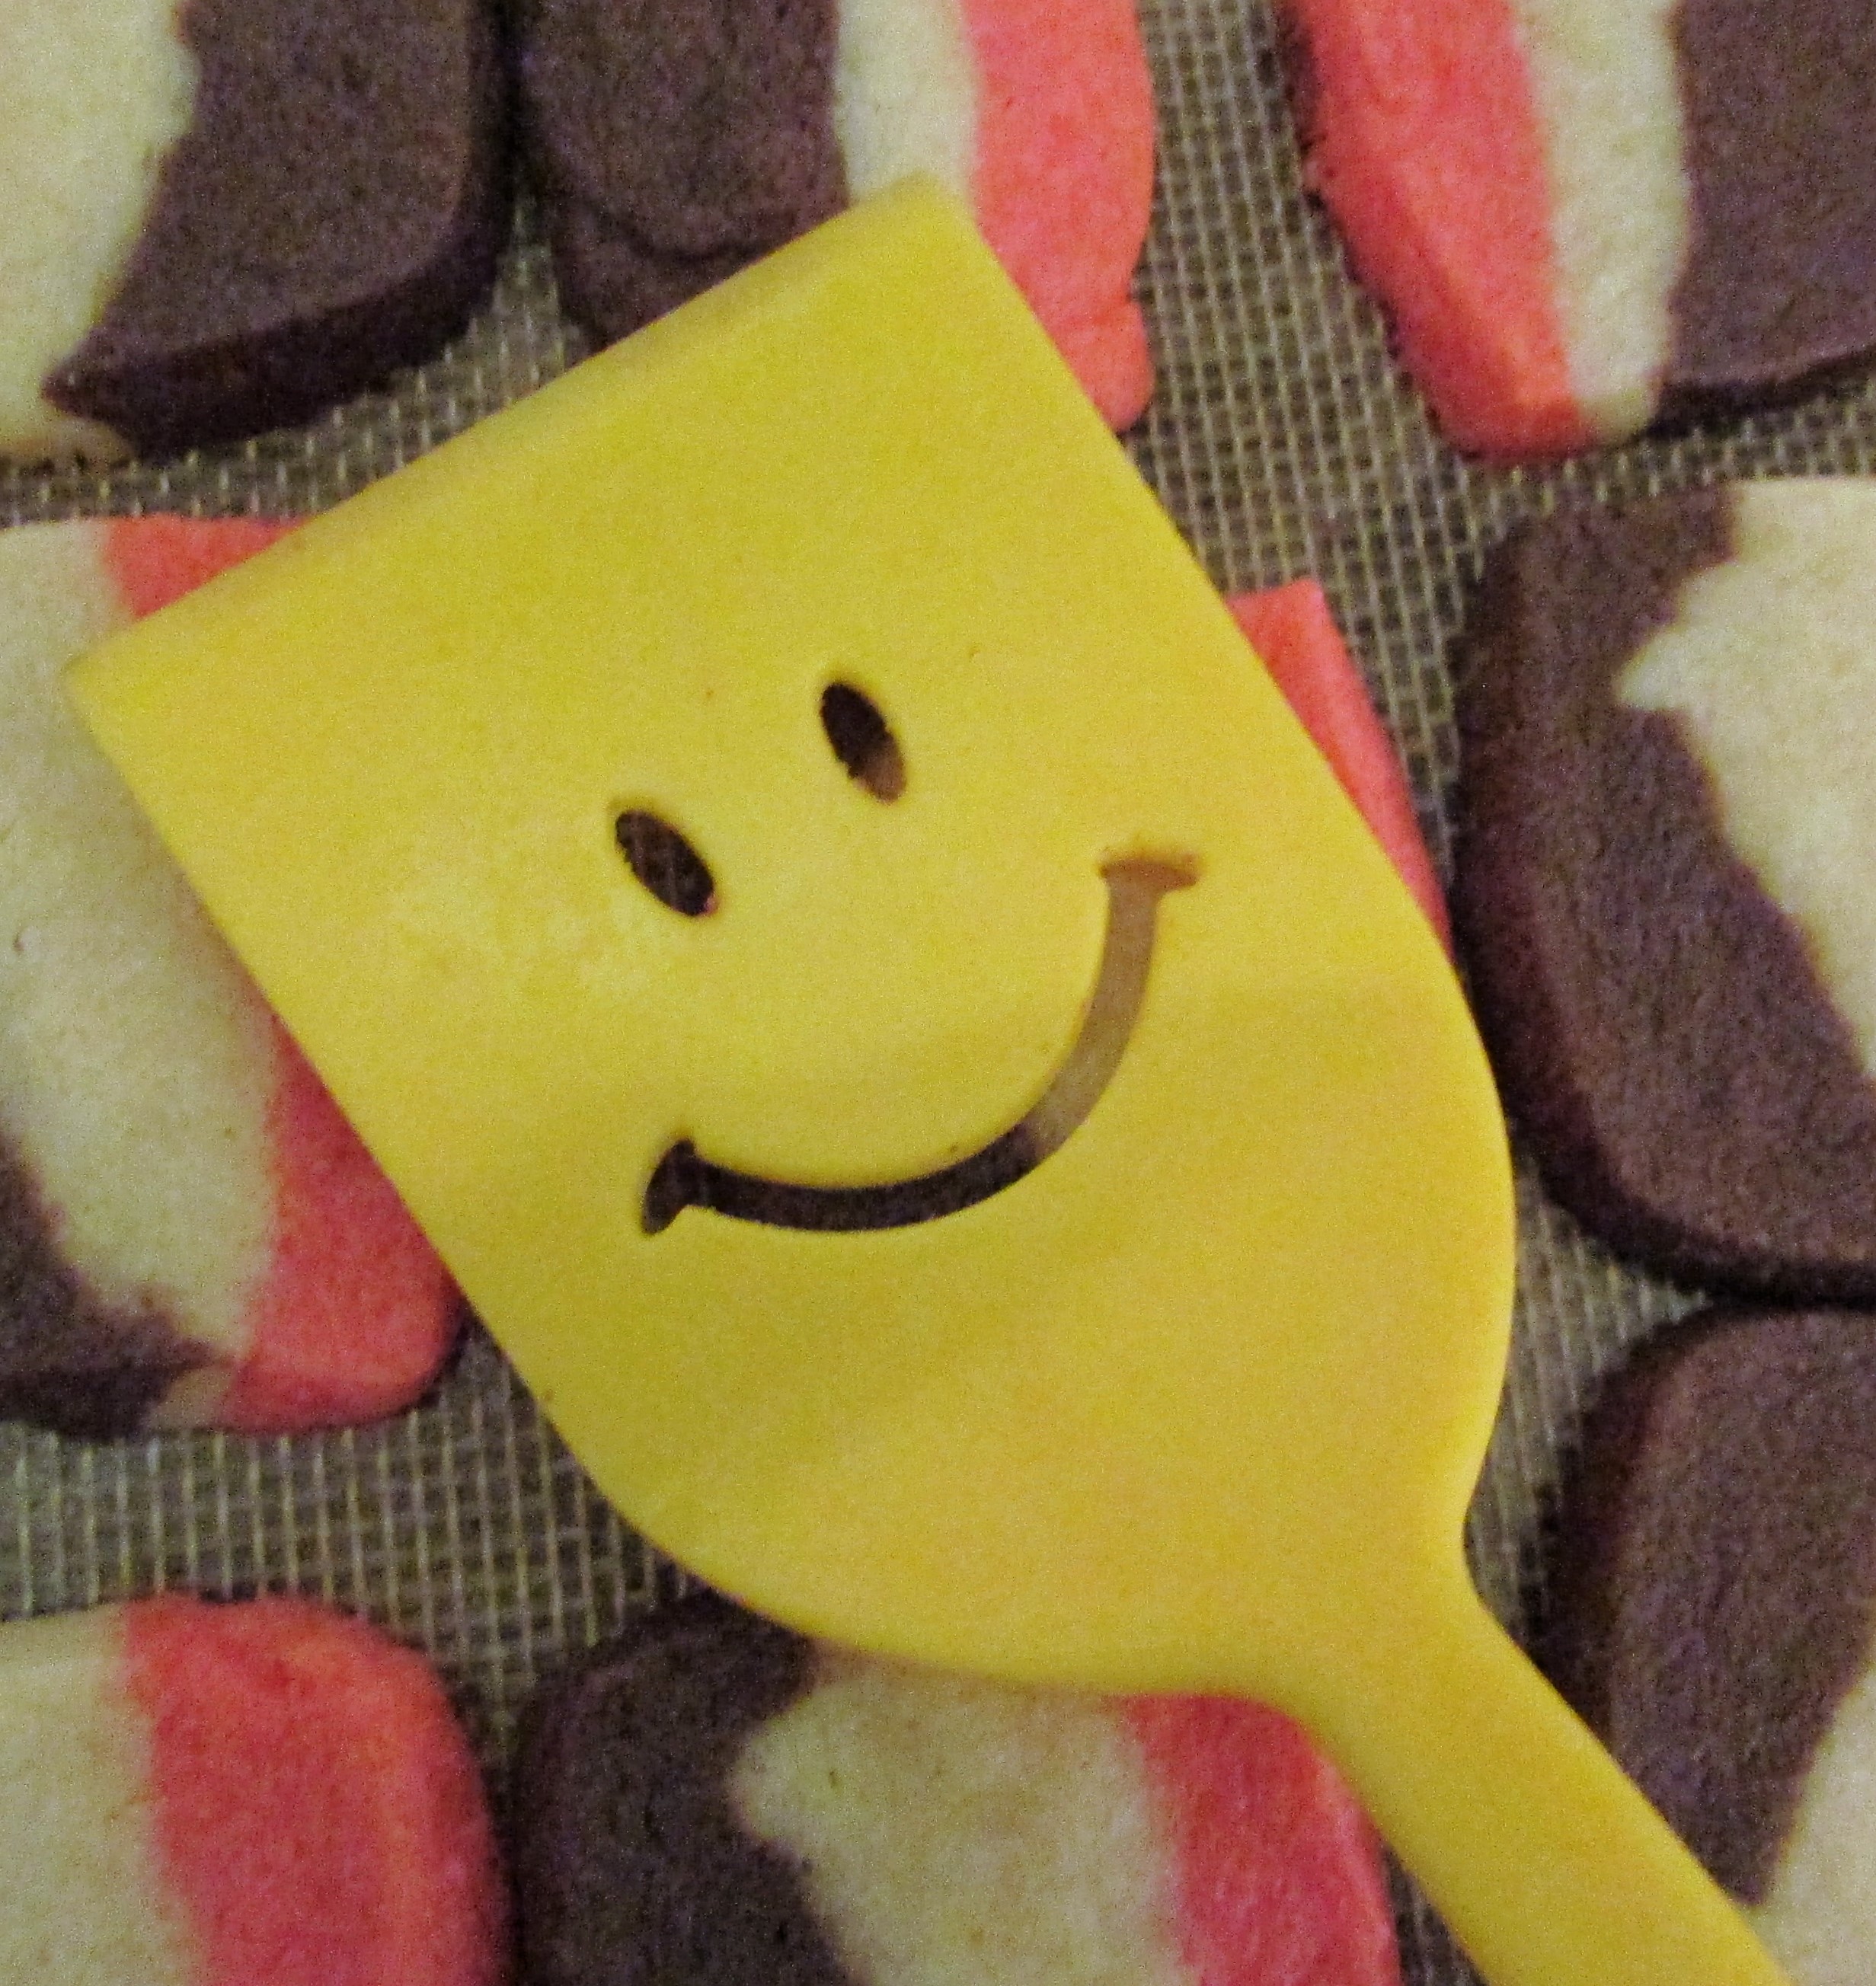
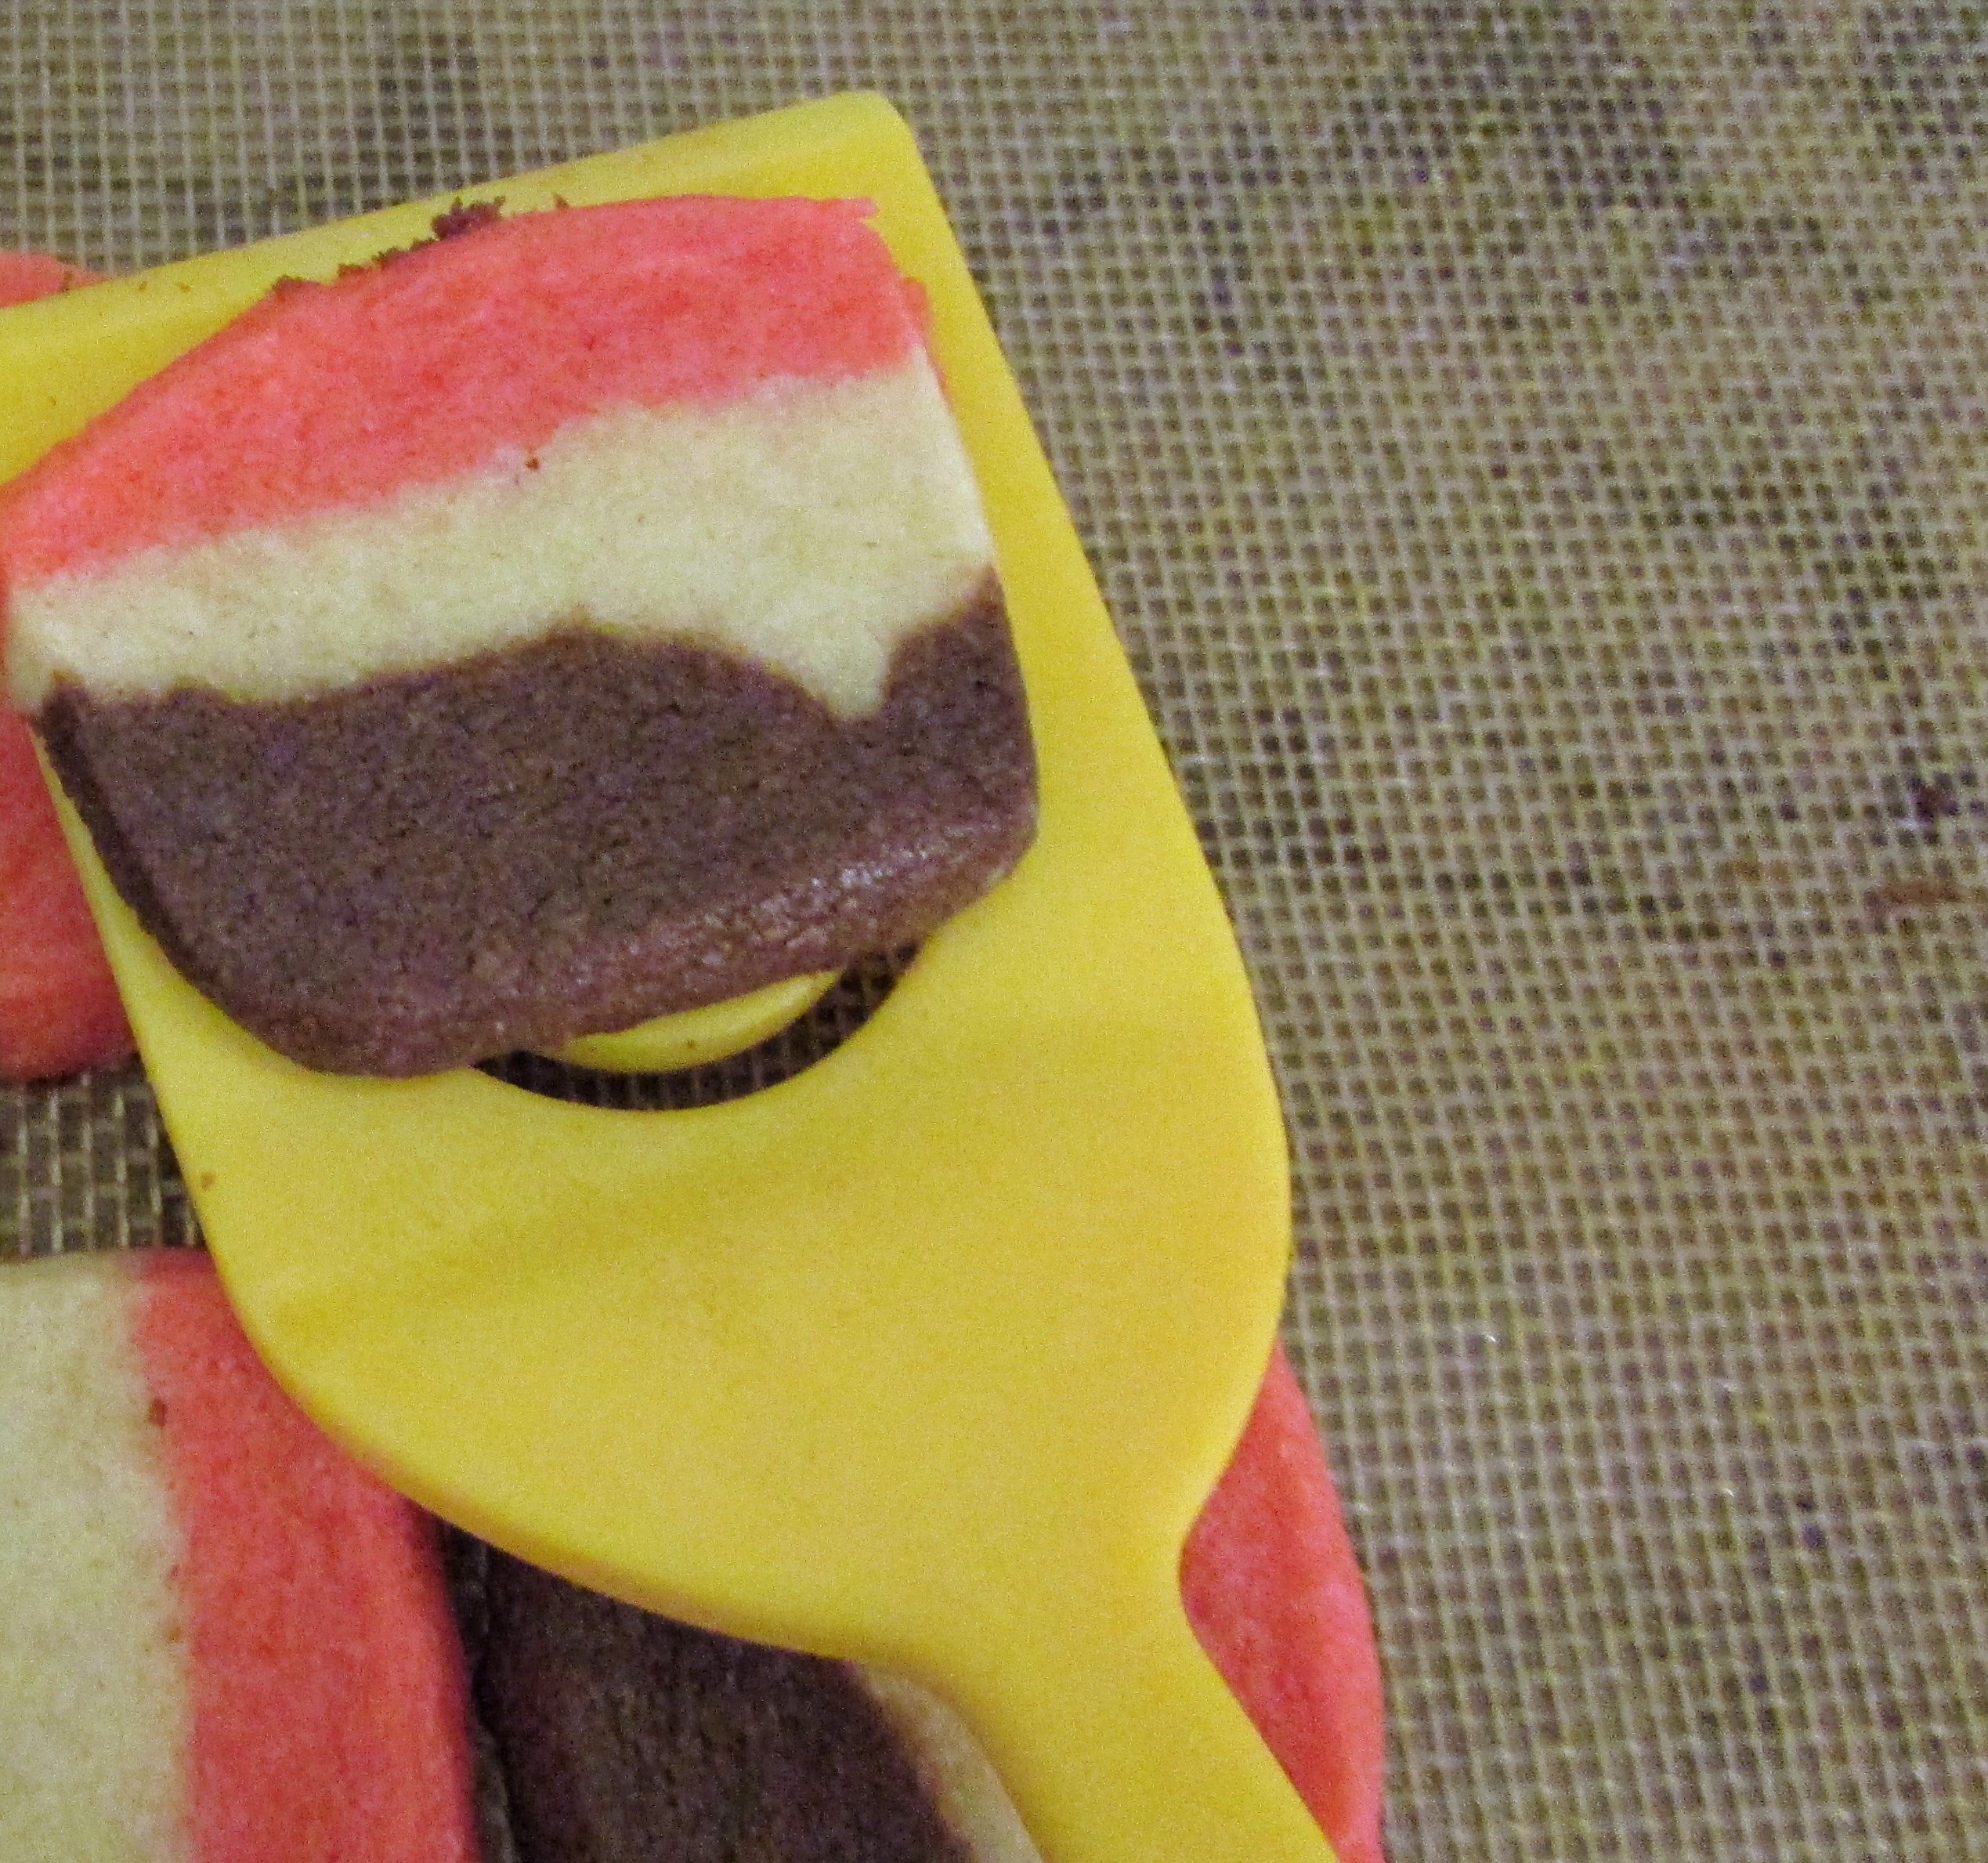
I baked almost all of my Christmas cookies for gift-giving over the weekend. It was rainy and dreary, a perfect day to hibernate indoors. I had all the ingredients on hand, and best of all, while shopping the outlet mall for gifts and stocking stuffers, I found the perfect spatula for removing the cookies from the baking sheet. My generation would probably say this spatula was based on a smiley face, a large percentage, if not all, of the younger generation would say it resembles an emoji.
The edge of the small spatula is angled, easily slipping beneath the warm cookies. I’ve had many cookies destroyed by overly large, blunt-edged spatulas. The smaller size of this smiley face spatula keeps its edges from ruining adjacent cookies when you scoop the cookie off the pan.
If you like the look of the Neapolitan cookies you can find a good recipe here:
I make these every year and change up the recipe a bit, leaving out the nuts and the almond extract. We have a grandchild with a tree nut allergy. The Neapolitans are amazing made without the nuts and flavoring…always a favorite.
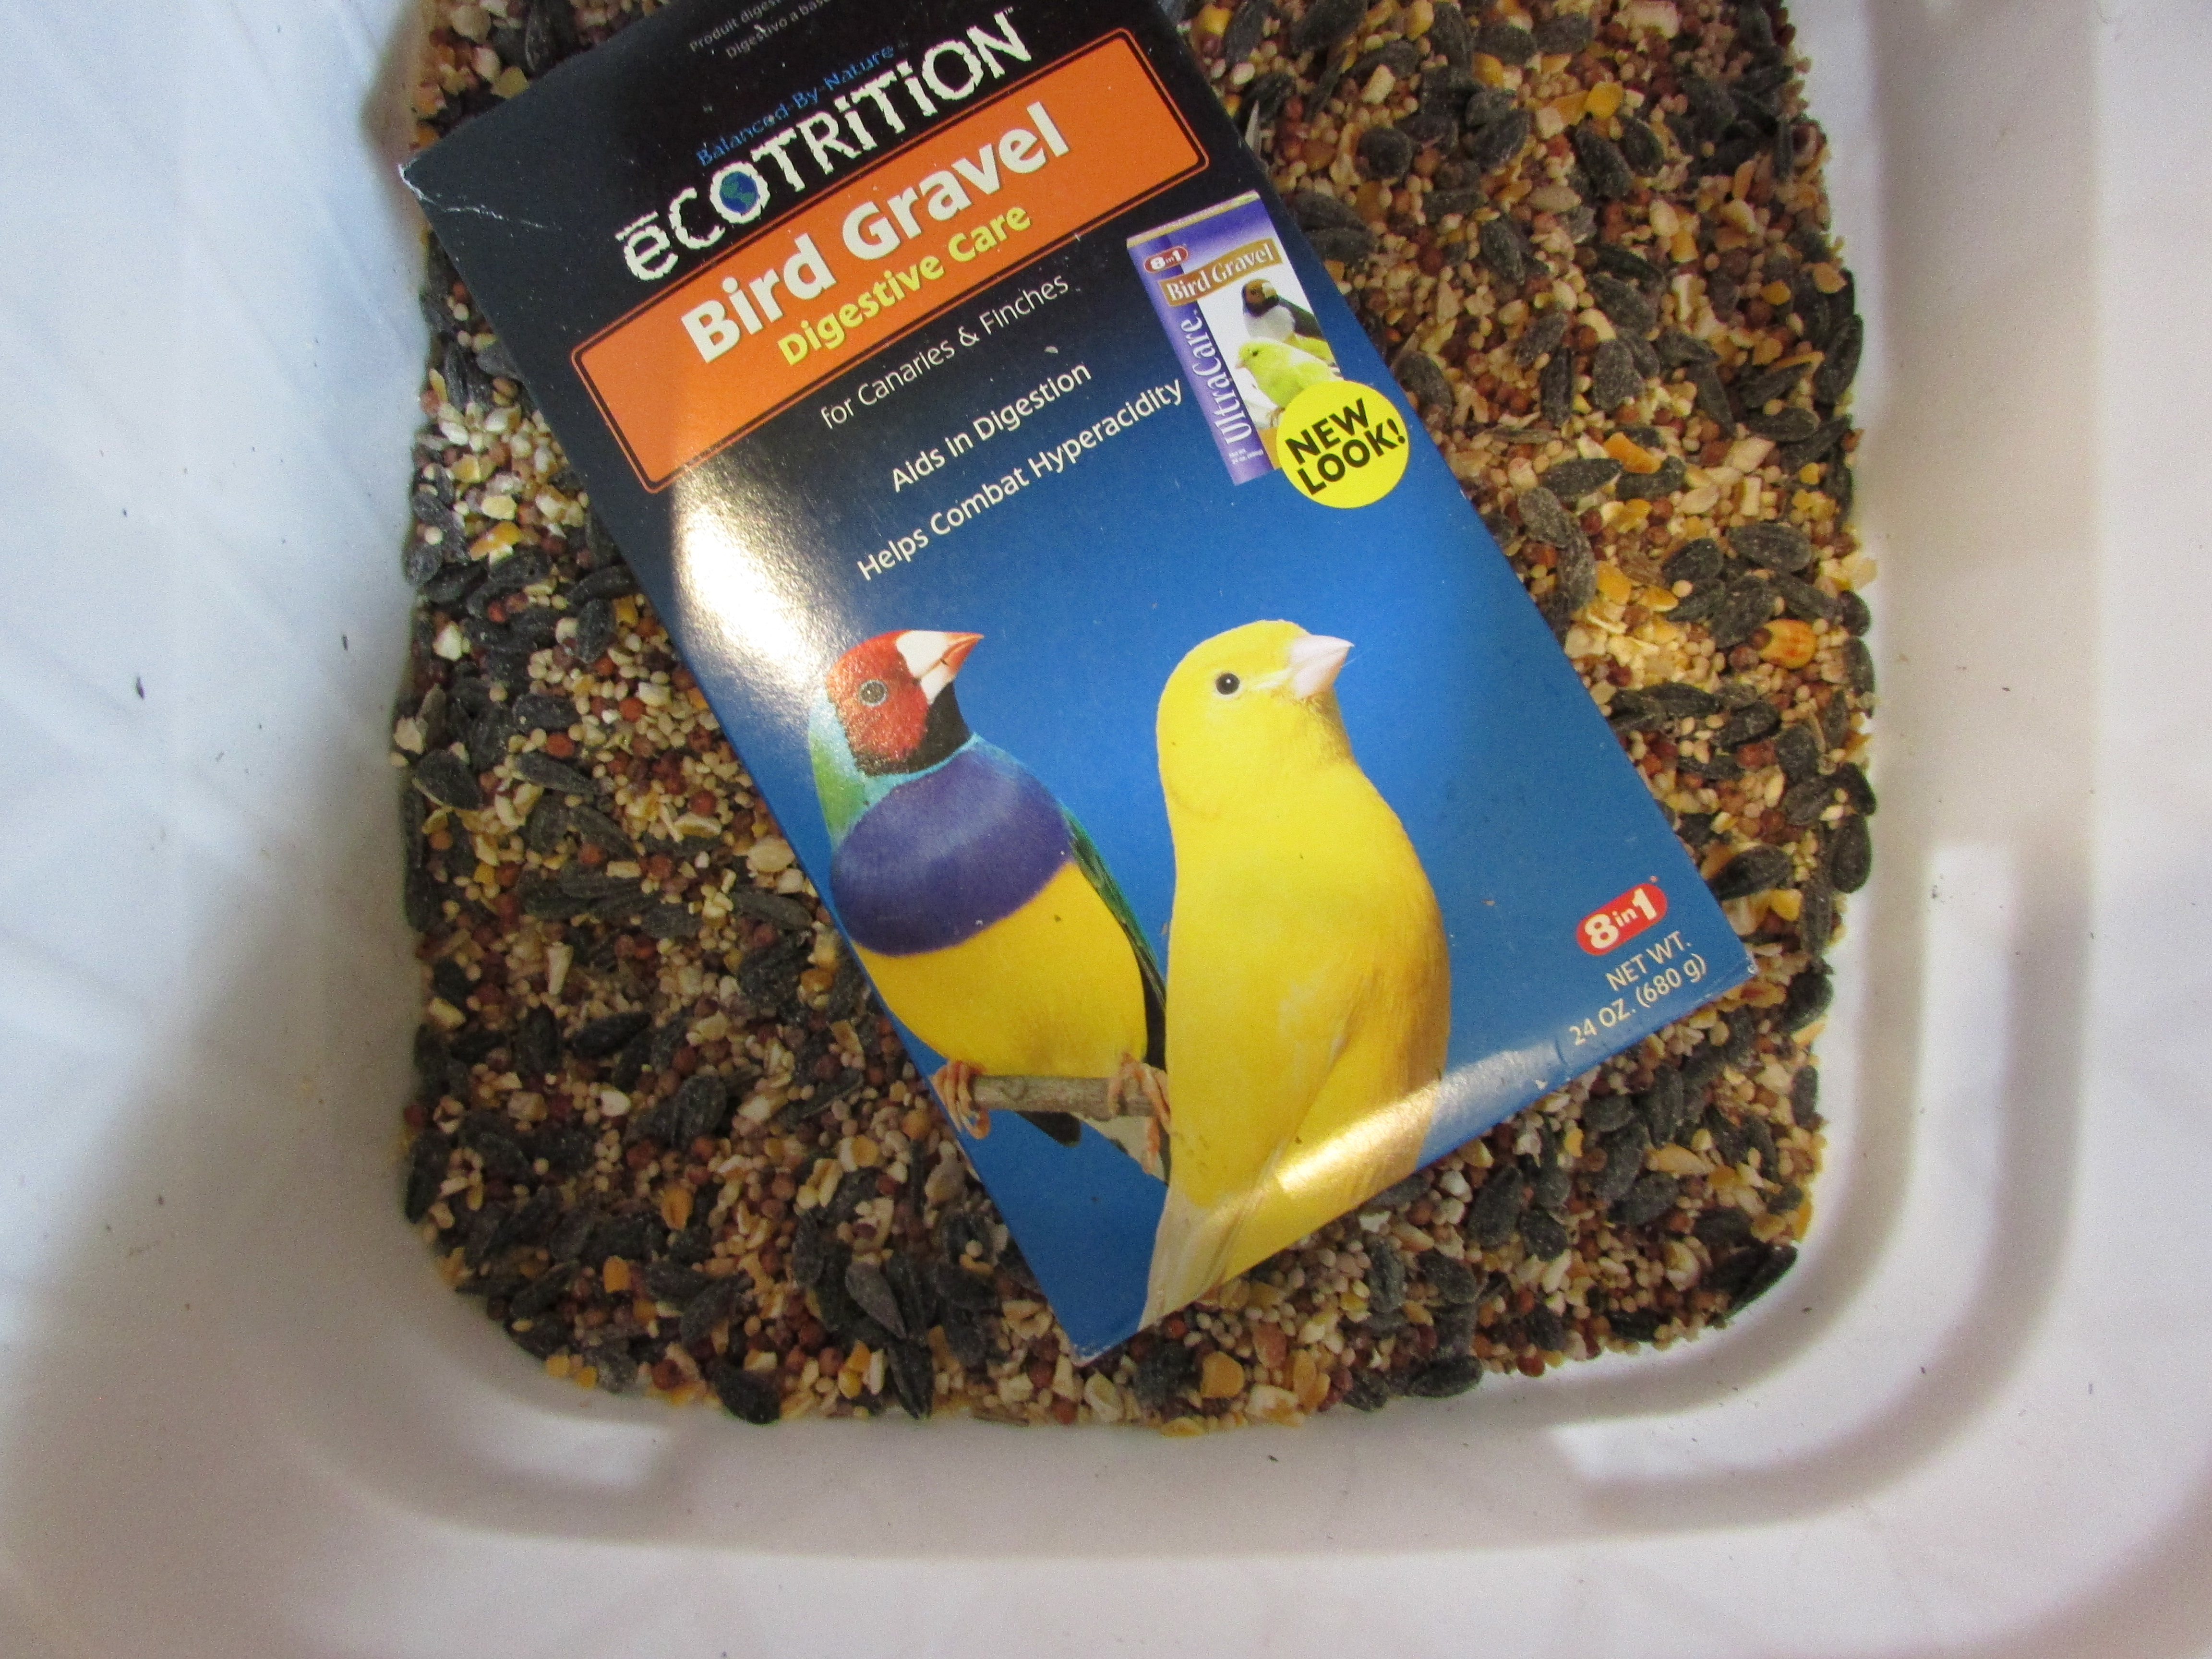
Today while running some errands I stopped at the local pet store and bought some bird grit. I don’t have pet birds, but recently was reminded while reading through Country Wisdom & Know How that birds are vulnerable to digestion problems when they can’t scratch up and ingest grit from the frozen earth.
“Grit is necessary for birds to grind the food they eat and for some mineral value. Offer ground oyster shell, sand or ground eggshell either alone in trays or mixed with seed or recipes." Country Wisdom & Know-How
We had snow yesterday, and while it is pretty and seasonal, it also makes life a bit harder for the backyard birds. When I fill the feeders I will add a bit of the grit to the tray. When the snow melts I’ll sprinkle a small amount beneath the feeders each day where the birds can easily find it.
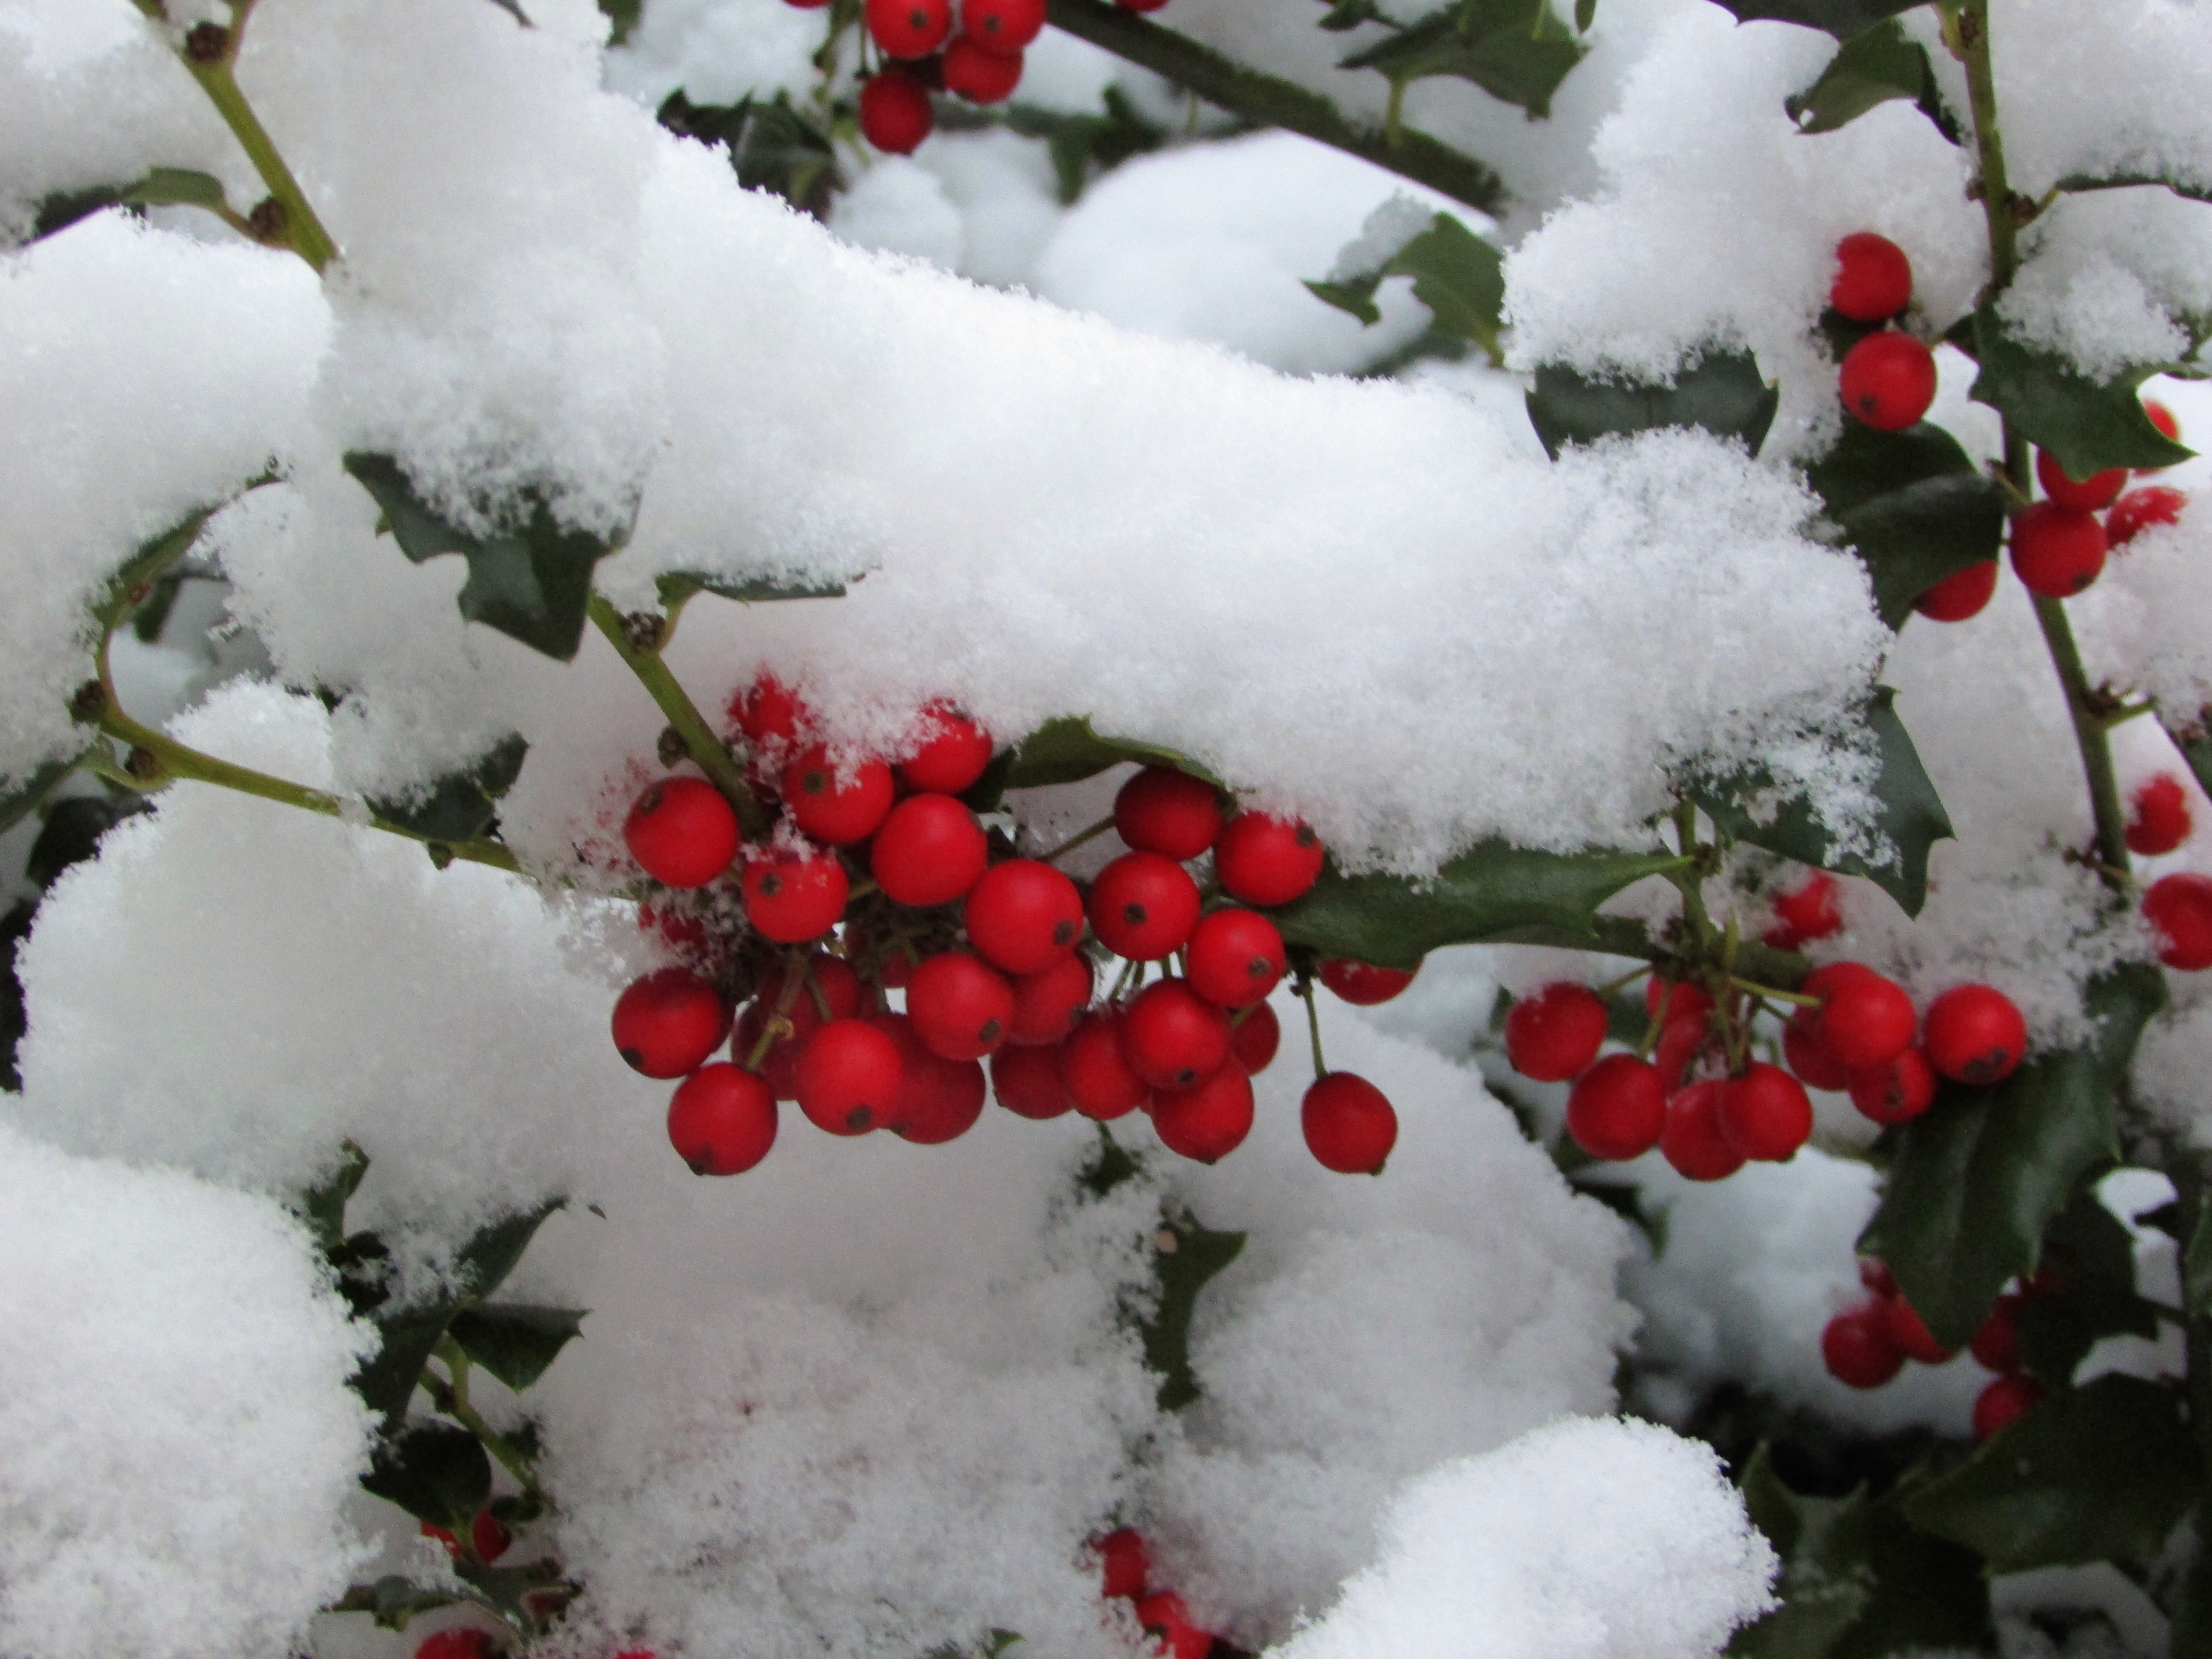
The first snowfall was pretty, but also makes me resigned to the long winter ahead. For those of you who, like me, enjoy standing in the garden eating peas right out of the pod, I’m posting a reminder about sprouts. I love sprouts. The batch above was especially delicious, although definitely odd in appearance, when I used them on hummus for lunch this week. The meal might look a trifle strange, but it is full of health benefits and a good percentage of your daily vitamins and minerals.
Amazingly, the sprouting seeds I used were purchased in 2015 from The Sprout House through Amazon. After three years almost all the seeds in the packet I chose to use still sprouted. The Sprout House offers an amazing variety packet that will last for months, if not years.
“There are tremendous health benefits from including sprouts in your diet: … Vitamin, such as A, B, C and E, and essential fatty acid nutrients increase in sprouting and minerals bind to protein, making them more easily absorbed. Sprouts alkalize the body and protect it from disease including cancer.” ~Longevity Wellness Worldwide
The Sprout House on Amazon. Here’s the link to the variety package I purchased in 2015. You can also find smaller products through Amazon offered by The Sprout House.