
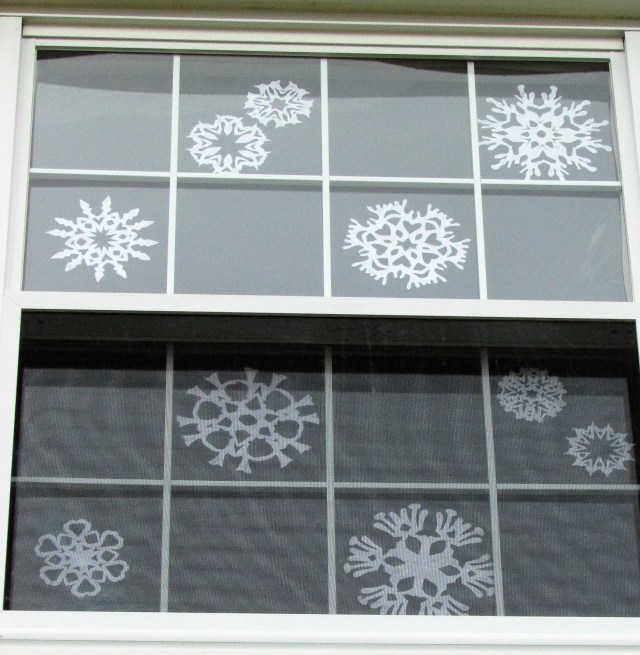
I have a brand new panoply of paper snowflakes on my window panes this year. Creating these inexpensive Christmas decorations is one of my joys. All it takes to make these lacy echoes of real snowflakes, is a bit of folding and snipping.

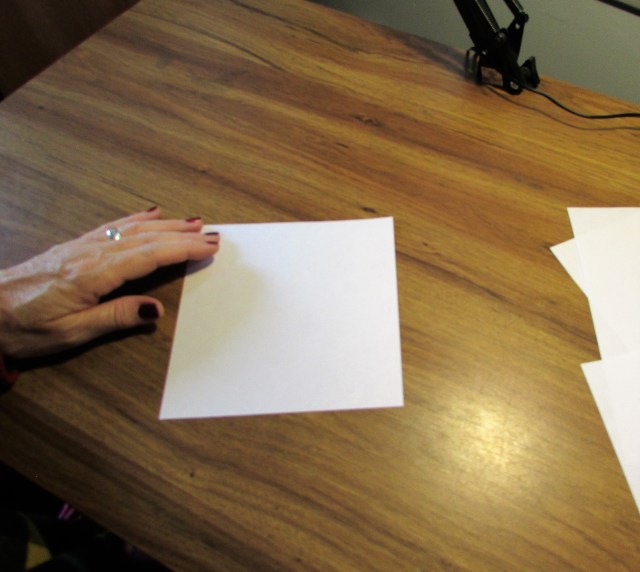
You will need squares of paper. Computer paper is a good choice for snowflakes. I use different sizes, eight, seven, six, five and four-inch squares. All of these sizes are fairly easy to fold and cut.
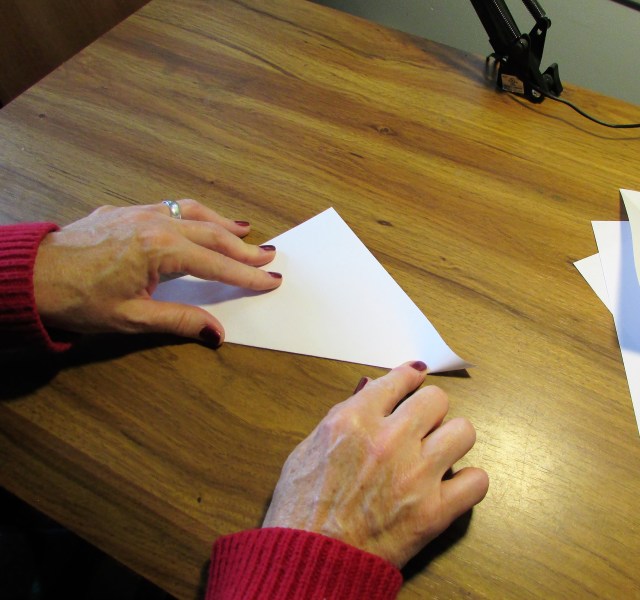
Fold the square into a triangle shape by matching catty-corners, or in more modern terms, opposite corners.
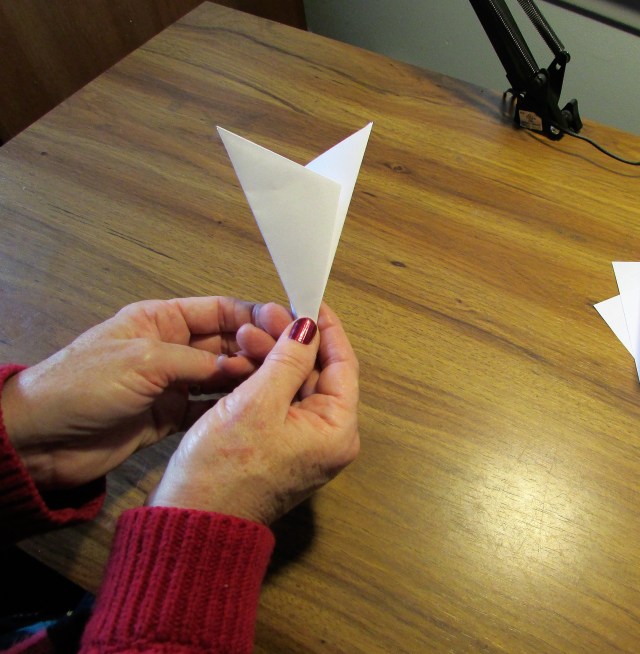
After the first fold is complete, using the corners on the long side of the triangle, fold the paper corner to corner once more.

This next part is a little tricky. Let the longer side of the triangle face away from you. Bring up the right corner and fold it about a third of a way from the middle. Turn the paper over and repeat this step. You will have an accordion folded piece of paper with two bunny-type ears if you have folded it correctly. If this step is confusing watching the video at the bottom of the post will help.


After I fold the triangle into this shape, I trim the ‘ears’ off leaving a cone shape. This does not have to be perfectly rounded, you will be cutting into it.

* Important * You must always leave a bit of the folded sides intact to keep the snowflake whole. Don’t worry if you accidentally cut one and have it fall to pieces…it’s only paper after all.
Begin cutting your snowflake. Try to use both rounded cuts and straight snips. The combination of round and straight will give your snowflake a natural look. After cutting, open up, and prepare to be amazed by your beautiful handiwork.
I like to place the finished snowflakes in the windows of the house. Because the indoor heat causes condensation, the next step is especially important if you are using them on windows.
Iron the snowflakes between sheets of waxed paper. The layer of wax deposited on the paper will create a barrier against moisture. If you are using a good iron, protect it and the ironing board. Cover the board with an old cloth and use layers of newspaper beneath and over the waxed paper before you begin. The heat of the iron will penetrate the layers of newspaper and melt the wax onto the paper. You might need to change the newspaper several times. I use the waxed paper only one time, use a new sheet, top and bottom, for each batch of snowflakes. * Important * Have a lot of newspaper on hand if you are using a good iron.
I remove the waxed paper immediately after ironing by pulling the two pieces apart. The snowflakes are ready to glue to your windows.

Glue??? Yes, you read right. I recommend Elmer’s Disappearing Purple School Glue. Unless you want to spend hours and hours peeling and scraping tape residue from your windows, use a washable glue stick. A glue stick does leave a bit of residue when you take down the snowflakes, but it’s easy to remove with a wet rag. A spray of window cleaner and you would never know glue had been on your windows.


Pretty Little Snow Flakes…………..Oh Ho, Ho I Love You………………Ooh Hoo Hoo!!
LikeLiked by 1 person
Thanks…they bring me joy when I see them from the inside and outside.
LikeLike
Oh! I love the glue stick idea! Thanks.
LikeLiked by 1 person
Holly, for years I taped these to my windows…seriously, it is a chore and very tedious to pick tape off of windows. The glue stick will stick, but all it takes is swishing a wet rag over it, waiting a moment or two, and off it comes with the next wipe. Thanks for the comment.
LikeLike
Lots of tape scraping here too!
LikeLiked by 1 person
The edges of the snowflakes usually tear when I remove them, but since I cut them for just the one season, it doesn’t matter to me.
LikeLiked by 1 person
✌ Amazing & Awesome
Shiva
🌷
LikeLiked by 1 person
They are fun to make…try a few. Thanks for the comment…it’s appreciated.
LikeLiked by 1 person
Kathy,
The snow flakes are beautiful and just perfect for the season. Perhaps its snowing there.
Your nails are painted so beautifully that I am quite ashamed of my unpainted stubbed nails and such a beautiful color too.
Third, who photographs your hands as they do crafts ?
Susie
LikeLiked by 1 person
Hi Susie, I had put on nail polish for my grand-daughters birthday on Sunday, and realized how awful my hands usually look, and decided at least for December to keep them nice. Do you see how short they are…it’s because I do so much with them, my nails just won’t grow. It is supposed to snow next week…maybe. I have a tripod that I bought from Amazon for a very good price. I can attach my camera to it, turn on the video, and go. I used to prop my camera on all kinds of things, ladders, tables piled with books, etc., to take photographs while I worked. This tripod is wonderful. Thanks Susie. I’ve missed you…were you away?
LikeLiked by 1 person
Kathy,
Didn’t you know / I thought I had told you- I went a-visiting my daughter- a visit long overdue. To her college and stayed a few days there, to try to regain some lost ground/trust/love.
By God’s grace, all went well.
Susie
LikeLiked by 1 person
I don’t think I knew that Susie, but if you did mention it, it was lost in things going on here…husband having surgery…the loss of a cousin…a lot of stressful situations. I am so glad it went well. I missed you. ❤
LikeLike