
Imagine growing hundreds of seedlings for your garden without the need to tend them indoors. It’s almost like magic! Winter Sowing is the answer to hands-off seedling success. I’m illustrating my steps to winter sowing with step by step photos. You can find amazing articles throughout the web and videos on Youtube if you need more information. I noticed there is even a Facebook group for Winter Sowing now. Today, I sowed and put my first container outdoors for the 2019 growing season. I planted beets from a dollar store packet that only cost 25 cents. I thickly sowed the seeds to take advantage of both greens and beets. Today in the supermarket one large beet was considered a bunch and was selling for $3.49. Outrageous! Winter Sowing is the brainchild of Trudi Davidoff. Detailed information and links on beginning winter sowing can be found here: Winter Sown

I’ve saved milk cartons in the basement for months.
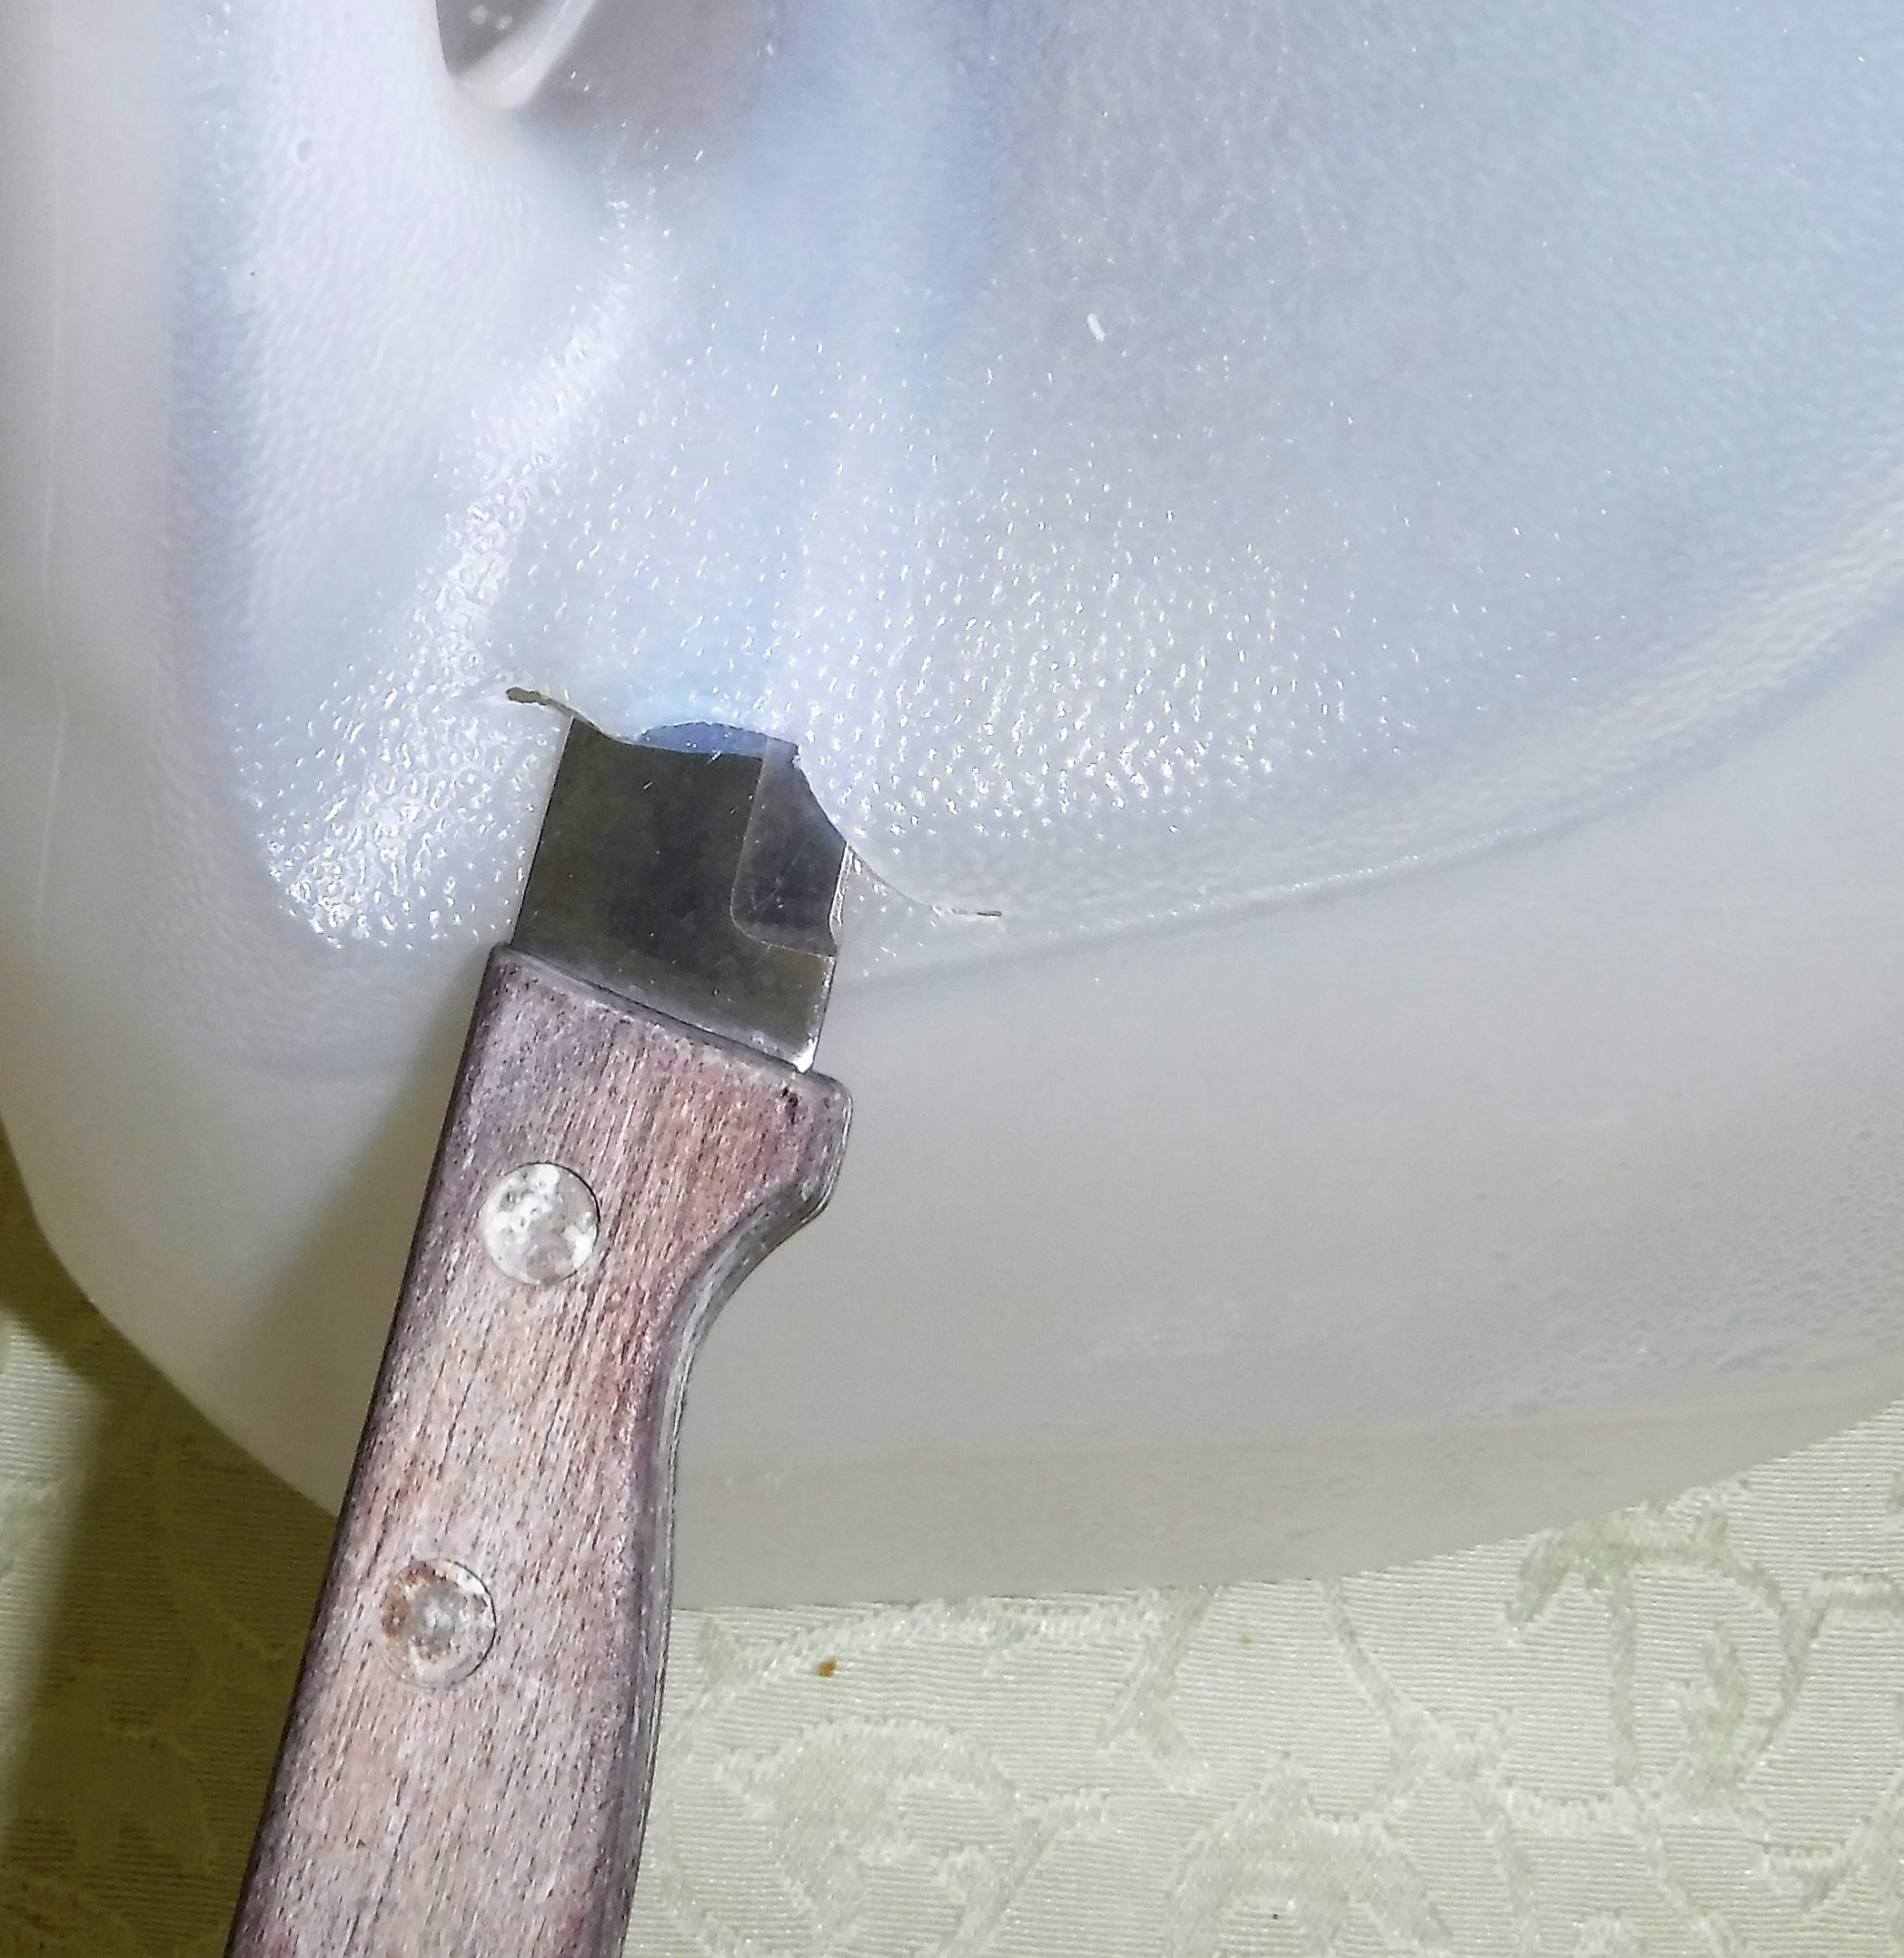
Begin by inserting a paring knife into the carton 3-4 inches from the bottom, near the handle.

After I make a small slit with the paring knife I cut around the bottom with scissors.

Stop before you cut all the way through, leaving a bit of carton near the handle to join the top and bottom. This makes taping the carton shut easier.

I place the bottom of the carton in my kitchen sink over the drain. I push my paring knife through the carton bottom in four spaced out spots.
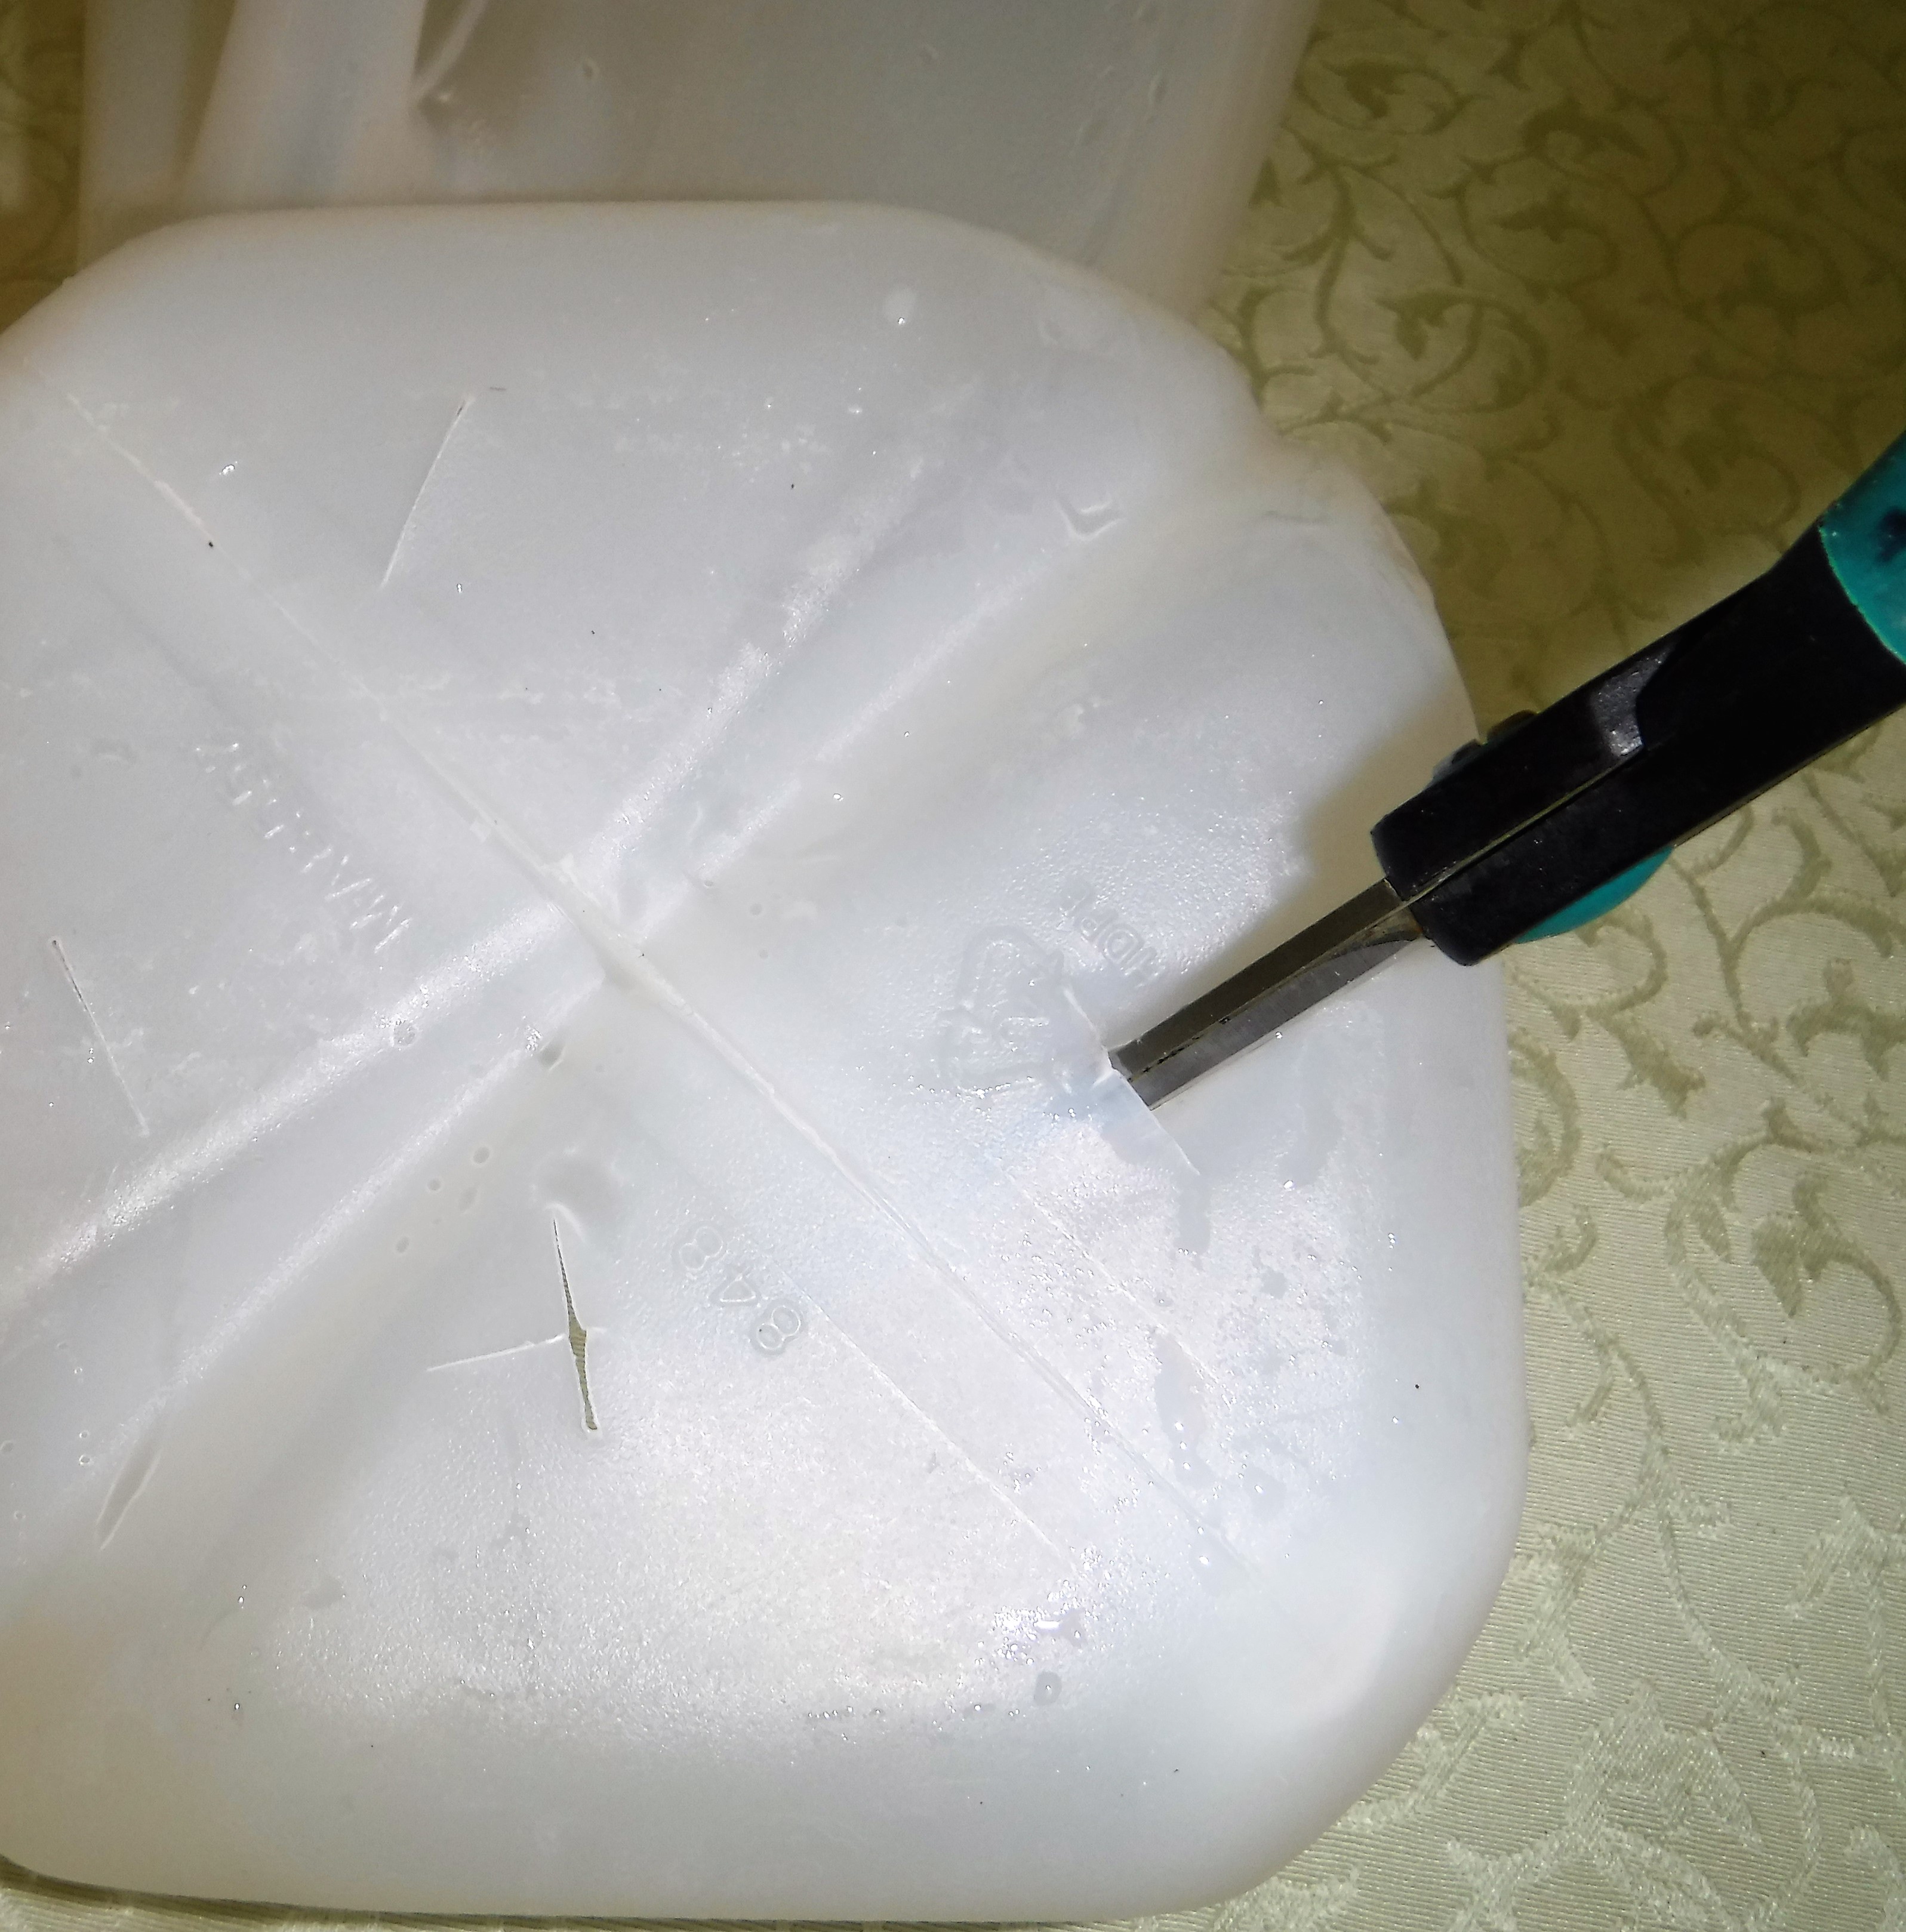
I insert the scissors in the slits and twist. This creates four large drainage holes. In the past I used a hot screw driver to make holes, but this process is easier and you don’t inhale toxic fumes from the melting plastic.

I fill the bottom of the carton with 1 1/2 inches of sterile organic potting soil. On top of the potting soil I add an equal amount of organic seed starter soil.

I water this until it is soaked and then let it fully drain.

I sow my seeds and cover with a thin layer of seed starter. If I keep the top layer very thin it will usually wick up water from the layer of seed starter soil beneath it.

I label the top with permanent marker. I have to keep a close eye on the labeling. The letters will fade in just weeks. It’s vital to reapply the marker when the letters lighten or I’ll be guessing as to which seedling is what. Tape the edges together with duct tape and place outside in a sunny spot. The wet soil in the carton bottom has always kept my cartons grounded, even in windy winter weather. I will remove the cap later today or the seeds might become too hot in warmer weather. I usually don’t quit my winter sowing madness until every spare milk carton is filled. You can find lists of which plants do best started this way on the Winter Sowing site. Happy Gardening!


I’ve just sown some beans in 5 ltr water bottles and a blog on the way too 😀
LikeLiked by 2 people
That would work great too! I’m brainstorming planting some seeds of milkweed in this way, but without a bottom. They don’t like to be transplanted. I’ve got my thinking cap on…updates to follow. I’ll be watching for your post. Thanks for stopping by and the comment. Happy Planting!
LikeLiked by 1 person
This is awesome. I will have to check the link as I wonder if our weather is too extreme to do this. We do get below zero some nights!
LikeLiked by 1 person
I think you can do it anywhere. I’ve had good luck with it in past years…last year I didn’t do much with it, and wished I had when I was taking care of too many seedlings in the house.
LikeLiked by 1 person
This is amazing. I’m not tempted, because I know my limits, but I enjoy reading about the things you do.
LikeLiked by 1 person
Thanks Anne.
LikeLike
Nice way to sow seeds. I just planted some seeds to in my small garden.
LikeLike
It’s such a joy when things sprout!
LikeLike
True 🙂
LikeLiked by 1 person
Kathy,
You are one for resourceful thinking and thinking out of the box and one of the greatest practitioners of ‘ where there is a will, there is a way”, in other words, a positive thinker.
How would you transplant these little ones onto your garden plots ?
Would you follow up on this post and show us how these babies progress ?
Susie
LikeLike
I will do that Susie. There might be some posts way back on planting them out in Spring. They are just like transplants you buy or grow indoors. The wonderful exception is you don’t have to harden them off before planting them out.
LikeLiked by 2 people
Pingback: Pleasures – Warm Day Walkabout/Emerging Spring – MINDING MY P'S WITH Q
Pingback: Planting – Updates – MINDING MY P'S WITH Q
Pingback: Phlutters – Small Miracles Part II – MINDING MY P'S WITH Q