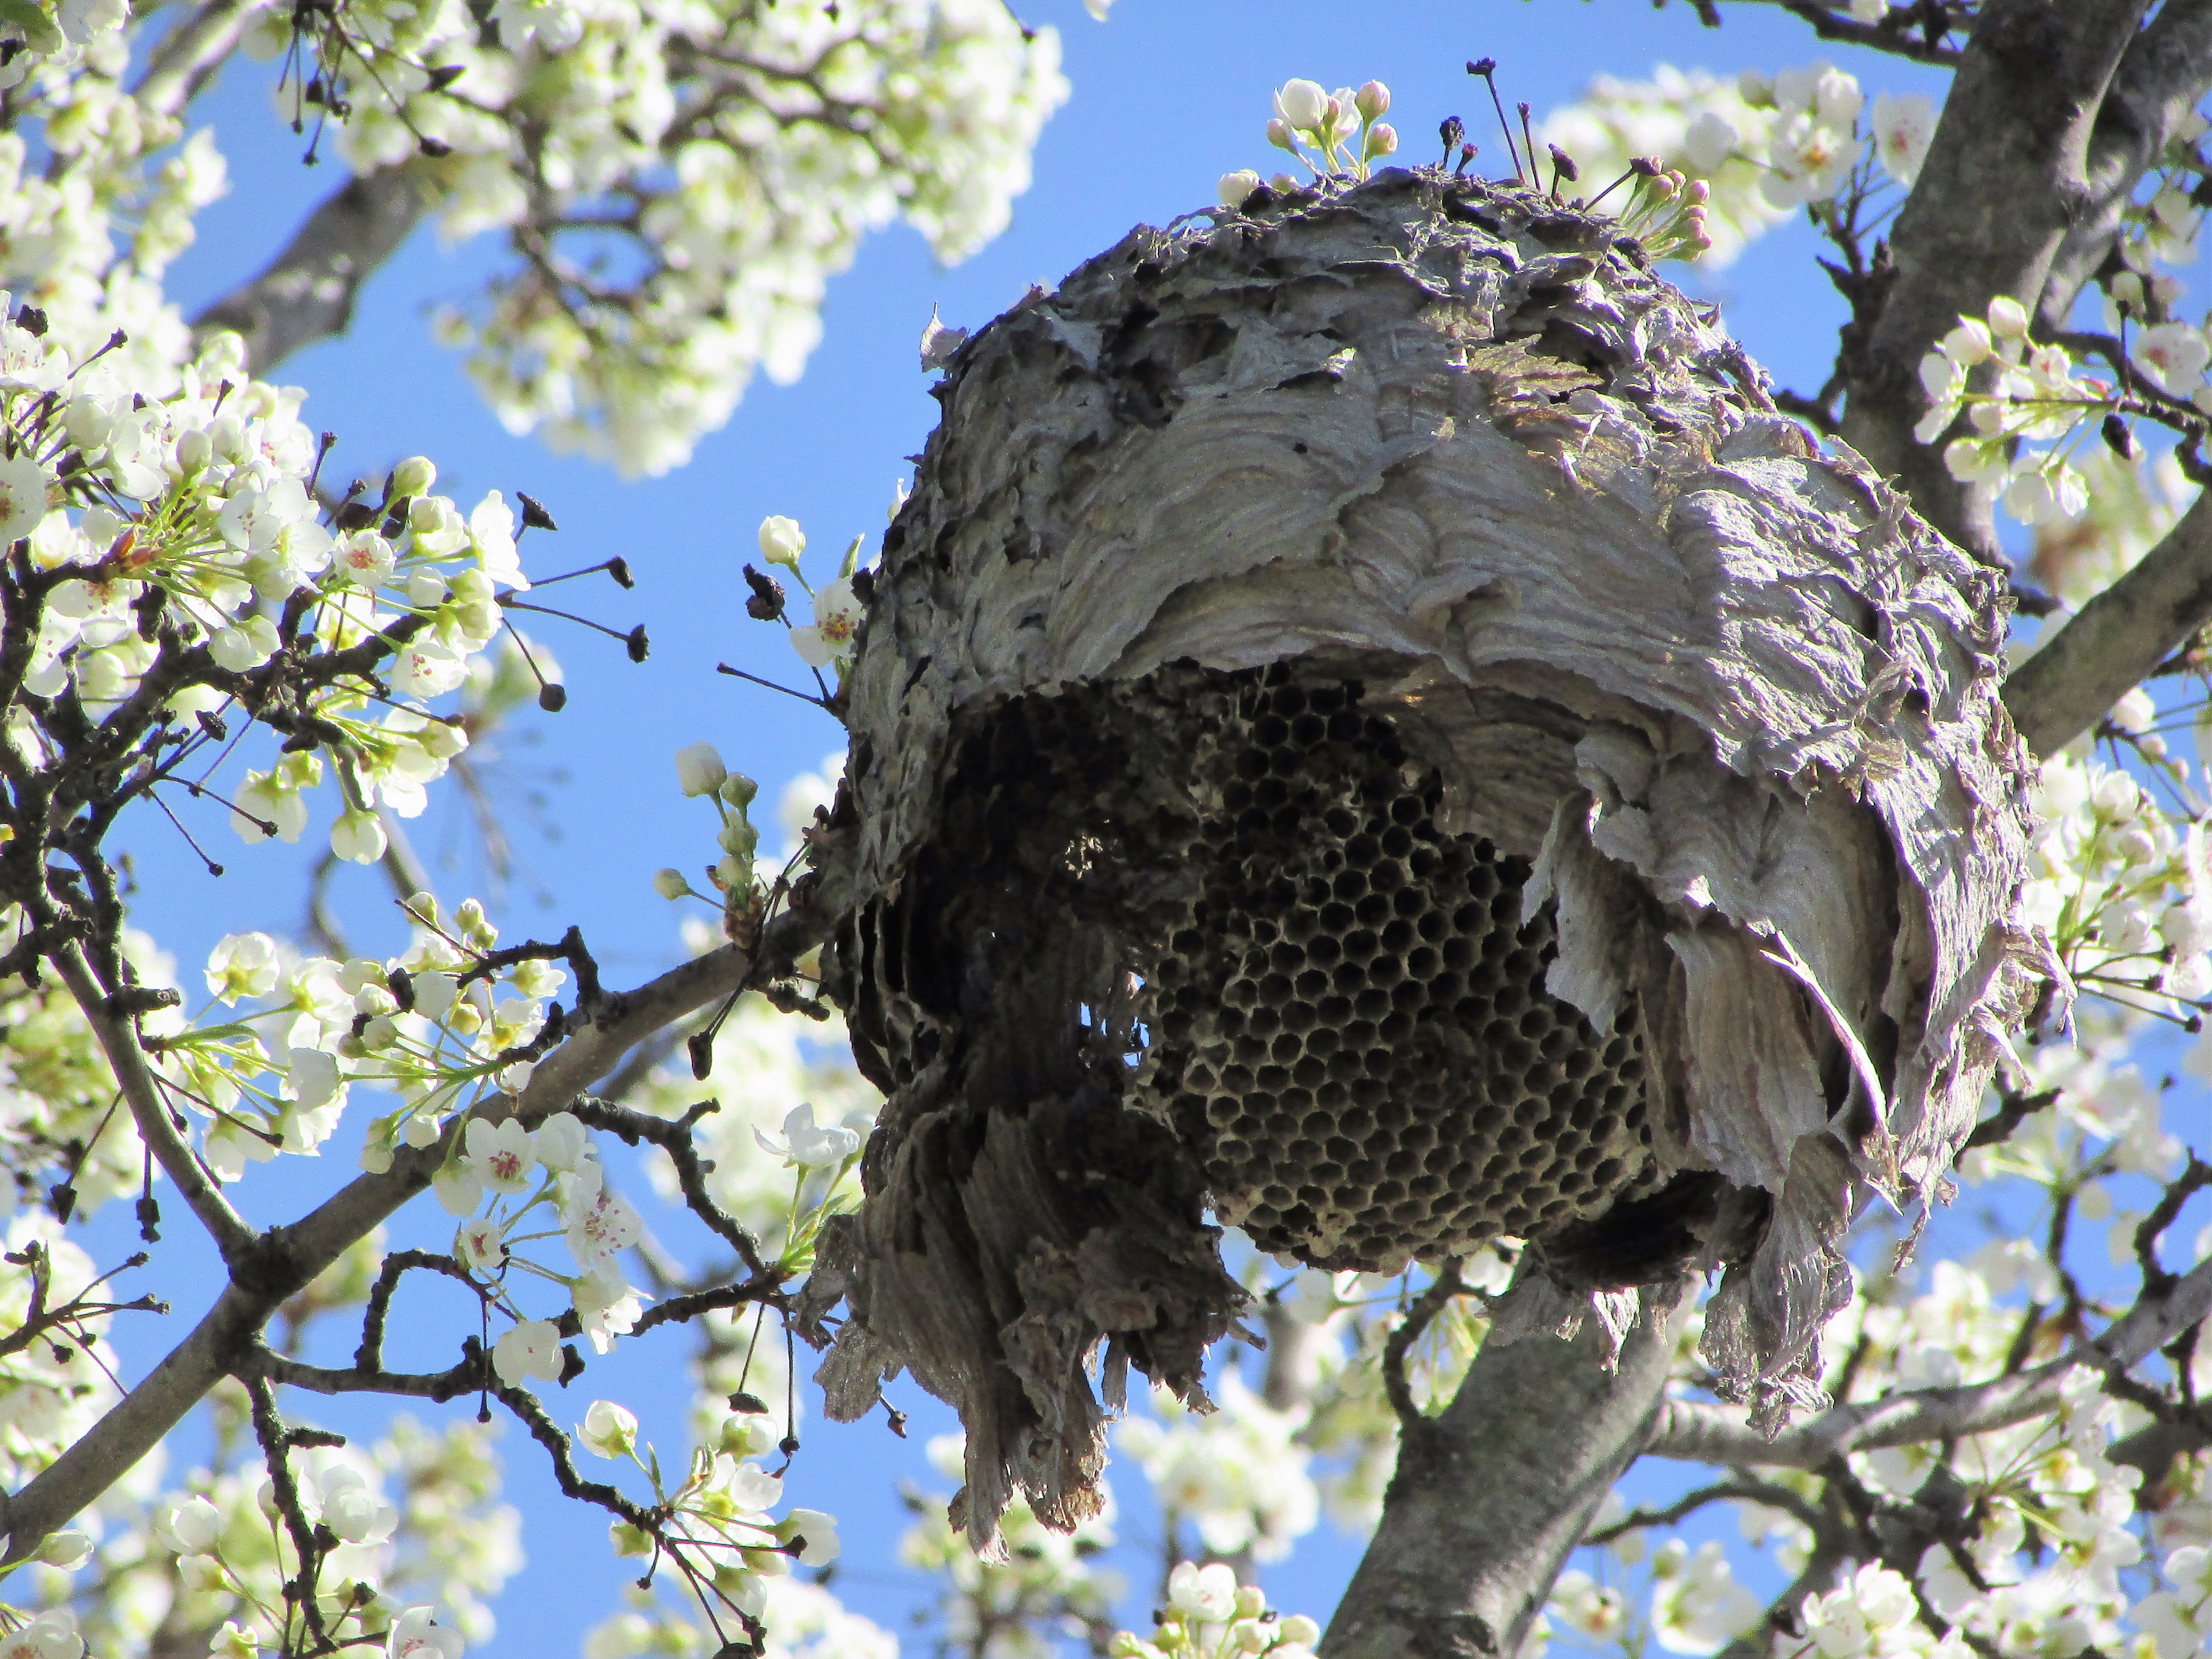
“”Where, O death, is your victory? Where, O death, is your sting?” ~ I Corinthians 15:55
Yesterday, I came upon this hornet’s nest, shattered, abandoned, with all its threats defeated. It seemed appropriate that it was being overtaken by the new life of the blossoming Spring trees; a perfect visual analogy to remind me that the sting of death was defeated by the Resurrection of Christ Jesus for all eternity. Hallelujah! He has risen!
“Therefore, since the children share in flesh and blood, He Himself likewise also partook of the same, that through death He might render powerless him who had the power of death, that is, the devil” ~ Hebrews 2:14
Spring-cleaning my blog has yielded a few posts that should be bumped back toward the front of the blog. Here’s a good one for this time of year, preventing/treating damp-off disease.
The fluffy white substance on the surface of the potting soil is a seed sprouter’s nightmare. Damping Off is lethal to newly sprouted seedlings. Since I am trying to be as organic as possible this year, I wanted a remedy that would not break my resolve so early in the season. I searched the web and found some odd fixes: lemon jello, ground up moss sprinkled on soil, cinnamon & sand. There were also two remedies I decided were the most logical for me to use. One idea was weak mixture of hydrogen peroxide and water, and the other was a weak solution of chamomile tea. I opted for the chamomile tea.
I went to my local grocery store and picked up a box of tea with ingredients of chamomile alone. There were many other mixes, some with lemon, which probably would also work, but I was taking no chances. When I arrived home I boiled water, steeped one bag in two cups, and let it cool down. I used an old hair spray bottle to treat the affected area. These bottles produce small droplets. A bottle with a heavier spray might beat the small seedlings into the soil, killing them even quicker than the damp-off disease.
Twelve hours later there is no sign of the damp off disease on the soil. To read more check out this forum on Gardenweb. Gardenweb Damping-Off Forum Responses.
Coleus update: Almost all of my initial coleus plantings have four leaves. It’s time to begin potting them up into individual cups. I use Solo brand 3 oz cups. the seedlings are potted up in Miracle Gro organic potting soil as the growing medium. The coleus are already beginning to show amazing colors. This time of year is very exciting as I watch my sprouts and seedlings develop.
As I ‘Spring Clean,’ I will come upon good posts that are buried in the archives and need to be brought forward. This repost is a good one. Many of you have probably seen variations of it on the web. I love this recipe. You can make it as inexpensive ($3.00, using dollar store ingredients) or expensive as you choose, using top-notch lotions. I have just mixed up a new batch of this cream. I would say mine is a medium-priced edition. I used dollar store vaseline, Avon Intensive Care lotion, and another leftover lotion I had on hand. I wish I had begun to use it sooner. Within a few days my dry, winter-weary feet felt smooth again.
As Sandra Lee says, “Semi-Homemade.”
1. Gather Supplies: Big Mixing Bowl, Mixer, 8 oz Baby Lotion, 4 oz Vitamin E Cream, 4 oz Vaseline. (As you can see if you check out the blog recipe at bottom of post, I halved the ingredients they suggested)
2. Scoop out Vitamin E Cream and Vaseline into mixing bowl. Measure out 8 oz of baby lotion.
3. Beat until the mixture resembles light whipped cream. (This step took less than a minute)
4. Scoop into jars.
5. Slather on dry heels and hands. Even my husband liked it. I love it! Next time I will make the full batch. The hardest part was gathering up the jars and getting the cream into the narrow mouths.
Here is the original blog recipe in case you want to check out this one too. Enjoy!
I’ve begun pressing flowers again now that the weather has warmed and early wildflowers and foliage are emerging.
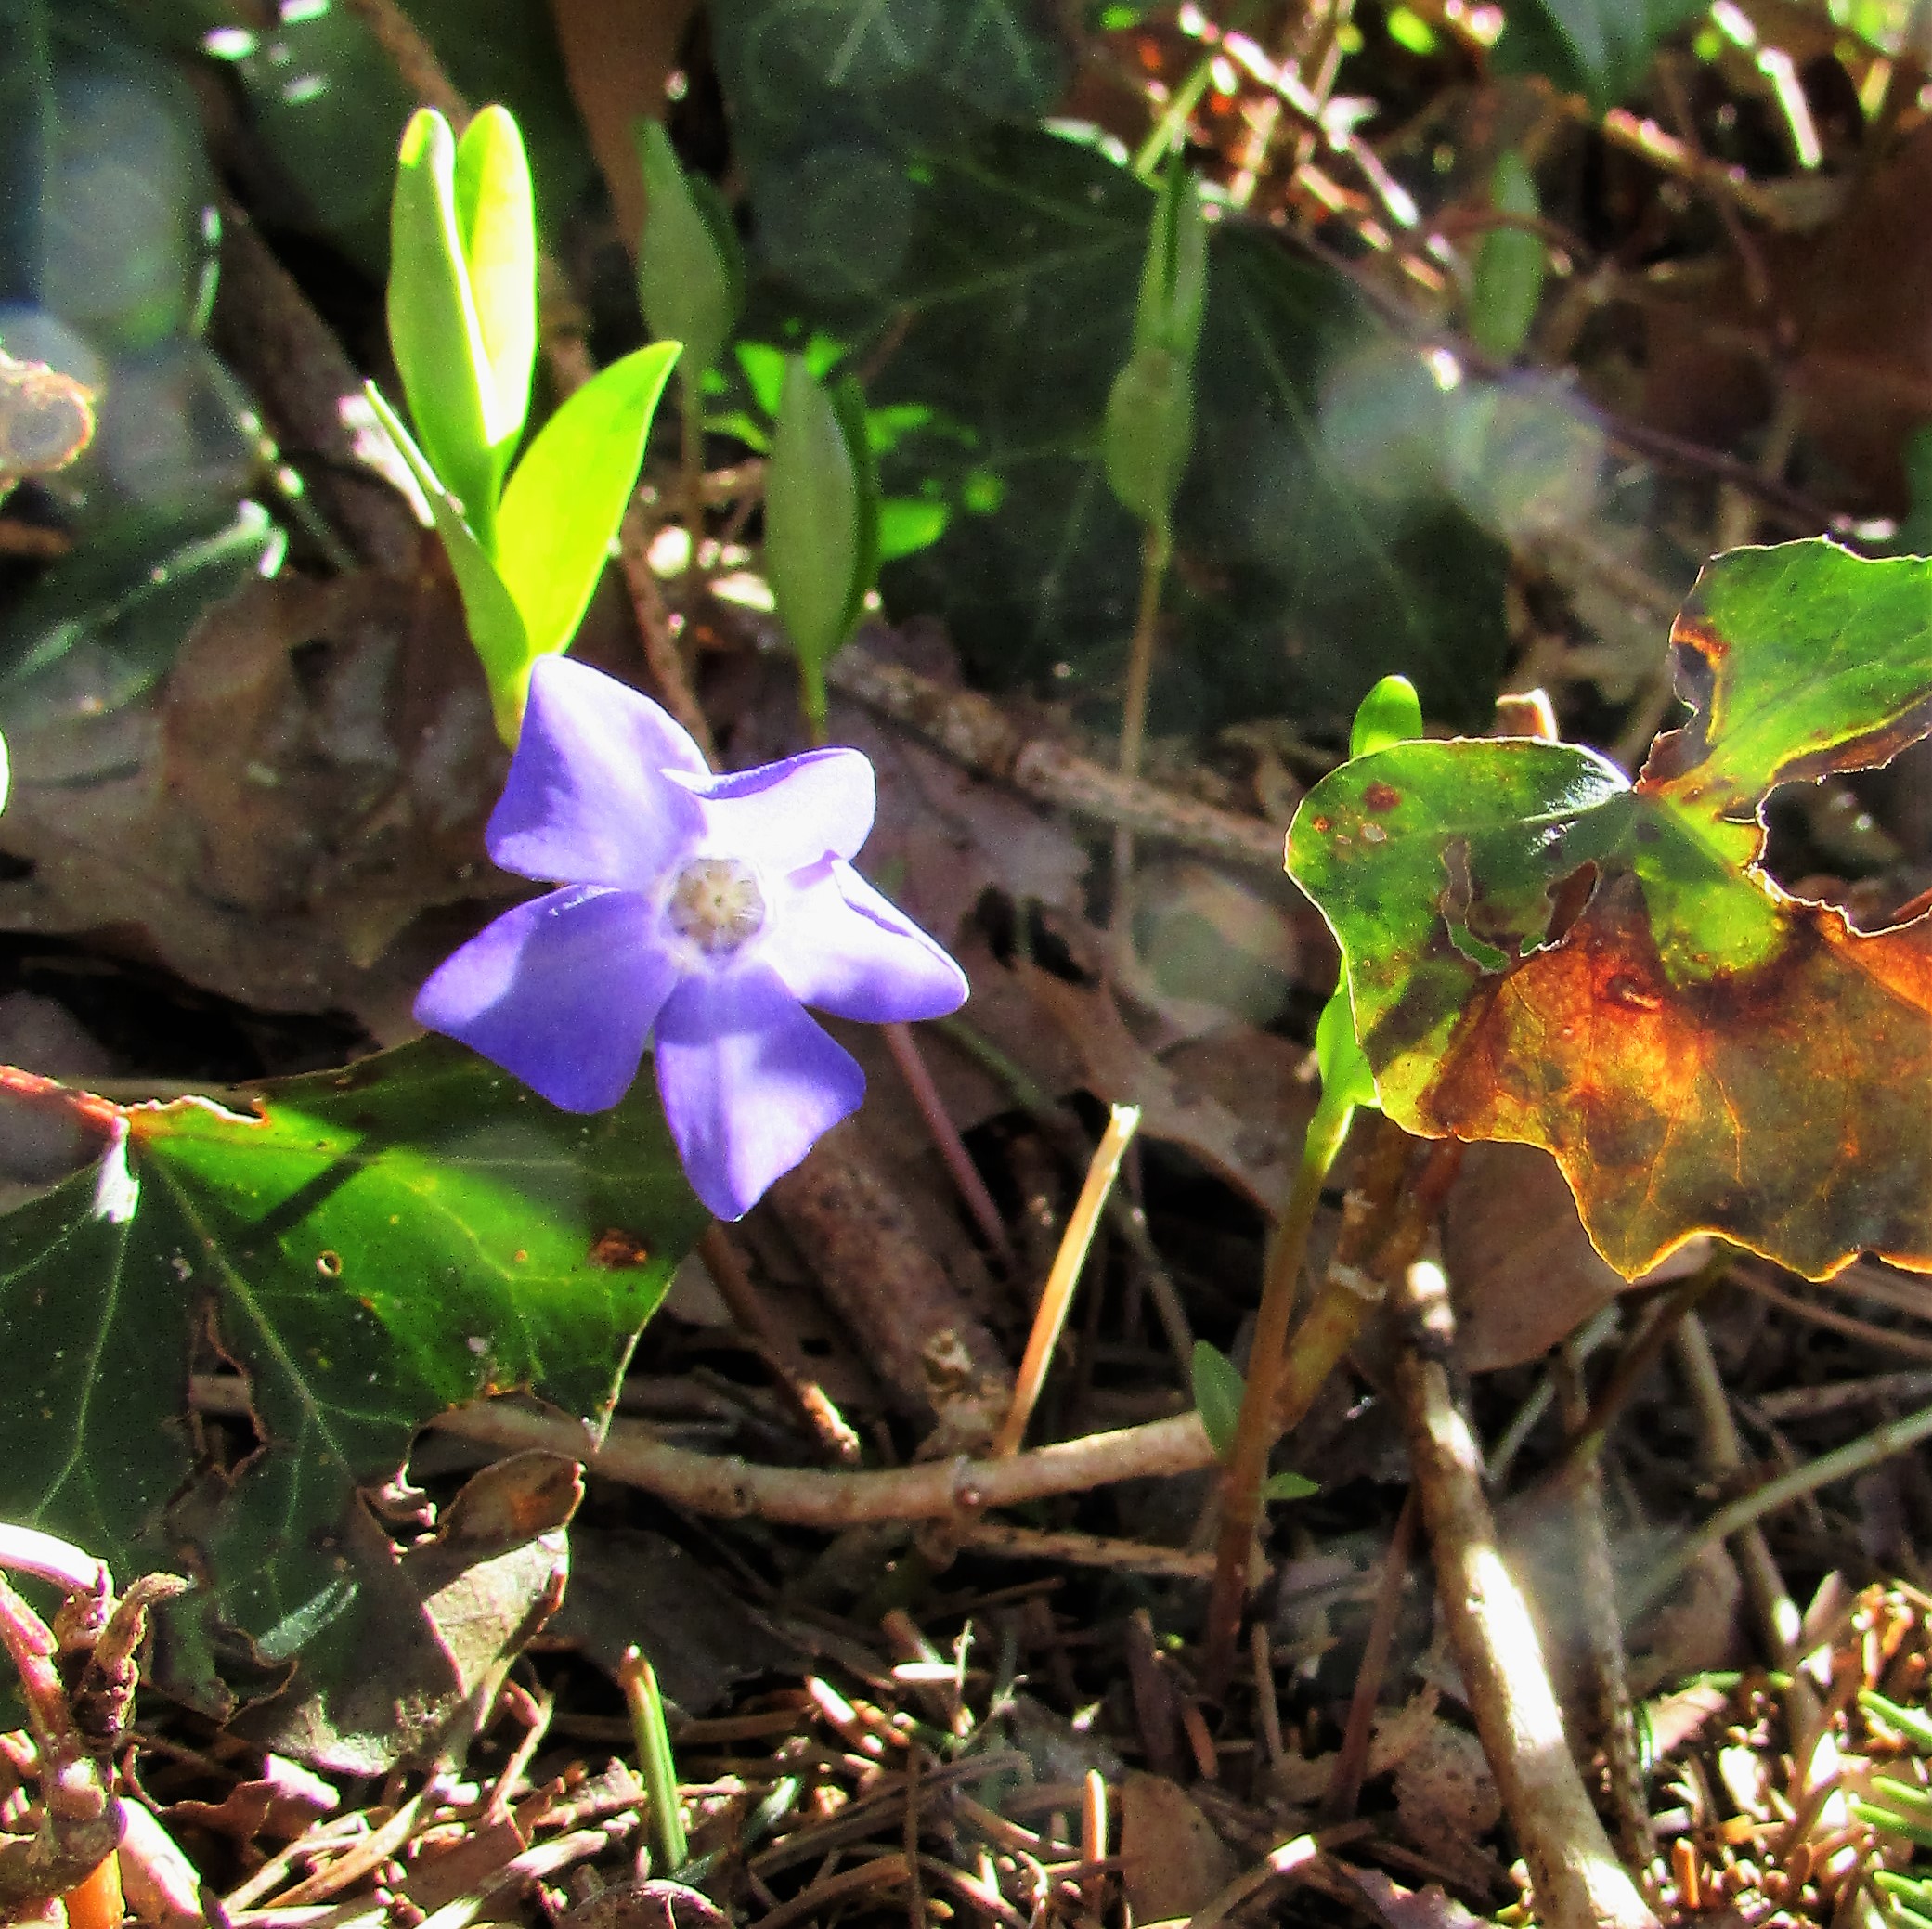
Periwinkle (Vinca minor) are one of the earliest flowers to blossom. An amazing groundcover, the ground vine can also become invasive if left unattended.
I pressed these periwinkle blossoms and stems only a few days before taking the photograph. Because I pressed in a hardback book, rubberbanded, and then microwaved, the flowers are ready to be used within a few days. The color of flower petals will usually darken a bit. The periwinkle blue of these flowers darkened to a Purple Mountain’s Majesty hue, a perfect choice for today’s Color Your World/120 Days of Crayola challenge. Always press more flowers than you think you will need to avoid disappointments, not every flower will press without blemish.
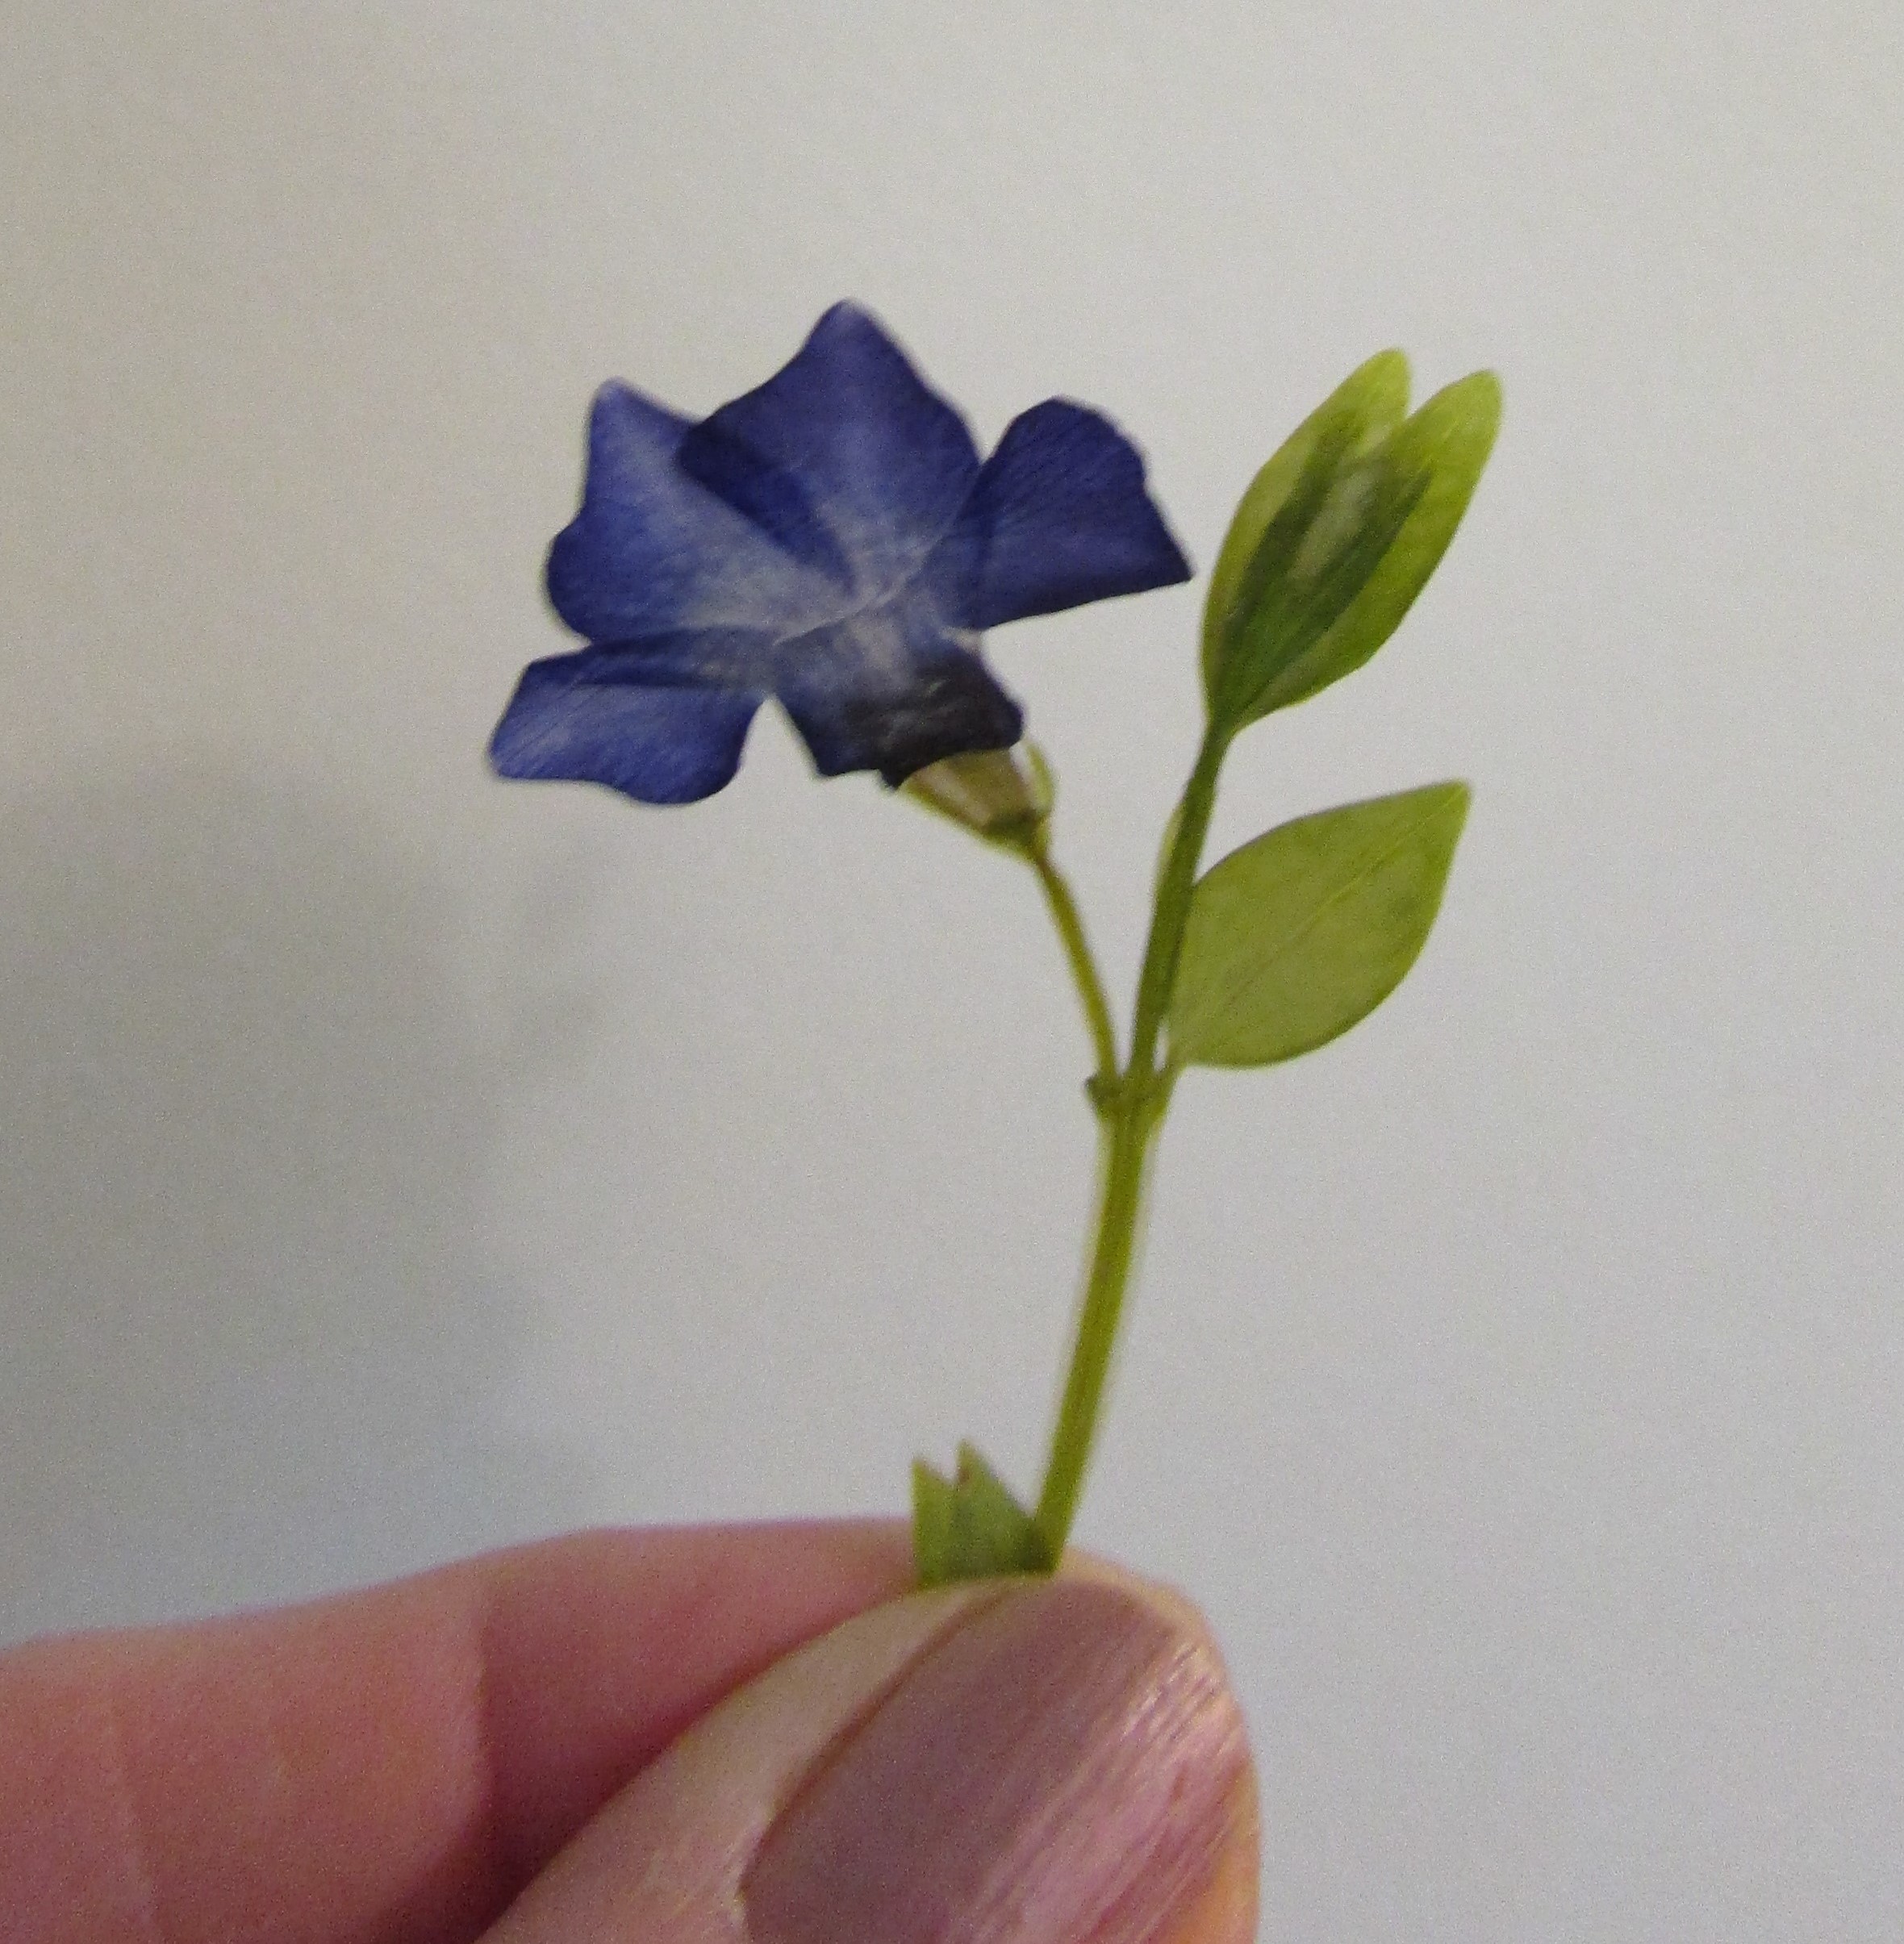
When the flowers are dry I remove them from the book I used for heating. If I leave them too long in the original book they could become impossible to remove.
As you can see in the photograph, the stem of the periwinkle easily lifts, but the more delicate flower is sticking to the page. I first lift the page and roll it a bit to help loosen the petals.
If rolling the page does not totally release the flowers, use a soft bristled paintbrush and gently tease the edges of the petals away from the page.
A pressed flower will stand on its own if it is dry enough to use in projects.
The WordPress Daily Post Prompt, ‘Shelf,’ was a perfect fit today for Throwback Thursday.
Probably few remember this early edition of the LC Smith & Corona Typewriter. Planning out this post brought back many reminders of my years of typing. What I miss is the sound of the old manual typewriters. I had forgotten that they ‘ding’ when you begin to reach the outer margins, a warning that you must begin a new sentence or hyphenate a word. For those of you who have never used a manual typewriter, the previous sentence probably sounds like a bit of gobbledy-gook. In that case, who best to demonstrate an old manual typewriter than the inimitable Jerry Lewis.
This typewriter was part of the family hardware store business for decades. Many a store invoice was typed out with its keys. When I researched the model the date it seemed to match best was 1927. The typewriter sat in our basement for years. Recently, while cleaning off shelves I came upon it and decided it was too unique to languish for more years in the dark and brought it upstairs. It can still type out letters and words, with a little help in moving the carriage, and I was able to type out a holiday greeting on parchment.
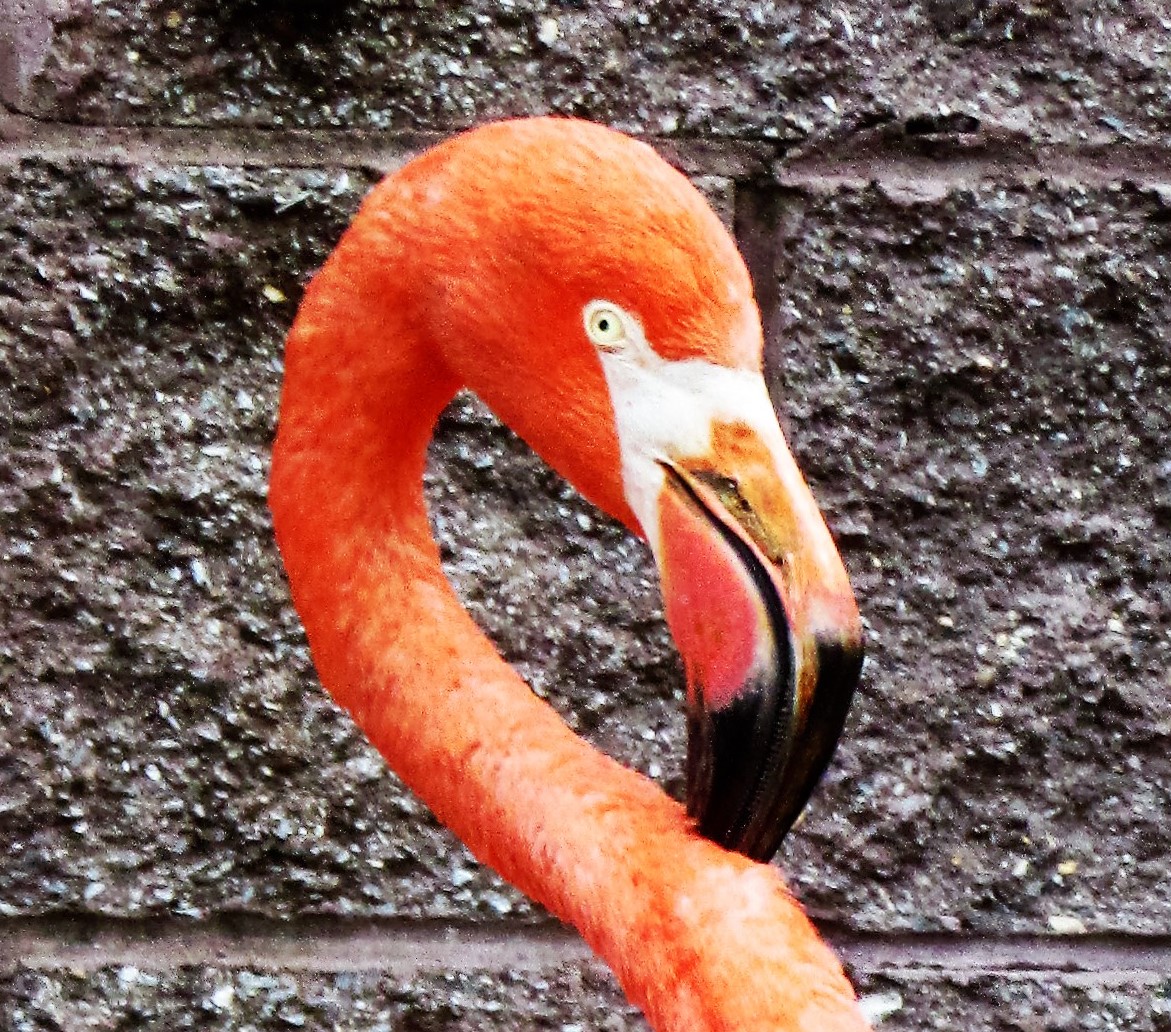
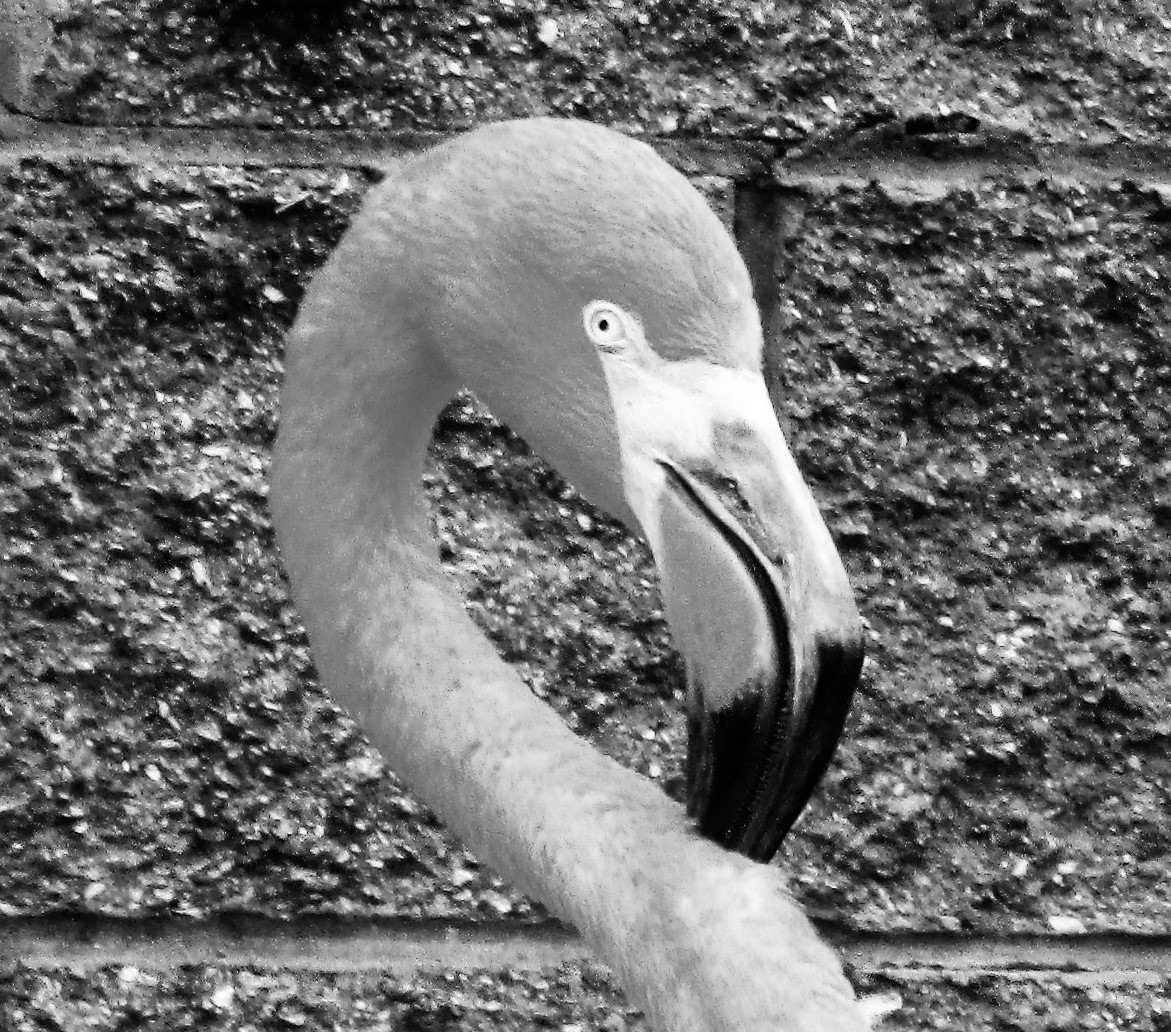
Color Your World – 120 Days of Crayola has been an enjoyable challenge for me through the winter months. On rainy days, when the view from the window is gray and dreary, I enjoy searching my photograph files for a pop of color. My entry for the Crayola color of, ‘Flamingo Pink,’ is a flamingo. In reality, the pink on his beak is closer to the actual hue of the crayon color.
This photograph was taken in December at the Cape May Zoo in New Jersey. I used it in a blog post then, but now I’ve cropped the flamingo’s head for a closer look. What an amazing bird. I also enjoyed removing the color…the flamingo is just as stunning in black and white. I hope this little pop of pink mid-March will brighten your day. The blessing of color…what a marvelous gift from God.
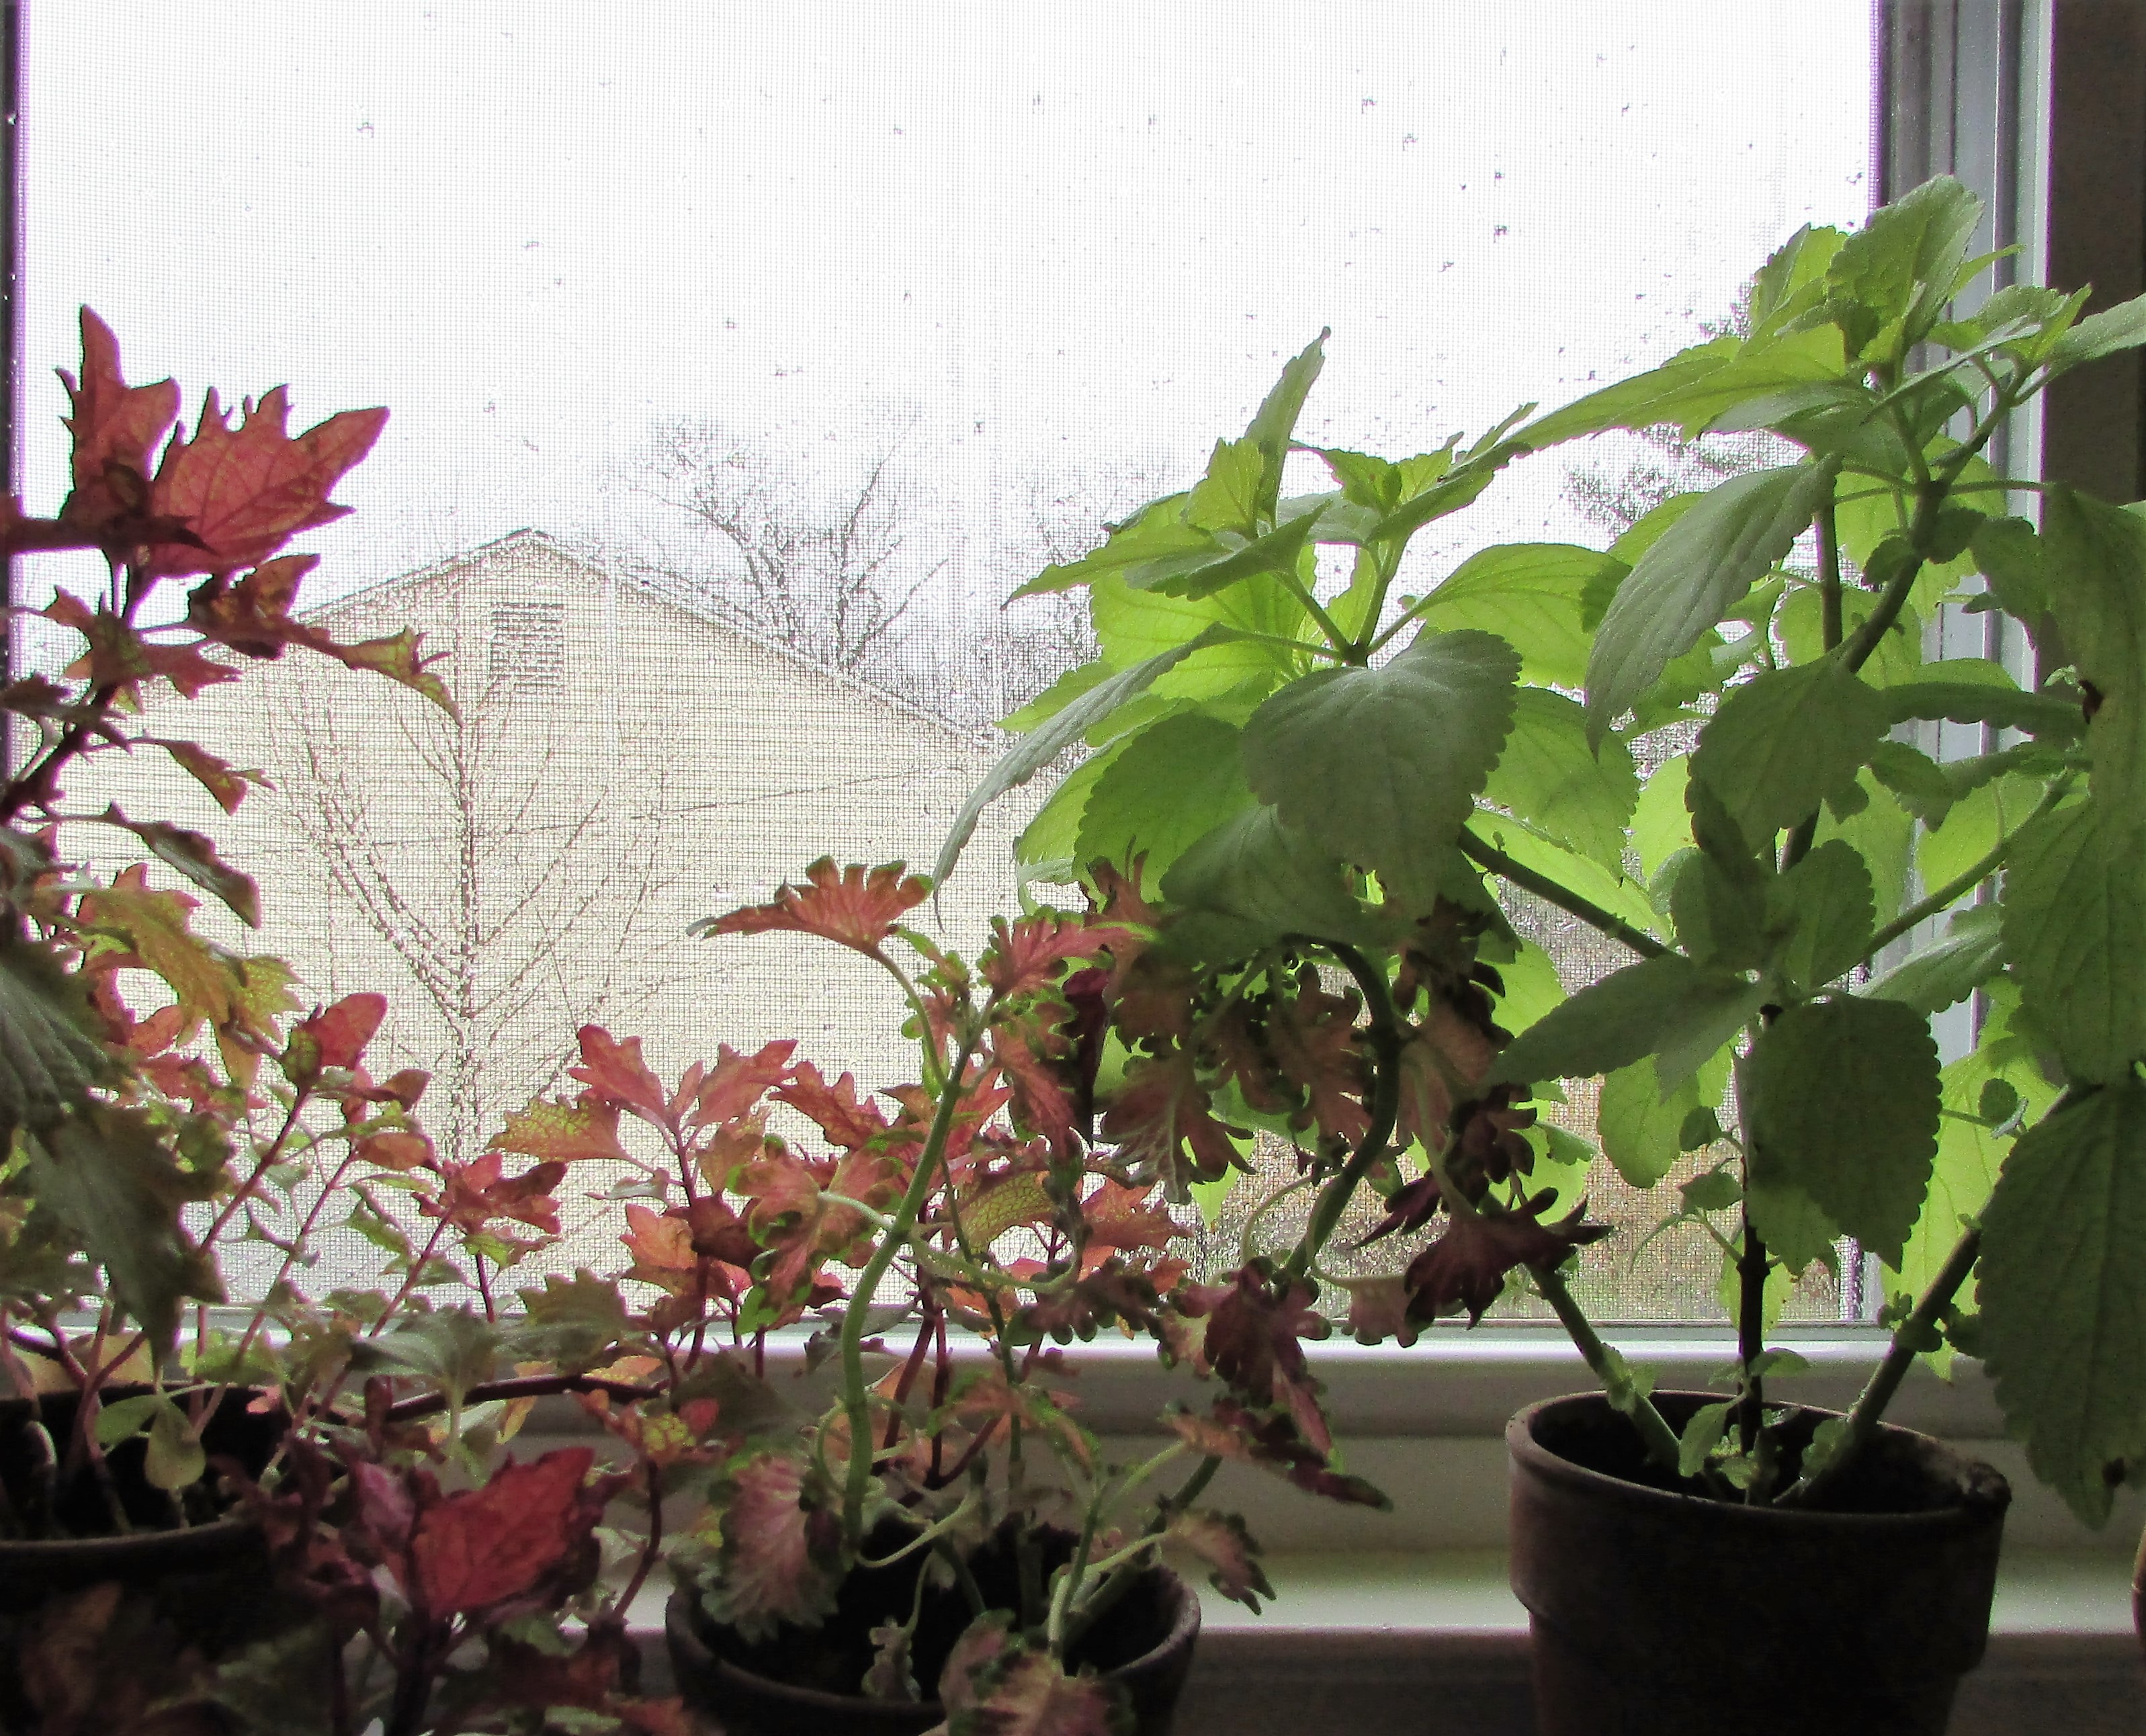
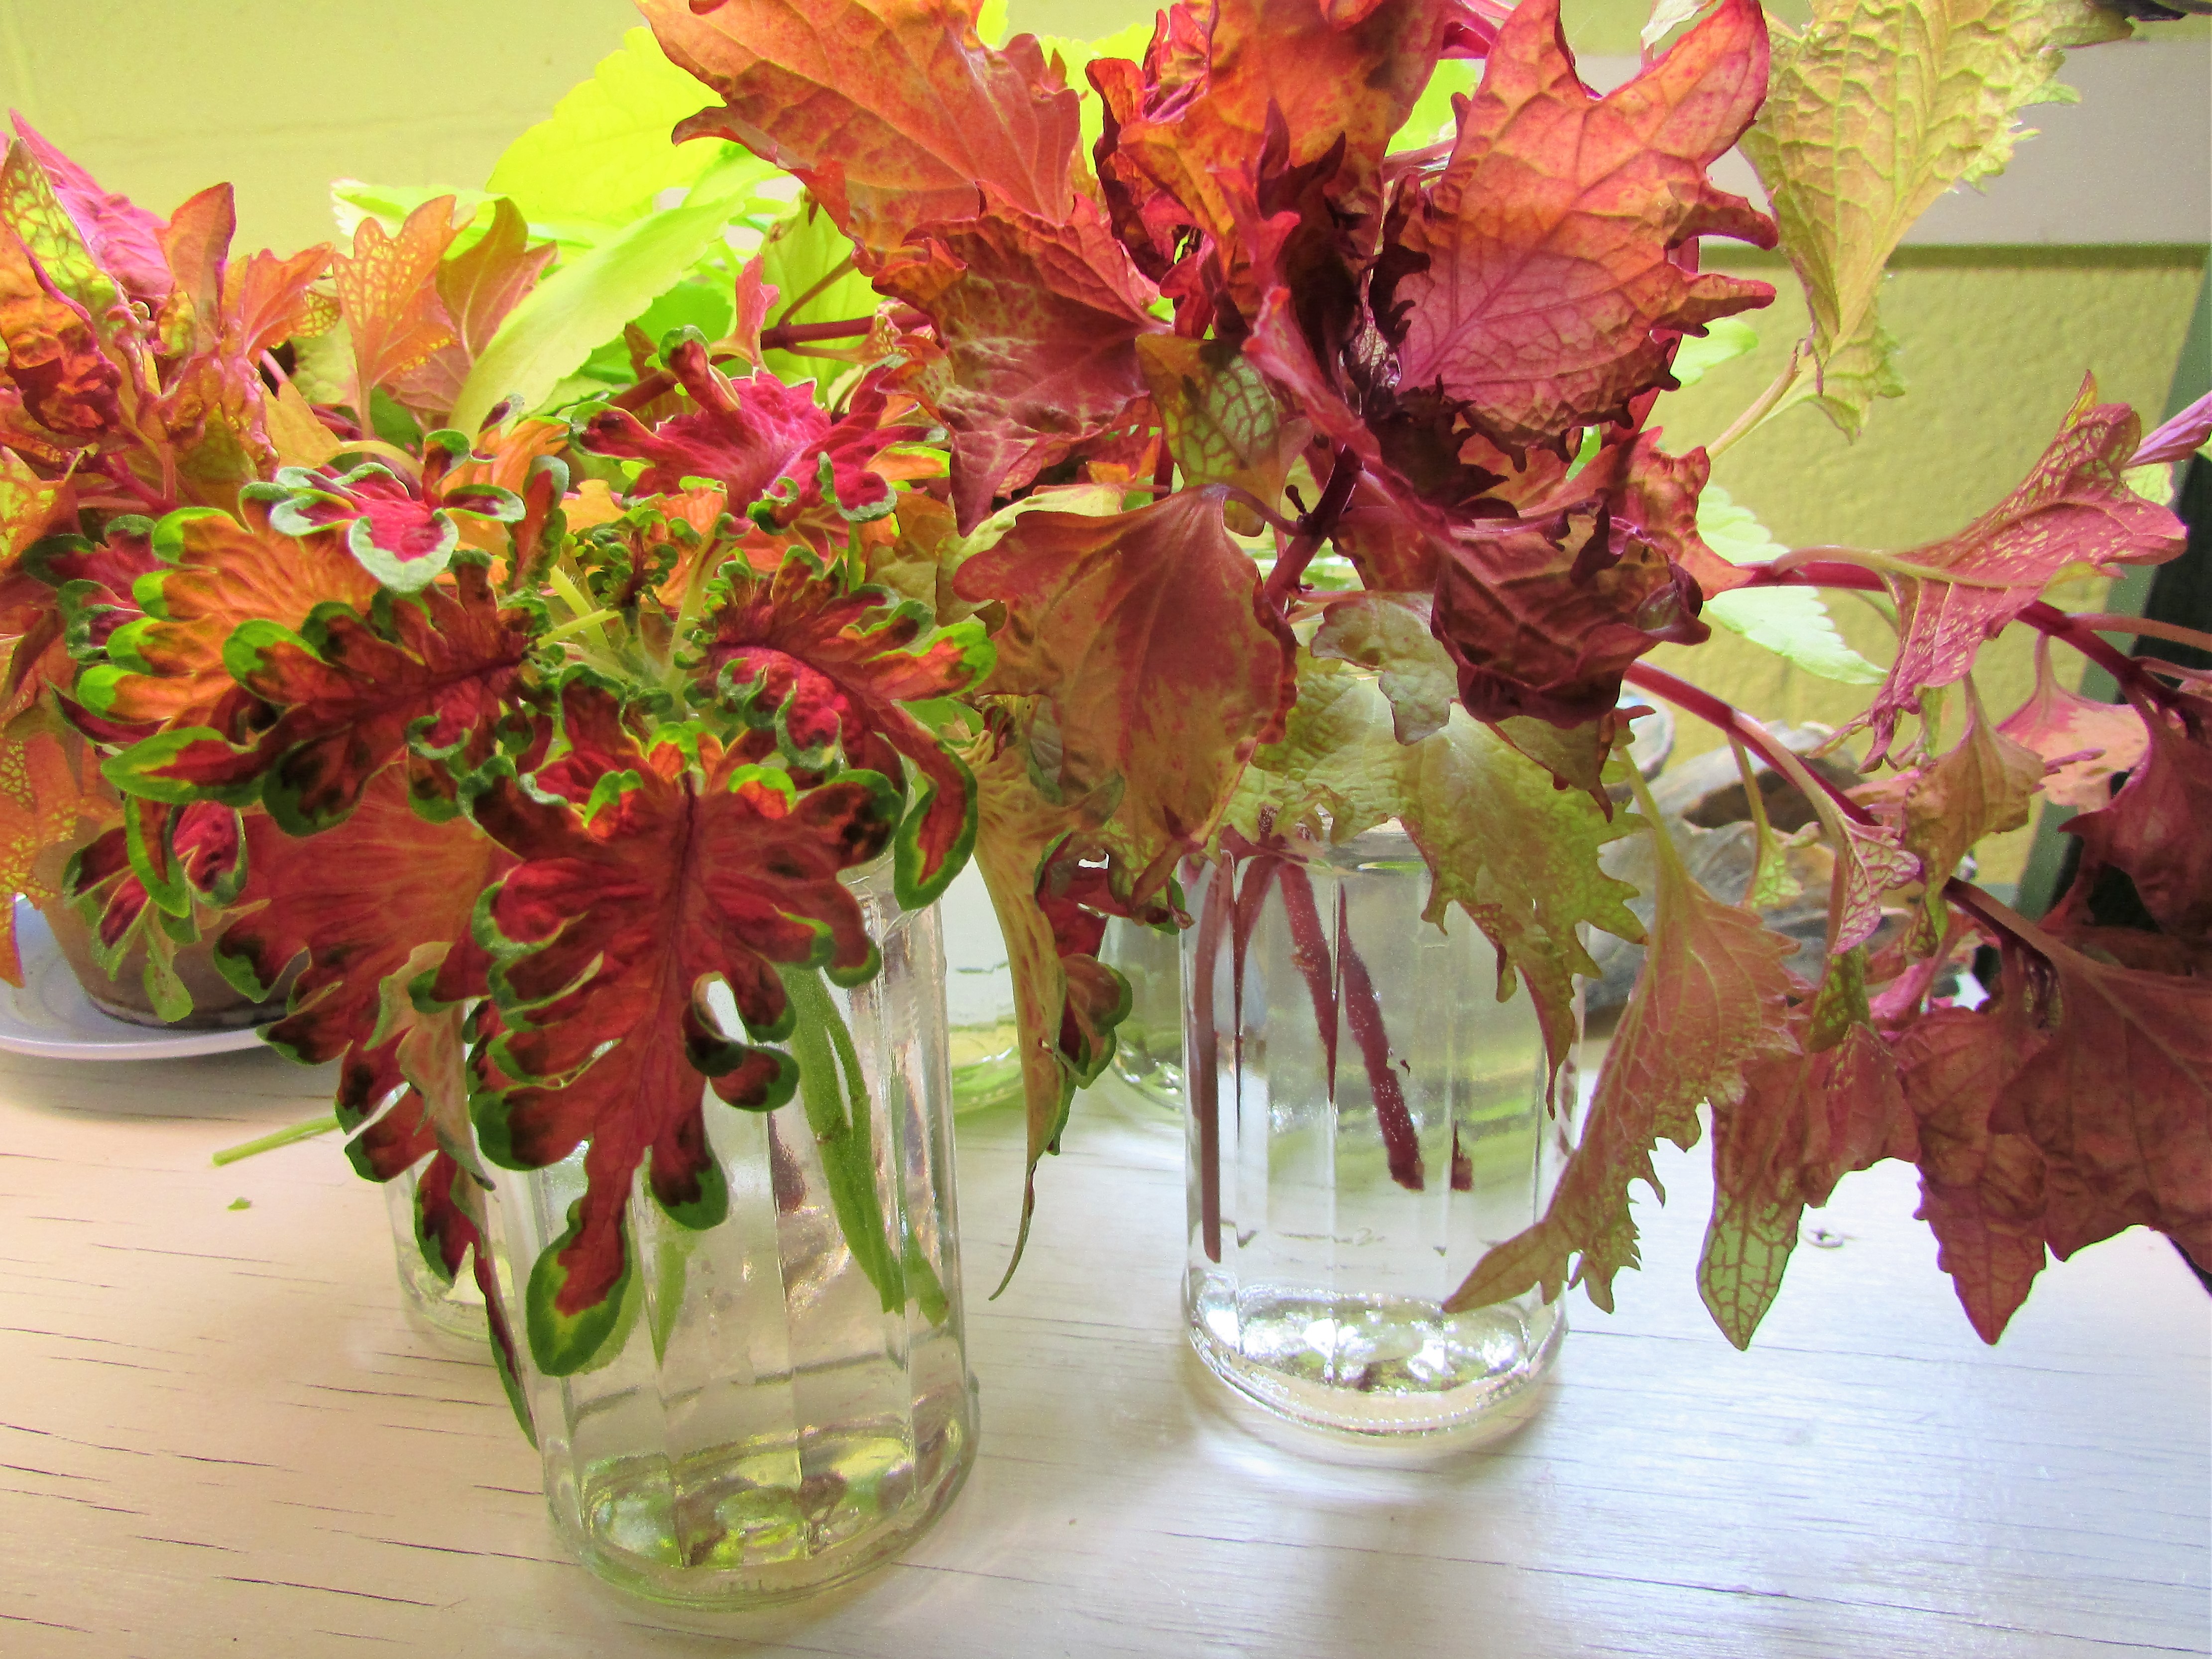
The day is dreary. A perfect moment in time to do a little indoor gardening in preparation for the growing season. The coleus cuttings I took from my outdoor plants in the Autumn have thrived. Now, it is time to take cuttings from these indoor plants, continuing the cycle of growing coleus indoors and out each year.
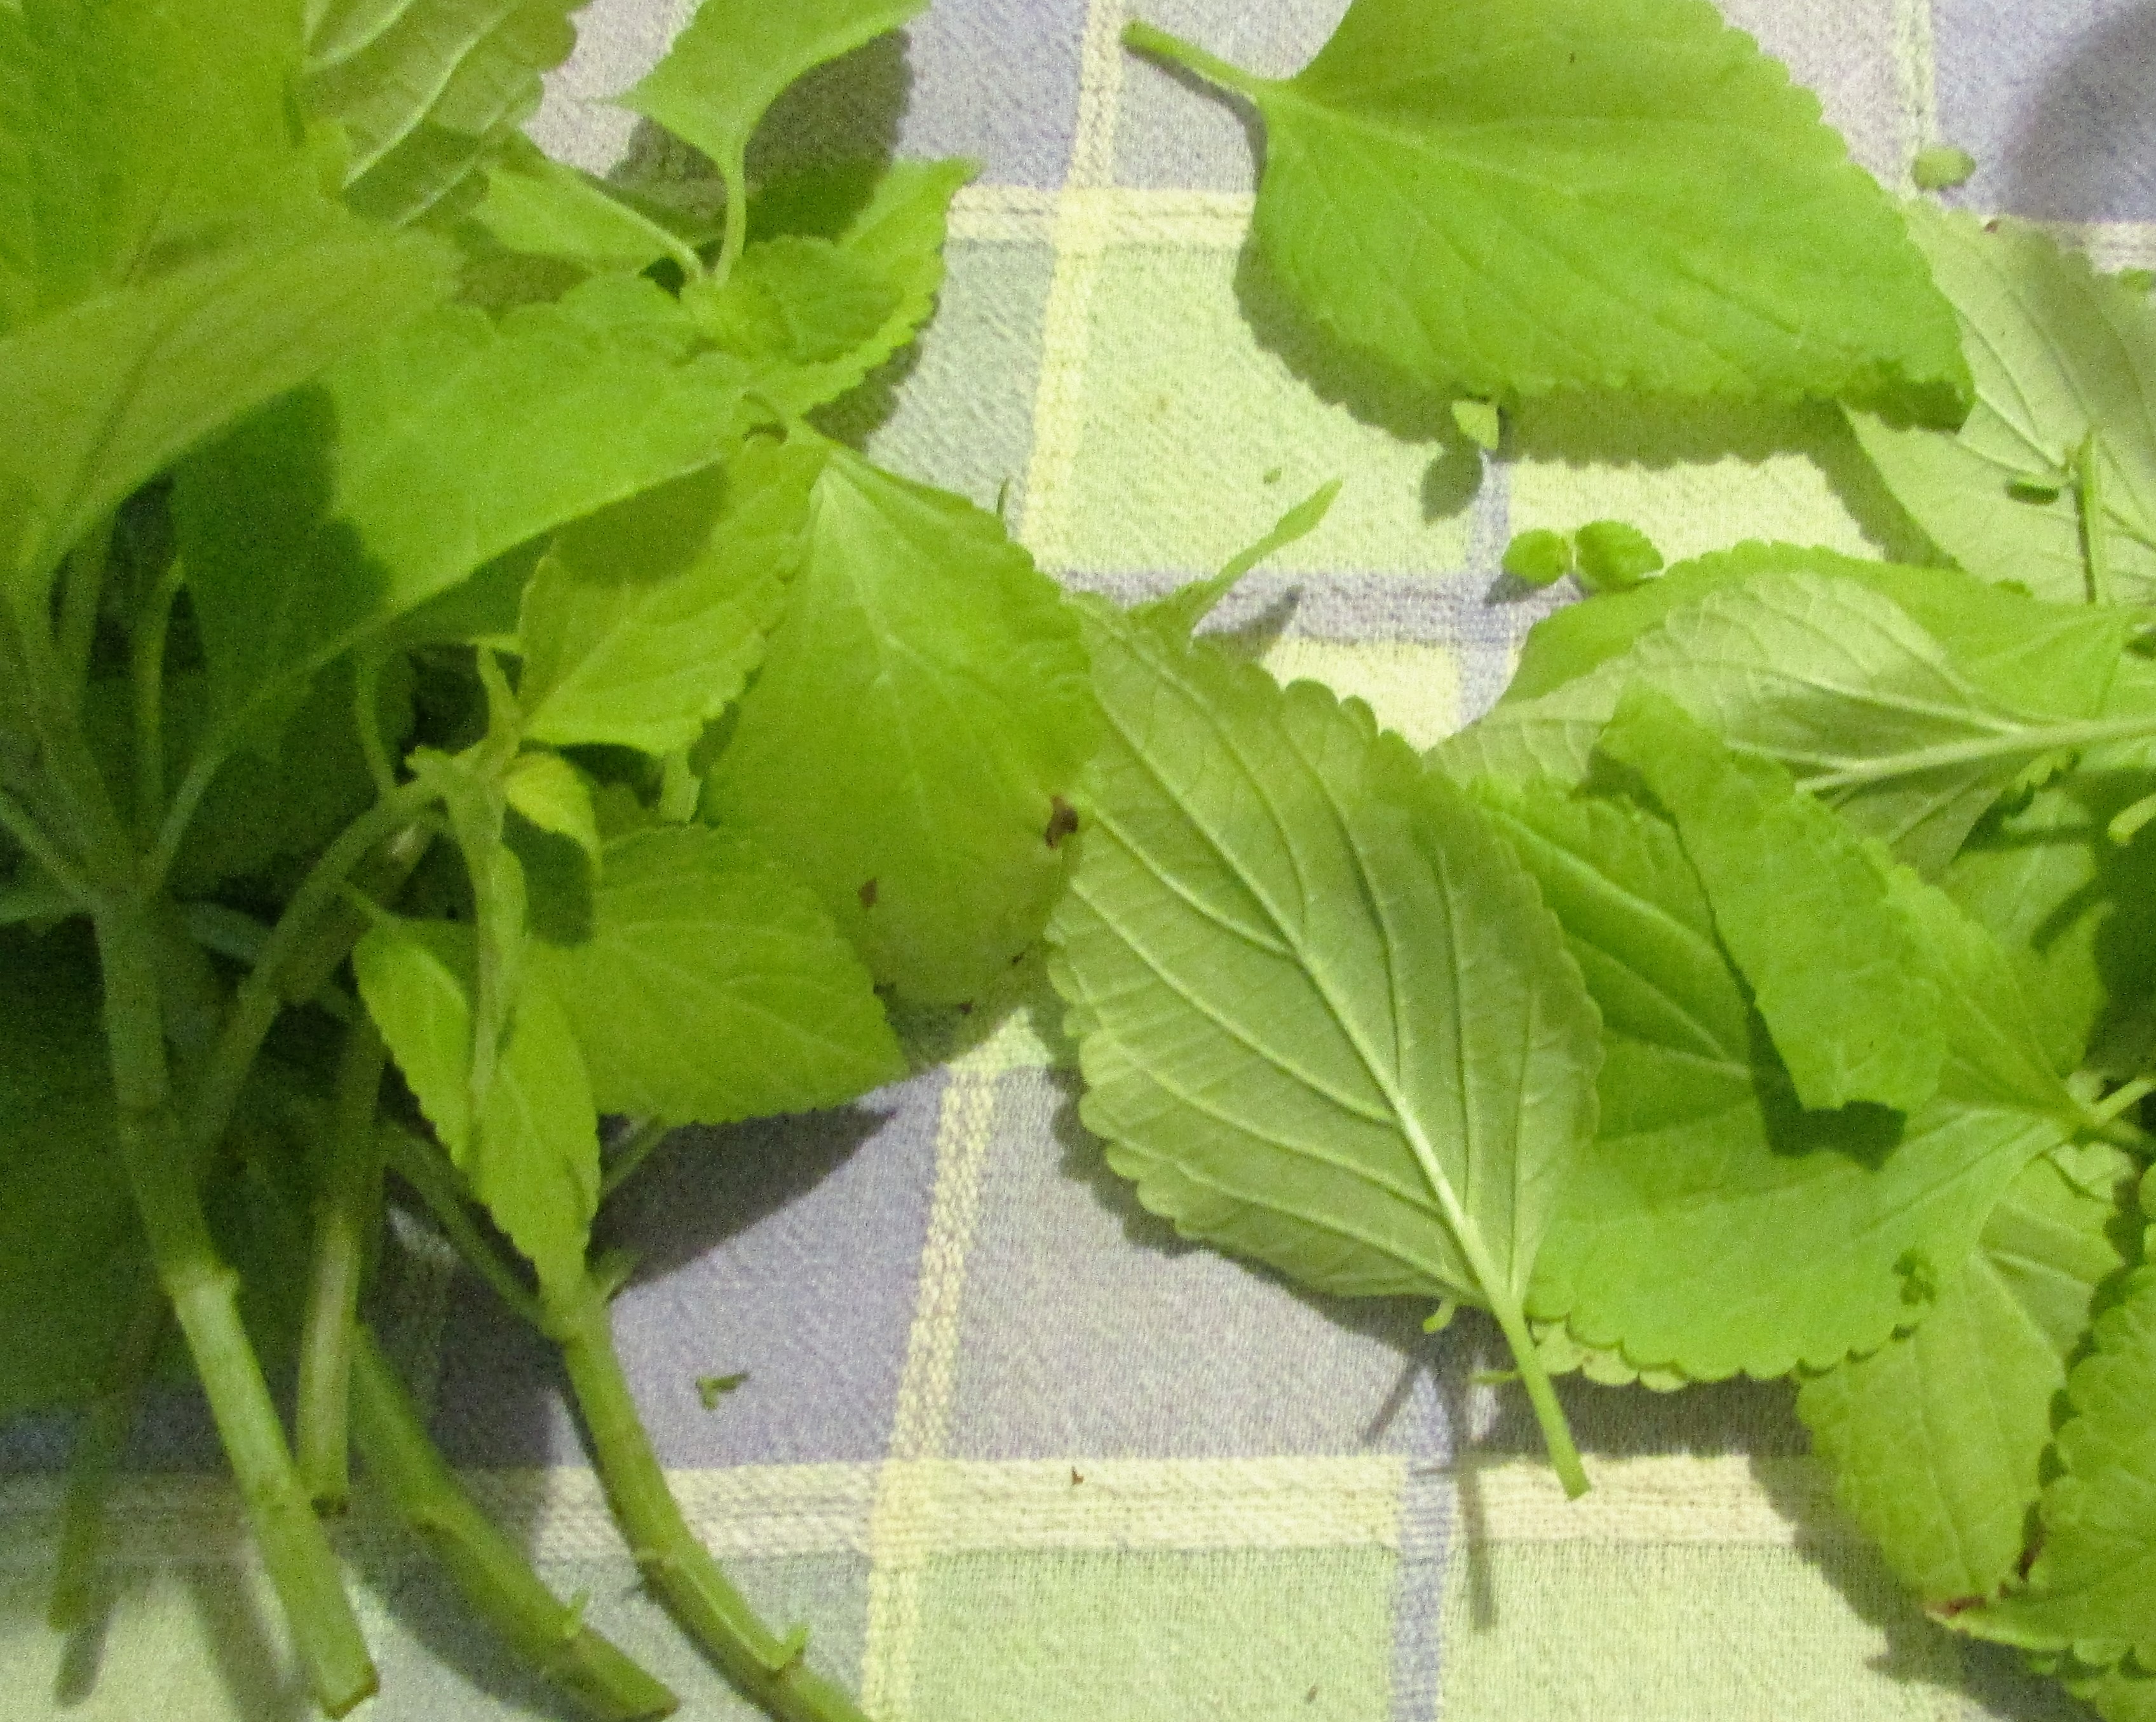
I took several cuttings of the longest plant branches. An important next step is the removal of leaves that will be below the water line.
My recycled jelly jars are the perfect size for rooting coleus cuttings. Direct sunlight is not a good idea with clear jars, but green glass is supposed to be good for rooting in direct sunlight. I placed my cuttings under a grow light, but any soft, indirect lighting will work. Within four weeks I should have dozens of roots growing from the stem. At that point I will place the coleus in potting soil and grow on in the house for a few more weeks, until the danger for frost is completely gone. Coleus will not survive a heavy frost.
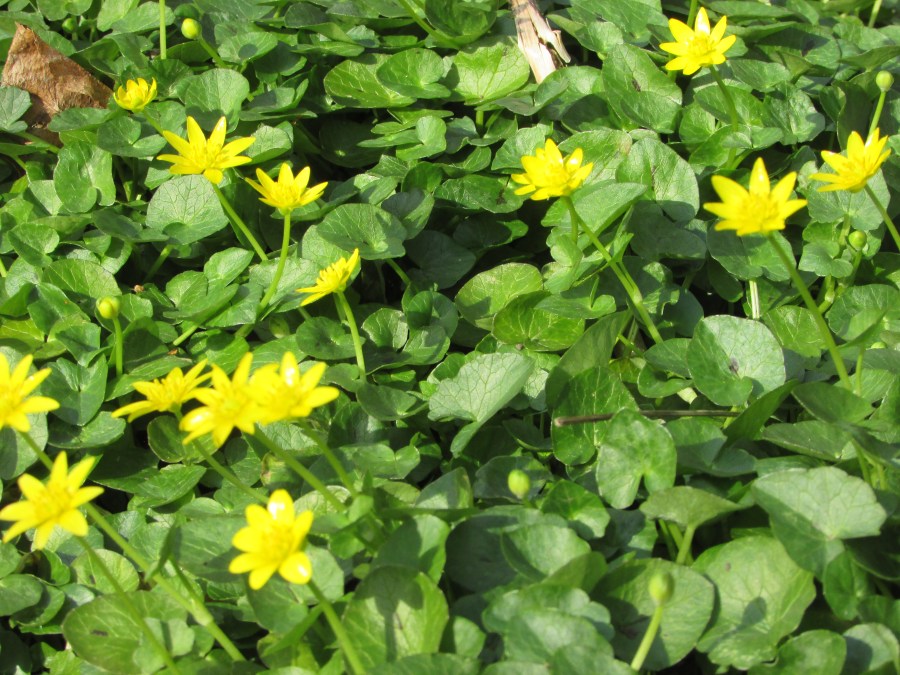
When I read today’s Daily Prompt title, “Flow,” I immediately thought of celandine. Also known as the fig buttercup, celandine rivals the common buttercup in the wow power of its brilliant gold petals. Add to that, its propensity to follow the flow of running water, in this instance a creek, and you will find a wildflower that creates a carpet of gold to greet the early warmth of March.
Celandine is considered invasive in some states. It can be toxic to grazing animals. On the other side of the problem of its invasive tendencies, is the ease of gathering and pressing, if you are a presser of flowers and foliage. Celandine retains its gorgeous gold color and presses well for me in traditional methods and in the microwave. Because it is very abundant, I never fear I am taking more than I should. Each year when I return to my favorite gathering places for celandine, I find the flow of flowers has taken over even more of the land.
The color yellow, at least in the realm of wildflower spunk (I’m thinking dandelions, buttercups and celandine here) usually signals, “Charge!”
Today I am busy, busy, busy cleaning mildew off the porch ceiling and washing down the warm weather furniture. Once it’s done the yard and gardens will call to me with more chores. I’m so glad I took time to walk and listen to the birdsong before I began all the spraying, scrubbing and rearranging. If I hadn’t I would have missed seeing this beautiful robin searching for worms.
On Friday, when I checked the topic for the weekly WordPress Photo Challenge, I was thrilled to find the title word of harmony.
Harmony
“The combination of simultaneously sounded musical notes to produce chords having a pleasing effect; the quality of forming a pleasing and consistent whole.” ~ WordPress Photo Challenge
Harmony, melodious, musical…all these words bestow on me an instant uptick in mood when I hear them. In my files, I knew I must have dozens of photographs perfect for depicting harmony, but none came to mind, and I couldn’t understand why I felt so blocked. Until today…
Today dawned warm for early March, the sky cloudless, almost like someone had colored its expanse with a Pacific Blue crayon. I took my grandchildren to a nearby playground, just three and almost four, they are the best of friends. Without any hesitation, they climbed the stairs and skipped across the bridge that spans two sliding board sections. As they crossed, they spontaneously began to sing, “London Bridge is falling down.” At such a young age, not in harmony of course, but in definite harmony with the spirit of the day and each other.
I blogged about this project last year, and since it was one of my favorites, I thought it deserved a repeat.
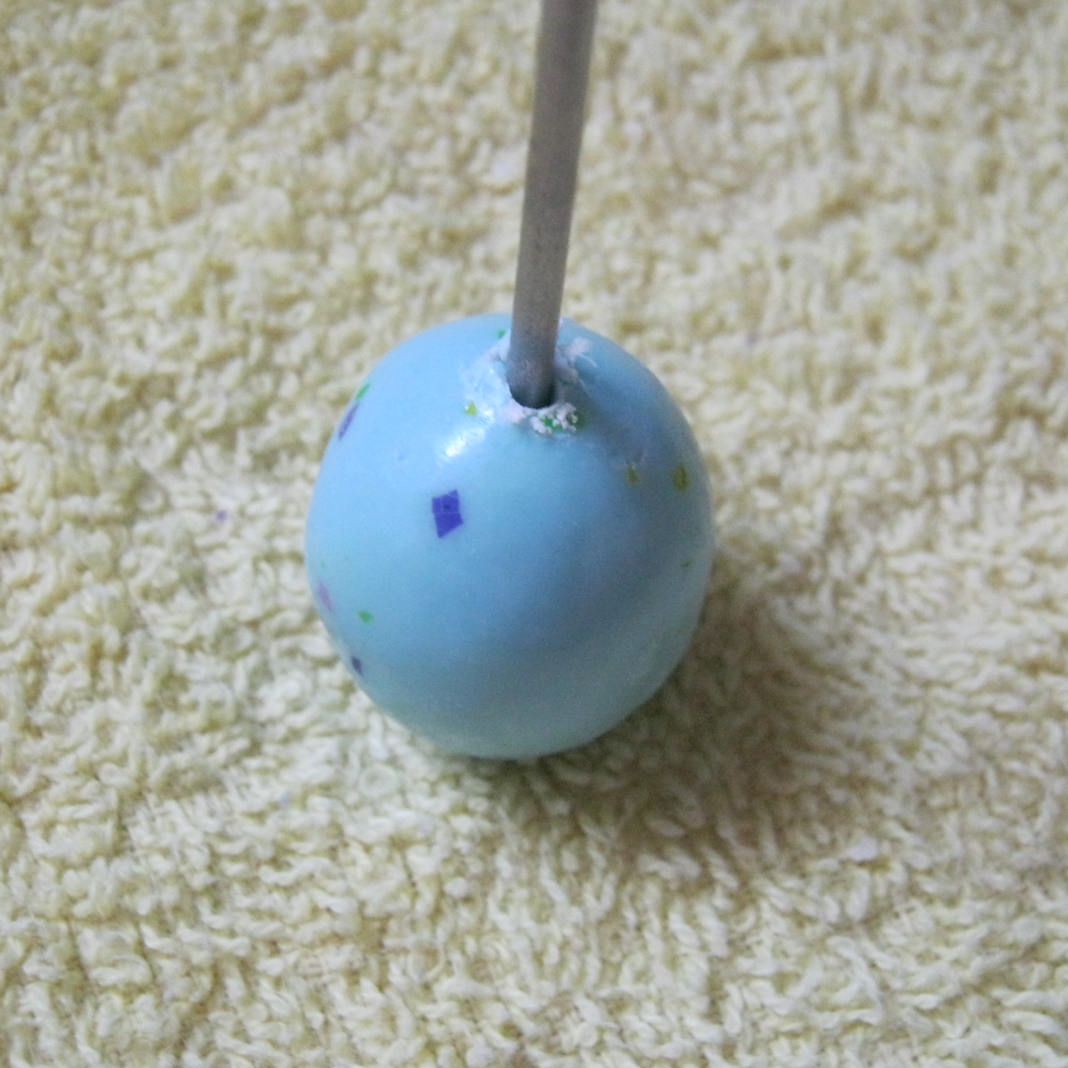
I love the appearance of wooden Easter eggs, but they can cost a pretty penny when hand-painted and strung for hanging. I found an alternative, but I must also include a warning: these faux eggs might magically disappear before you can use them for Easter decorating.
Malted Easter Eggs
I recently purchased a package of malted Easter eggs in my local drugstore. I chose them for their eye-appeal; covered in pastel candy, speckled in darker pastels, the malted eggs were small, delicate and irresistible.. While I was pondering all the ways I could rig them for hanging, I ate one…then another, and so on…and you know the end of my tale, by the time I had a plan in place half my eggs had disappeared.
Skewering an Egg
To create a hole for threading, place the malted egg on a wash cloth or other thick cloth, pointy end up. Place a barbecue skewer, ice pick, heavy-duty toothpick, etc., on the top and slowly twist until it penetrates the outer shell. Continue twisting and applying pressure until the skewer reaches the bottom of the egg and exits through the bottom.
Malted Easter Eggs with Ribbons
A thin looped ribbon was easily pushed through with a toothpick, and knotted on the larger end. Voila`, easy faux wooden eggs for a fraction of the cost. The eggs won’t last more than one season, but if they did I would miss the fun of making (and eating) them again next year.
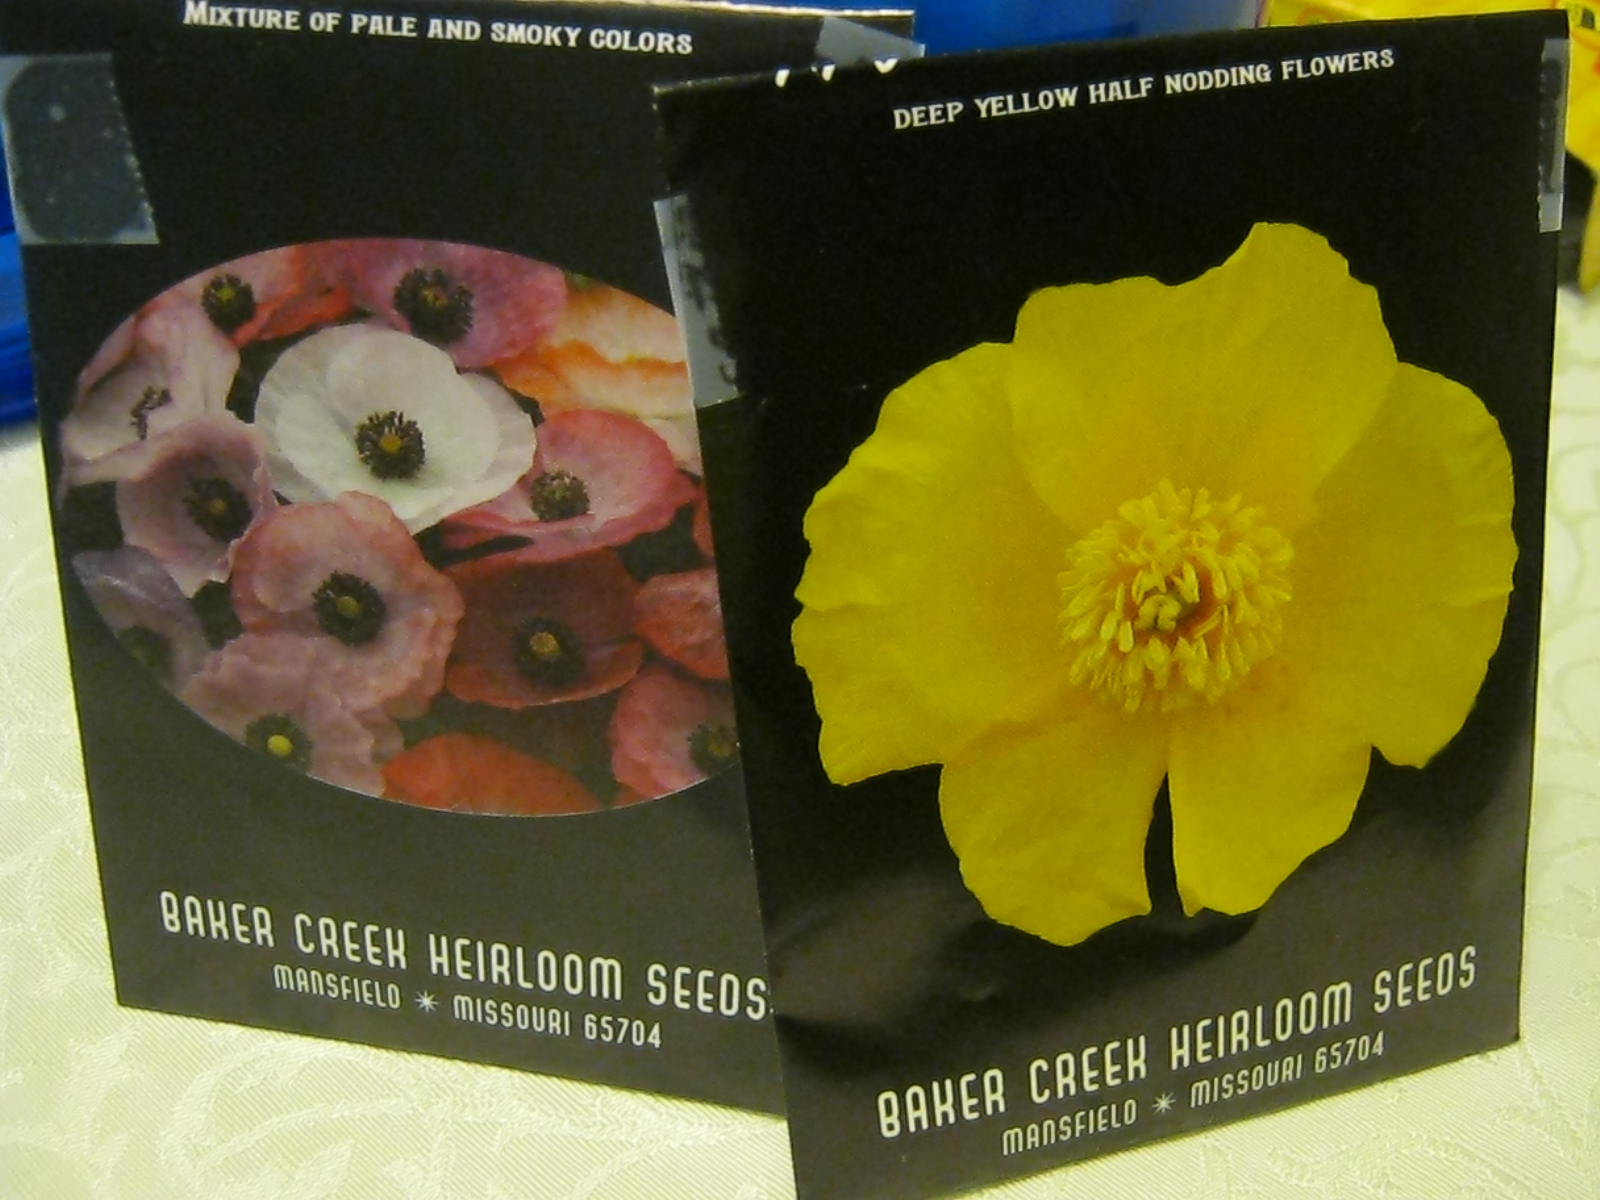
In the Spring, garden seed racks are available in almost every store I shop in. It’s hard to resist taking a moment to look over their display in search of something new. I’ve noticed almost every seed company offers a packet of mixed flowers that will draw butterflies. I enjoy growing flowers for butterflies and find zinnias are a favorite of the delicate winged creatures.
An additional way of bringing butterflies into your yard is to grow the plant/plants they use as a host for their offspring. Dill is one of the best for attracting swallowtail butterflies to your yard. Dill is readily available as a plant or seed in most garden centers.
Dill is easy to grow and a good choice for a child’s garden. The yellow flowers resemble a burst a fireworks, and the seeds they develop can be collected for cooking. The fern-like foliage is a perfect addition to many recipes. I sow dill seeds directly in the garden beds, and also start it indoors for quicker blooms. Give dill a try, you won’t be disappointed.
The year’s at the spring,
And day’s at the morn;
Morning’s at seven;
The hill-side’s dew-pearled;
The lark’s on the wing;
The snail’s on the thorn;
God’s in his Heaven—
All’s right with the world!
~ Robert Browning
I’m getting a later start than usual with my winter sowing. Instead of planting just cold-hardy varieties this year, I’m going to try a bit of everything, even my tomatoes and eggplant seeds. Here’s a repost of one of my favorite methods for growing seeds without taking up too much room in the house. If you have any plastic milk cartons or other large clear/translucent plastic containers, give winter sowing a try. Happy Gardening!
Winter Sowing is an easy way to start your own transplants.
Winter Sowing is the process of planting hardy and half-hardy seeds in clear or translucent containers. The containers are sealed with duct tape and placed outdoors in the winter weather. This method of sowing seeds has been attributed to Trudi Davidoff.
Over the next week or two I hope to Winter Sow more of my perennial seeds, and later in the season some of my vegetables, annuals and herbs. A good source of information and discussion about Winter Sowing can be found on the Gardenweb Winter Sowing Forum.
“STEPS FOR WINTER SOWING (My own technique, might differ slightly from how others winter sow.)
1. Poke holes in the bottom of your container with a sharp tool or a hot screw driver. A soldering iron works too, but most folks don’t have one.
2. Cut the container in half, leaving a small tab to keep the two halves connected.
3. Add an inch of potting soil, add about two inches of seed starting mixture to top of soil. Moisten all, let water run out the bottom. Plant seeds. Label the outside of the container with permanent marker. You might need to go back over the labeling before planting time. Even a permanent marker fades in the sunshine.
4. Tape two halves together with duct tape.
5. Place outdoors in a sunny spot. DO NOT KEEP CAP ON TOP. The top needs to be left open for moisture.
6. Check periodically for sufficient moisture.
7. When temperatures warm up, open container in the daytime. Be very careful to check daily that the soil is moist after opening. Soil and seedlings dry out quickly.”
PART II
I’ve added to my cache of winter sown containers. The warm springlike weather of the past weeks helped many seeds sprout. As they are HHA (Half Hardy Annuals) and cold tolerant vegetables, I’m not worried about the possible onset of colder temperatures through the next weeks. The plastic containers work as mini-greenhouses and protect the seedlings from frost. The cold will strengthen them and keep them from becoming leggy and outgrowing their containers. I’ve had a lot of fun with this project. I also set aside a portion of each type of seed so that in the event that some of the containers fail I will have a back-up.
A view of some of the sprouts inside their containers. The above photos show my recycled orange juice bottles. These mini-greenhouses are light in weight. To windproof them I wedge them in among the heavier milk jugs. (I don’t use small containers anymore, they dry out too quickly. I try to use gallon-sized or larger containers.)
A bird’s-eye-view through the top of a milk jug. The seedlings inside are asters.
Two of my mini-greenhouses had indications of the dirt drying out. I placed these inside a plastic shoebox filled with water, a perfect fit, and let them soak up a little moisture through the drainage holes in the bottom. This worked and within a half hour they were watered.
PART III
Poppies! I LOVE poppies, but I have some problems with poppies too. Number one on my list of loves is the way poppies develop big, luscious looking pods. When the pods begin to widen and split to reveal the color of the flower inside, honestly, I must admit I run out into the yard several times a day to see if the silken petals have opened. There is something magical in the wispy crown in the center of each flower too. Often there will be a splotch or two of contrasting color at the base of each petal. The foliage of many poppy plants glows in beautiful bluish green tones. Yes…I LOVE poppies.
One of the major drawbacks of poppies, at least in my opinion, is how hard it is to grow them from seed. For years I followed the advice on the back of the packets and on the pages of reliable gardening books and sowed them directly in the ground. This NEVER worked for me. Heavy spring rains ALWAYS washed my poppy seeds away before they could sprout. If they did grow, the delicate small seedlings would be beat into the ground by that same rain. The “experts” say poppies don’t transplant well. I agree if they are grown in the house, but I have found a way to get a head start on poppies and that method is winter sowing.
I am also including a post that shows the results of my winter sown poppies: Poppies
If you want to grow poppies this year, and have a milk carton or two on hand, give winter-sowing a try. It only takes a few minutes to create a miniature greenhouse to place outside in the sunshine. Happy Gardening!
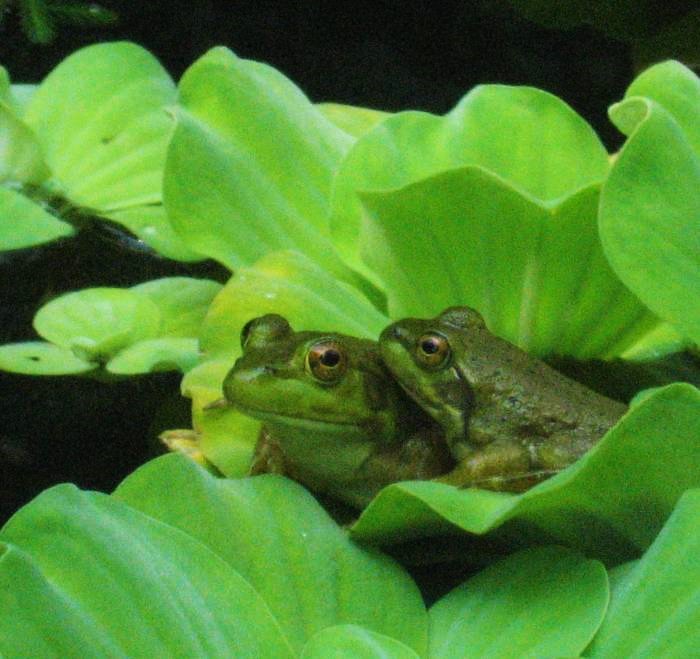
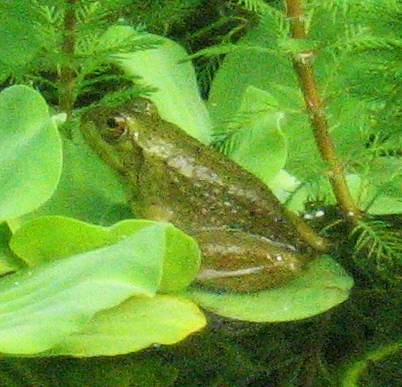
March came in for me, not like a lion, nor a lamb, but exactly like a frog. Last night, as I left the house on an errand, the air was redolent with the scent of approaching Spring. The sound of a seasonal symphony trilled through the air; the singing of Peepers, or as they are technically called, Eastern Tree Frogs. I love the throbbing song they sing, or should I say peep, into the quiet of the evening.
I enjoy frogs. I usually have quite a few in residence in my garden pond. Unfortunately, my photographs aren’t portraits of tree frogs. Tree Frogs are very elusive and the only ones I have ever seen in my yard were living in my basement window well.
March coming in like a frog is a perfect start to Spring…at least in my estimation. What could be a better entry than a sweet frog in Cee’s Fun Foto Challenge – Things That are Wet?
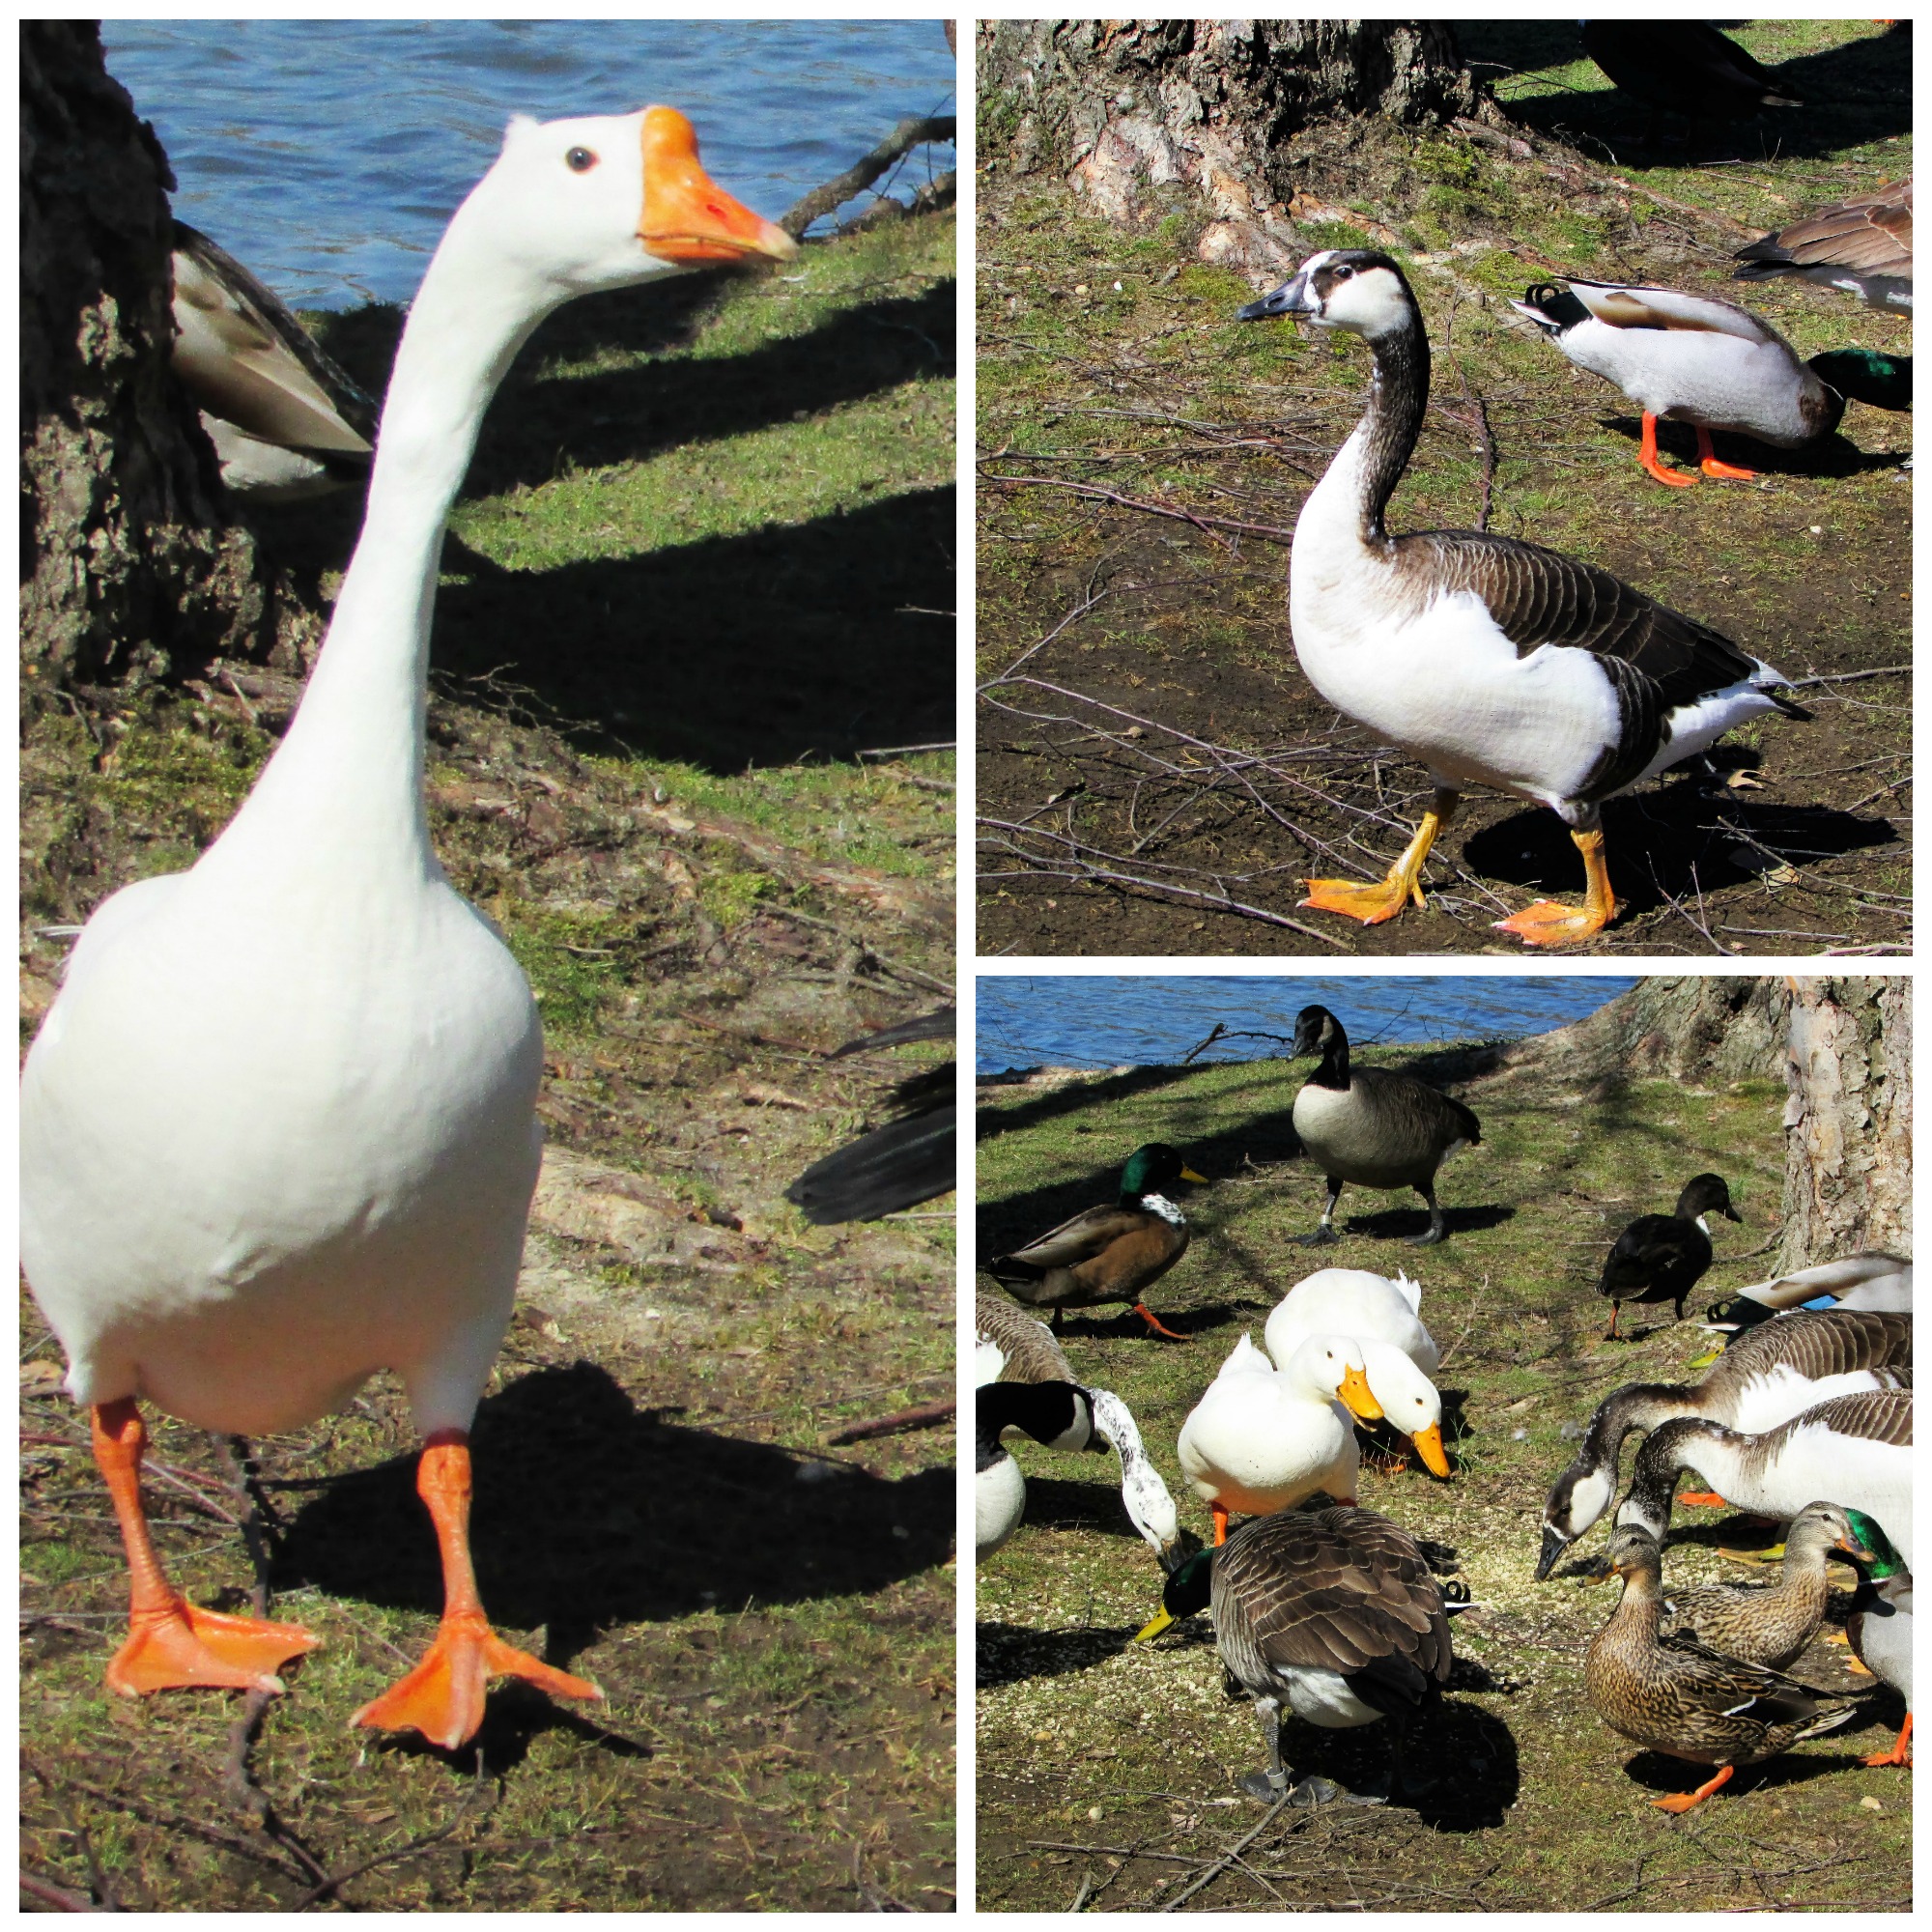
Near my home is a park I have visited since I was seven years old. I take my grandchildren to the same park, although now the “dangerous” playground equipment we adored has been replaced by a one-piece plastic structure. Yesterday, I took a bike ride, with a bag of old cereal strung across my handlebars. My destination was the park and the goose who rules there, the white goose with the blue eyes.
I call her Old Blue Eyes, but she responds to anyone carrying a bag that might be filled with goodies for geese and ducks. The moment I scattered the stale Rice Krispies on the ground a feeding frenzy began. Some of the wild geese/mallard ducks in the park have become domesticated because of injury. At this time of year, when food is scarce, a little grain in the form of cereal might help them survive.