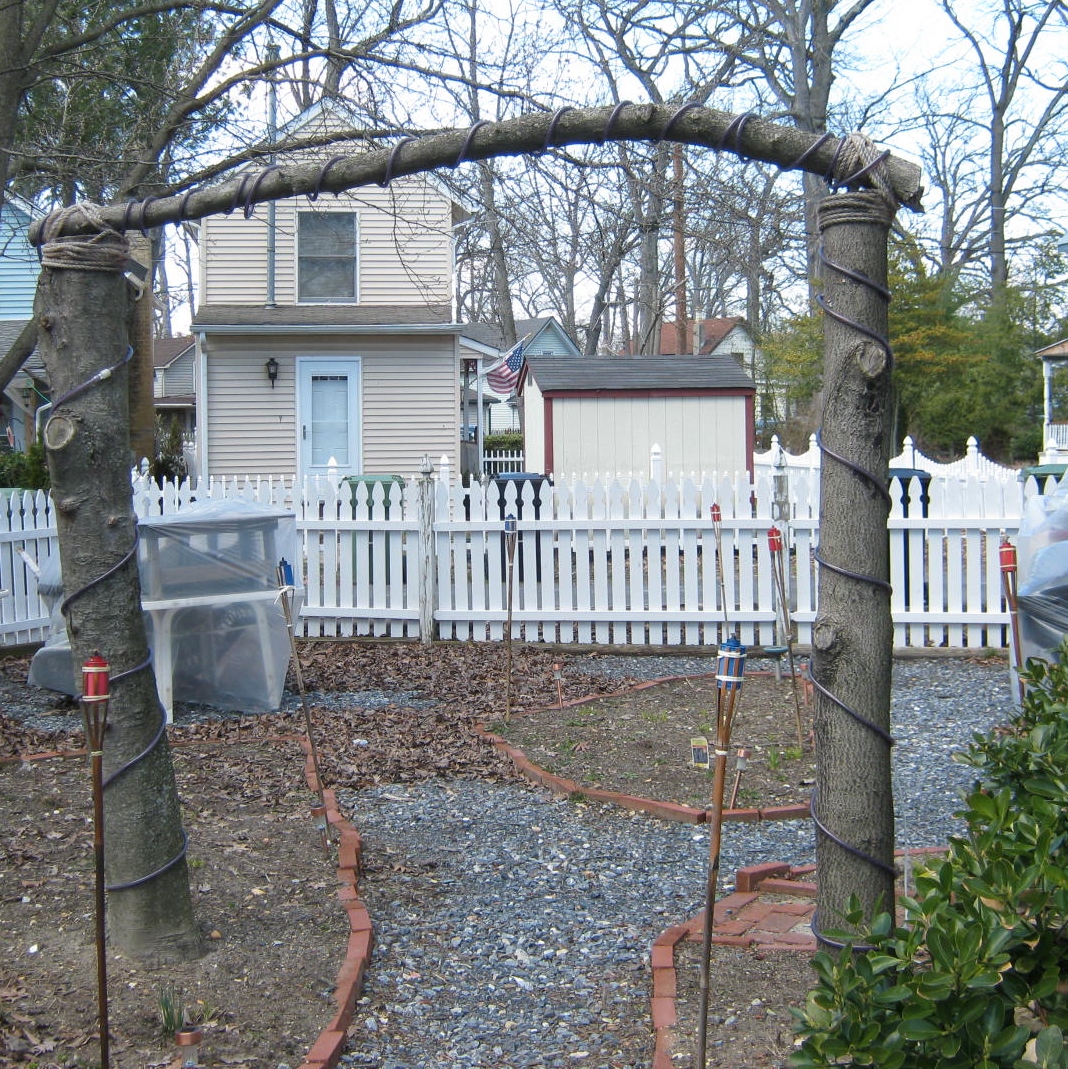
I thought this a clever use of two unwanted trees. The rope around the trees is actually a rope of lights. A really cute way to create an archway.

I thought this a clever use of two unwanted trees. The rope around the trees is actually a rope of lights. A really cute way to create an archway.

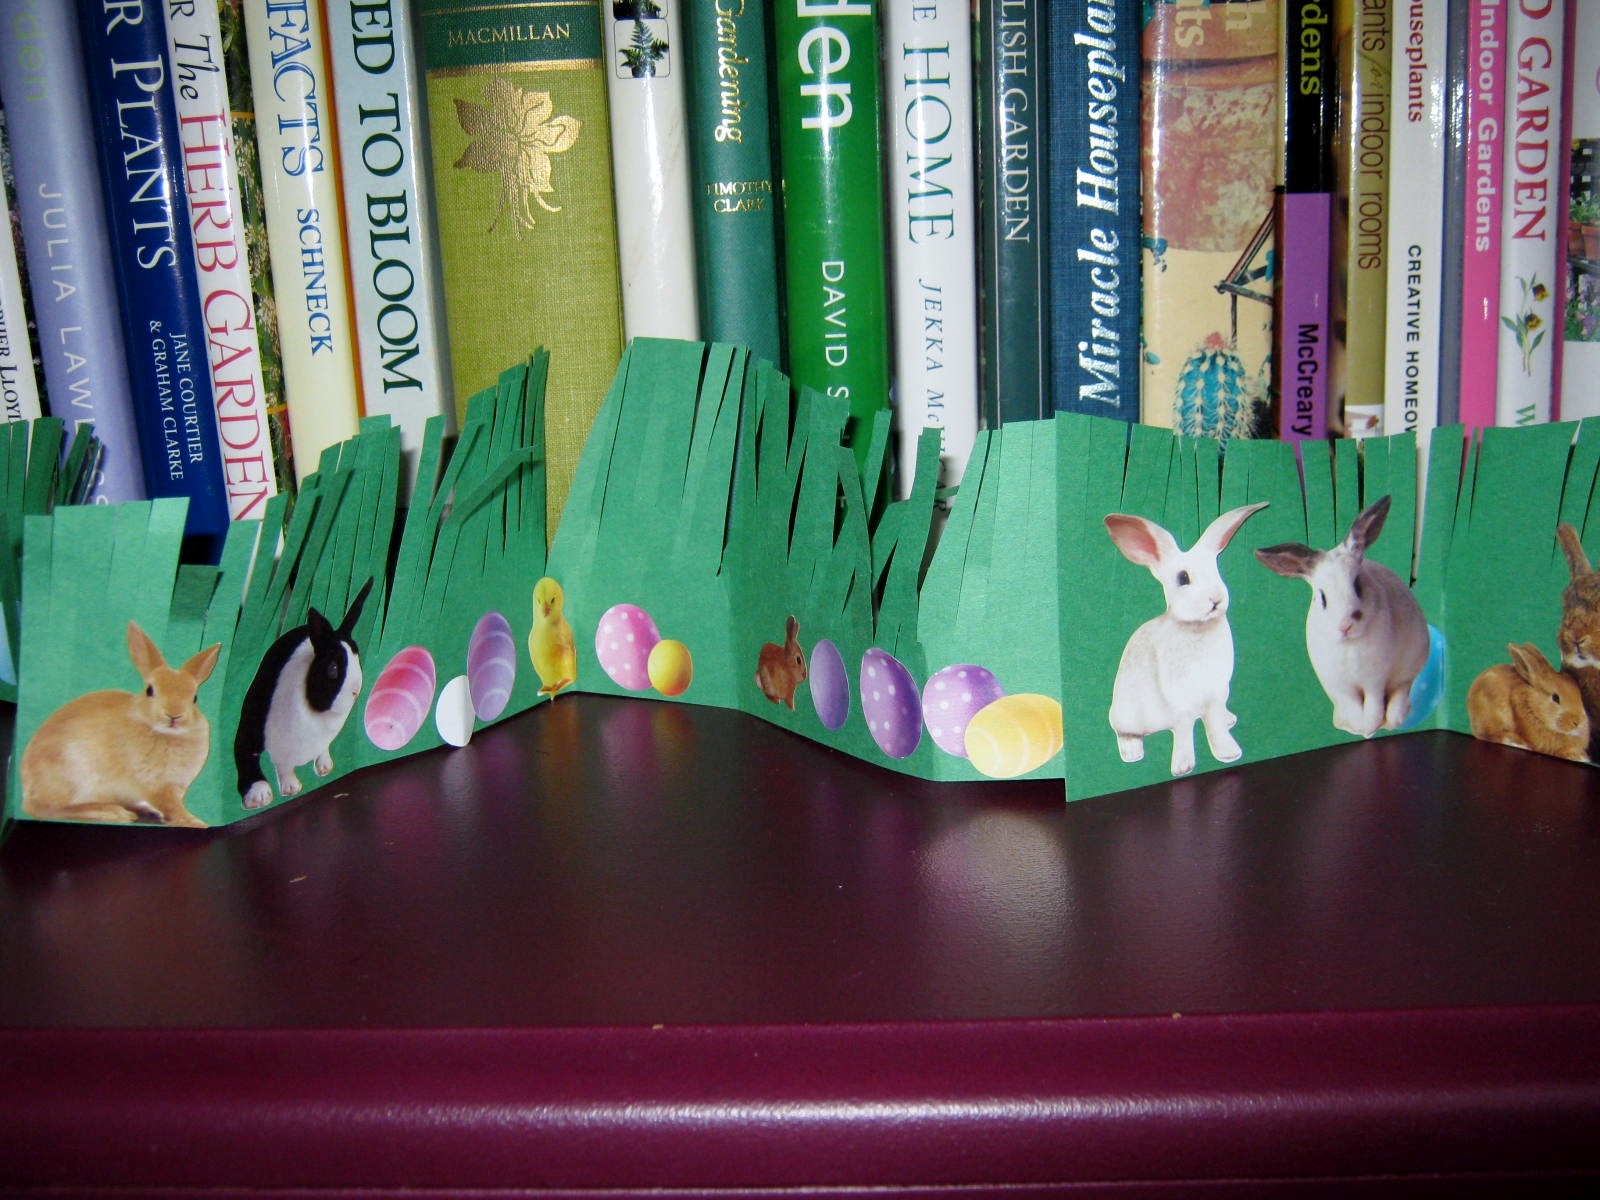
This is a quick, easy and inexpensive Easter Project for younger children. All you need is a piece of green construction paper, a pair of scissors, scotch tape and Easter stickers. Start by dividing construction paper into thirds. Leave one edge straight, cut the other edge in uneven, rolling curves. On the curved side cut straight snips an inch or two down from the top with the scissors. Uneven spacing is best…every now and then nip a piece off low. According to my grandson who created the grass above, “Those pieces of grass are the ones that bunnies bit off.”
When you have finished snipping, butt the pieces of grass together and tape the back sides together. Accordion fold the grass about every six inches. This helps it to stand. Add the Easter stickers to the front side. Voila! Festive bunny grass for only pennies. Heavier cardstock works too, but is not as easy to cut. Happy crafting!


A few years ago I found four small wooden frames at a yard sale for only a few pennies each. Of course I bought them, and stuck them away until inspiration struck. That time is now! I have four grandchildren and a multitude of adorable pictures of them to display on my fridge. What better way to do that than in frames specially crafted to match the kitchen and highlight their cuteness all at the same time.

I coated the frames with Folk Art’s Hauser Green shade. Oh the loveliness of that apple green! I let the paint sit for a minute or two, and then before it dried too much, I gently wiped away a bit of the paint from the gold trim with a napkin. Voila! I was left with amazing gold highlights shining through the green.
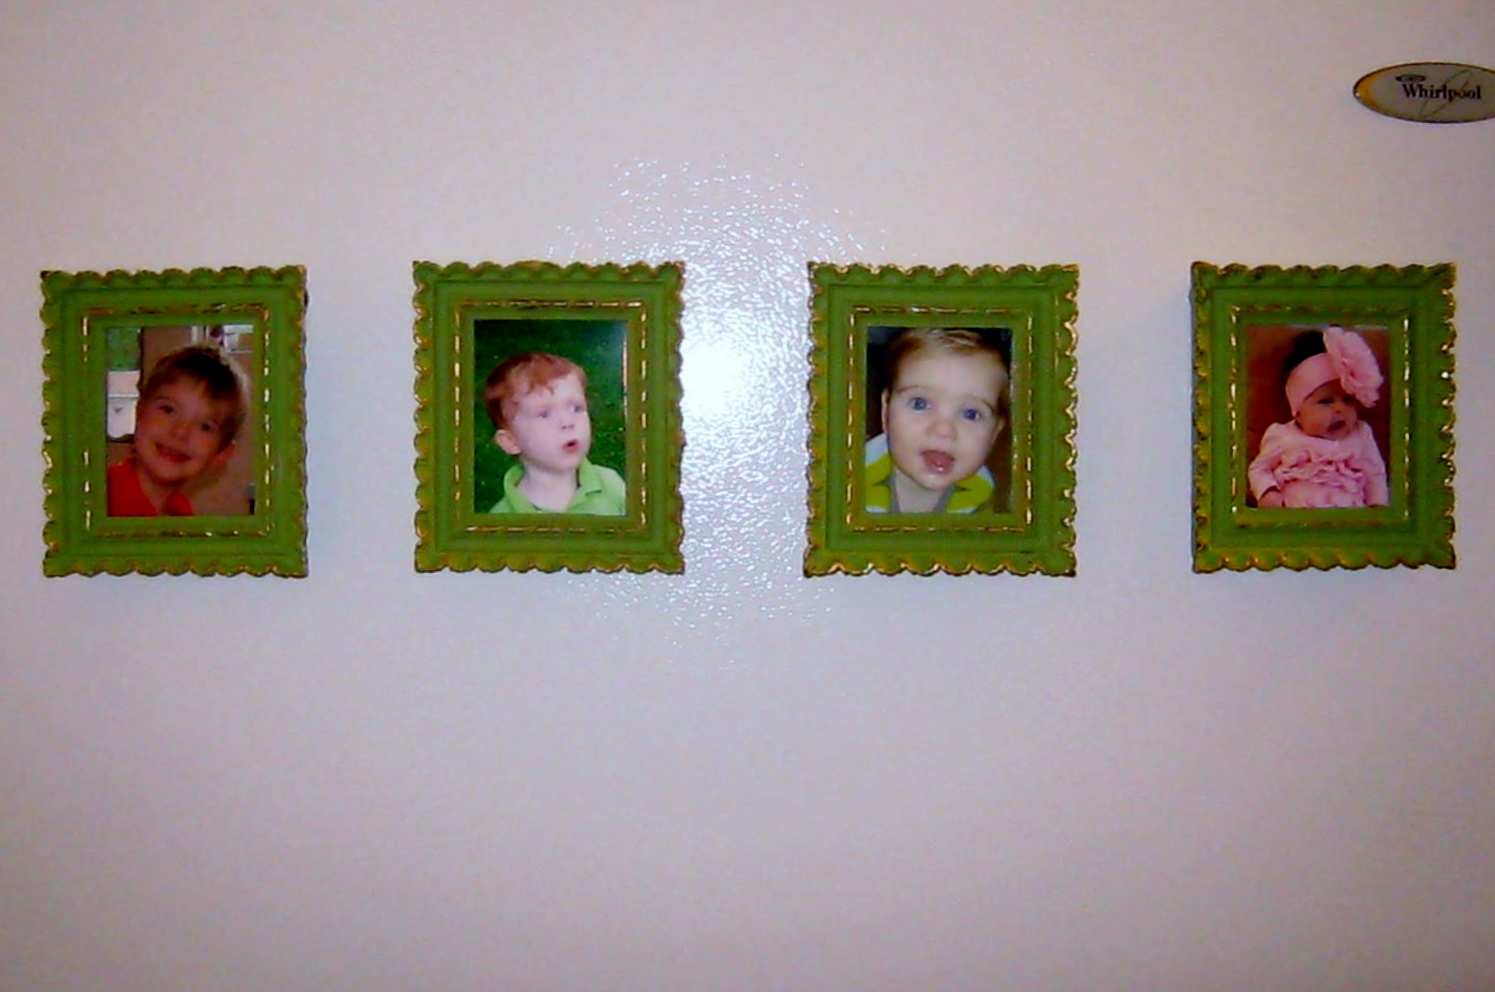
I added some heavy duty magnets on the back, inserted the pictures and hung them on my fridge. I smile every time I see the sweet faces framed in green and gold.


This week my grandsons and I created stained glass Easter eggs from waxed paper and crayons. The process must involve the participation of an adult.
SUPPLIES

To start, I tore away the crayon paper and chopped them into bits with a large knife, much as if I was chopping nuts. The crayons chop easily, but also fly about a bit. Children can create their own crayon bits by tearing away the paper and sharpening the crayon into fragments. This method takes quite a bit of time. Since I planned on creating three dozen eggs it was easier for me to prepare in advance.

Egg cartons are the perfect container for the chips.

I used a cookie cutter as a pattern, several egg patterns can be found at this link: Egg Patterns. Our eggs are about six inches in length. This was an easy size to handle and large enough to display the colors and patterns.
In retrospect, I wish I had traced with something other than a marker, but can’t think of what might withstand the heat of the iron and still show up for cutting. The process causing a bit of steaming and light smoke to fill the room. It’s a good idea to have some sort of ventilation when you begin (kitchen fan or a slightly open window) If anyone has a good idea for tracing please let me know via the comment sections below and I will edit the post to include your ideas. Thanks!

The boys scattered chips of crayon into the pattern with small measuring spoons. It’s best to limit each eggs choice of color to three, any more than that and you get a muddy look.

An adult needs to complete the next step. Fold over the waxed paper or cover with another sheet. If you are using a good iron cover with newspaper. Since I used a craft iron that is specifically used for messy crafts, I ironed directly on the waxed paper so I could see the progression of the melting. Here’s a step by step look at the bits melting into the finished design.


At this point lay the egg aside to completely dry. This only takes a minute or two. When it is cool and the wax hardened, cut the egg out with scissors.
I hang my eggs by using glue stick on the back and placing them directly on the windows. The glue dries clear, and upon removal is easy to wipe away with a wet washcloth before cleaning your windows with Windex.
We found using a large amount of chips equaled a vibrant, colorful egg. To create a more pastel appearance, such as the last egg featured below, use less chips.
Here a few samples of our Easter eggs. I hope you will give this beautiful craft a try.


![]()


Most of us at one time or another have crafted a project that uses an up-cycled bottle or jar. We all know how difficult the labels and glue can be to remove without marring the surface. Recently, I wanted to create a Discovery bottle with my grandsons. Since the project needed a clean plastic bottle, I began to remove the label ahead of time. The glue and paper were very stubborn. I cut and peeled away the label, soaked the bottle in water, but was still left with unsightly glue and scraps of paper on the surface.
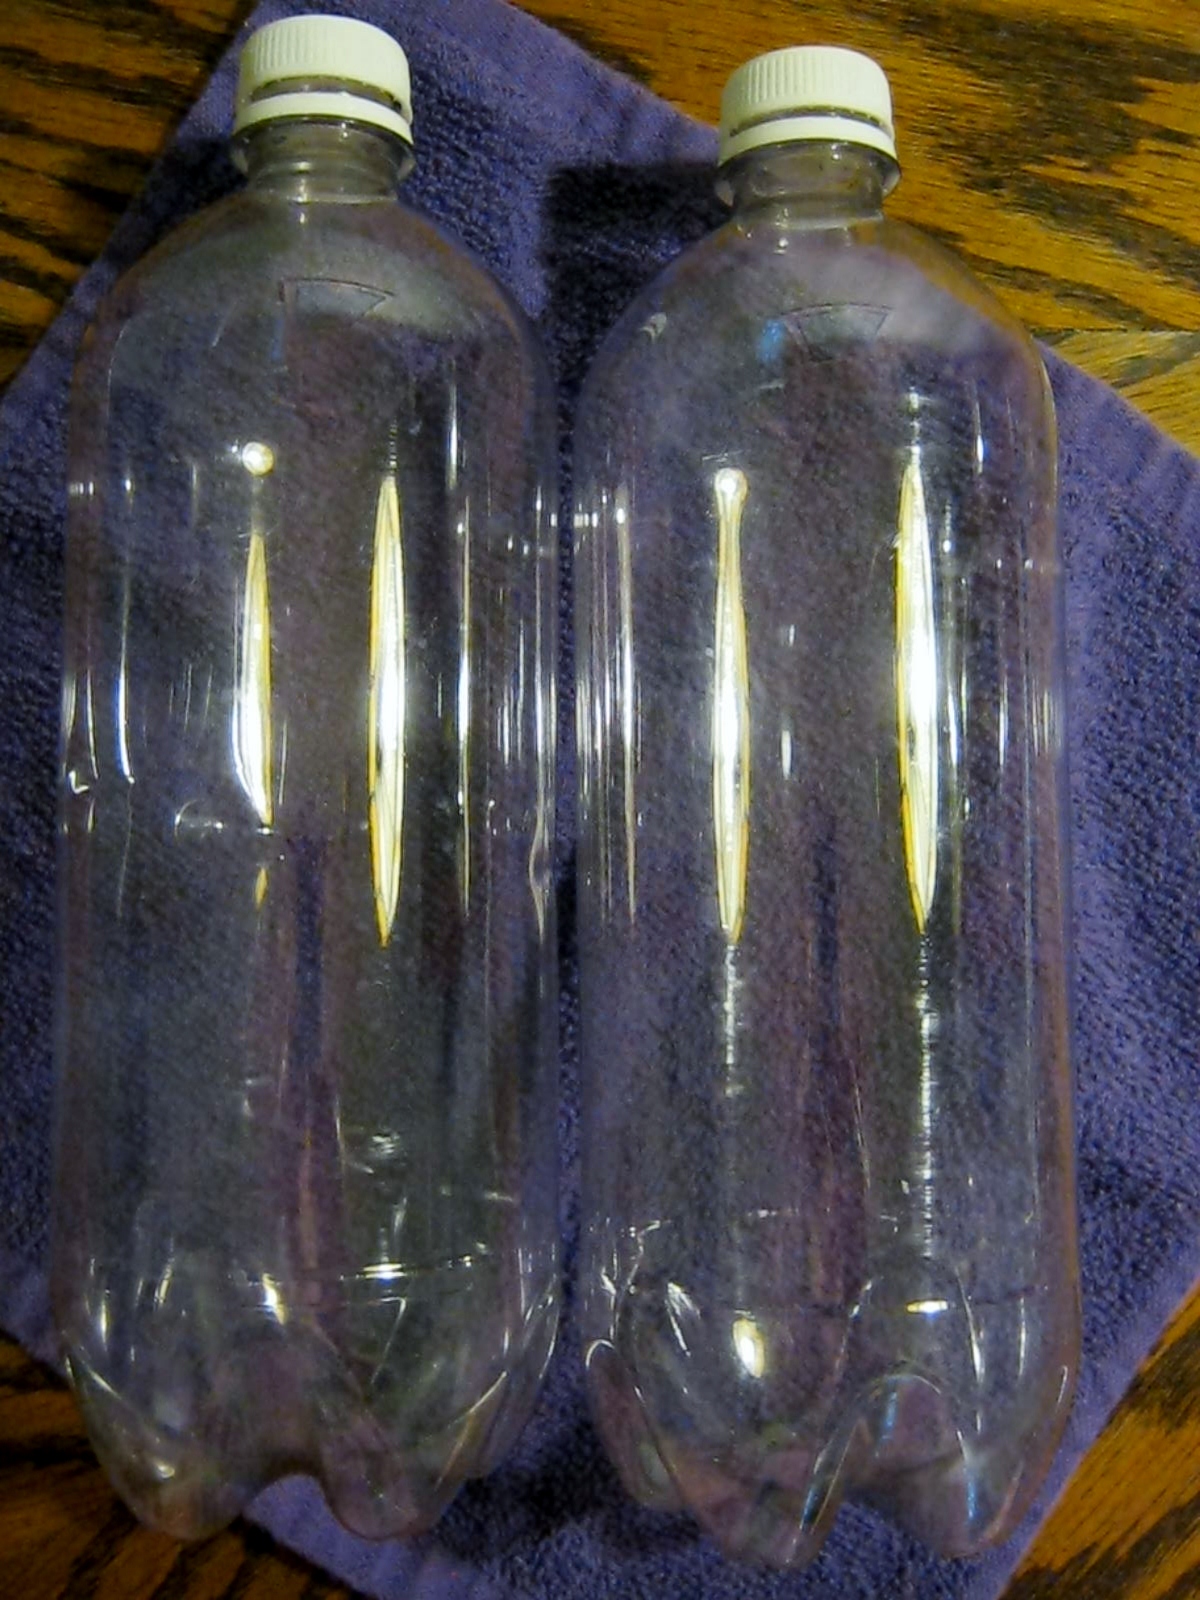
I searched the Internet for a solution and found the tip of using ordinary mayonnaise to remove labels. I gently scraped away anything I could with the top of a butter knife, applied the mayo and then scraped again in about an hour. There was still residue. I reapplied and waited another hour. I removed a bit more label, reapplied again and tried once more. Hooray! The mayonnaise worked. If you use this tip for removing labels you will be pleased that it is chemical free and very gentle. The downside is it takes a few hours. Use this tip only on surfaces that are hard as you will need to wash afterwards with warm soapy water to remove the oily residue of the mayo.

A wintry afternoon was the perfect time to begin making “Discovery Bottles.”
Click here for more information on Discovery Bottles: Discovery Bottles
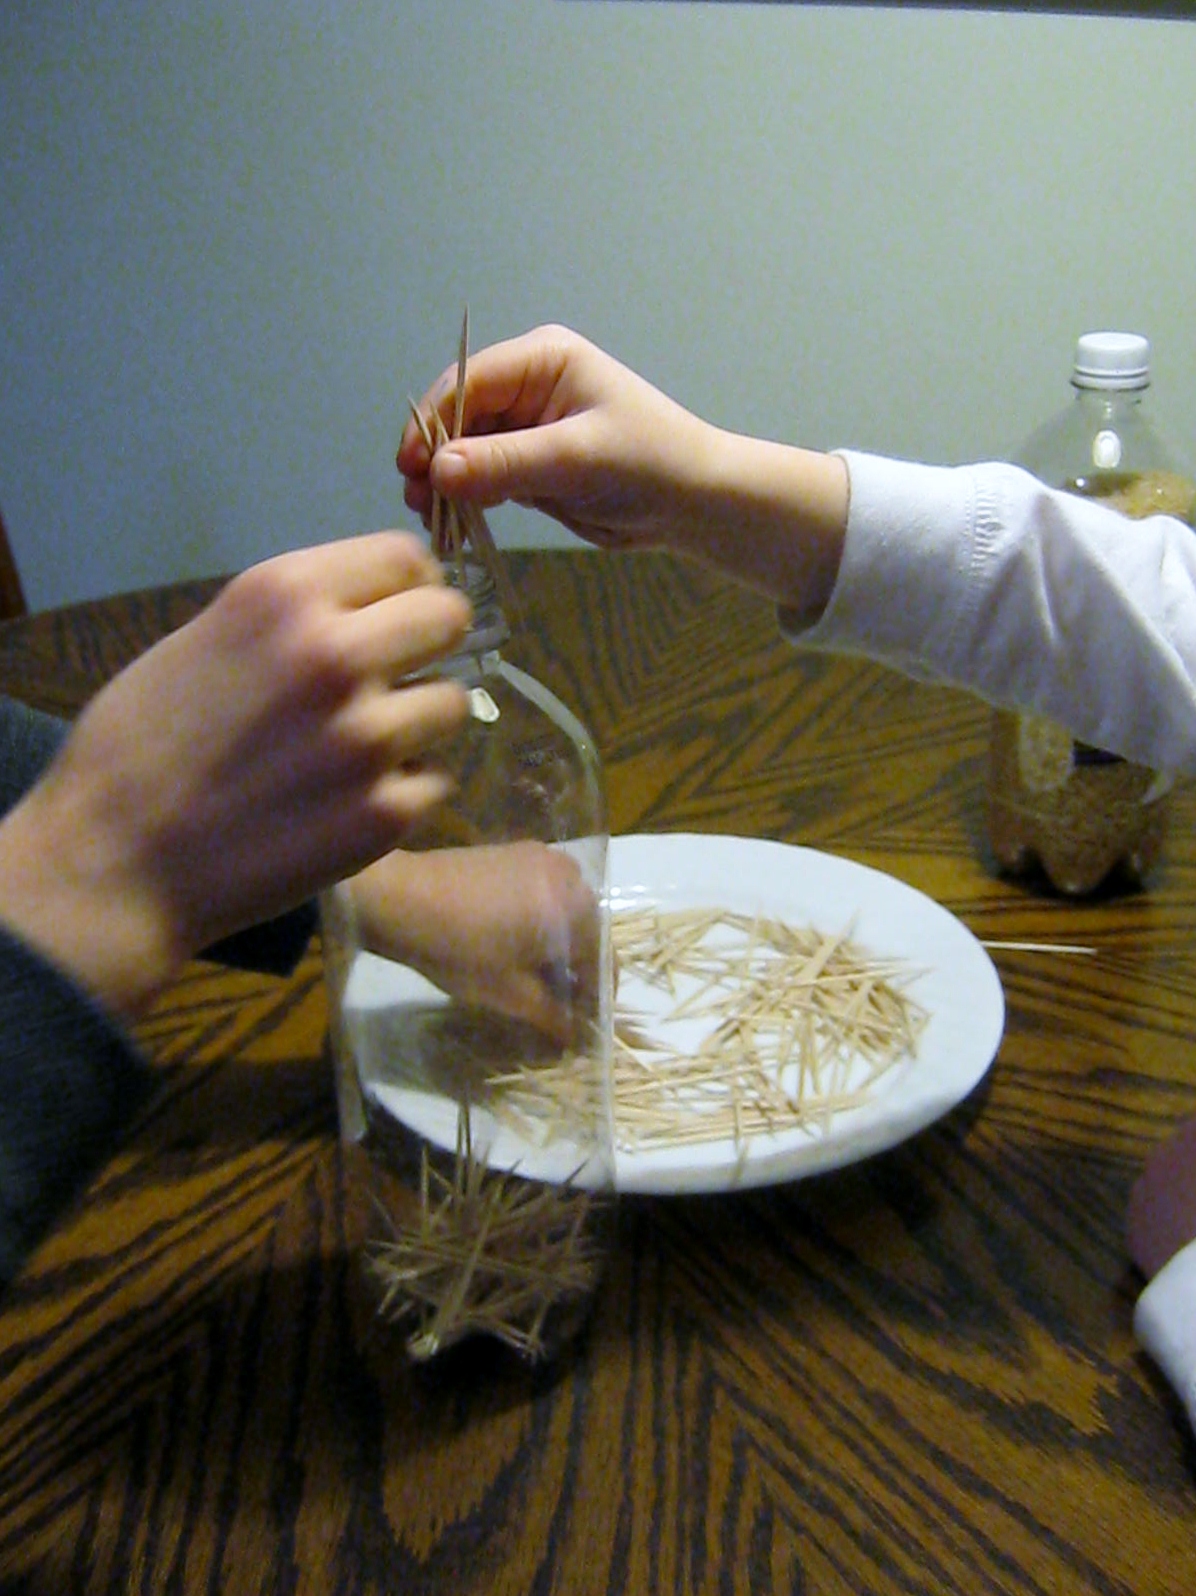
We decided to make a rain bottle first. Fill the bottle with toothpicks, add some dried rice, when you turn the bottle upside down the toothpicks and grains of rice sliding down the plastic sounds like rain on a roof. The boys really enjoyed filling the bottle, and after I glued the cap on with hot glue, they had fun turning it up and down to hear the soothing sound of the “rain.”
If you are creating Discovery Bottles for toddlers please take care to use a plastic bottle with a very wide cap/lid. A small water bottle cap is not appropriate because of choking issues. Gatorade bottles and other juice containers often have a wide lid. Remember the elbow rule, nothing smaller for a baby or toddler than your elbow.
Always use a permanent glue when closing the bottles. I used hot glue for the rain bottle, but if I was using liquid in the bottle I would use a double dose of glue: a waterproof sealant and then a layer of hot glue for extra strength.
![]()

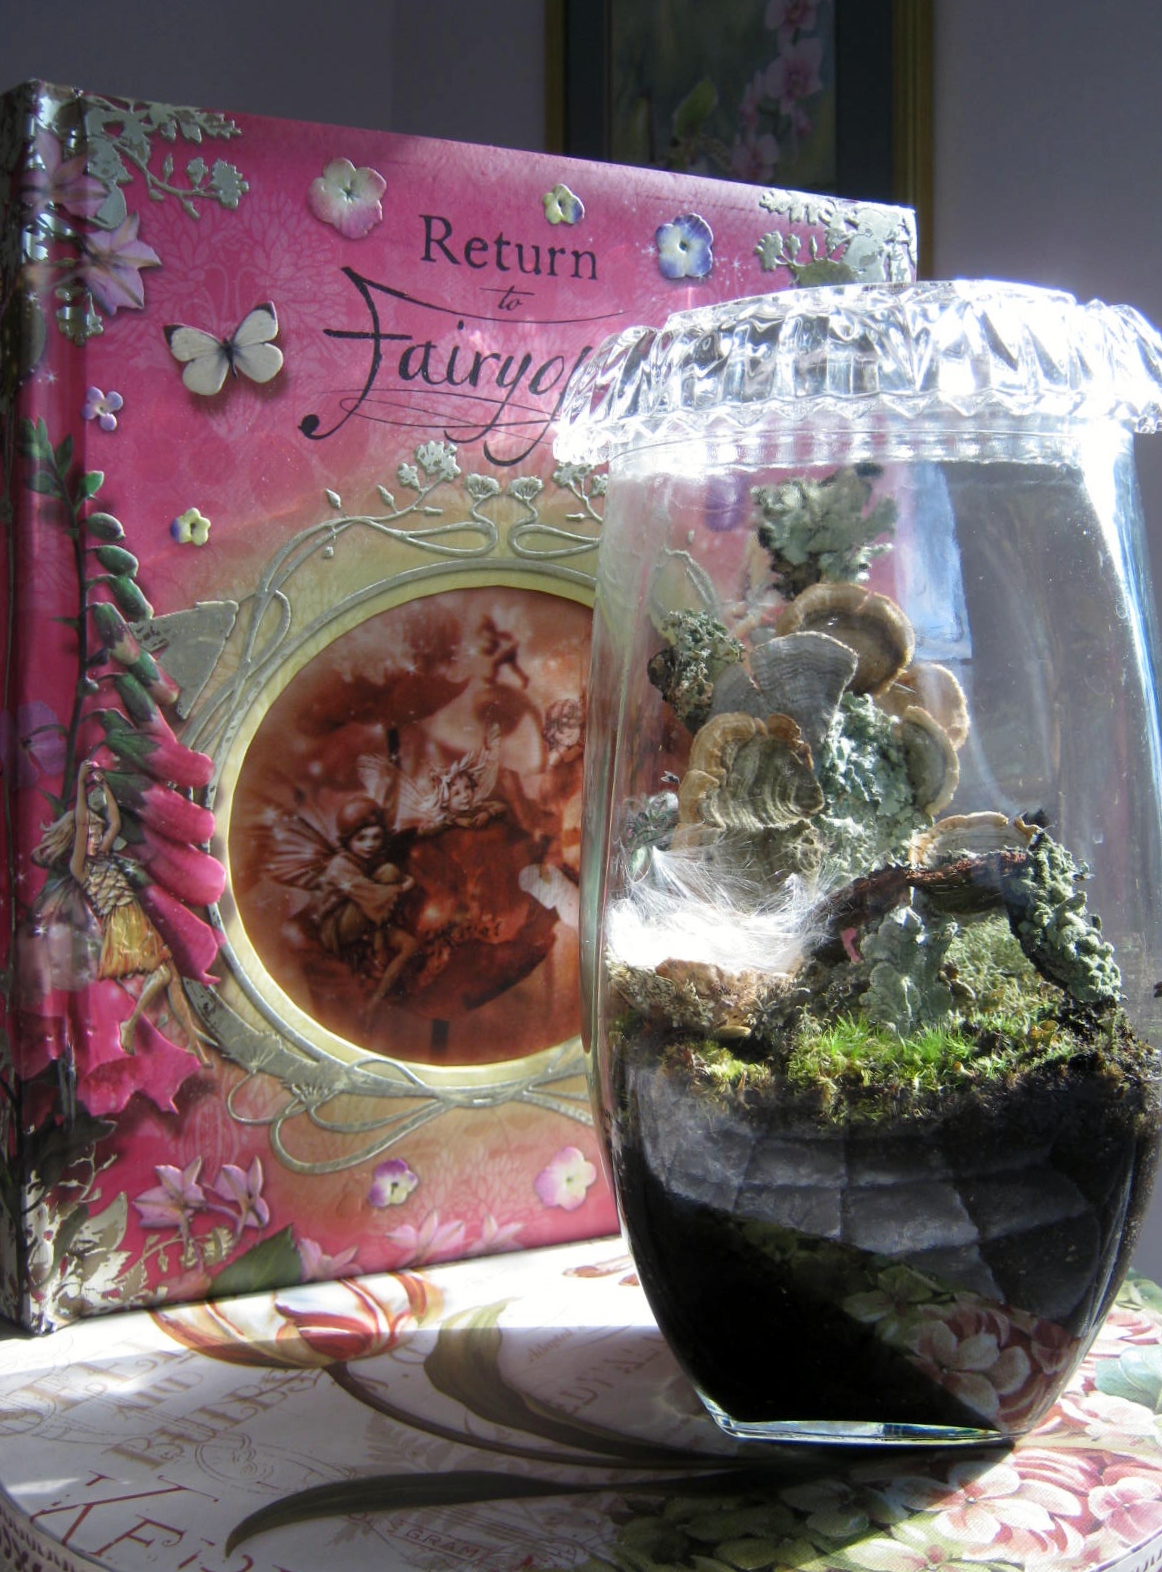
I’ve been experimenting with lichen covered branches and bark in an attempt to create a fairy chair that will actually be alive and growing inside a terrarium. I think I succeeded with the mossy concept when I crafted the chair shown above, but I am not happy at all with the appearance of the miniature replica. It has no fey appeal or magical delicacy. To my mind, it calls to mind a gnarly resting place for the local gnome or troll instead.
I do like the papery thin, empty insect pod I used as a fairy basket. It is filled with several pieces of milkweed fluff, which when tossed into the air become floating fairy wishes. I can just imagine a sweet woodland lady sitting down and spinning the soft strands into gossamer yarn.
Aesthetics aside, a good tip for covering a terrarium is to use a shallow glass bowl or dish for a lid. This crystal lid fits nicely on top of my odd-shaped garden. I’ll keep trying to come up with a way to create the fragile, yet strong, fairy furniture I desire. Until then, “Calling all gnomes!”

I promised when I started this blog to be truthful when a project fails or has a problem.
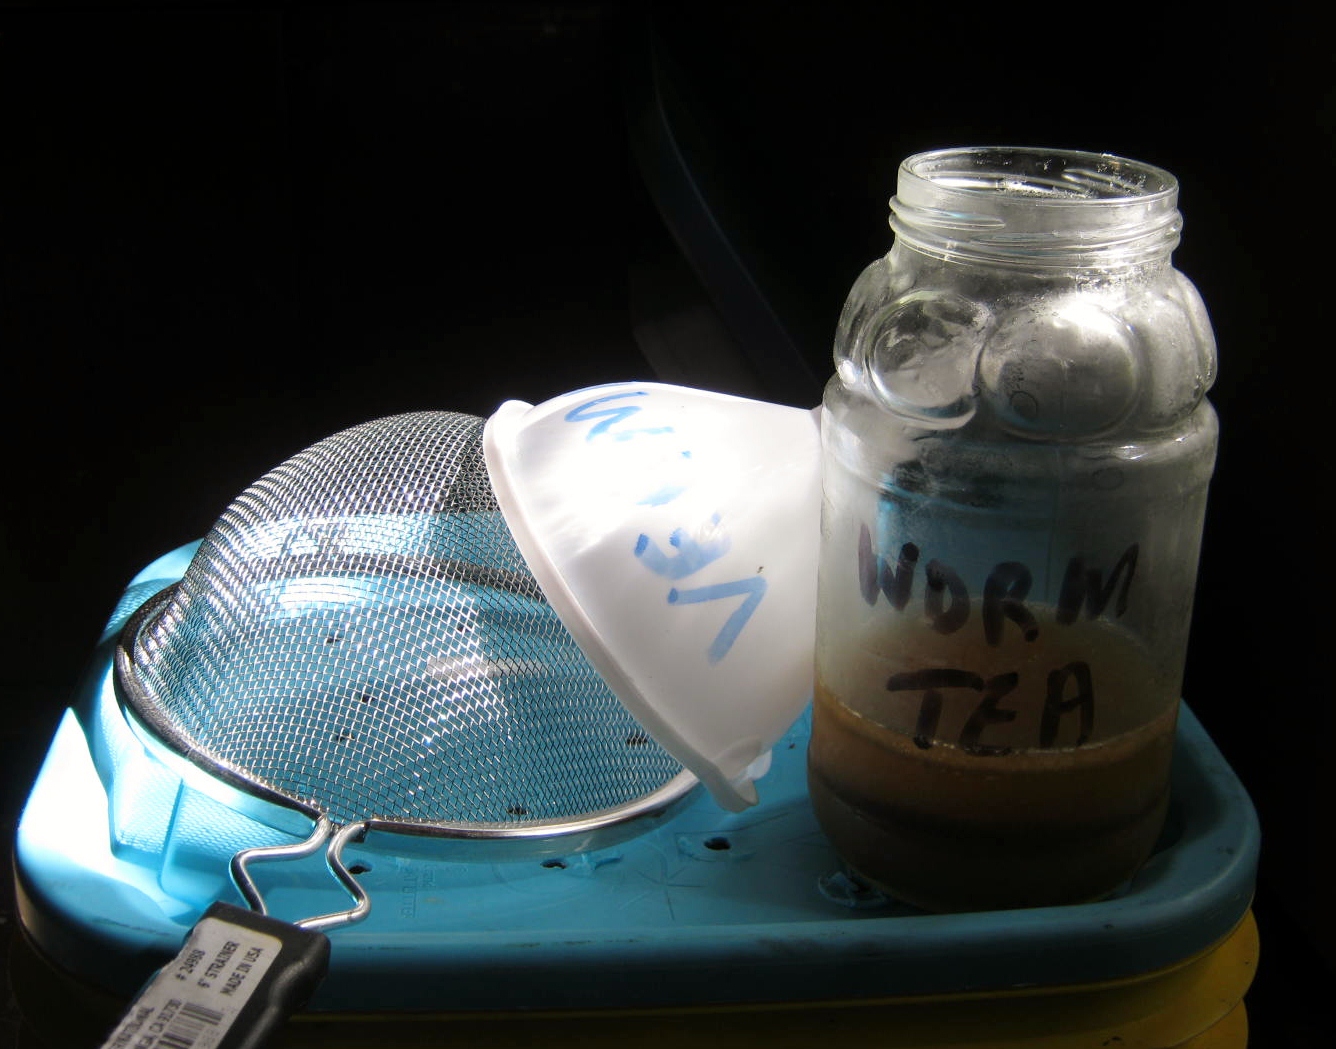
Vermicomposting (Worm Farming)
Problem #1 – My worm farm is going strong and thriving, but in the time I’ve been “farming” the worms I’ve run up against two very “stinky” problems. Most of the time my worm farm smells fresh, a bit like the fragrance that wafts upward when you rustle your feet along a woodland path. A sure proof way to foul that nice smell is to feed the worms leftover broccoli. OH MY!!! The smell was absolutely horrendous for days. Thankfully the worm farm is in my basement, and the smell didn’t escape too far into main house, but it was definitely noticeable at the top of the basement stairs and in the hallway. Happily, the worms seemed to really like the mushy, stinky broccoli, and ate it quickly. Hooray! But…I will never, ever, ever feed them a cruciferous vegetable scrap again. Only apples and other sweet-smelling leftovers from now on.
Problem # 2 – Do not feed your houseplants the worm tea as fertilizer. The worm tea had very little odor when harvested, but seemed to develop an off odor after applied to the soil of houseplants, even though it was very watered down. Lesson learned – Save the worm tea for outdoor plants.
Problem #3 – I have had two escapees. I think they slipped out the holes in the side. The unlucky fellows didn’t even make it a yard past the worm farm. Since I keep the bin in the basement the concrete floor acted exactly as a sidewalk does…think dried and shriveled worms in the summer sun…the escapees seemed to have instantly dried up and died on the basement floor.
To read about the start of my worm farming click on these links:
The Worm Farm
Worm Farm Update


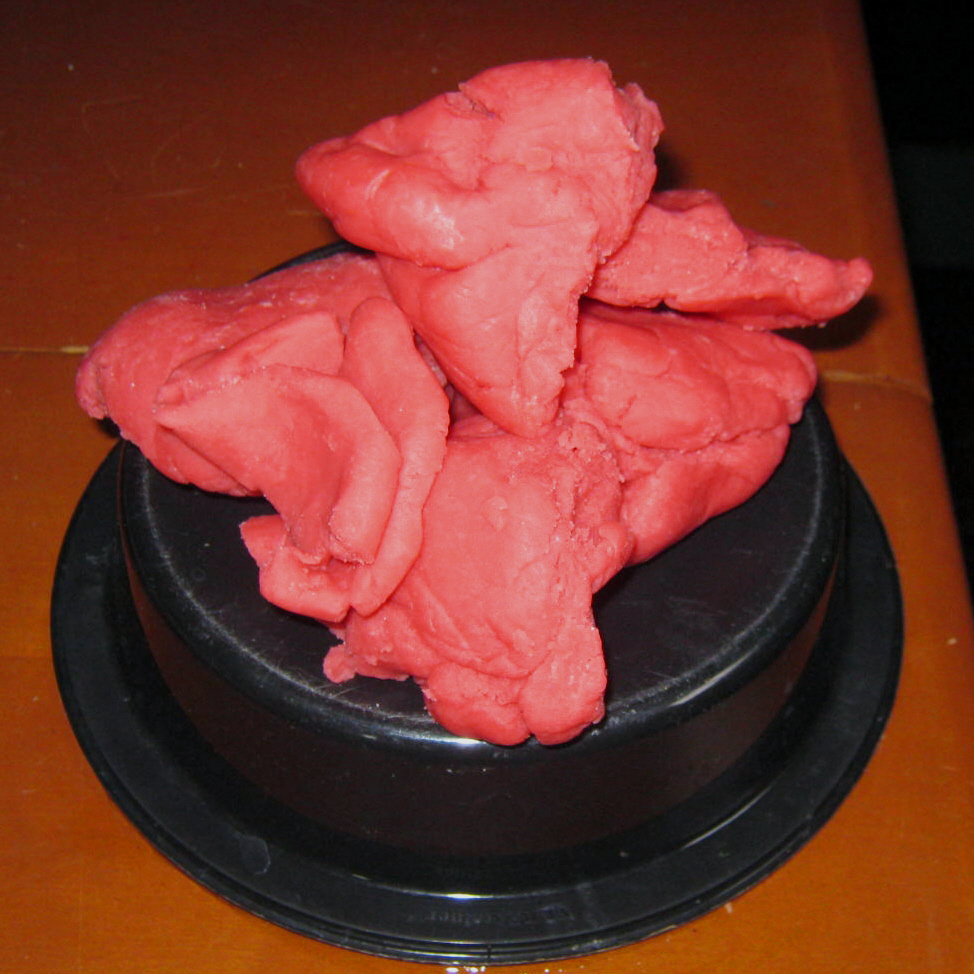
Homemade Playdoh
We had a very good time making homemade playdoh yesterday. The project is a perfect winter’s day craft. The total time was about 30 – 45 minutes. The children sifted the ingredients together into a medium sized plastic bowl. (flour, salt and packet of unsweetened Kool-Aid, recipe below) The next step was the addition of a tablespoon of oil and boiling water. (Must be done by an adult)
Oh my goodness does the playdoh smell good!
After all the ingredients were stirred together we set the dough outside in the cold garage for 5 – 10 minutes to rest and cool down. An adult transferred the dough into ziplock bags and the children pounded away for 5 – 10 minutes. Oh what FUN! The recipe makes about 2 cups of playdoh. The color is very vibrant.
We didn’t have good luck with yellow (lemonade) Kool-Aid. The addition of the packet did not produce much color in the dough so we added a packet of orange.
One drawback, the oil does transfer to the hands and working surface a bit. My grandson put the playdoh on top of his head to mimic a brain and the oil from the dough got into his hair. Make sure you protect all surfaces the children work and play on.
All in all, this project was a big success and quite a lot of FUN!
Kool-Aid Playdoh Recipe
1 cup flour
1/2 cup salt
1 packet unsweetened Kool-Aid
1 tbs oil
1 cup boiling water (must be poured and stirred in by adult)
Sift first three ingredients together into a medium sized bowl. Add water and oil and stir. Let rest in a cool place for 10 minutes or so. Place inside a ziplock bag, knead and pound until it is smooth and soft. Have fun with your Kool-Aid Playdoh

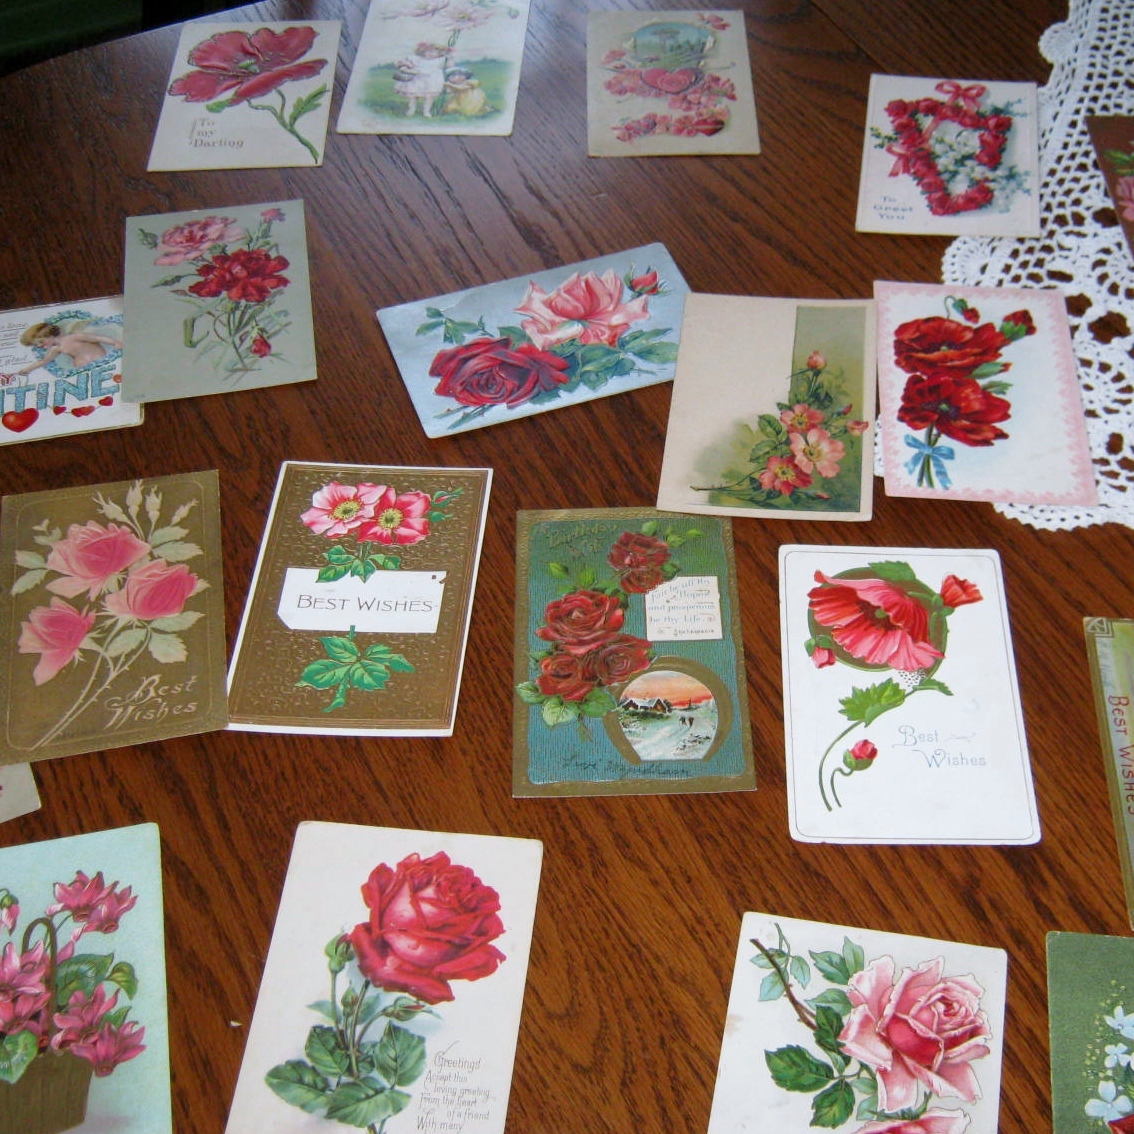
I love to display holiday themed antique postcards when I have a chance. Below is a step by step tutorial on how I accomplished this and provided a bit of protection for the cards at the same time.
The only equipment needed is fancy-edged scissors, small straight-edged scissors, construction paper and postcards.

Lay your postcards out on different colored construction paper to help you decide how to best arrange them. Three postcards fit on a piece of standard construction paper.

If you have fancy scissors cut a pattern very close to the edge so that you don’t lose too much of the paper.

Cut the construction paper to about a 6 1/2 to 7 inch height. Tri-fold this rectangle and then cut small snips on the diagonal to hold your cards. You might need to make a few trial runs of this to get the placement correct.
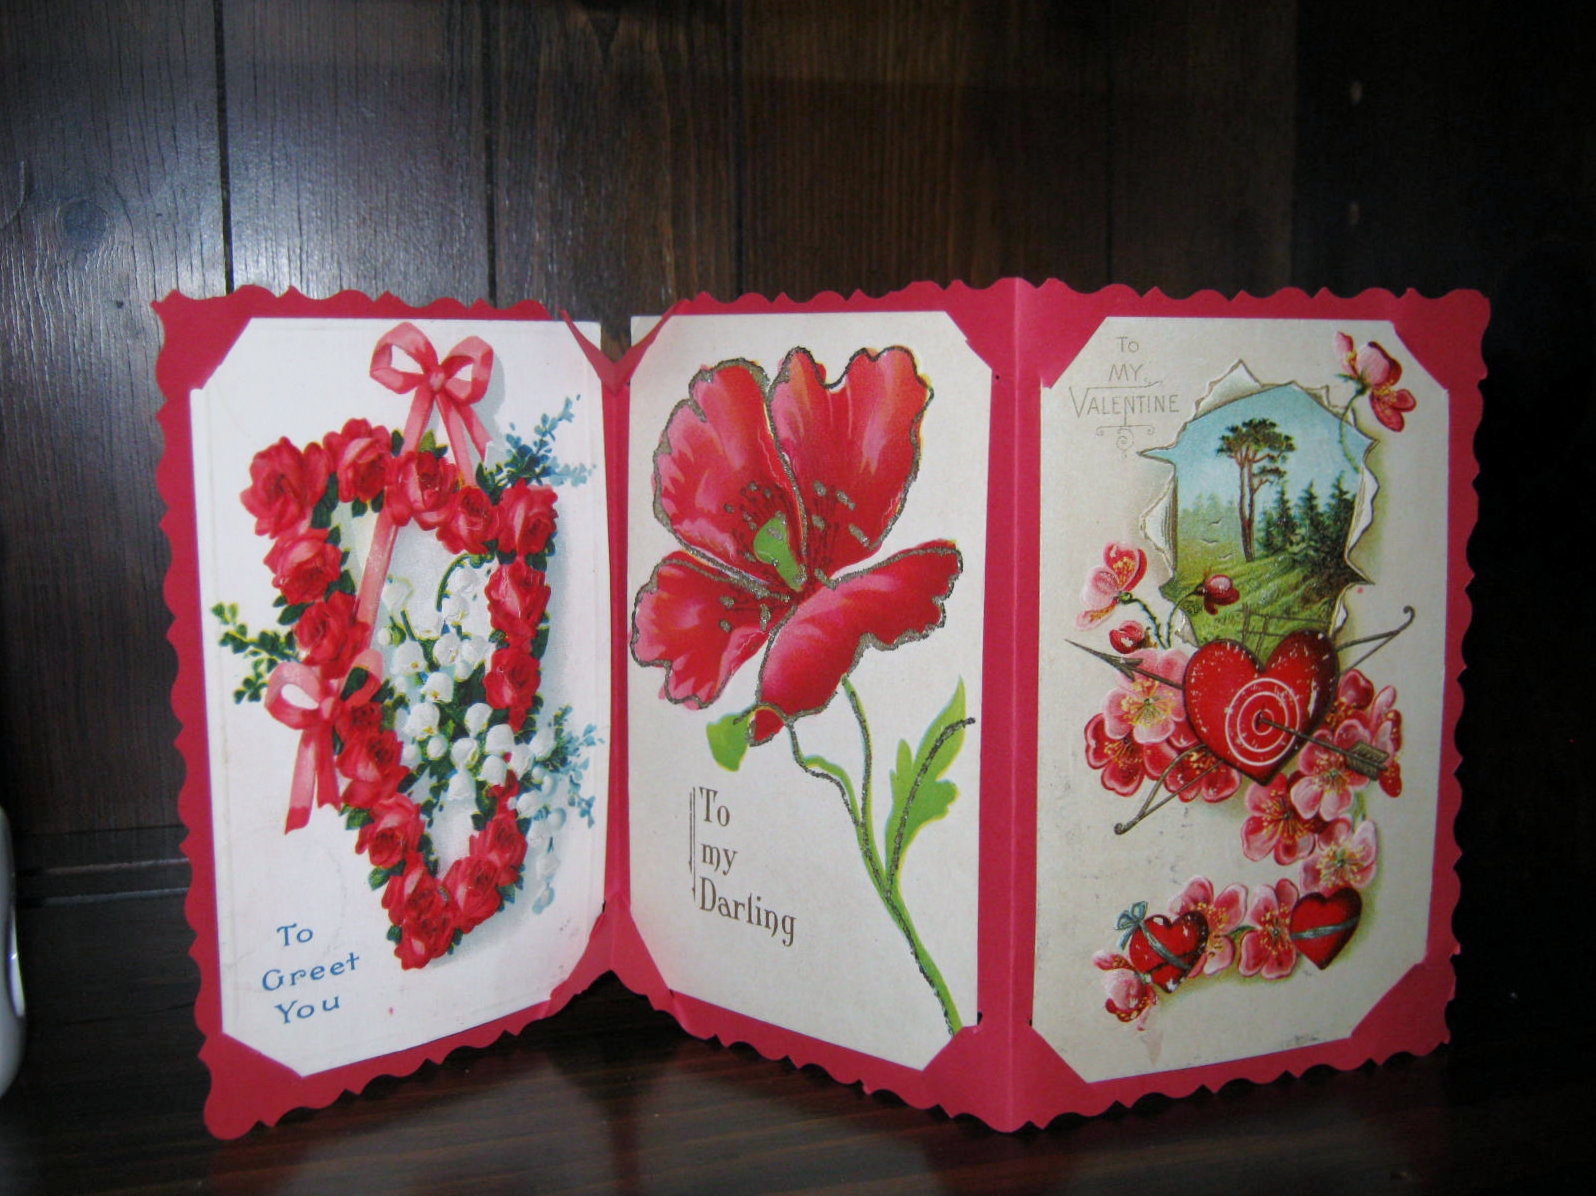
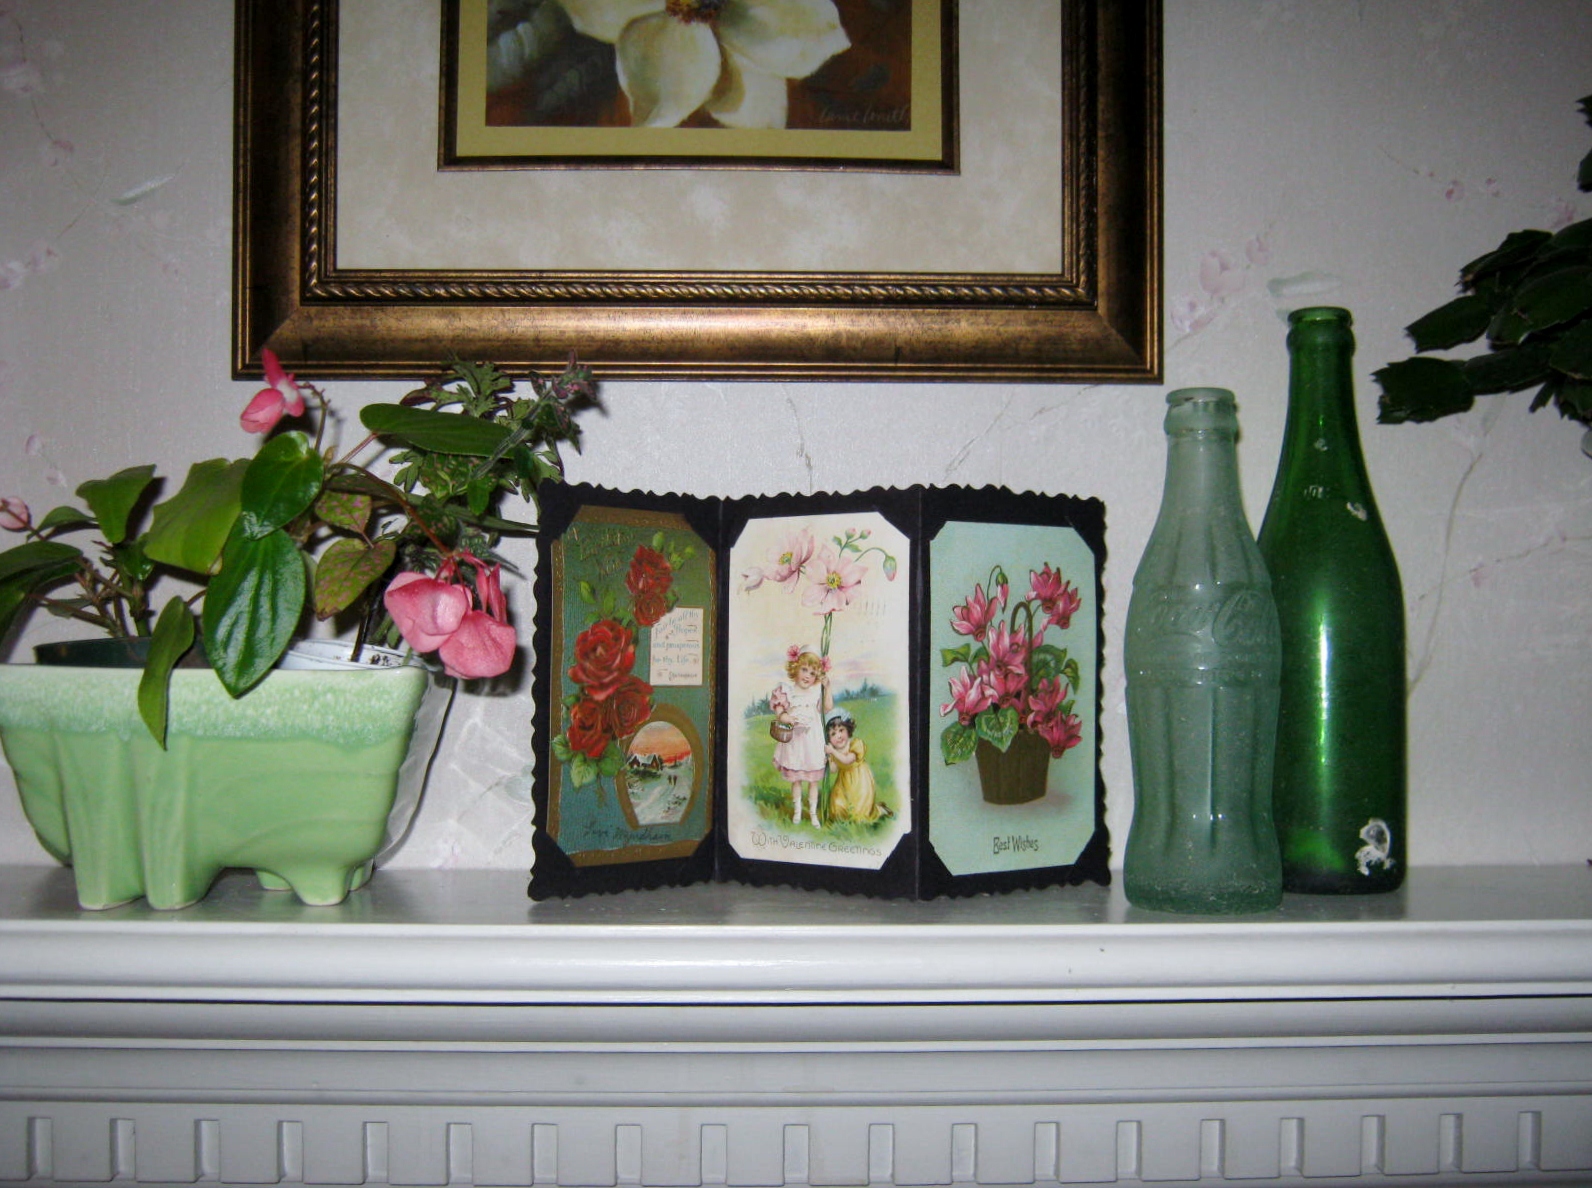
Carefully slip the corners of your postcards into the diagonal slits. Displaying the postcards like this lessens the wear and tear the edges and corners might receive. Remember to keep them out of direct light.
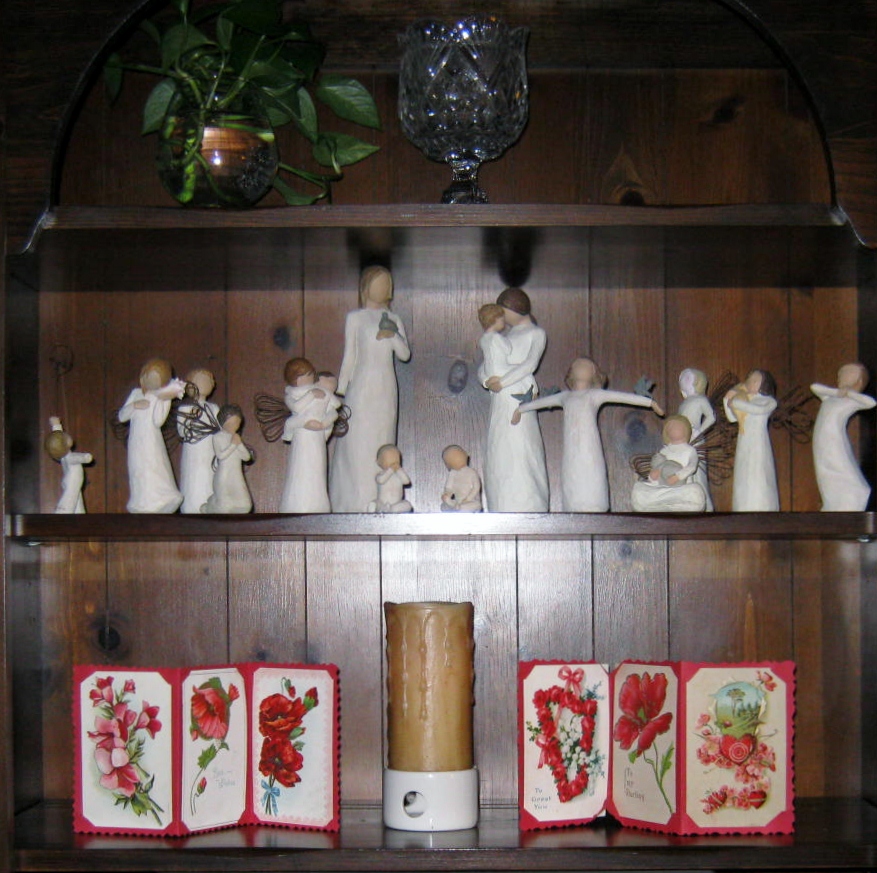
Display your creations all over your house.
Happy February and Happy Crafting!
![]()


The lack of sunny weather for outdoor play is the perfect opportunity to break out Paperclay.
“Creative Paperclay is a non-toxic modeling material that can be sculpted, molded or shaped, and air dries (no baking!) to a hard finish that can be carved, or sanded – perfect for artists and crafters of all kinds!”
I found Paperclay at my local craft store. It is reasonably priced, and even better, I used a coupon for 40% off.
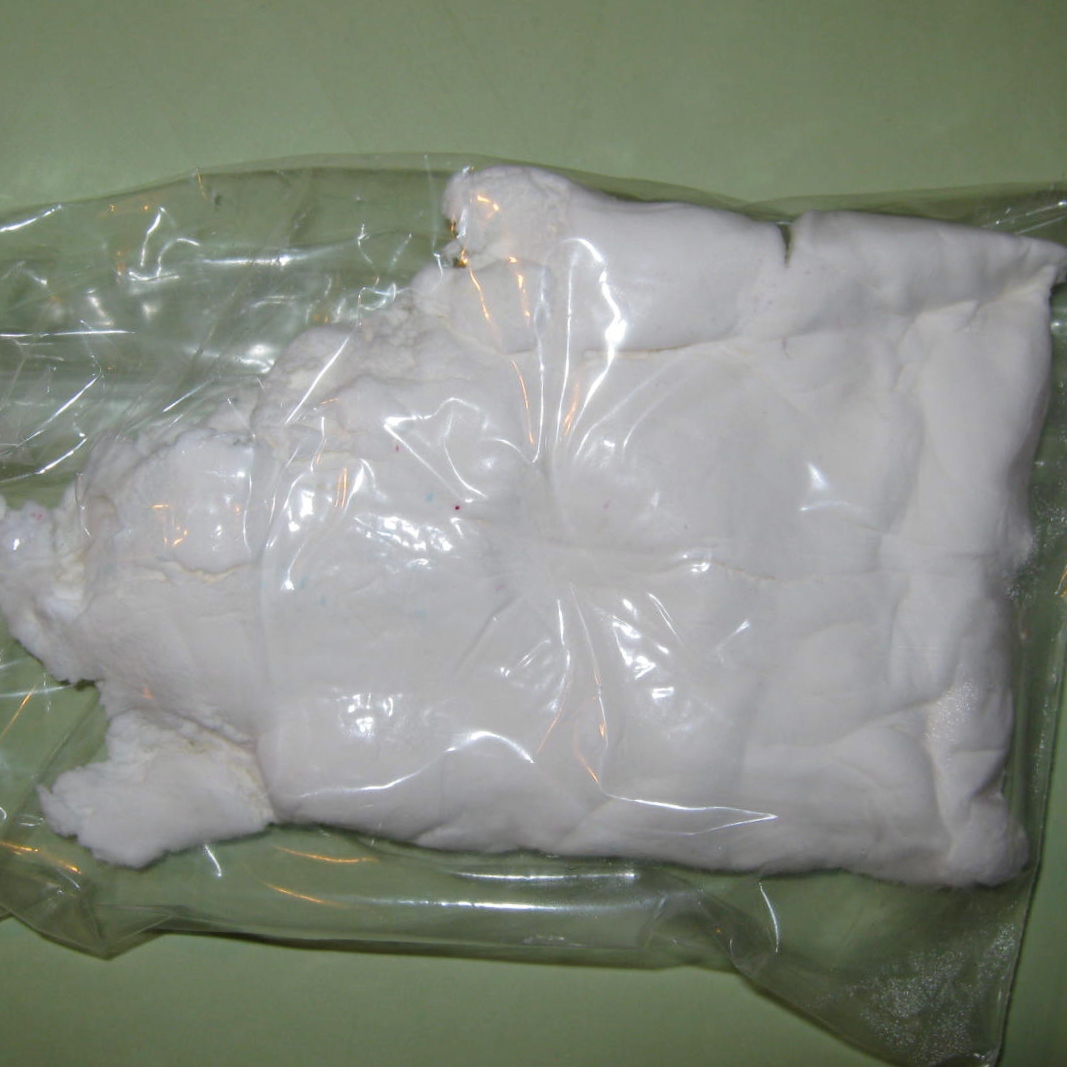
Instead of painting after the clay was molded, I decided it would be easier to tint it before shaping. Because my grandsons are very young, I completed this step before they began to create their designs. Working over the kitchen sink I created a cup shape with a piece of the Paperclay. I globbed a quarter sized amount of Crayola washable paint into the cup with a paintbrush and worked it through the clay. The clay quickly absorbed the color. I found I needed to add a bit more paint to increase the vibrancy of the hue. I turned it in on itself and kneaded it until the Paperclay returned to a drier state.
At this point I gave it to my grandsons to enjoy and fashion into their mushrooms, piglets and dolphins. They both worked on a piece of freezer paper, but waxed paper would work just as well. The dolphins were a challenge, the mushrooms and the piglets were very easy. In 24 hours they were completely dry. We enjoyed the texture of the finished product, very lightweight, and reminiscent of a dried out marshmallow.
I decided to glue the magnets on myself with Tacky Glue. Magnets such as these are very dangerous around small children. Swallowing them can be fatal. Be extra cautious when using magnets of any kind around children.
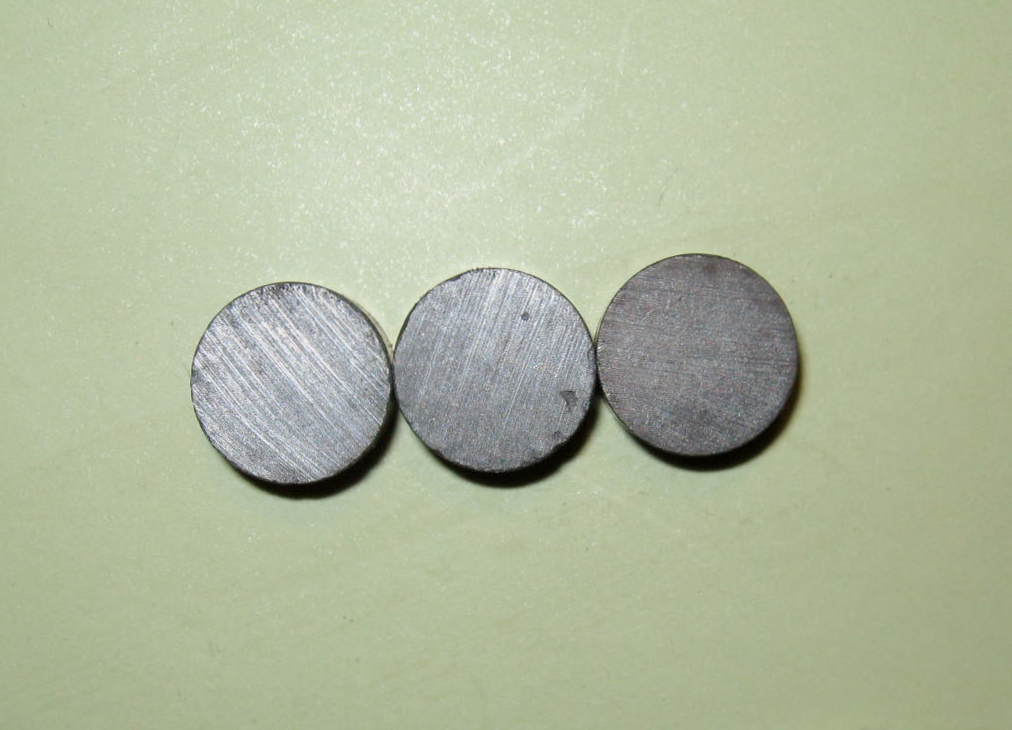
The magnets are not intended to be a toy. Use the finished product on the upper levels of your fridge door to hold all your children’s masterpieces in place. Happy crafting.
To learn more about paperclay check out their tips and techniques, along with many project ideas, at their website: Paperclay Tips
The inspiration for our project was found in our Sesame Street Craft Book.
![]()

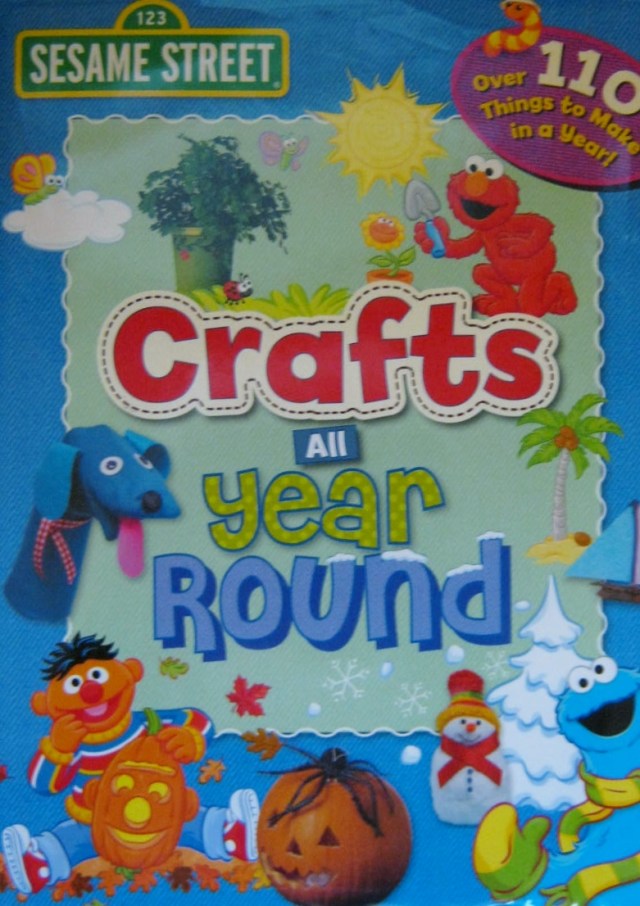
I love this book from Sesame Street. It is full of ideas to craft with young children. My grandsons and I have enjoyed making several of the projects, and last night, a sleepover night, we were able to complete another one.

Using a pair of my old socks that had lost their elasticity we cut a piece of heavy cardboard into a long rectangular shape and inserted it into the sock. This kept the two layers of the sock from touching as we glued bits and pieces to both sides. Next we glued on a red foam tongue in the area right under the heel, facing toward the toe of the sock.
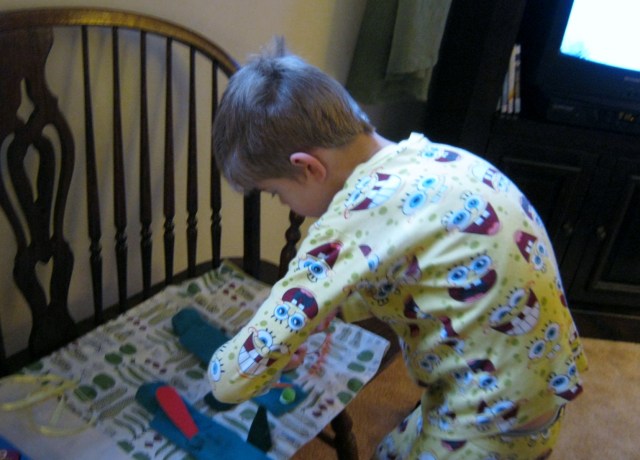
The next step was the fun part…using more tacky glue we added googly eyes, a pompom nose and felt ears on the edges, facing outward. We made sure that the felt ears extended beyond the sides of the sock so that when the puppet was on a hand the ears would droop downward. Everything was left to dry for several hours, then we removed the cardboard, tied a ribbon around the neck of the puppet and added a heart dog tag.
SO MUCH FUN!!!


I have a miniature Christmas tree in my living room that I am trying to keep outdoorsy in appearance. I wanted to have several butterflies adorn the branches, but didn’t want to spend a fortune buying more decorations. A good solution was this border of butterflies. I separated them by cutting with small manicure scissors. I then used some wired silk leaves I had on hand, and cut most of the leaf away leaving a nub of silk on the wire. I encased this nub within two of the butterflies, glued together back to back.


This was very easy to do and even easier to twist onto the tree by twirling the wire around the end of the branches a few times. I like the natural look of this Christmas tree.


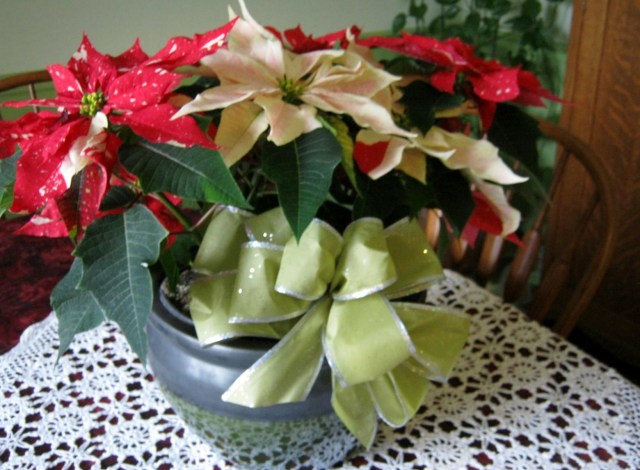
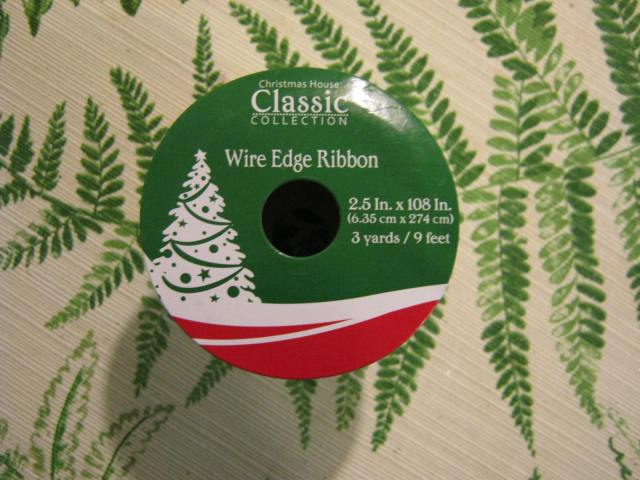
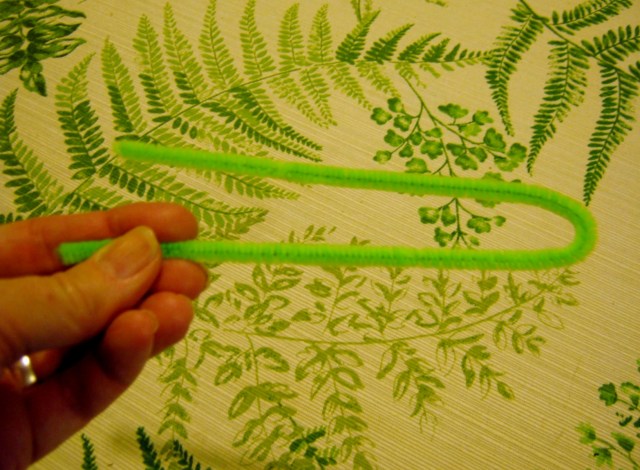
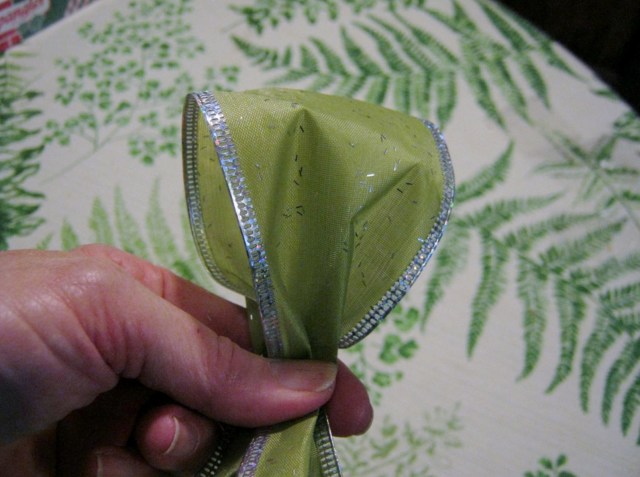
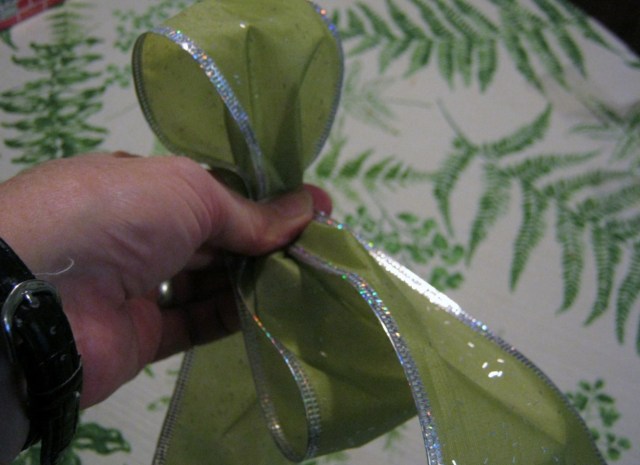
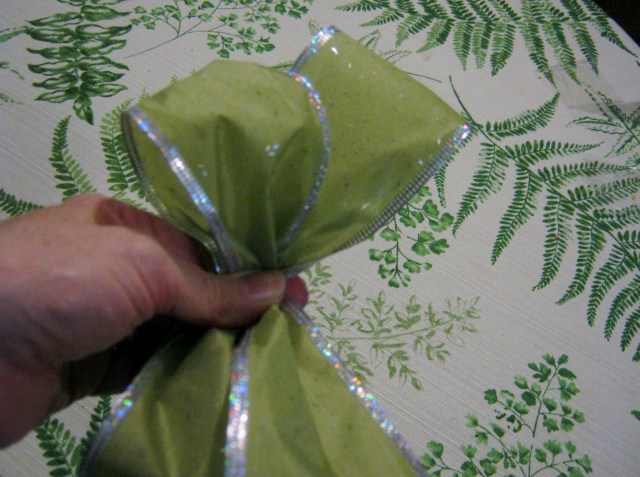
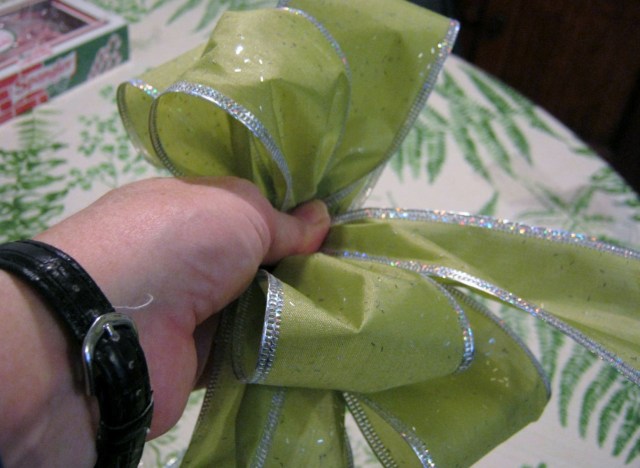
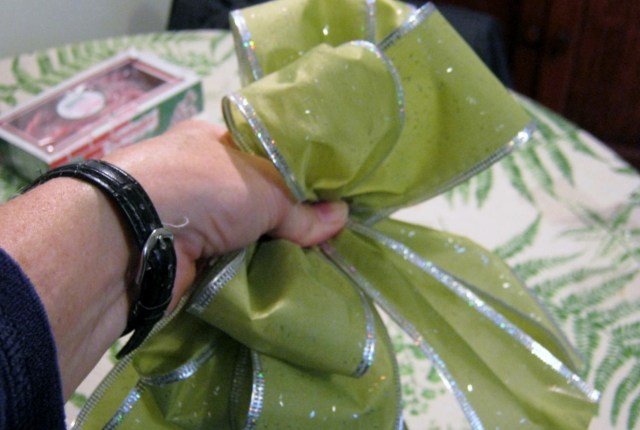
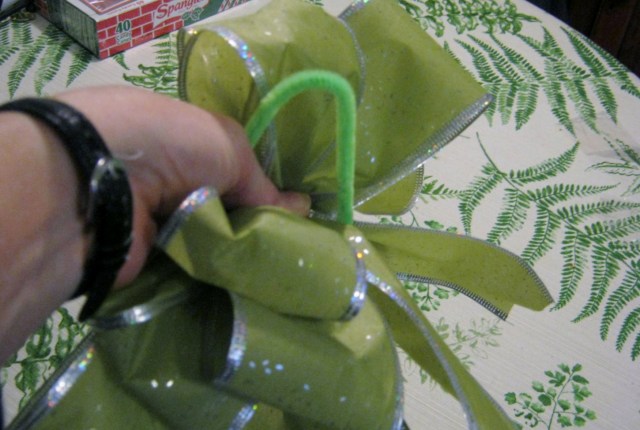
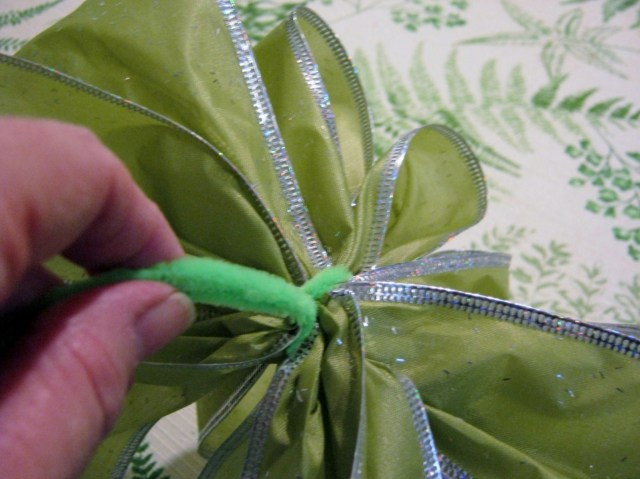
A perfect holiday floral bow is easy to make. Below you will find a video tutorial and step by step picture instructions on how to make a bow with 3 yards of ribbon.


We recently made heart shaped crayons using a silicone baking sheet of hearts and old broken crayons.
Strip paper off of crayons
Break into small pieces
Place into silicone molds (I easily cut mine in half to fit into toaster)
Place on sturdy tray. Heat in oven at 250
Check constantly
When pieces are melted take out of oven immediately
Let cool completely
Pop out of mold by turning the sheet inside out
We used the toaster oven and heated the crayons out on the porch just in case the smell of the crayons melting became overpowering.
One quick tip: You may notice some of the crayons are a solid color and some have many different swirls of colors. We prefer the swirled colors. The solid colors heated too long and the colors melted together too completely. To get the swirled effect take the crayons out of the toaster as soon as they are melted.
![]()


Have I said yet that I love Pinterest? Or course I have. There are so many good ideas and projects to be found at the Pinterest boards. Click here to visit Pinterest. Recently I found a project to make for the grandchildren. The directions are so easy. I went to the local craft store and bought three sheets of magnetic paper.

The next stop was a local thrift store…six books for 1.00. I flipped through the books and chose several illustrations that I thought the grandsons would like.

I cut the illustrations out of the books leaving a bit of paper border around each. I brushed a little matte Mod-Podge onto the magnetic sheet and smoothed the illustrations onto the surface, then coated them with another thin and even coat of the Mod-Podge. They were dry in just a few hours. I then cut them out along the outer lines.

They curled up a bit so I weighted them in a large book. Within a few hours they were completely flat and ready to use.

The magnets worked like a dream and bought a big smile to the face of my three year old grandson. Hooray!
![]()

")
My sister Amy created a handmade card for my birthday this year. She drew leaves, watercolored lightly, then filled in the shape and other areas with an ultra-fine felt tip pen. I love my beautiful card.

TIME TO CUT THE SNOWFLAKES
PART 2 SHOWS HOW TO ADD A LAYER OF WAX TO THE SNOWFLAKES TO REPEL MOISTURE FROM THE WINDOWS.
I posted these last year, but they are worth repeating.


A quick update on my vermicomposting project. Vermicomposting is a fancy name for worm farming. You can read my initial blog post on worm farming here: The Worm Farm.
The “farm” is doing terrific. I found a wonderful blog that is helping me along. Vermicomposters.com contains the answers to any question a newbie vermicomposter has about worm farming. You can take a look at the site here: Vermicomposters.
One of the topics I found to be of great help was on the subject of what the worms like to eat. I saw that cantaloupe and other melons are a worm favorite. I had an old piece of cantaloupe rind in my fridge that was beyond the date of safe human consumption so I decided to give it a try. I scooped out the interior of the melon and placed it in a corner of the worm farm. What a surprise awaited me in about ten days or so…the cantaloupe seeds had sprouted. You can see a few of them in the picture above. After reading a blog post on Vermicomposters.com, I was assured that this is common and is an indication that you are doing things right. You can read the vermicomposting post here: Sprouting Seeds
Another surprise has been the fresh air smell that wafts out of the composter. I was prepared for a sour odor…not so…the smell that awaits me each time I feed the worms is that of the floor of woodsy forest. It is in no way offensive.
I feed my worms every five days. So far I have given them lettuce, apple peels, crushed eggshells, a minimal amount of coffee grounds, and the cantaloupe. They are thriving. The bottom layer of newspaper bedding I added at the start has since turned into compost. I’m thrilled! The liquid capture kitty litter bucket has been filled with bits of compost and liquid, again no odor, and I have added this to the water I give to my houseplants.
Need I even say that so far my worm farm has been a success! If you’ve ever felt a nudge to give it a try…please give into your inclination. It is so much fun.
I will post updates about my worm farm progress through the next few months…check back.

It’s time to begin a few indoor gardening projects. At the top of my list is growing a sweet potato plant with my grandchildren.

Growing a sweet potato is easy. Buy a good-sized sweet potato or yam from a farm or organic market; they are less likely to be treated with chemicals to prevent sprouting. Insert three or four toothpicks around the widest circumference and place the bottom in water. A flower vase with a slender neck is the perfect container to choose.
The tuber grows quickly and develops a large root system. In just over a month it will be ready for planting in a pot of soil.

I left a portion of the tuber above the soil line. I think it adds a bit of interest to the look of the plant. I also like the way the tuber mirrors the golden-orange brown of the pot’s ceramic finish.

Growing a sweet potato is a fun and easy project for Autumn or Winter.


Yesterday my grandson was baptized. Afterwards family and friends gathered at our home. Since the weather is cooler, and there has been so much moisture in the past weeks, the house smelled a little musty. It was the perfect opportunity to use an idea for naturally freshening the air I found on the Pinterest site.
Fill an aromatherapy pot, a small crockpot, or a pot on the stove with water. Add a capful of pure vanilla extract, some fresh lemon peel and snips of rosemary. I used fresh Rosemary, but I think dried would work just as well. Heat to a simmer. This fragrance is soft and natural and doesn’t seem to cause anyone, even those with allergies, any breathing or headache problems.
Be watchful of heating elements and be aware of possible fire hazards when in use.
![]()

