Quick Tips – A Trio of Tips

IMG_3607

Don’t throw away onion skins, wash them, place in a baggie or container, and freeze. Onion skins are terrific additions to chicken broth stock. The skins add a lovely sparkle of yellow color. Onion skins can also be used to create natural dyes.

IMG_3656

Drilling a hole in the ceiling or wall?

IMG_3657

Drill through a clear plastic glass first. After drilling do not remove glass from drill bit.

IMG_3660

Place plastic glass flat against wall or ceiling, drill your hole with the glass held in place.

My husband looked puzzled when I asked for a photograph of him drilling. “Why?” he asked.

“To use as a tip on my blog,” I answered.

“Everyone knows this tip already.” he teased.

For those of you like me who didn’t know, and never would have thought of this…WOW! What a great way to keep dust and debris off your furniture and floor.

IMG_3320

The final tip…at your next gathering or party capture a little bit of whimsy. Welcome your guests with a greeting written in chalk on your sidewalk or drive. Guaranteed to start a party off with everyone smiling. 🙂

Quick Tip – Scaring Skeeters

IMG_2150

We recently went camping with the family in Belleplain State Forest. There are quite a few cedar swamps in the area, and we knew we needed to be prepared for an attack of mosquitoes. I read on the Pinterest site that Listerine, because of the eucalyptus and thymol it contains, is a terrific mosquito repellent. The directions were to spray on the ground around you and the mosquitoes would stay away. It worked! We didn’t have any problem at all with the mosquitoes. Now if only we could find something to keep the ticks away. Several of us came home with a passenger aboard our skin. Yuck!

For ease in application I placed the Listerine (I used a generic brand) in an empty window cleaner bottle. My mistake: my first mouthwash purchase was blue mint. It looked exactly the same as the window cleaner. The second time I bought mouthwash as an insect repellent I bought the amber colored Listerine. It definitely did not smell as good, but it worked just the same. Hmmm…maybe next time I will try the green mint flavor. Smile!

Follow Me on Pinterest

Please take a look at the comment section of this post…there are many additional “natural” remedies included in one of the comments. Thanks James!”

Quick Tip – Remove Tarnish From Silver

IMG_1703

The very tarnished pair of earrings in the picture above went from dingy and dark to sparkling and bright.

IMG_1795

It’s easy to remove the tarnish, all you need is aluminum foil, a teaspoon of salt, a teaspoon of baking soda, boiling water and a glass bowl.

IMG_1702

Boil your water, gently crumple foil to fit bottom of bowl. Lay silver on top of foil. If there is more than one piece make sure the pieces touch. Pour boiling water into bowl to cover silver pieces. Add baking soda and salt all at once. It will bubble and steam, there might be a momentary strange odor. The tarnish will bubble off of the silver.

IMG_1704

My earrings were heavily tarnished so I repeated the process. I also buffed off a few leftover specks of tarnish with white toothpaste.

This is an environmentally safe way to clean tarnish from silver. It is also a fun experiment for children to watch.

Quick Tip – Steak Roll Substitution

IMG_0254

Beyond bread slices, french baguettes make an amazing substitute for steak or sandwich rolls. If there is too much bread involved for you, slice away the middle and feed it to the birds, or save for homemade bread crumbs. The baguette has much better flavor and crispy crunch than a typical steak sandwich roll.

Ounce for ounce the baguette is usually a better buy too!

Quick Tip – Freezing Broths and Buttermilk

IMG_9867

I enjoy cooking with buttermilk. It adds a little bit of “zing” and moistness to several of my recipes. I recently found a good recipe for Buttermilk Chocolate Cupcakes on Cooks.com. (See bottom of post for recipe links) The cupcakes turned out great, moist, and without an overload of sugar.

Buttermilk runs near $3.00 in my area. Because I only use it in a few recipes, often when the expiration date draws near I am left with half a carton or more to use. I have found buttermilk freezes surprisingly well. I pour it into ice cube trays, freeze, pop out the cubes and store in my freezer. When I thaw the cubes, the buttermilk separates a bit, but a quick whisk with a fork reincorporates the liquid.

A good rule for freezing liquid is to make sure the ice cube trays you are using are BPA free. A good article on toxin-free cooking and food storage can be found here: 12 Ways to Avoid Toxins in Kitchen

It’s a good idea to put as many of the “kitchen fixes” in practice as you can without becoming a complete nervous wreck over it. Sometimes, through the Internet and constant news programs, the problems we face in keeping out homes and bodies healthy can become overwhelming and a danger in itself to our stress levels and mental health.

A Thank you to Jane who added these additional ideas for freezing liquids in the comment section: “I think a lot of us have had that problem with leftover buttermilk. If you put them in ice trays, though, I would think that you would have to use them exclusively for this or other leftover liquids, etc, because they are plastic and tend to absorb the odor of whatever you would freeze in them. I’ve tried the dried buttermilk but it is expensive. I think you could also measure out 1/2 cups and put that in those snack-sized or sandwich ziplock bags. I freeze a lot of spaghetti sauce, soups, etc, in quart sized freezer bags because they are flat and don’t take up as much freezer space as a rubber maid container. Before I freeze food in the rubber maid containers, I press a layer of plastic wrap directly onto the food surface (tucking the excess into the container) to avoid ice crystals. Sorry for the long post.  I should add that when I put those ziplocks in the freezer (remove all air in the bag), I lay them on a flat surface  until hardened – easier to stack them afterwards.”

IMG_9869

Buttermilk Chocolate Cupcakes

Scoop the batter out with an ice cream dipper for uniform cupcakes.

IMG_9865

An alternative frosting can be found here: Chocolate Sour Cream Frosting

Chocolate flavor with a tang of sour cream is a novel choice for a cupcake topping. I do refrigerate these cupcakes to keep the sour cream fresh. The frosting has a fudgy consistency due to the melted chocolate. Milk chocolate or dark chocolate are both good choices. Happy Baking!

Follow Me on Pinterest

Quick Tip – Seed Sowing 101/Seed Packet Storage and Sowing Seeds

seed packet 1

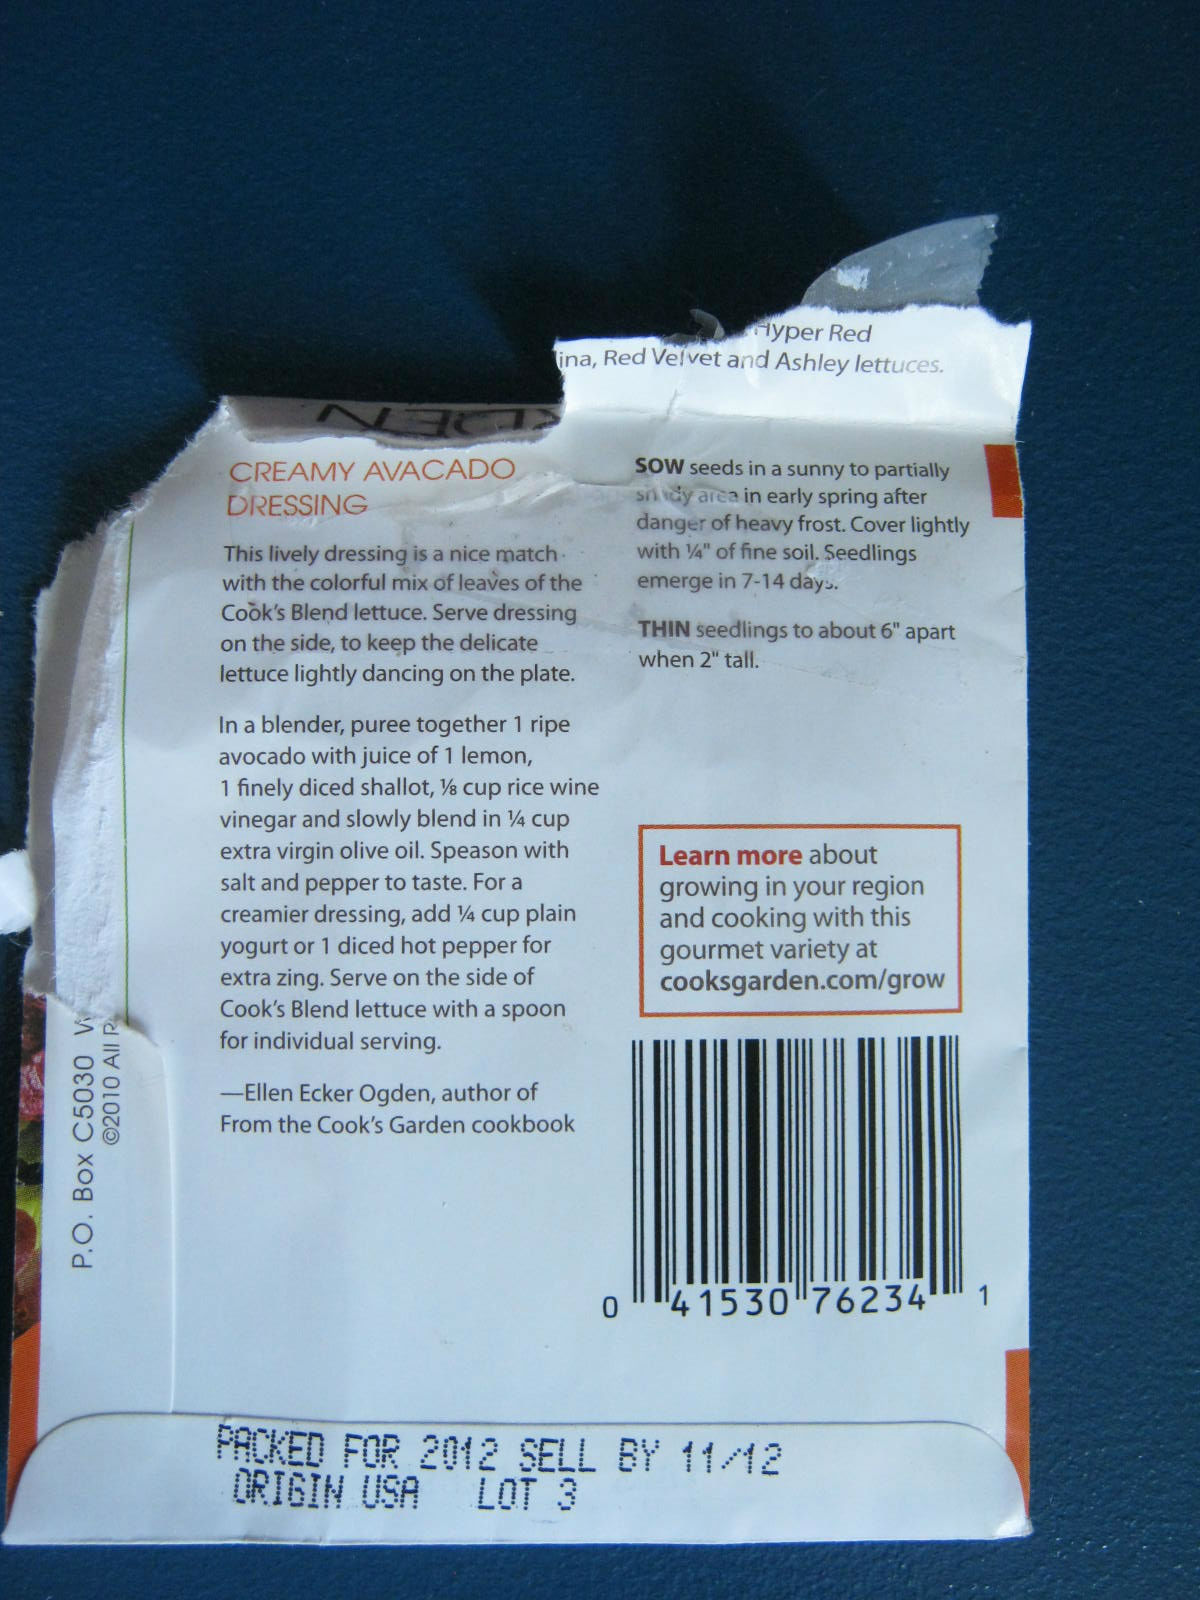
I’m afraid I must admit that many of my older seed packets look like the one pictured above. Tearing off the top, resealing with scotch tape, creates a ragged and ripped mess when I try to reopen. I know it sounds silly to even take time to give write a tip like this, but it is more a reminder, than it is a tip, on how much information is contained on the small space of the packet.

seed packet 2

For instance, if I tear away the top of the seed packet shown above I will never again be able to rely on the terrific and almost poetic description of the contents printed on the top of the flap.

“Crisp textured loose heads have broad frilled and crumpled leaves.”

There are also height, width, sunshine and water requirements printed on the packet. To save as much information as possible cut away with scissors the smallest fraction of the packet top when opening.

seed packet 3

In the past I have often taped the top of the my packets down when I am finished sowing the seeds they contain. If I don’t firmly close them in a way that will stay secure I will end up with hundred of seeds, completely unidentifiable, on the bottom of my seed box. A small, tight paperclip holds the twice-folded seed packet top closed without possibility of loosening.

seed packet 4

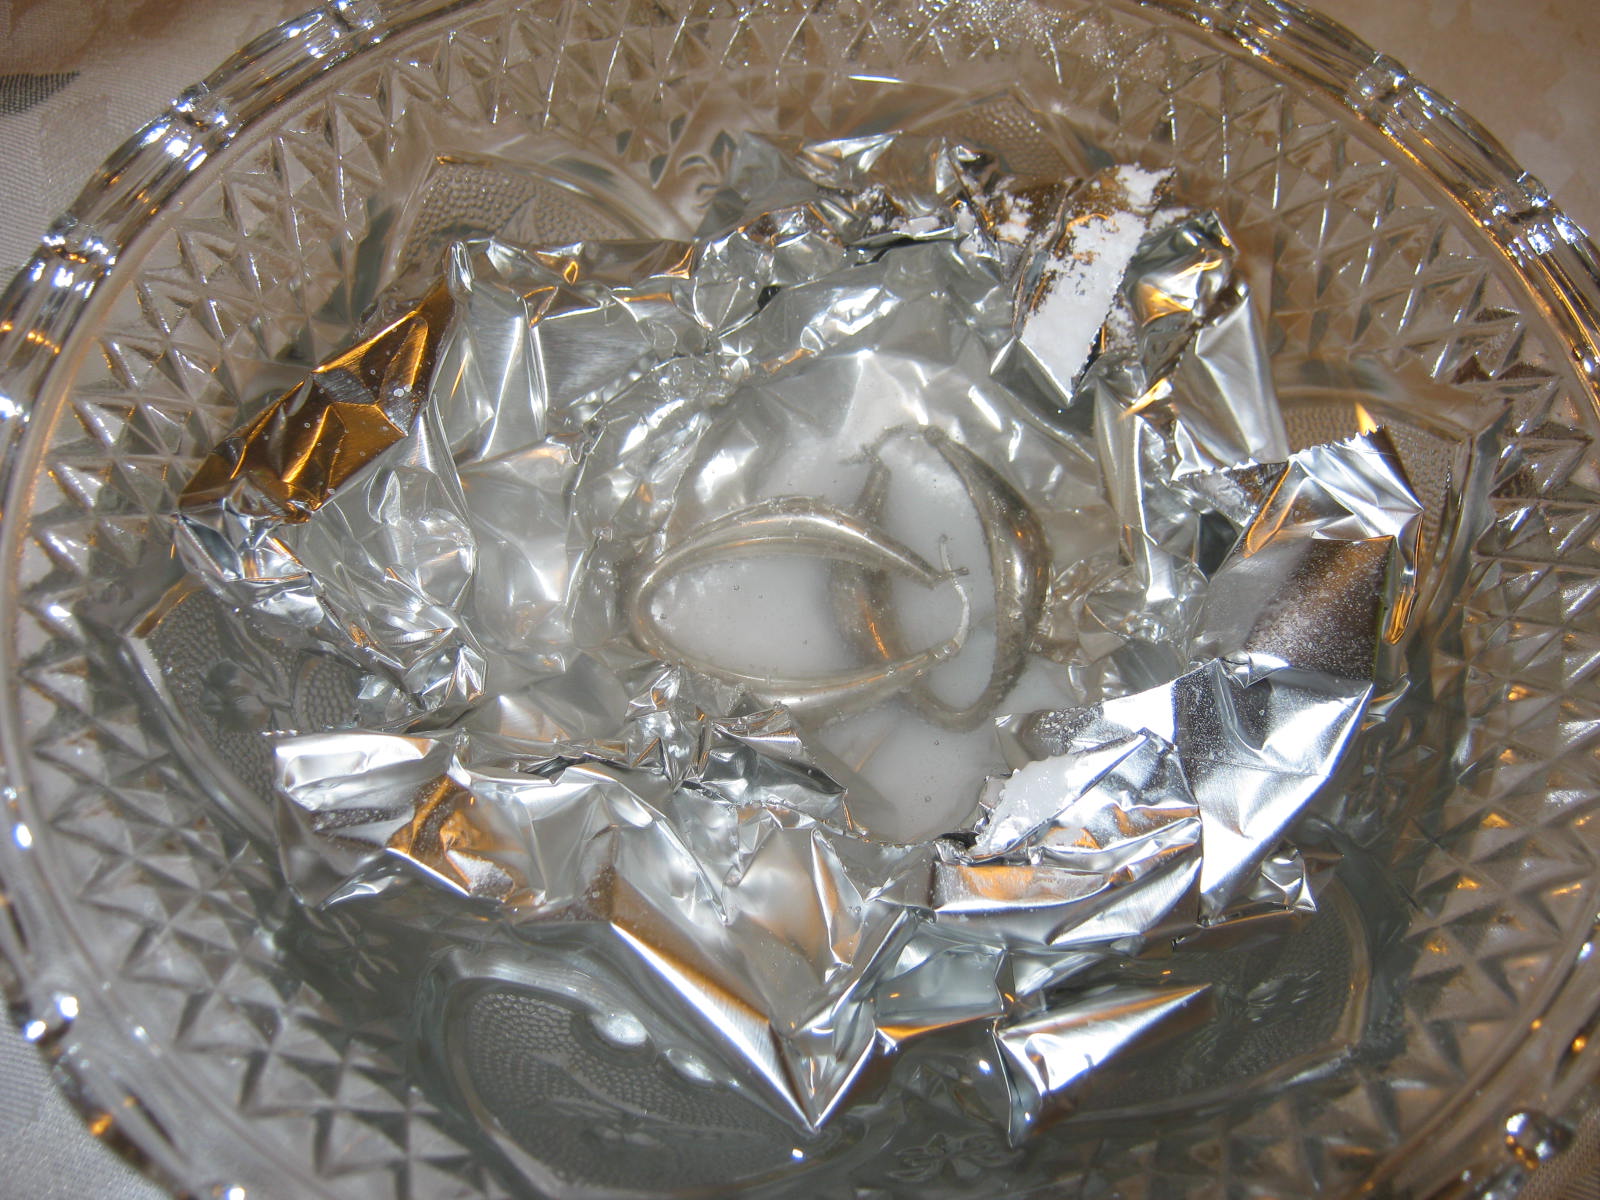
Another important tip is labeling the small white packet inside some varieties of seeds. Burpee packages its seeds with an inner foil pack. Take my word for it, all these look alike if you mix them up. Unless you are a real professional at identifying seeds, it will be plant and hope for the best if you mix up the inner packets. I’ve learned my lesson and I now label the inner packet with a permanent black felt-tip pen.

I know these tips might seem rather self-evident, but hey, it’s so easy to get excited about planting and lose track of what you are doing in the pursuit of the perfect garden. These are just a few of the simple ways I make the whole experience enjoyable and less frustrating at the time of planting and in the future.

I received a terrific idea through the comment section of this post. I thought it would be a good idea to edit the post and add the comment as another alternative for saving the information on the packets. Thanks so much Tulani!

Tulani comments, “Here’s an idea in dealing with the torn/frayed tops of the seed packets. If you have an all in one printer, make a copy of the seed packet BEFORE you open it…that way you have all that precious information intact & semi easy to read whenever you may need it. If you do not have an all in one printer, many of the local drug stores & other businesses have copy machines & charge $0.10 – $0.25 per copy.  Libraries are another place to go for copies too! When you have all these copies made, they can then be cut down so you only have the picture of that packet, & store them in a photo album. If there’s a problem with the plant, or the seeds, you’ll have all that info at your fingertips, & you will know whether or not to buy them seeds next year. It may not be foolproof, but it sure beats dealing with torn/frayed seed packets.”

seed packet 5

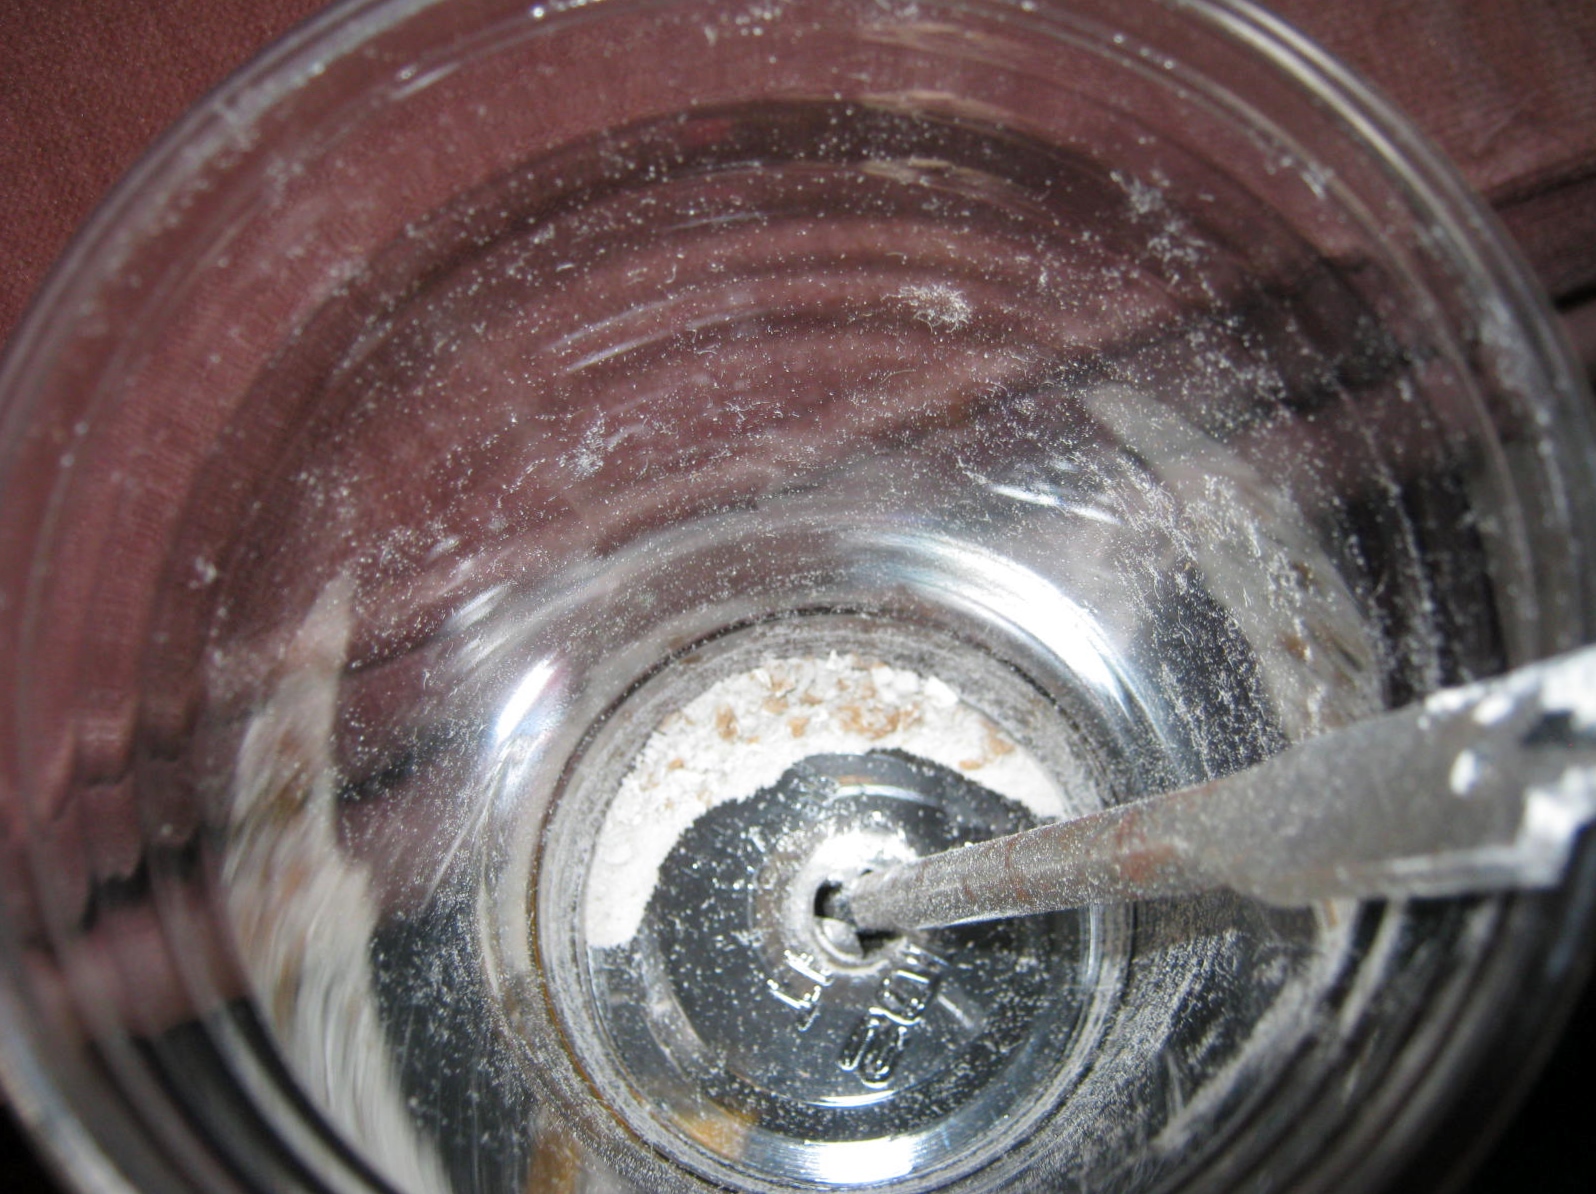
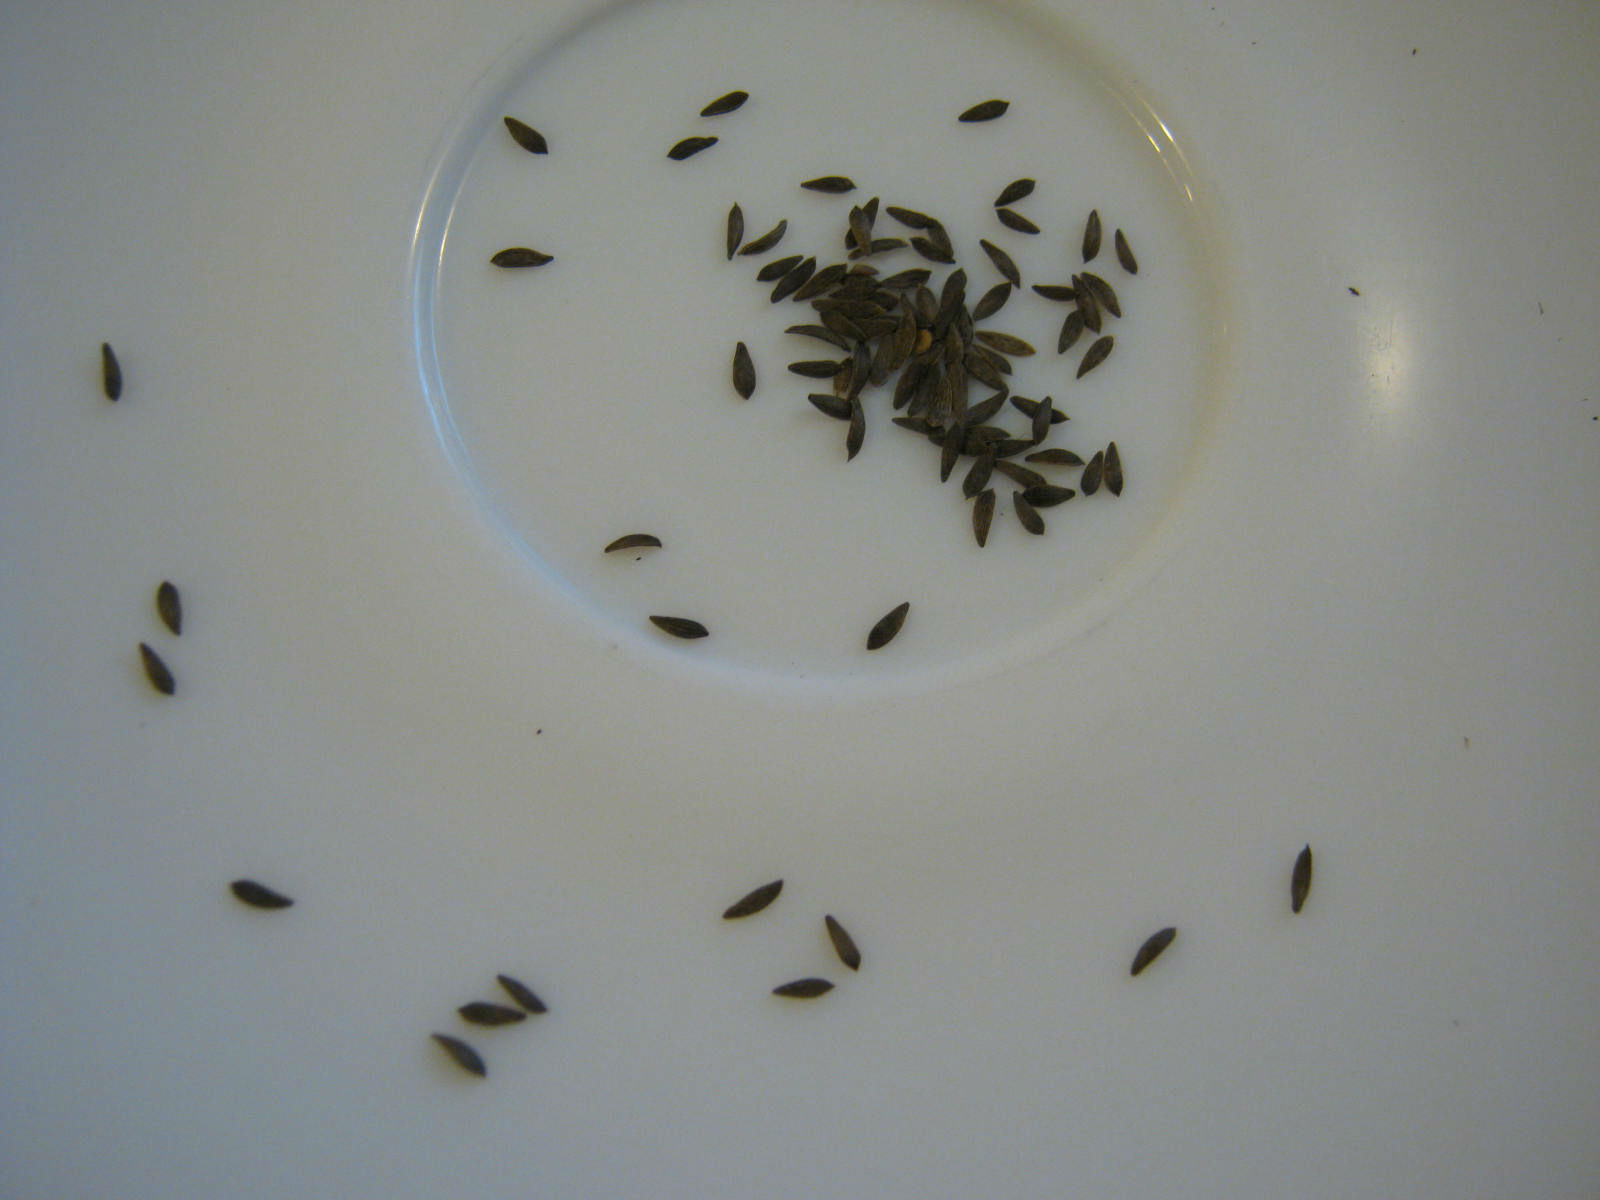
Another quick tip – For larger seeds I often dump out the contents of the packet onto teacup saucer. The little indentation in the center holds the bulk of the seed. I then pull a few seeds up onto the lip of the plate. Because the dish curves upward, it is easy to slide a few seeds to the edge of the plate with my forefinger and then grasp one or two between forefinger and thumb and place each where I want them on the soil. I know that many people “broadcast” the seeds across the top of the planting medium, but I have found over and over again that this method causes crowding and is the forerunner of damping-off disease. Happy Gardening!

Follow Me on Pinterest