Peculiarities – Horseshoe Crabs

My beautiful picture

Horseshoe crabs are becoming a common sight once more along the beaches of the Delaware Bay. At one point in time they were severely endangered due to being used as fertilizer and bait for eels and whelks.

myrna 002

A female lays between 60,000 to 120,000 eggs in a season. These eggs are important not only to further the population of horseshoe crabs, but also to provide food for endangered migratory shore birds.

Horseshoe crabs breed in shallow waters and lay their eggs along the beach. They easily upturn in the surf and it is not an uncommon sight to see dozens on their backs along the shoreline. Volunteers gather during mating season to turn the horseshoe crabs right side up again. You can read about their efforts here: Volunteers Saving Horseshoe Crabs

Although we weren’t part of a group, last year my cousin and I flipped all the upturned crabs we found back on their feet, or would that be legs…or claws? Anyway, we turned them right side up again. Unfortunately, several flipped onto their backs again with the next incoming wave. Still, I’m sure a few survived because of our efforts.

blog 001

We were really hungry after our rescue mission, and went to a terrific little bayside cafe called “The Landing.”

Plants – Bougainvillea

IMG_0584

I love Jamaica and the beautiful tropical plants and bushes that grace the landscapes and beach areas. One of my favorites is the bougainvillea. Last year I was able to purchase plug/starter sprouts of bougainvillea. Each plantlet was about twelve inches with a spray of flowers on the end. I planted them in a garden bed where they did fairly well. When the weather turned cold I brought them indoors. The bougainvillea are planted in pots this year, happily growing on my back porch.  New growth is beginning to form on the ends of their branches.

IMG_1330
My garden bougainvillea

Bougainvillea grow outside year round in some of the sub-tropical regions of the US. Here is a website with terrific facts and tips on how to grow this beautiful plant. How to grow Bougainvillea

Jamaican Bougainvillea plants

IMG_0788

IMG_0789

IMG_0787

The plants can also be found in some nurseries and garden centers. If you are lucky enough to run across one of these plants give growing one a try.


Planting – The Great Tomato Saga Part III – To Fertilize Or Not To Fertilize?

IMG_1340

I have over a dozen tomatoes planted in my Square Foot Garden. I started them from seed in the house this year. The tomatoes are doing okay, but not producing growth to rave about.

IMG_1338

The potted tomatoes were sown from the same seed packets, and grown in exactly the same conditions. The only difference is that these tomatoes are planted in pots of Whitney Farms Organic Potting Soil. This is a terrific soil loaded with natural fertilizers. OH MY! Compare the color of the leaves to the first photograph, and take a look at the size of the plants. The tomatoes in the pots are much greener and in some cases more than double the size. The potted plants are already setting blossoms. In hopes of helping them catch them up, I side-dressed the Square Foot Garden plants with organic fertilizer. I think in the case of the tomatoes I need to do a little bit more than the manual recommends. I’ll update in a few weeks.


Quirkiness – The Great Tomato Saga Part II – The Junque Trellis

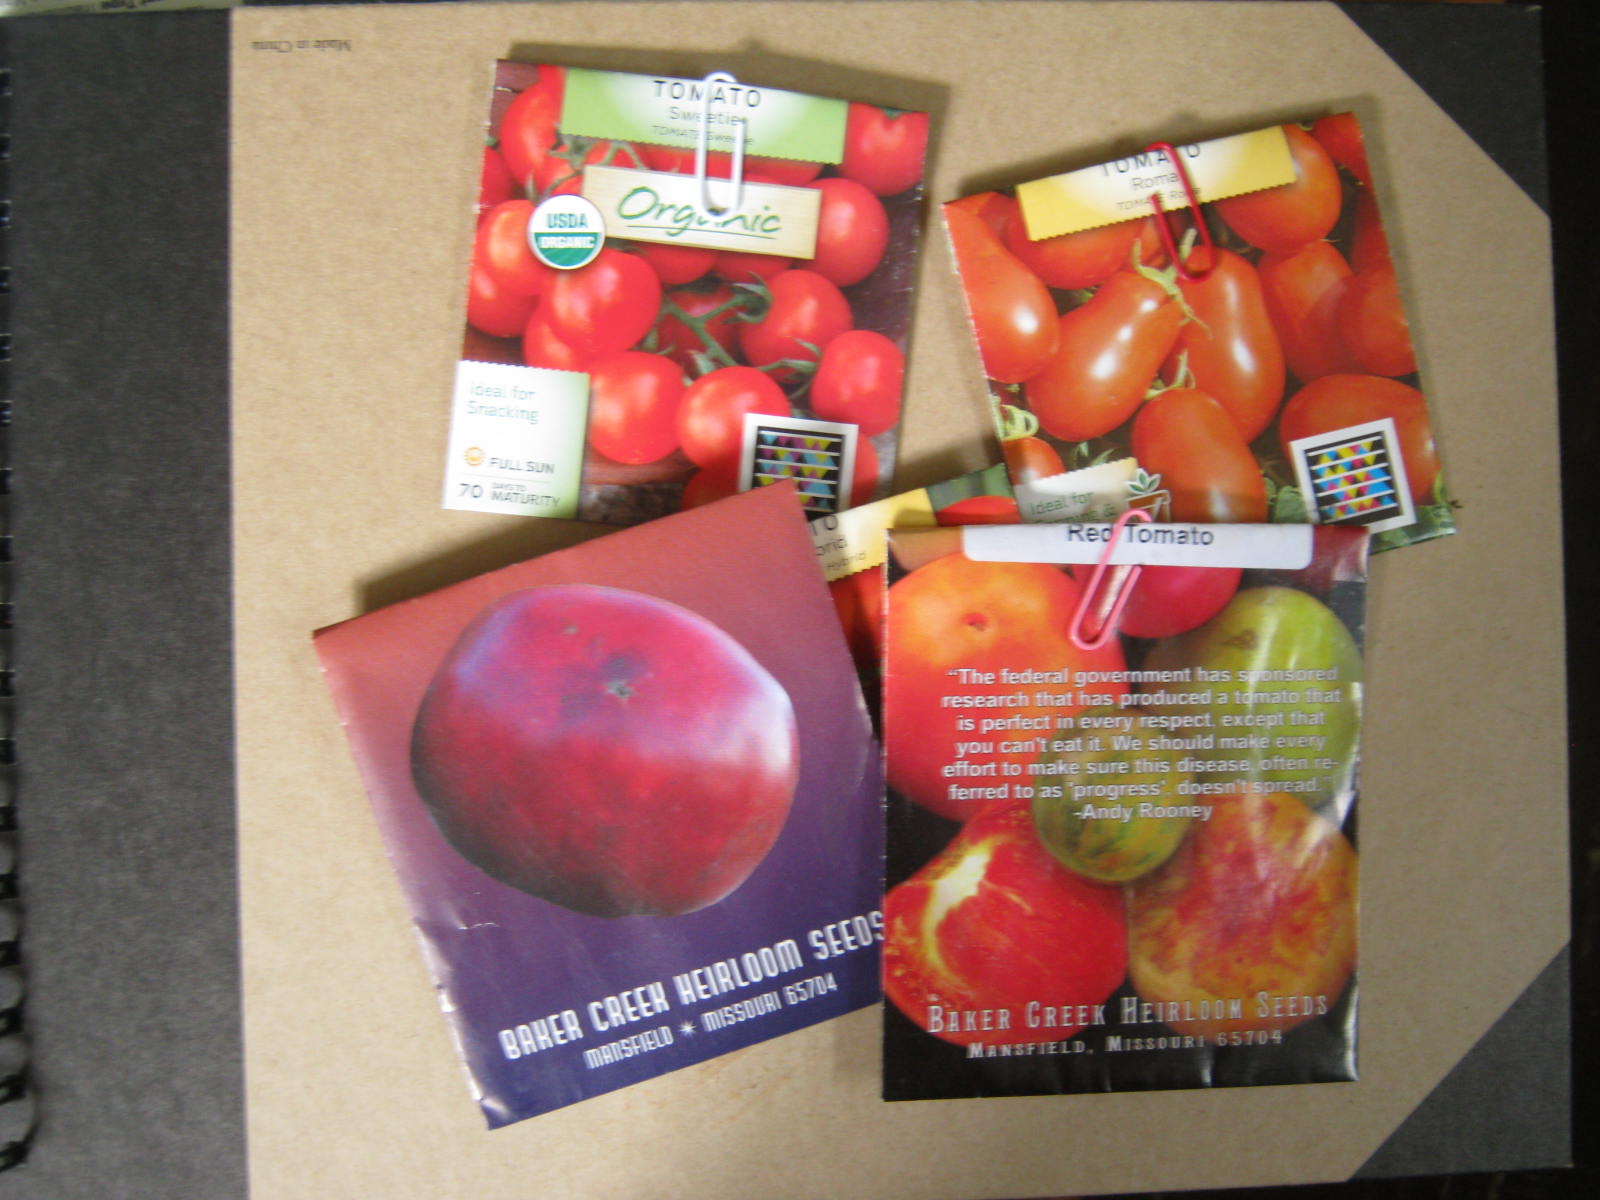
I was inspired by the video I posted yesterday on suckering and stringing tomatoes. Over the weekend I decided I MUST try stringing, suckering and fertilizing my tomatoes more diligently this year. The fertilizing was easy. I already had an organic tomato and vegetable fertilizer from Whitney Farms on hand. I side-dressed the tomatoes with the fertilizer, tilled the soil a little, and the first part of my goal was complete.

Suckering turned out to be pretty easy too. After watching the video I easily suckered every plant in only a matter of minutes. Figuring out how to string them for growing…hmmm…not so easy.

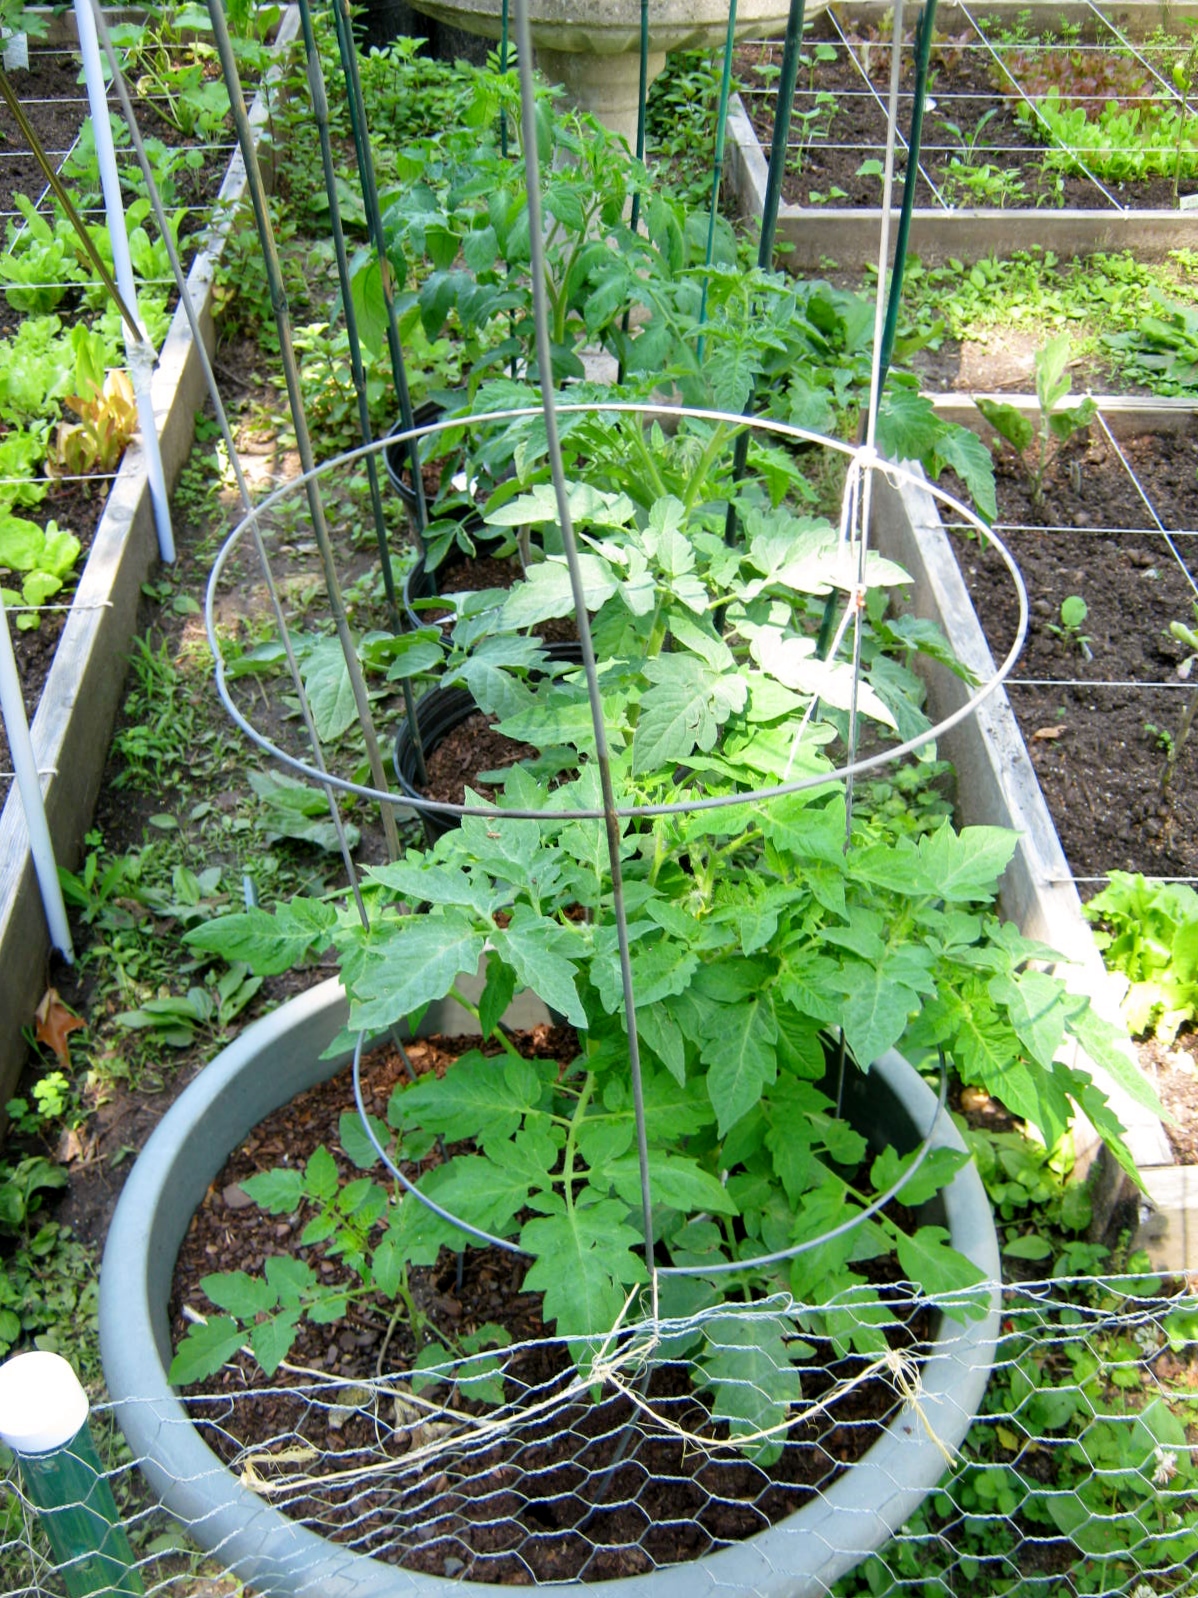
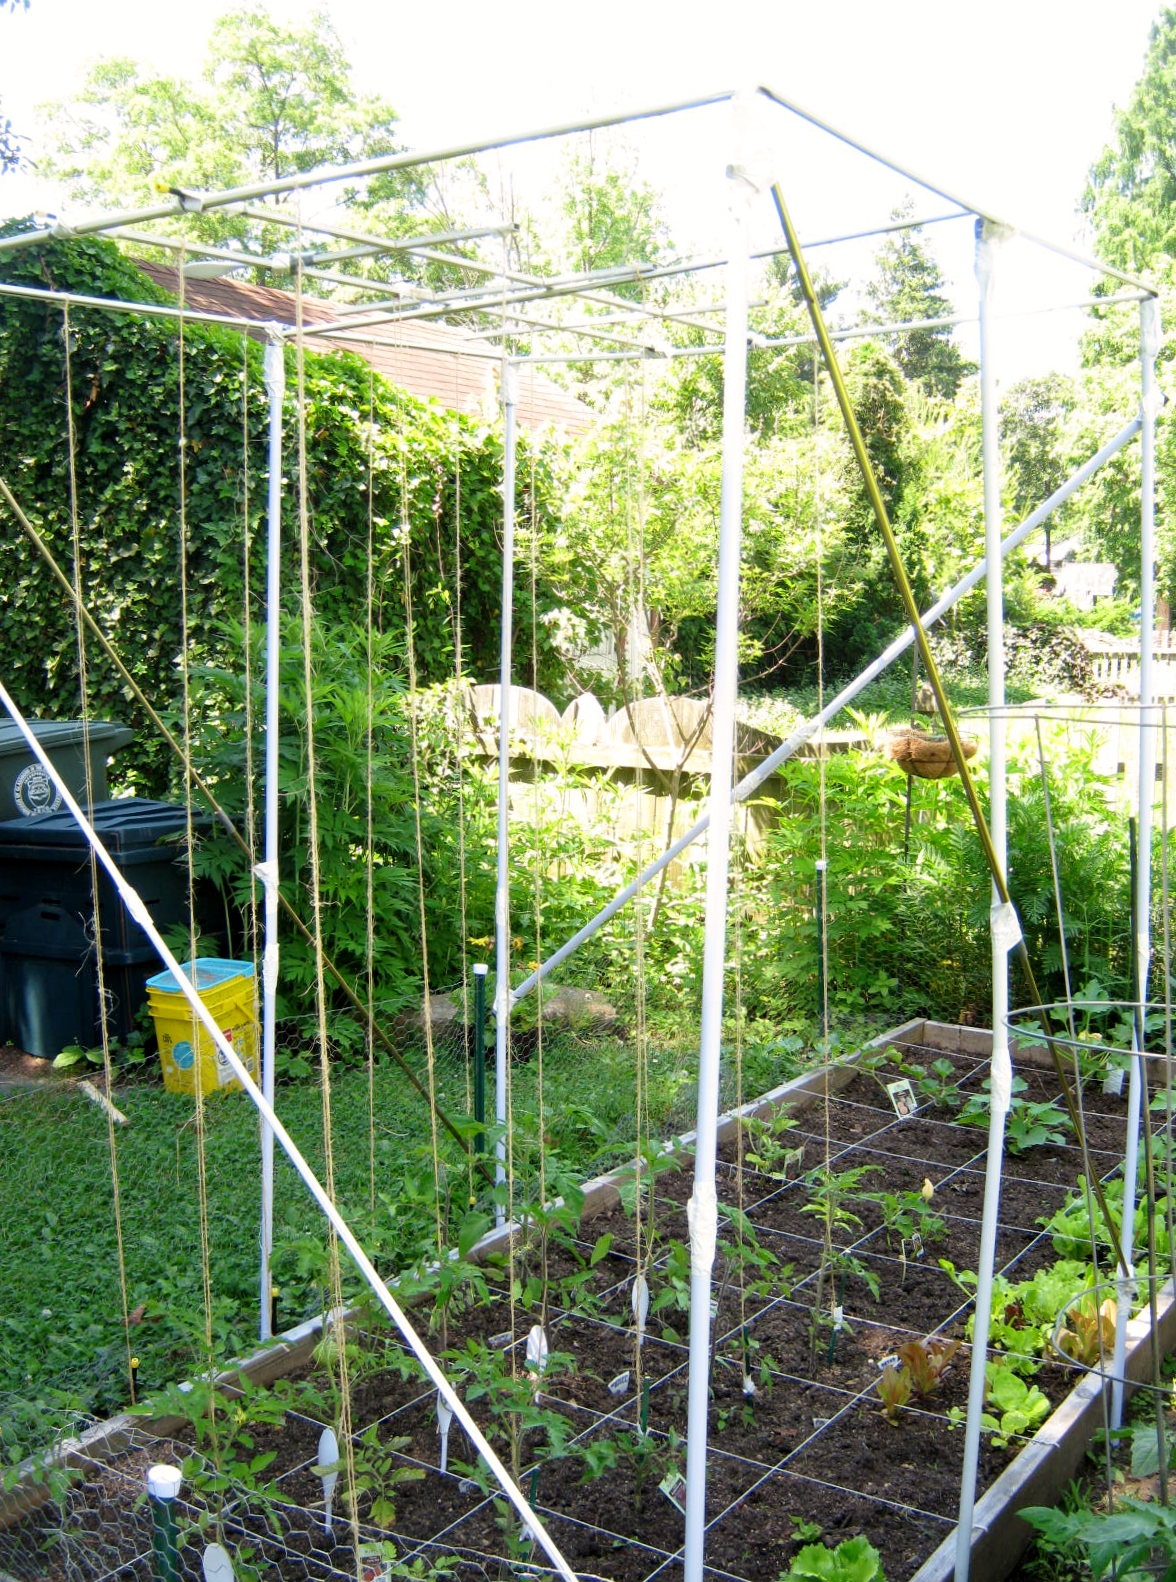
I didn’t want to spend a lot of money on creating/building a permanent trellis. I gave the problem some thought and remembered the mop handles I had saved from another project for garden stakes. Would these work? No, when driven into the ground they would be too short. What if I attached two together? I’d have plenty of height if this solution worked. How to attach them together though? Aha…DUCT TAPE!

IMG_1337

I went to the dollar store in search of more mop handles. I couldn’t find them, but I did find brooms that would unscrew easily leaving a handle for me to use. I also purchased some plastic spoons and two packets of thin little screwdrivers. This all cost me less than $20.00. The duct tape I had on hand.

IMG_1336

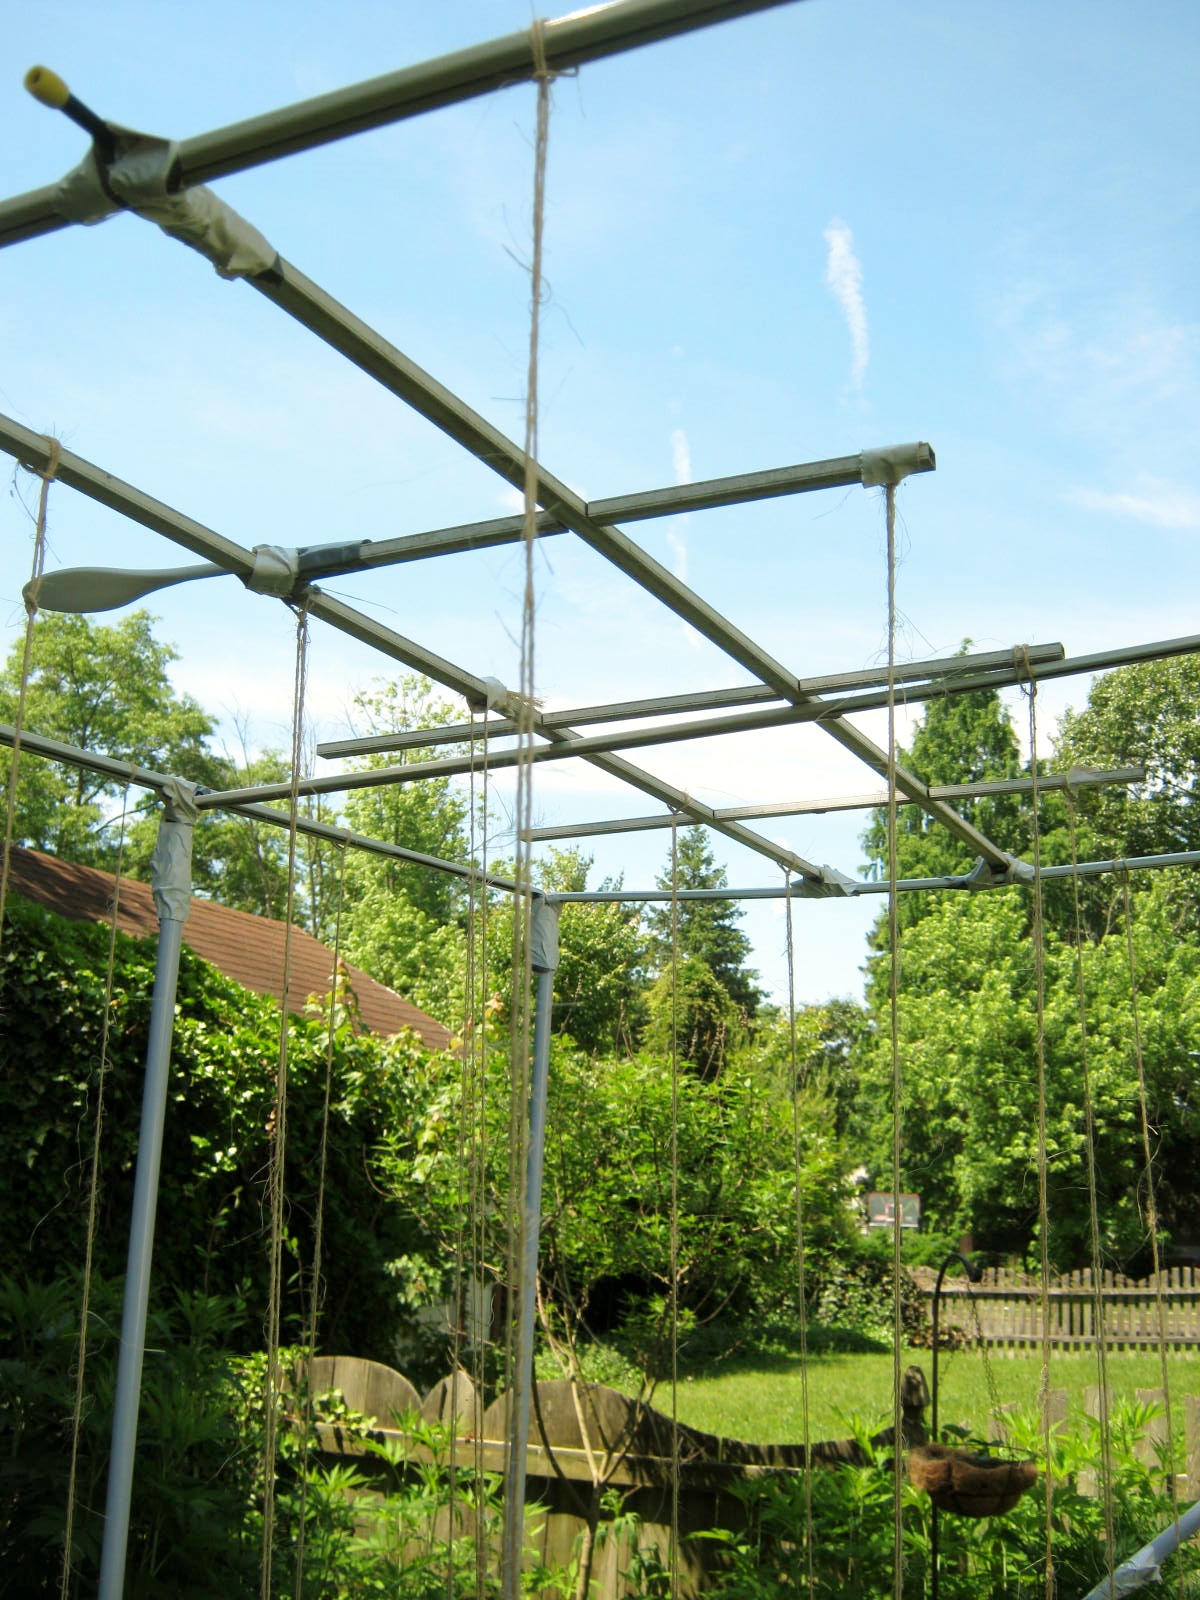
I constructed the trellis piece by piece from the ground up. I had no plan to follow, the process was a little bit like putting together Tinker Toys. (Oh my, I’m giving away my age) To strengthen the structure I added some old curtain rods taped on at the diagonal. My son, who is a builder, told me I needed to do this to keep the base steady. I also used curtain rods across the tops of the handles. Duct-taped again! An old sectional window frame was taped on top of the structure for stringing the tomatoes.

IMG_1341

My junque trellis is not pretty, but oh my, it is interesting! Best of all, the basic concept works perfectly. We have already had heavy rains and not a curtain rod or handle has budged a millimeter. I LOVE DUCT TAPE!

IMG_1343

How to anchor the sisal string beside each tomato plant was my next problem. I used spoons for the soil. I looped string onto the window frame first with a type of slip-knot then let the free ends dangle down and tied them to a spoon. I pushed the spoon into the soil beside the tomato and the string was anchored. I used small screwdrivers driven into the wooden slats for the tomatoes near the border of the garden.

IMG_1340

I’m hoping for hundreds of tomatoes. I want to give them away to everyone I know. If this one-season fix works for me then I will consider spending a larger amount of money for a more aesthetically appealing structure. Something portable, but also permanent in durability. I know that what I’ve built for this season will not last forever. Happy Gardening!

Follow Me on Pinterest

Gardening Tip: Dollar stores are terrific places to find unusual items to use in gardening. Take a look around your home too…you’ll be surprised at some of the “stuff” you have stashed away that will work as trellises, etc., in the garden.

IMG_1344

IMG_1345

Planting – The Great Tomato Saga – Part One

To all the fine bloggers out there in Blog-World, I thank you. You never know when a post might absolutely consume one of your readers. In the case of this past weekend, that blog reader was me. I happened upon a post on the blog Over the Fence Urban Garden and was completely captivated by a Youtube video they had embedded in their post titled, “Tomato Fingers.”

You can read the blog post here: Over The Fence Urban Farm/Tomato Fingers

IMG_1360

A little of my history in regard to tomatoes: Until I was forty or so I detested the look, smell and taste of tomatoes. A sandwich with just one tomato seed accidentally placed upon it was, in my opinion, RUINED. I am not alone in this. I married a man who felt exactly the same way. We both loved tomatoes in the form of cooked sauce, but raw…”Phooey!” Then…the strangest of strange events occurred. Where once I abhored raw tomatoes, I suddenly could not get enough of them! (Unfortunately, my husband’s taste buds have stayed the same. 😦 ) I bought them by the pound, and became an avid grower of them too. Tomato plants have never done that well for me though. I assumed all I needed to do was plant tomatoes in a decent soil and location, and they would grow. No…I have found tomatoes need a bit of coddling.

I grow my tomatoes from seed. They quickly sprout for me in a sunny window. They don’t grow fast in the house, but they do grow steadily. This year I had great success with my tomato seedlings, many of them heirloom varieties, and hated to give up even one to the compost heap. (Please read important note at the end of blog post on the composting of tomatoes) Instead I planted as many as I could into the soil of my Square Foot Gardens. Since all but one of the varieties I grew were indeterminate, (vining) I was able to plant one to a square. I figured I would use tomato cages again for support, as I did every other year. Then I came upon the terrific youtube video posted on Over the Gate Urban Garden. Maybe I have never had good luck growing tomatoes because I have never “suckered” them or “strung” them.

I have spent the weekend “suckering” and constructing a trellis to “string” my indeterminate tomatoes. The video is a little long, but absolutely full of information you might not have heard in the past about how to grow the perfect tomato. More to come on my “stringing” adventures in parts two and three of my tomato saga.

* Don’t compost any foliage of tomato plants unless you are SURE they are free of disease. Tomato plant disease is easily spread this way. Smokers should also not touch tomato plants unless they wash their hands first as tomato mosaic virus can be spread this way.

Place & People – Normandy France

NormandyPhotograph courtesy of Pampe/WetCanvas Reference Library

Today is the anniversary of the Invasion of Normandy. Gratitude should fill all our hearts today for those who served. You can read a brief history of Normandy here: Normandy

Pets – Grumpy People and Pets

IMG_8702

Rusty, our Maine Coon Cat, is a beautiful animal…but unfortunately when he isn’t hiding from the ringing of the doorbell or other “intrusive” noises, he is rather grumpy.

IMG_8695

My grandsons, even though they’ve received nothing but hissing and growls from Rusty, can’t seem to give up on him. Sweet boys…they create toys for him out of pipe-cleaners and talk to him with soft voices, precious overtures in hopes of making friends with him. Rusty’s response…well the old cliche a picture says a thousand words is the perfect explanation.

IMG_8699

Oh dear…it’s sad but true, you are never going to please some pets, just as you won’t please some people. Love them…but get over attempting to make them happy and move on. Happy Thursday to You!

Pots and Pans – Fresh Pineapple and Cheese Casserole with a TWIST.

IMG_1248

Pineapple on sale…only $1.99 apiece. Terrific! Only problem is I don’t like eating pineapple by itself…hmmm…grandchildren over for dinner, how best would they like to eat the pineapple? I decided on baked pineapple casserole. When I looked for a recipe on the Internet all I found were recipes for canned pineapple. Not an option when you have a gigantic pineapple waiting to be eaten. Finally on the site Big Oven, I found a recipe for a fresh pineapple casserole. You can find that recipe here: Fresh Pineapple and Cheese Casserole

I cut the pineapple up into small chunks as instructed, and began putting the casserole together, only to discover I did not have the proper ingredients. I had no Ritz crackers, and my shredded cheese was flavored for Tacos. RATS! What to do with all the pineapple I had cut? I decided to use what I had on hand. Soda crackers and the Taco flavored cheese would have to stand in for the proper ingredients. I also chose to add a bit of brown sugar to the recipe to mimic the richness of the Ritz Crackers.

Oh MY! The casserole was delicious. Everyone from young to well, hmmm…older, enjoyed the pineapple cheese casserole and asked for more. Here is my altered recipe. I am sure Big Oven’s recipe is terrific too since most of the ingredients listed were also in my casserole.

1/2 c Sugar
1/2 c Butter (melted)
1 c Fresh pineapple; chunks ( make the chunks smaller rather than larger, a few of mine stayed a little hard)
3 tbs Flour
1 1/4 Cups soda crackers; crushed into small and large crumbs
1 Cup shredded Taco seasoned cheddar cheese
2 TBS brown sugar

Preheat oven to 350 degrees and grease a 13 x 9 baking pan or dish. Mix sugar and flour together. Stir pineapple into the flour and sugar. Pour into a greased baking dish. (I like glass for this recipe, you can also use a large round casserole dish) Sprinkle with taco cheese in an even layer on top. Add 1/2 cracker crumbs dry, spaced evenly. Drizzle with half the melted butter. Mix remaining crackers and butter in small bowl. Sprinkle this evenly over top of casserole. Sprinkle 2tbs brown sugar evenly over the top of casserole. Bake at 350 degrees for 35 minutes until the topping is crispy and slightly golden brown with bubbly edges. Remove and cool till set. (10-20 minutes) The casserole can be served hot or at room temperature. This recipe reheats easily in microwave or stovetop. You also could bake it a bit, but it might dry out.

Painting – WetCanvas Challenges

This months Plant Parade challenge at WetCanvas Florals and Botanicals is the magnificent peony. Oh my! What gorgeous reference photographs Marionh has included with this month’s challenge. I have included two of the photographs here, courtesy of Mariohh and Maltman. There are many more reference photos to choose from and you are also able to use your own. The challenge is open to anyone, but if you wish to include your artwork in the challenge posts you must join WetCanvas. Joining Wetcanvas is free…give it a try. Here is the link to this months challenge: WetCanvas Plant Parade – June 2014

DSC0058

42113-flowers_284_Copy

In the WetCanvas Watercolor Studio Yorky (Doug) has chosen Clumber Church, in Clumber Park, Nottinghamshire, England, once part of Sherwood Forest, as June’s Challenge. You can see more posts and Yorky’s watercolor of this church at this link: Watercolor Studio Challenge – June 2014

Clumber_Park

Pressed Flowers – Pressed Flower Farms Revisited

These two past blog posts have been combined and reblogged. If you press flowers now is the time to consider creating a “Pressed Flower Farm.”

I love my gardens, and I love pressing flowers, within that statement lies my dilemma. If I pick from my gardens too extensively, I lose the appeal of their mass of colors. I’ve learned over the years to grow the flowers I press in separate containers in an out-of-the-way place. When I grow my pressed flowers this way I can lift the containers onto my potting bench for easy picking, and my gardens don’t begin to look like lush foliage without bloom. The flowers planted in containers also gather less soil on their petals in rainstorms or heavy winds. I buy most of my containers at the dollar store and fill them with inexpensive soil. They do great and having them all in one area saves time too.

pressed flowers 003

Although the greens in this pressed flower composition have faded into brown, it is still a good example of how well the actual flowers and leaves hold up over time. This pressed flower picture was an entry in the Philadelphia Flower Show in the early 1990’s. The Category was “City of Brotherly Love,” and the piece was supposed to portray a quilt. Considering the span of time, near twenty years, I think it has held up very well.

Most foliage and greens will age to a tan or brown over time. Many flowers, however, will retain a good bit of color. The flowers above are: delphiniums (dark blue), verbena (maroon) and lobelia (light blue.) Many other flowers will hold onto their hues. A few of these that come to mind are buttercups, purple verbena and larkspur. I’ve also had good luck with spring bulbs, although their moisture content can be a problem and they do best using a microwaved book. Many of the techniques and tips I’ve learned can be found here:

Pressed Flower Tips and Techniques

It’s time to begin pressing emerging miniature pieces of foliage and tendrils. Wildflowers will soon be blooming too. Buttercups are one of the earliest and press very well. (Pinch out the hard center first) Happy Pressing!

People – Maya Angelou

Maya Angelou

“I believe that each of us comes from the Creator trailing wisps of glory.” Maya Angelou

A brilliant and admirable woman. Maya, you are now back with your Creator in  that land of glory…God bless.

Plants – African Violet/Stunted Growth Part II

The stunted violet in yesterday’s post will never become an attractive plant again. What to do? Toss it and buy another, or attempt to start a new plant from a few of the healthier leaves. Since it is summertime, most of my houseplants are having a vacation on the outdoor porch. I have plenty of room on my indoor plant table so this is a perfect time to root some cuttings inside.

IMG_1244

First I will take a cutting with an inch or two of stem. While searching the Internet for good information on taking cuttings I came across a new garden site I hadn’t seen in the past. Take a look at this informative page: The Garden Helper/Cuttings

IMG_1245

I’ll let the leaf-cutting dry for a few hours to harden the end of the stem a bit. I’ll prepare a container of sand and loose potting soil, and make a hole with the end of a pencil. After dipping the cutting in honey I will place it in the dirt, firm the soil around the stem, and close the top to keep in the humidity. In about six weeks I should be able to see small leaflets forming at the base of the stem. I’ll update the progress in a month or two.

Plants – African Violet/Stunted Growth Part I

IMG_1172

Two of my African Violets have stunted, misshapen leaves in the middle of the rosette. I have encountered the problem in the past, and often, I give up and throw the plant away. This time, I decided to start new plants from leaf cuttings, but first, I wanted assurance the leaves were not diseased or infested.

Plants with this type of stunted growth can be infested with spider mites. Oh my! I have battled these little pests on other plants. I inspected the violet in question with a magnifying glass but didn’t find any spider mites.

A few other possible causes:

Cool temperatures – Yes, we keep our house cool in the winter.

Too little light – Yes, I did move them to a window with very little afternoon sunshine.

Too much fertilizer – A possibility, but the problem would be caused by pre-fertilized African violet soil, not from anything I added. From now on, I’ll try to water from the top with a squirt bottle. Using this technique, I will avoid getting the leaves or crown of the violet wet, and salts and other toxins in the soil will be washed out of the bottom.

A normal violet below:
IMG_1173

Pheathers – Red-Bellied Woodpecker

Our yard has been visited quite often this spring by a red-bellied woodpecker. We weren’t aware of him until he began singing. His warbling song is very unique. At first it almost sounded like a spooky laugh of some kind. I have had quite a few different woodpeckers and nuthatches at the suet feeder this year. I am going to keep it full through the summer since I have found a suet that is not supposed to melt. We’ll see….

woodpecker

Flickr
Photo courtesy of Dawn Hornvolt
To view more pictures on Flickr or the photographs of Dawn Hornvolt please click on the links above.