Planting – Timely Soil Tip

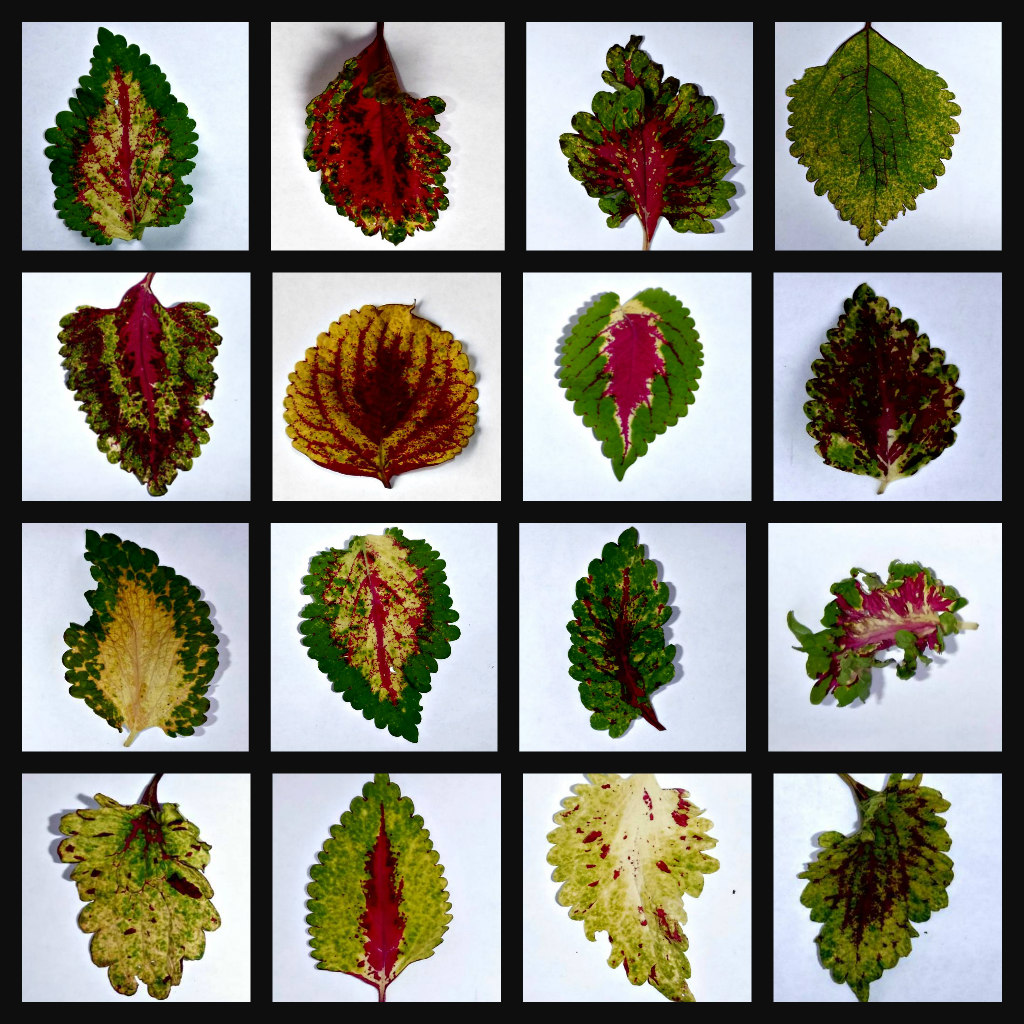
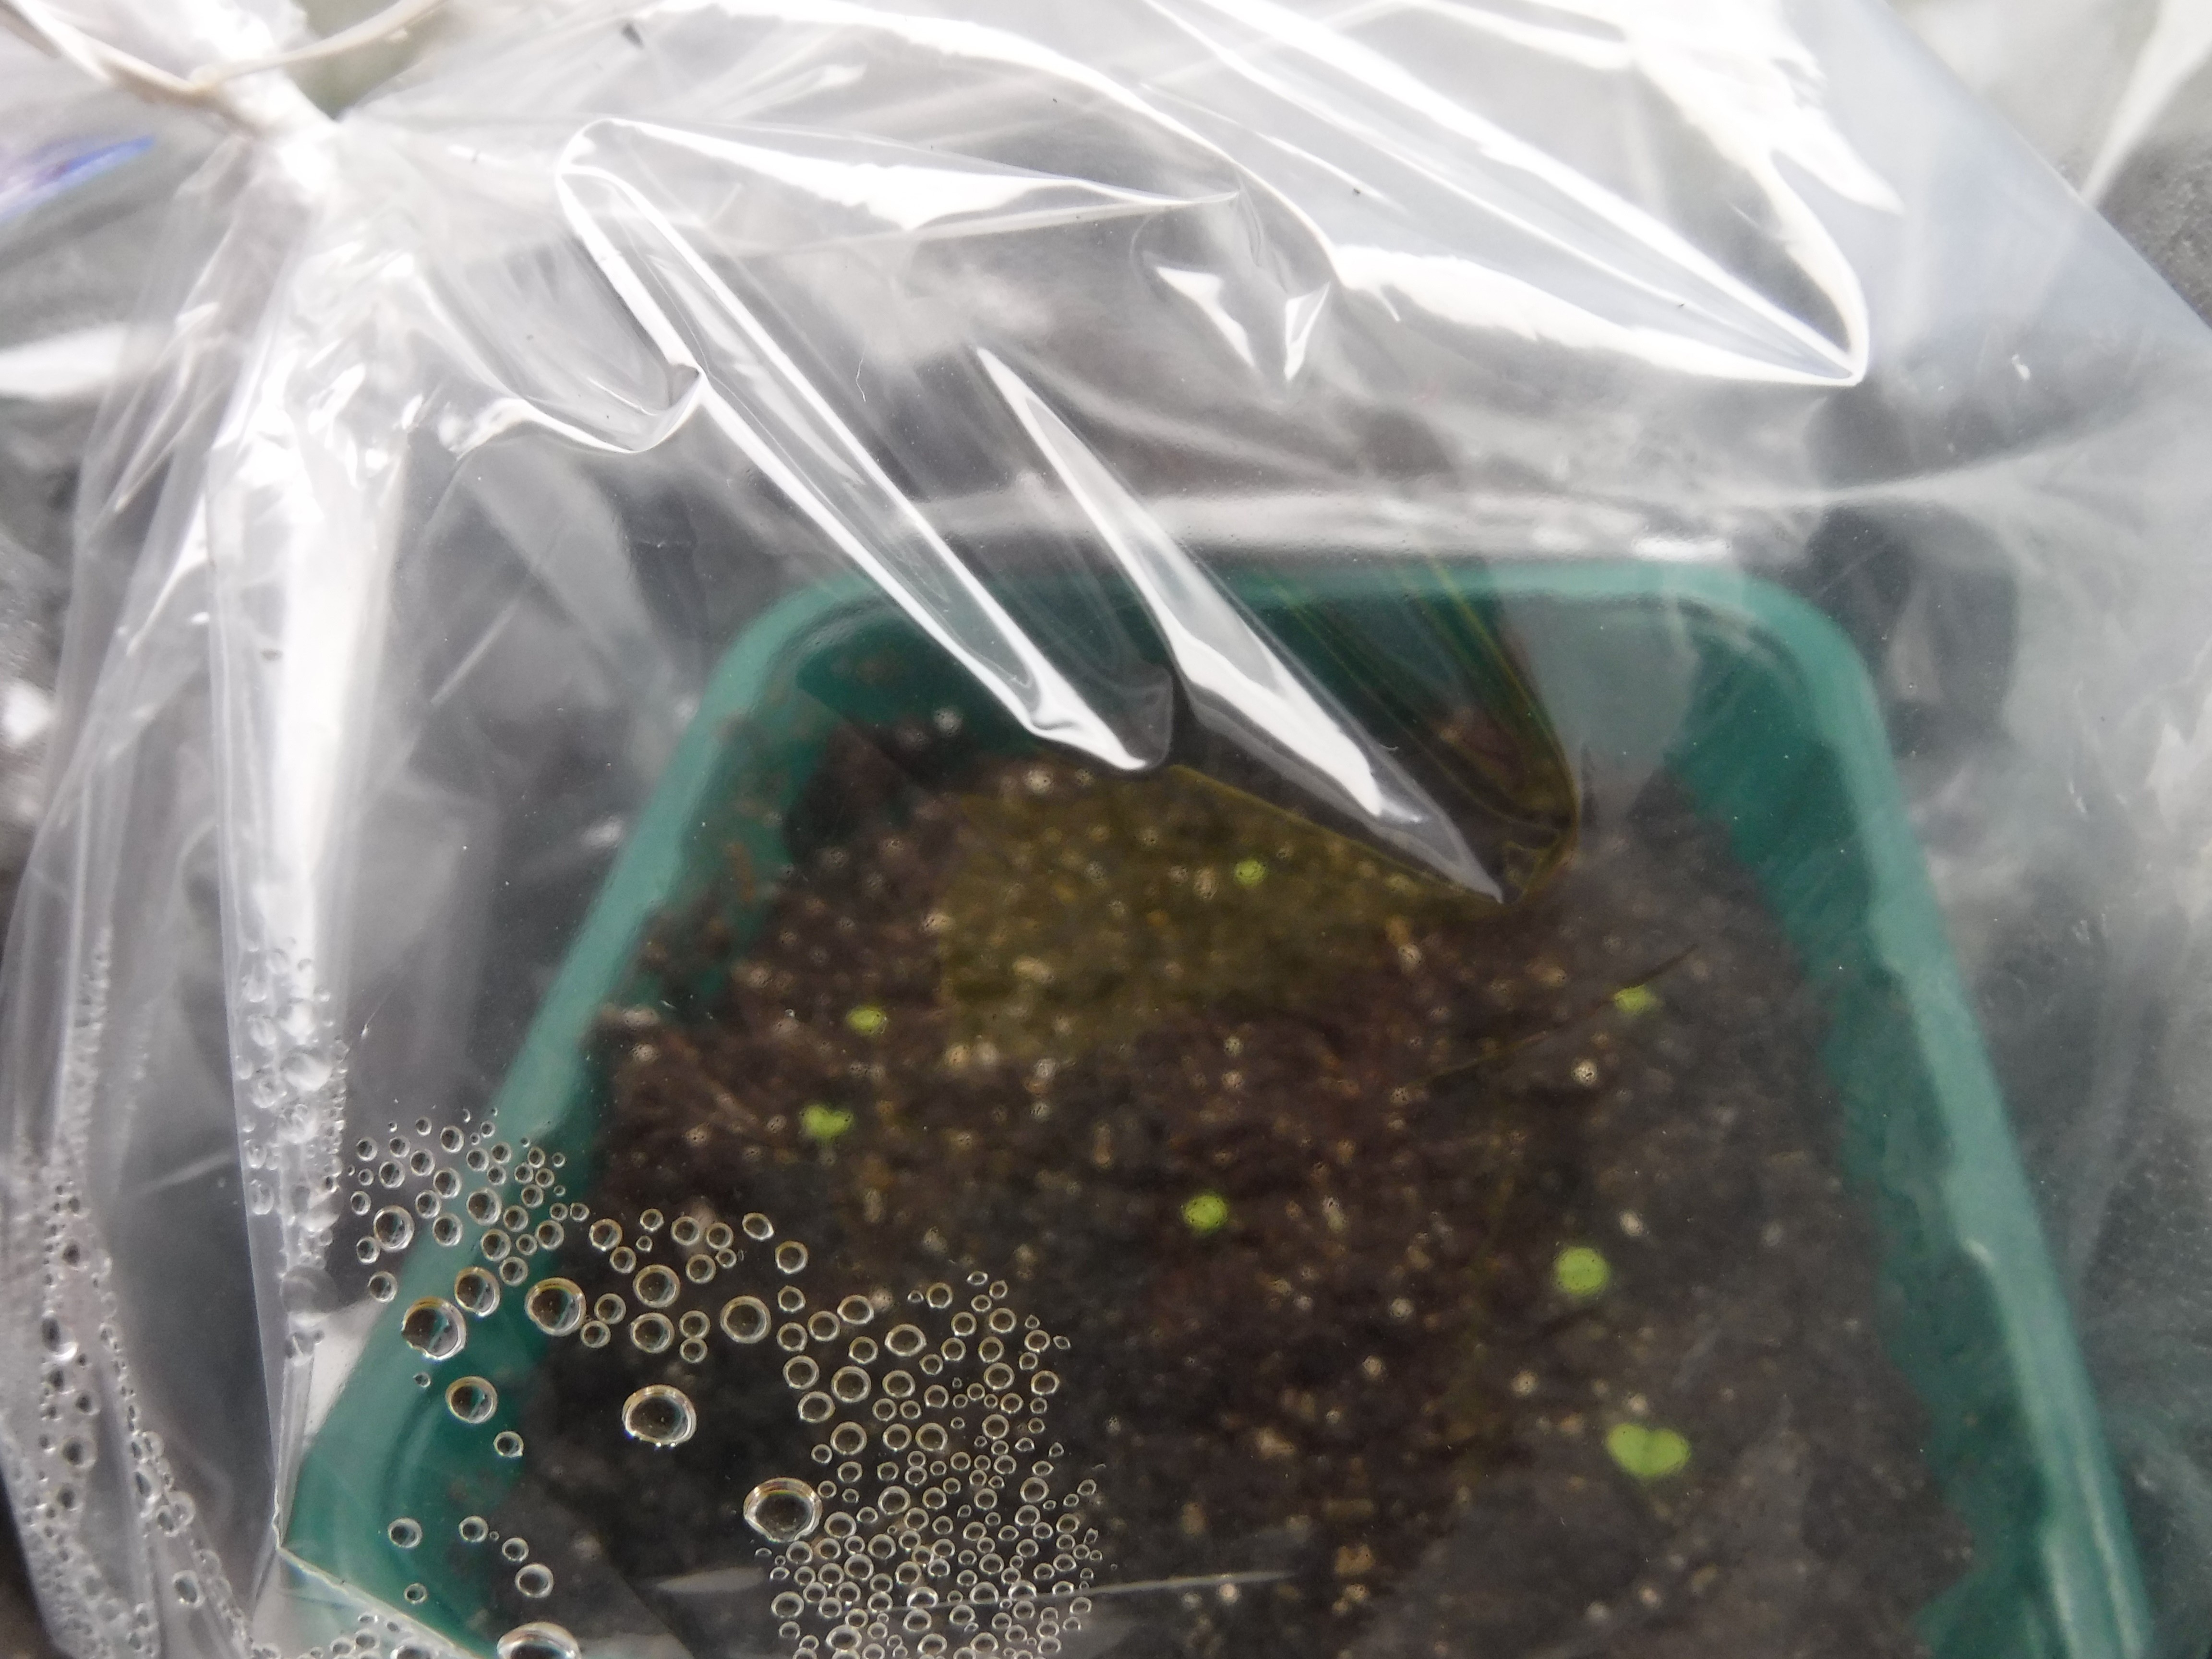
My close focus photograph of these coleus sprouts is rather blurry, but I only took the one shot, and it is a perfect example of the problem-solving tip I want to share today. When planting small seeds, even specially blended seed-starting soil can be full of lumps, small twigs, and other woodsy debris used to create the mix. Luckily for me, only one of my coleus seeds was placed on a ‘clod’ of dirt. The seed sprouted fine, the problem arose when the small root tried to reach the moisture beneath it. The hard clod of dirt it was planted on created a barrier and the sprout withered a day or two after emerging from the seed.

To give future seeds a better chance I filled the bottom of the container with about 1.5 inches of seed starter, then using an old sifter, I added about 1/4 inch of finely sifted seed starter mix. This makes a huge difference in the success of growing small seeds.

After sifting, place the container in a shallow pan of water and allow the mix to wick up more water. If the bottom layer of seed starter is sufficiently drenched, the sifted layer will absorb plenty of water for sprouting. Make sure and cover small seedlings with plastic wrap or another type of lid to ensure uniform moistness through the sprouting stage.

Plants – Coleus Harvest & Sampler

I am in the midst of harvesting and packaging my coleus seeds from 2020 to offer at The Flower Ark Etsy Shop.

I’ve enjoyed watching the plants develop from small seeds into 12 -30 inch plants. There have been many new patterns, colors, and edge variations to observe and cherish. I haven’t been disappointed!

This beauty growing in the side yard produced an abundance of colorful leaves and flower stalks. It was the first to produce seed this year.

For some reason I loved the simplicity of this green and ecru plant. Surrounded by impatiens and other coleus, the gently swirling leaves were finely marked and scalloped.


To create my samplers I photograph the leaves and insert them in Ribbet’s collage maker. This is a very easy application to use.

As I gather and package the seeds, I am already dreaming of next year’s crop. Coleus seeds will sprout and grow through the winter and make amazing and easy to grow houseplants. Indoors give them your sunniest window to prevent leggy growth. Pinch out the tips and you will soon have a bushy, colorful addition to your plant menagerie.

Planting – Updates

Do you remember the sea bean pod I found on Cape May’s beaches a few weeks ago? I culled out four of the small trees that sprouted and potted one up to grow to a larger size. The seedling is most likely a black locust tree, but my daydreams find me still wondering if the pod might have made a seaward journey from the tropics via the Gulf stream to Cape May.

The sea bean seeds are a good example of garden wisdom: nick and soak large seeds before planting. The sweet pea seeds I soaked, and also nicked with a nail clipper, have already sprouted outdoors in the winter sown containers, while those not treated are only beginning to swell a bit.

Here’s an inside peek at one of the milk jugs. The arugula seeds are already growing. Also sprouting outdoors is broccoli, mustard spinach and the sweet peas.

For plants that will only grow in warm conditions, such as coleus, I’m having good luck in the basement. A small heater inside a plastic covered light table mimics a greenhouse and the seeds are sprouting well. They will not need to be thinned since I sowed them with the small seed sowing method.

Planting – Small Seeds/Coleus & Others

It’s that time of year again…my coleus seeds need to be planted now if they are to reach a decent size by the end of April. Below you will find a re-blogged post on how I plant small seeds. It may seem tedious, but it keeps the small plantlets separate and drastically cuts back on damping-off disease.

I have collected seeds from my coleus plants for well over ten years. Each year I plant the offspring of the previous year, the seedlings grow, are cross-pollinated by the bees, and new seeds are harvested in the late Autumn. I start my coleus very early, the seeds are small, quick to sprout, but slow to grow. I don’t sow them thickly into the flats. Seedlings sown too close together tend to get damping-off disease.

I found these great lidded containers made by Solo this year. They are the perfect coleus incubator/flat.

I sow the seeds sparingly using the sharpened point of a pencil. I dip the pencil point into water and touch it to one seed. The dampness grabs hold of the seed. I touch the seed to the wet seed starter mix in the flat, and the seed adheres to the wet soil. I repeat this process between sixty and seventy times per flat.

I use wire garbage bag ties, marked in segments with magic marker, to guide me in the placement of the seeds.

After I sow a row of seeds I remove the wire guide so I don’t double plant a row.

The next step is a gentle spray of water to seal the seeds to the wet soil.

I cover the flat with the lid. It is gratifying to observe it instantly steam up with warmth and humidity.

I place the planted flat of coleus seed on top of my refrigerator or near, but not on, a heating vent. I’ll update the progress as the seeds sprout and grow.

Follow Me on Pinterest

Plants – Coleus Sampler 2014

Coleus sampler jpg

Here’s a sampling of my coleus this summer of 2014. The weather in my area has been unseasonably cool, and the coleus have never reached their full potential. They are half the height and breadth of past coleus  grown in Southern New Jersey. Not to worry though…they are beginning to put out flower spikes and next year’s coleus seeds will soon be developing.