Prayer & Pressed Flowers – The Prayer Flag Project

The Prayer Flag Project

“Therefore, confess your sins to one another and pray for one another, that you may be healed. The prayer of a righteous person has great power as it is working.” James 5:16

I recently participated in “The Prayer Flag Project” by creating a prayer flag.

“In June of 2011, Vivika Hansen DeNegre started The Prayer Flag Project. She invited people from around the world to to join her in making Prayer Flags. Each flag is created in the artists own style, then hung outside for a while, its words and sentiment dissolving into the wind and being spread to all whom the wind touches. They are a living, breathing, kinetic journal of our hopes, dreams and concerns. The Prayer Flag Project… Join us if you’d like.”

The theme: Create a flag that incorporates “Images of leaping humans (think leap of faith), and of course maps and lettering.” My flag, and the flags of others, can be viewed by clicking on the button at the top of this post.

My initial flag was created with pressed flowers on Mulberry paper. It turned out lovely, but I realized it was too fragile to send through the mail, and most likely would not hold up being sewn to binding along the top. Here’s a peek at the finished flag.

The Dragonfly: Pressed Flower Artwork, 5 x 7, Blue Hydrangeas, Queen Anne's Lace, Seaweed, Lichen, Mulberry Leaves
The Dragonfly, pressed flower artwork, 5 x 7, Blue Hydrangeas, Queen Anne’s Lace, Seaweed, Lichen, Mulberry Leaves

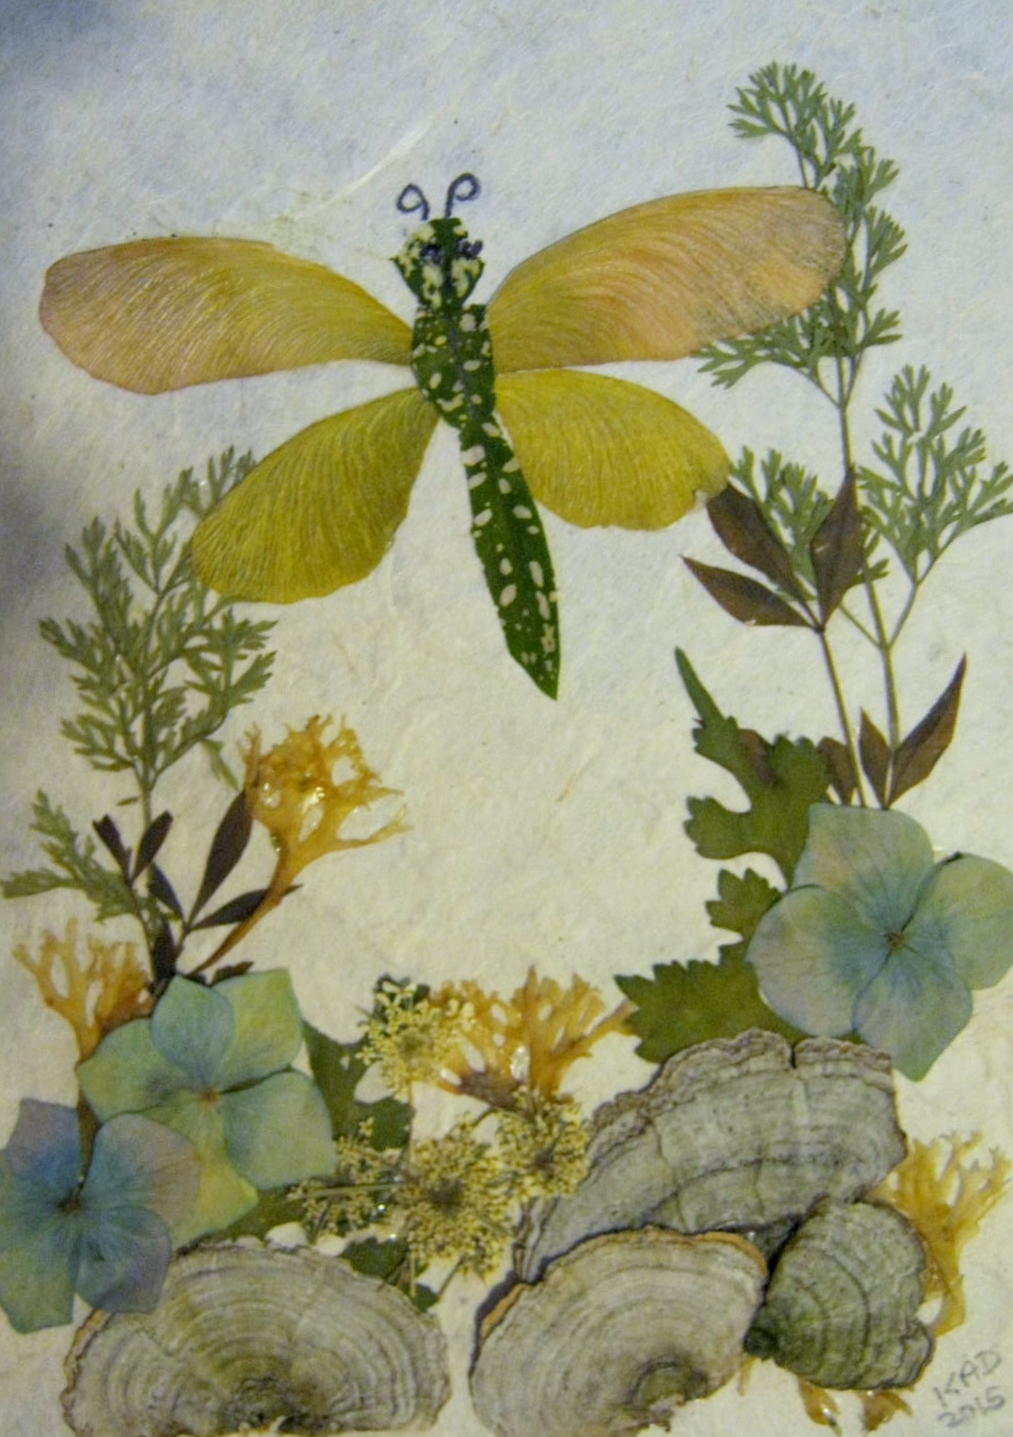
Pressed Flower Tip: Hydrangeas are a good pressed flower candidate. The hard round center must be removed before pressing. Press without heat in between non-shiny pages.Lichens can be pressed flat in books. Seaweed can be dried and pressed between pages. Wildflower and tree foliage presses beautifully.

Pressed Flowers – Cutting Autumn Leaves

Autumn leaves are one of the easiest pieces of foliage to press. Collect them when dry, put each between the pages of a book, and usually in less than a week they are ready to use. The colors dull and fade a bit, but they still retain their resiliency and good looks. I use quite a few Autumn leaves in my pressed flower compositions. They are great for cutting into different shapes. I create many things with the pressed leaves: birdhouses, wagons, baskets, flowerpots and even small houses.

One problem that arises when cutting the leaves is their brittle nature when dried and pressed. To cut without treating them in some way usually results in shattered pieces or raggedy edges. I’ve found a few fixes for combating this problem by stabilizing the leaves with an added layer. Today I’ll share Fix #1.

Fix #1 – Mod Podge the back side of the leaves

Brush the Mod Podge on the back of the leaves with a soft brush. Let it dry completely. While it dries create a pattern out of cardboard for the shape you want to use. In my case it was a tiny house greeting card I call “Home Sweet Home.”

When the Mod-Podge is completely dry, I use a Sharpie marker to trace the house pattern onto the mod-podged side of the leaves. Use a marker that is as close to the color of the leaf as possible or it might show through to the front side. Make sure you remember that when you cut out the traced pattern it will reverse itself. For instance, in the finished card, if I use side one of my pattern to trace, on the finished house the door will be on the left of the house, not on the right.

To finish this card I choose small pieces of foliage and very tiny flower bunches to create the trees. I set these aside at the ready.

For everyone who wondered why I press seaweed….here is the answer: Pressed seaweed is perfect to make small trees. When dried and pressed the thick fronds of this type of seaweed shrink to delicate branches.

Small ferns, leaves and pieces of Queen Anne’s lace foliage, all look like small trees.

Small florets of flowers look like Crape Myrtle trees in bloom.

Here are a few of the finished cards. Four seasons of pressed flower houses.

SPRING

For those who wondered why in the world I would press pieces of an abandoned hornet’s nest, the answer is above: hornet’s nest paper, pressed and mod-podged, is easy to cut into shapes for unique additions to my pressed flower creations.

SUMMER

AUTUMN

WINTER

Place and Play – Block Island Day 5

I am not much of a beach bather, but I am an absolutely avid beachcomber. The evidence sits on shelves in my garage. Stacked in boxes and bins are hundreds of pieces of driftwood, seashells, sea glass and even fishing lures that have washed up on the beaches I visit. I also enjoy creating cairns (more on these tomorrow) and stone sea nymphs. Here are a few pictures of this year’s creations. I named the photo above “Three Sisters.” I am a part of that three sister trio. I am the stone maiden on the right. My sister Amy is on the left, and sister Sue is in the middle.

I also really enjoyed putting together the bride and groom beneath the driftwood arch. Fun! Yes, it’s true…I will never grow up.

Place and Pressed Flowers – Pressing the Odd Item/Block Island Day 4

Clayhead Beach on Block Island is probably my favorite beach. This past winter, storms and currents deposited extra sand on the shoreline. The stretch of sand along Clayhead has always been sensational, and now is better than ever. The large rocks just off the beach create amazing tidal pools. These pools capture hermit crabs, periwinkles, starfish, and this year I even saw a sea urchin for the first time. The pools are a big draw for beachcombers, young and old.

Seaweed is abundant on Block Island and grows in these pools. In the past it was farmed and sold. While I was researching the seaweed, I found this article about a present day forager of seaweed. You can read the article here: Seaweed Forager – Jen Lighty

Here are some photographs of the seaweed on the island.

I especially loved the look of the frondy seaweed in the picture above and decided to try to press it. Luckily, I had thought ahead and brought a few books for pressing along with me. I gathered up a cupful of the seaweed then soaked it in fresh water, changing the water several times. I then spread the clean seaweed on several layers of newspaper and left it in the sun. Within a matter of hours the seaweed had lost all moisture, but unfortunately was also rock hard. To press it in this brittle condition would have shattered it. I decided it was an impossible task. Happily, I didn’t throw it out right away, but forgot and left the hardened seaweed on the balcony overnight.

Hooray! Thank goodness for my occasional absent-mindedness. During the night the seaweed reabsorbed a bit of moisture from the dew and fog. It was not wet, but only sticky and damp, and a bit pliable. I put it between the pages of my book and in a few days it was hardened again, but now perfectly flat.

The dried and pressed seaweed held on to a bit of its pink color, but all the greens and whites faded out or darkened into browns and tan. The pieces, even though pressed, are still fairly thick. I don’t think I can use it in my usual greeting card artwork. One idea I have thought of is to use it as a stencil in my painting. I also could apply paint with a brush and use the pressed seaweed as a stamp. Any ideas for me? Please leave a comment. I’d love to get some input on how to use it.