
Don’t throw your banana peels away. Bury them alongside your roses for beautiful bushes and blooms. Check out this great article from Mother Earth News: Banana Peels for Beautiful Roses

Don’t throw your banana peels away. Bury them alongside your roses for beautiful bushes and blooms. Check out this great article from Mother Earth News: Banana Peels for Beautiful Roses


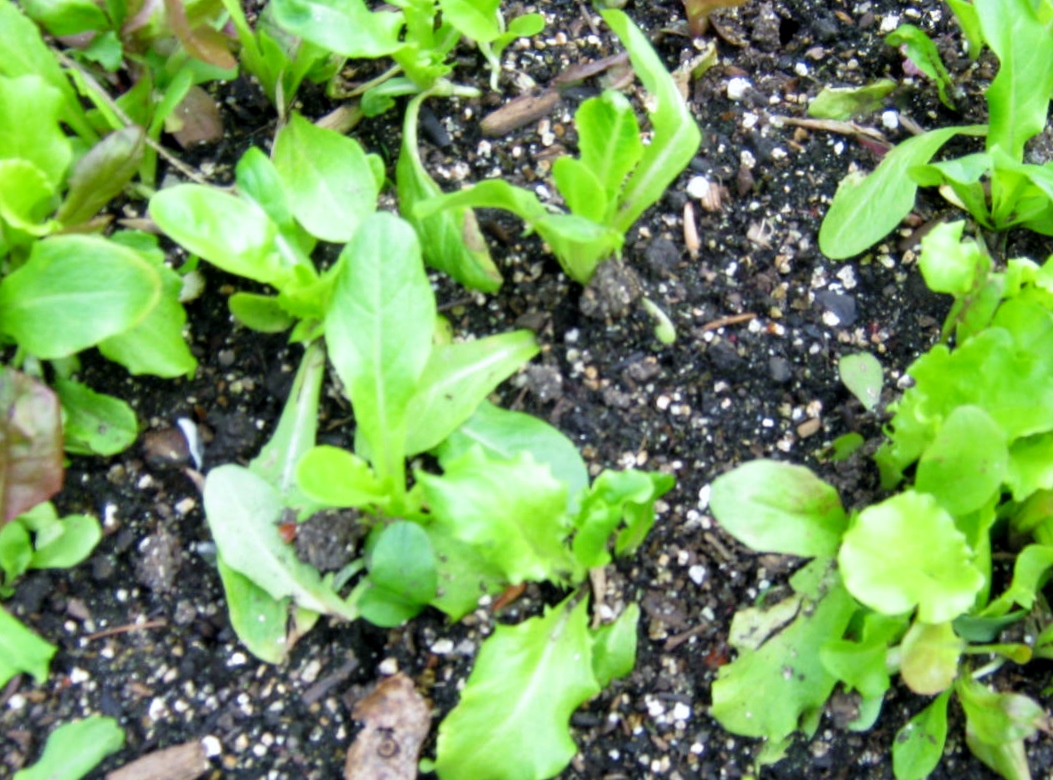
I have begun harvesting some of my lettuce. The seedlings I grew through winter-sowing have leaves big enough to pick and enjoy eating.

The delicious lettuce leaves above, varieties Cook’s Garden Mix and Black Seeded Simpson, were the perfect addition to a turkey sandwich on toast.


Each time I gaze upon this lovely primrose, peaking right now with three stalks of bloom, something in my heart goes “Zing!” Perhaps it is the soft pink of the petals, or the glowing of the green leaves within the rays of the sun. I’m so smitten by the primrose I have decided I must attempt to grow a few from seed to blooming size.
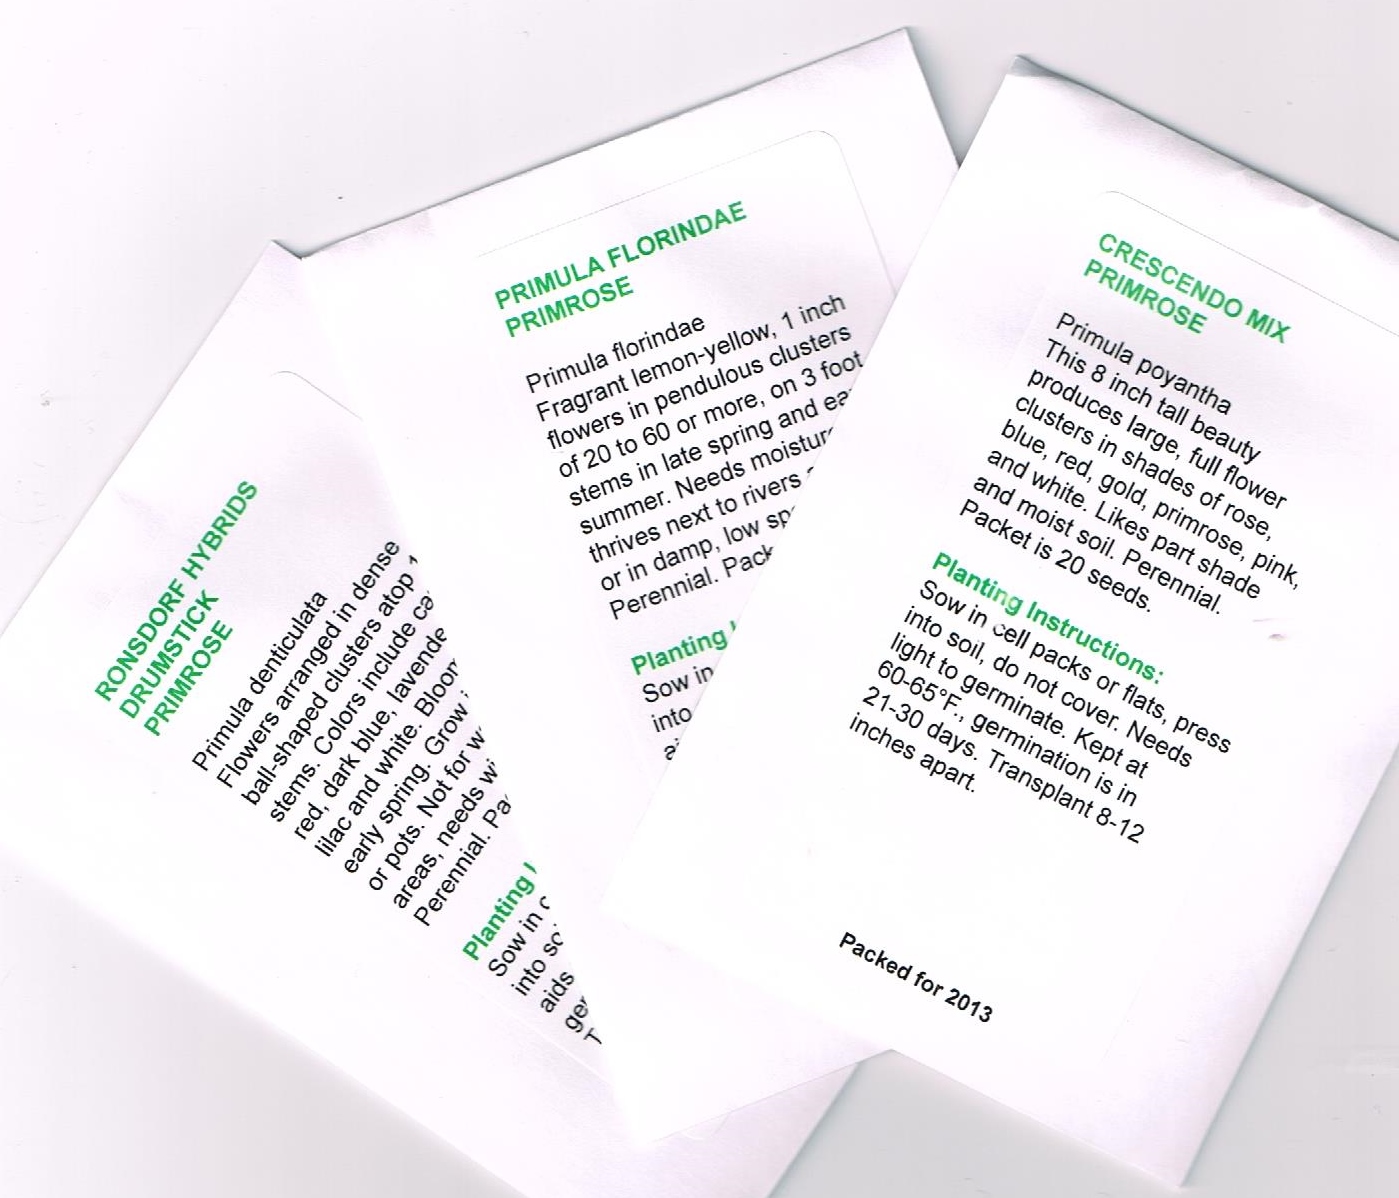
I’ve been having good luck with seeds purchased from a company called Swallowtail Garden seeds. Without fail, all of the seeds I have purchased from this source have quickly sprouted and are growing now beneath lights.

Here is a link to Swallowtail Garden Seeds. I live on the other side of the country, and the seeds reached me very quickly. I was able to keep track of their progress because of the great communication and tracking number they sent me. The seeds were well-packed in a bubble envelope. I recommend this company for quality and amazing selection of seeds.
Click below to visit Swallowtail Website:


Glad Press’n Seal is one of my favorite Garden Accessories. When I sow seedlings nothing works better for sealing in the moisture and creating a mini-greenhouse effect.

The photo above shows one of my hanging planters with Glad Press’n Seal
Within a week my tomatoes were up and beginning to grow. Time to take off the Press’n Seal and watch their progress. When the plants are at this stage I must check each pot daily to make sure they are not drying out.

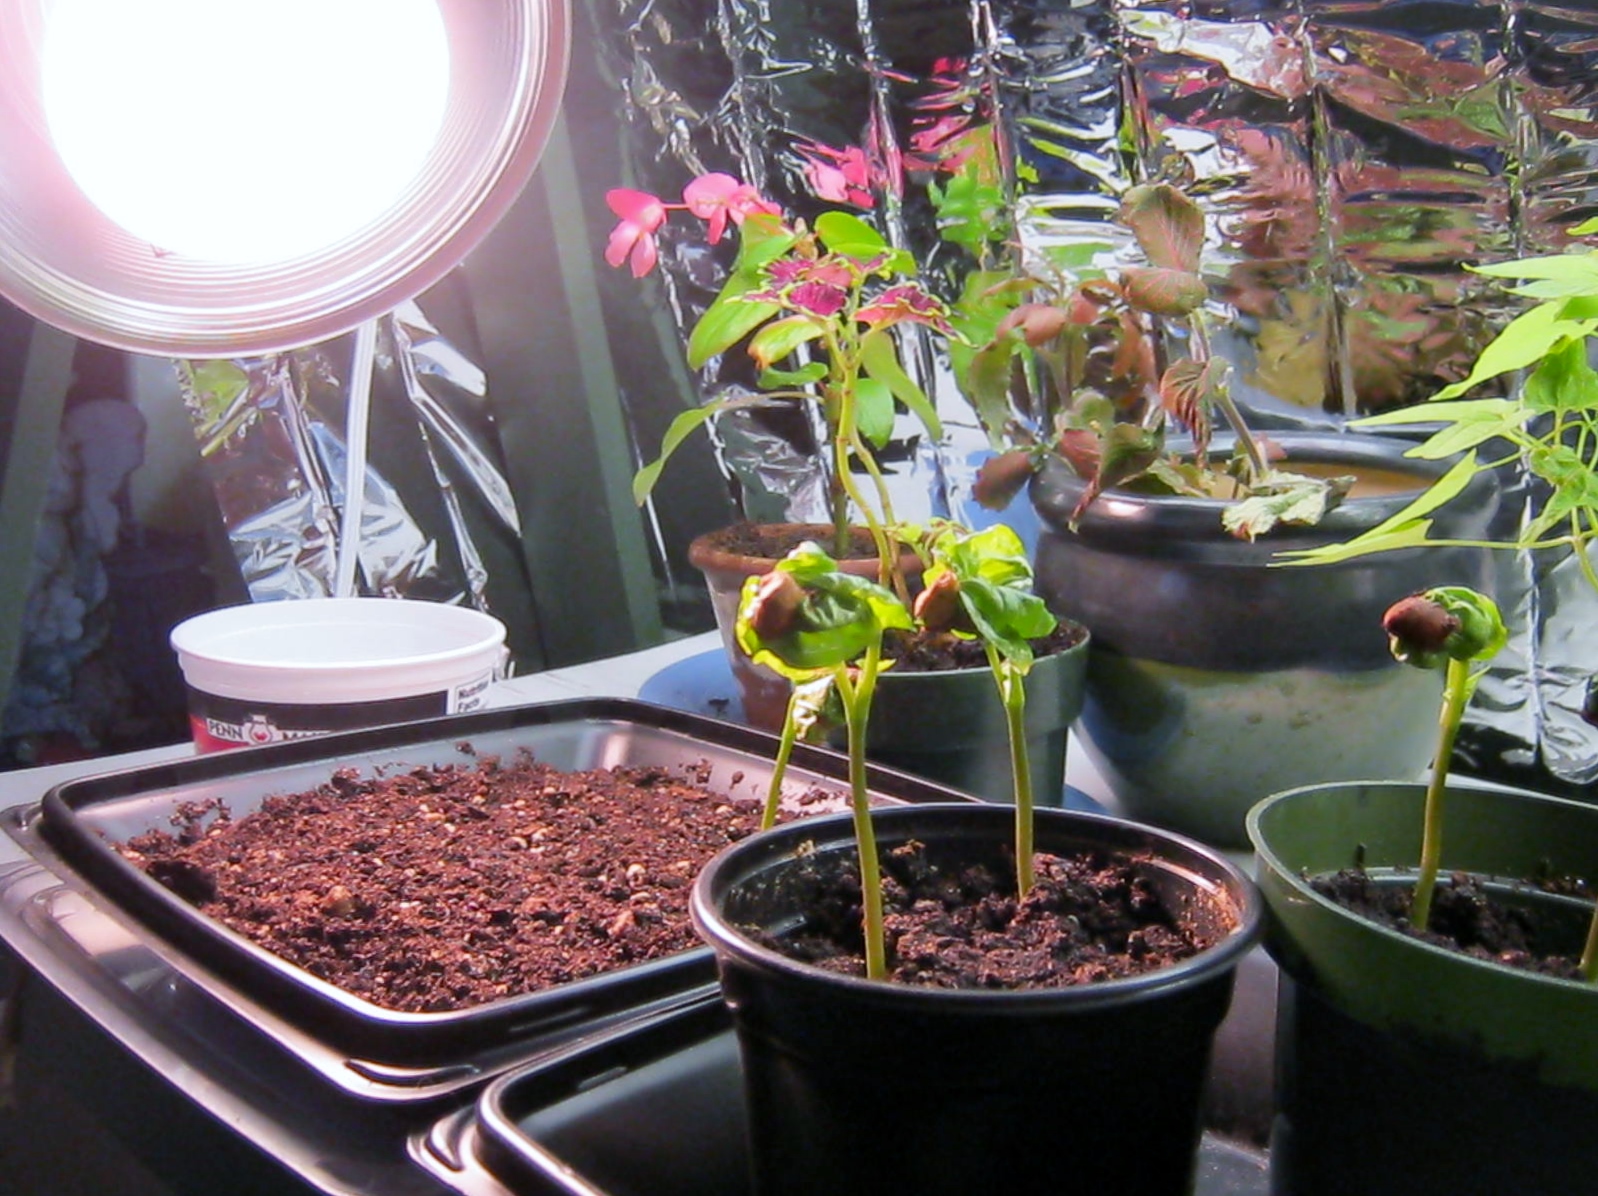
This year I have begun planting my seeds for indoor growing a bit later than usual. In hopes of jump-starting the growth process with extra heat and light I have enclosed my light table with a mylar blanket. These can be found in the camping sections of retail and sporting stores. I found mine at Kmart and I have purchased them in the past at Walmart. They are also great to have in your glove compartment in the event of an emergency situation. Since my light table is in the basement, I also brought a brooder lamp for extra warmth. The soil in my seedling containers warms up quickly when the bulb is plugged in, and the light of the table as a whole is a bit brighter with the reflective blanket in place. I must be very diligent in checking the soil for drying out. If you go this route be sure to check your seedlings a minimum of twice a day. If you are going to be away for longer than eight hours it is best to unplug the heat lamp.

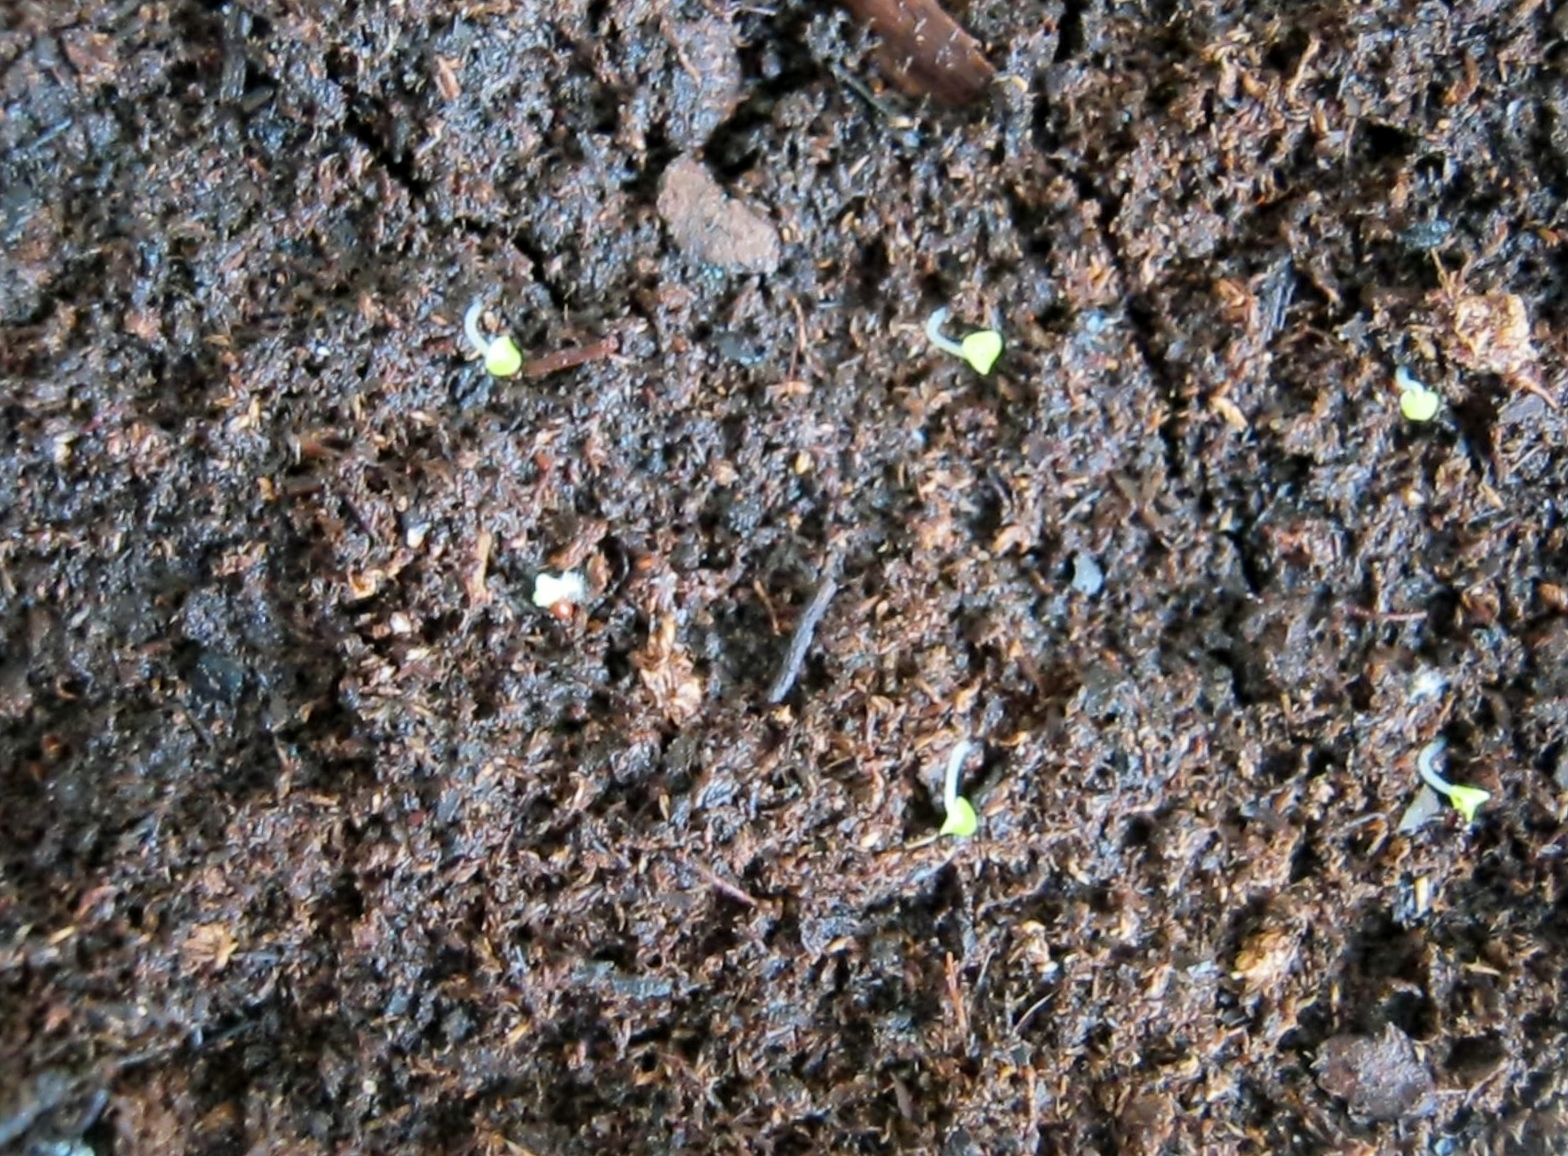
My coleus seedlings are sprouting. To guard against damping off diseases I keep the seeds spaced apart. I have found in the past that crowding seedlings invites disease.
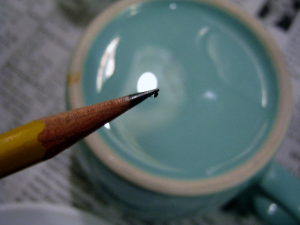
Coleus seeds, among many others, are smaller than the head of a pin. Sowing them in neat rows can be a daunting task. To accomplish this with as little frustration as possible I use water and a pencil.
An explanation of this technique can be found here: Planting Small Seeds
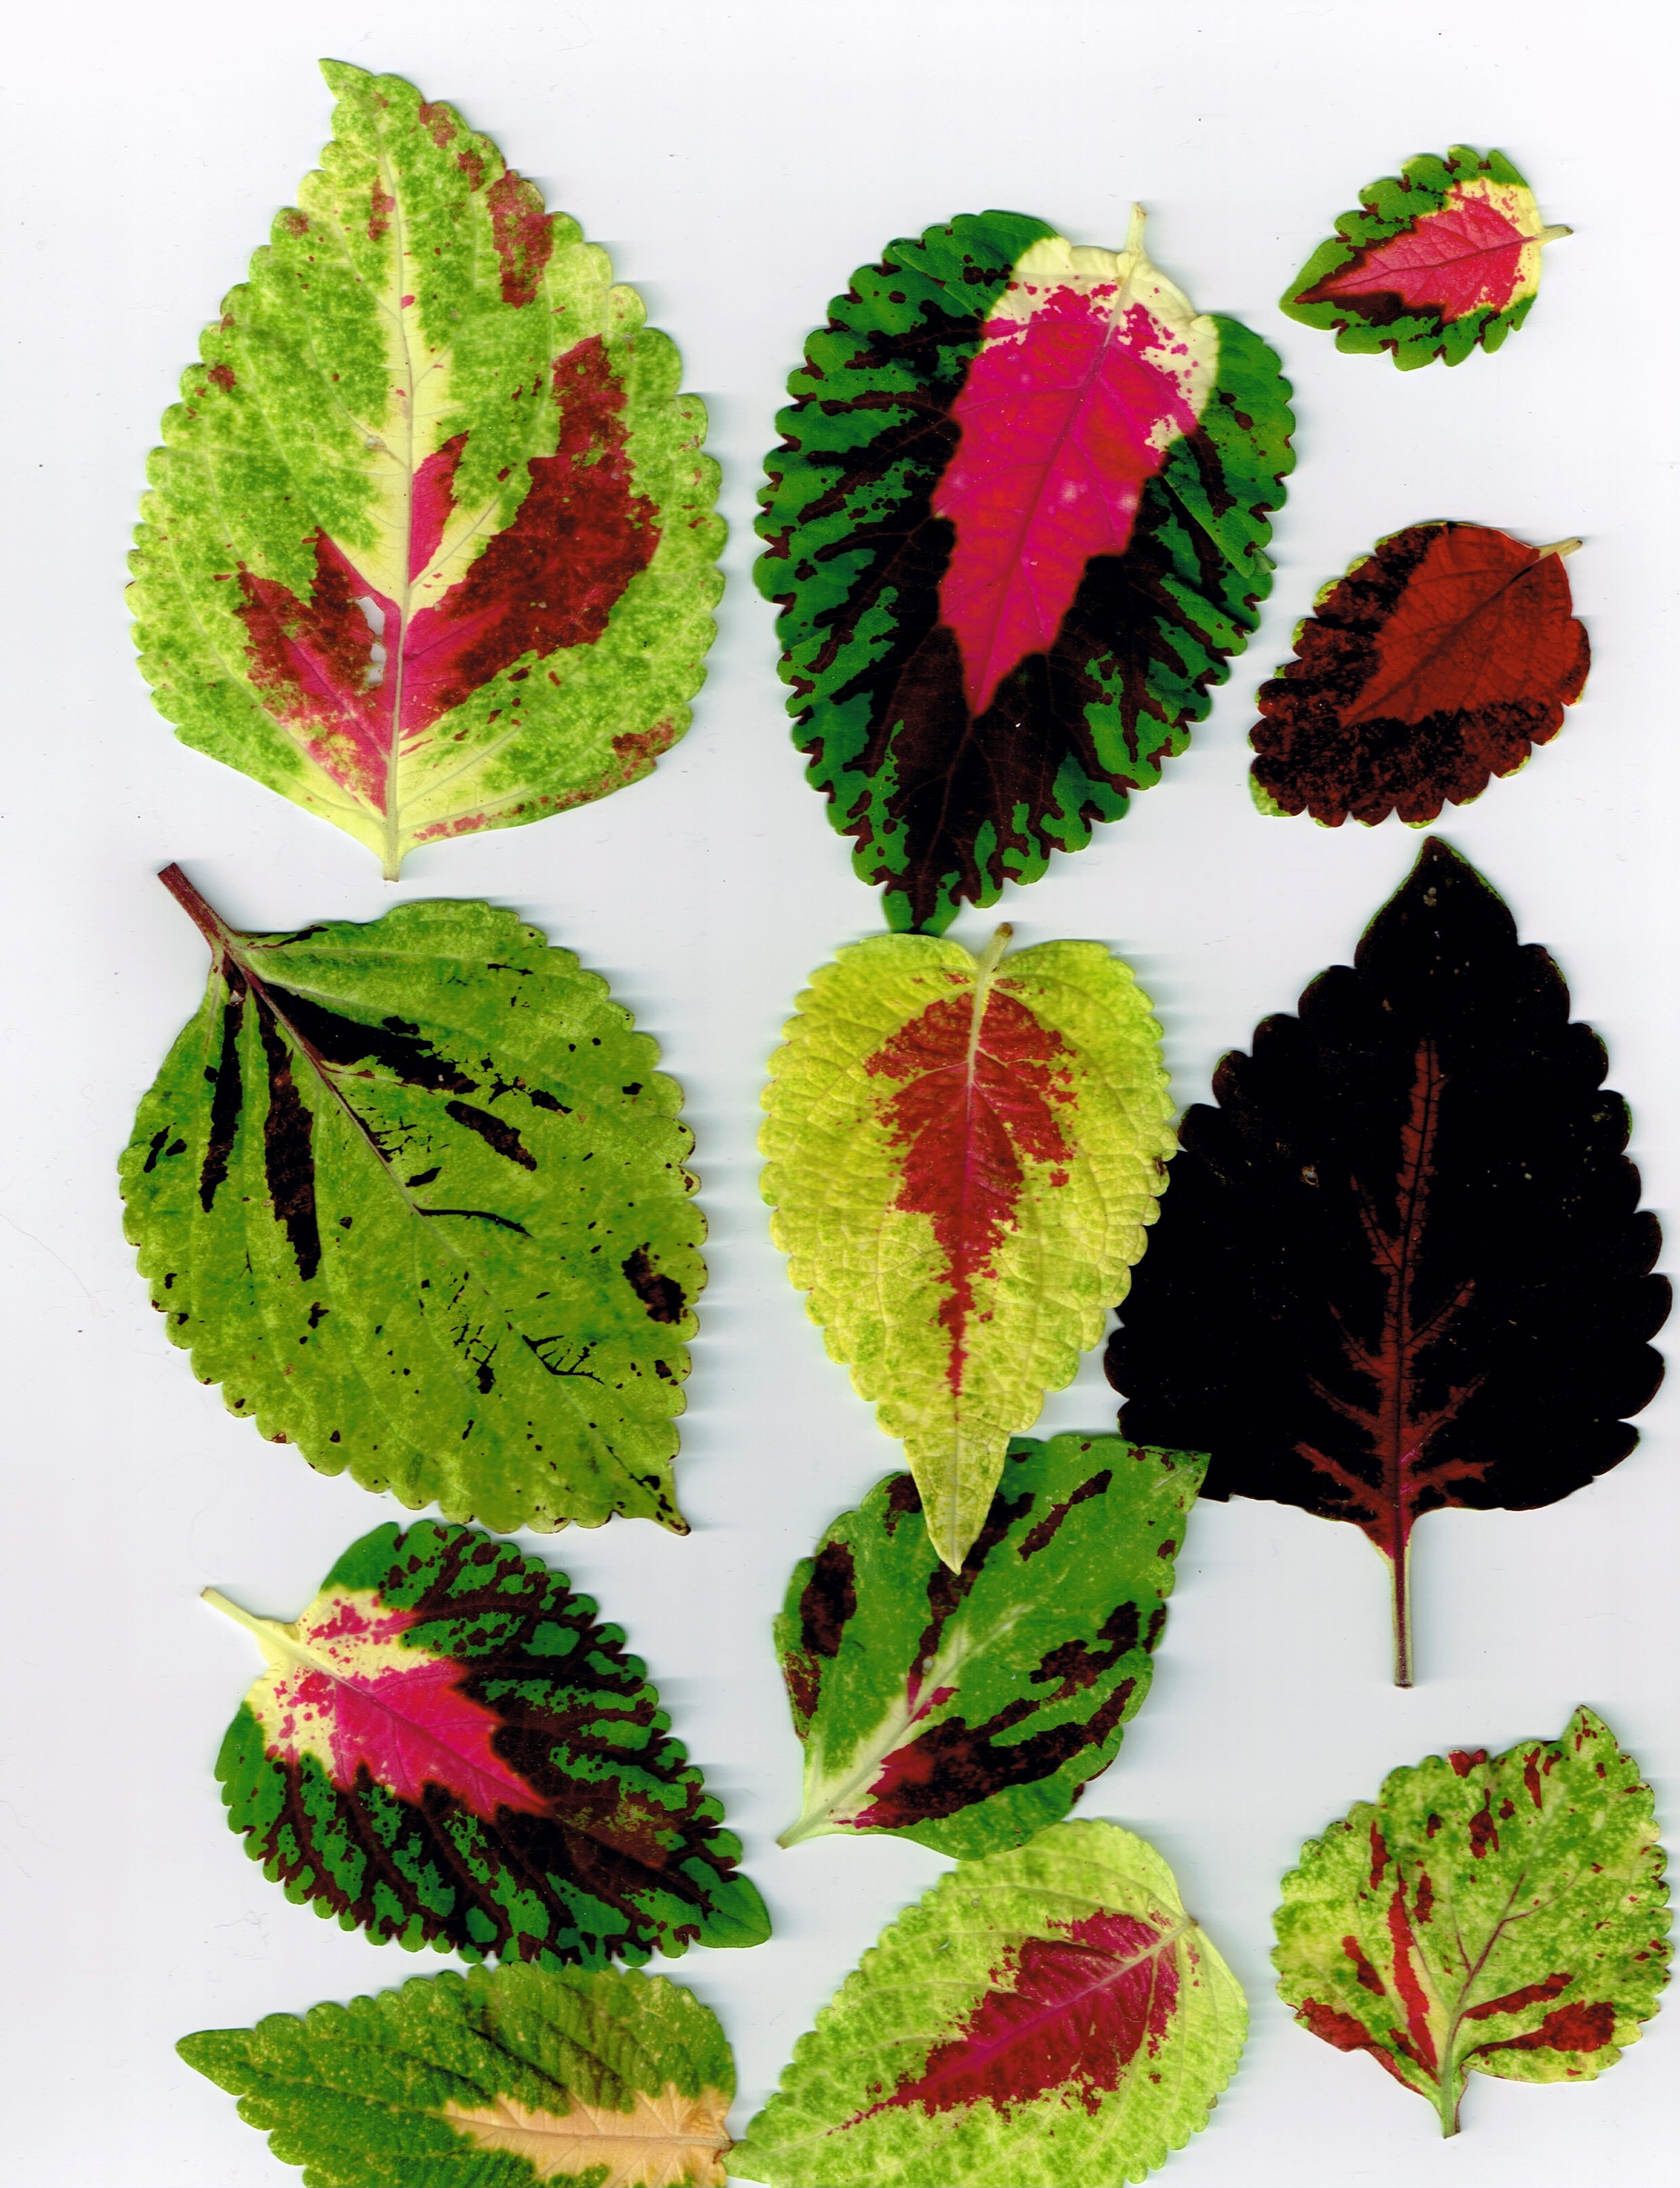
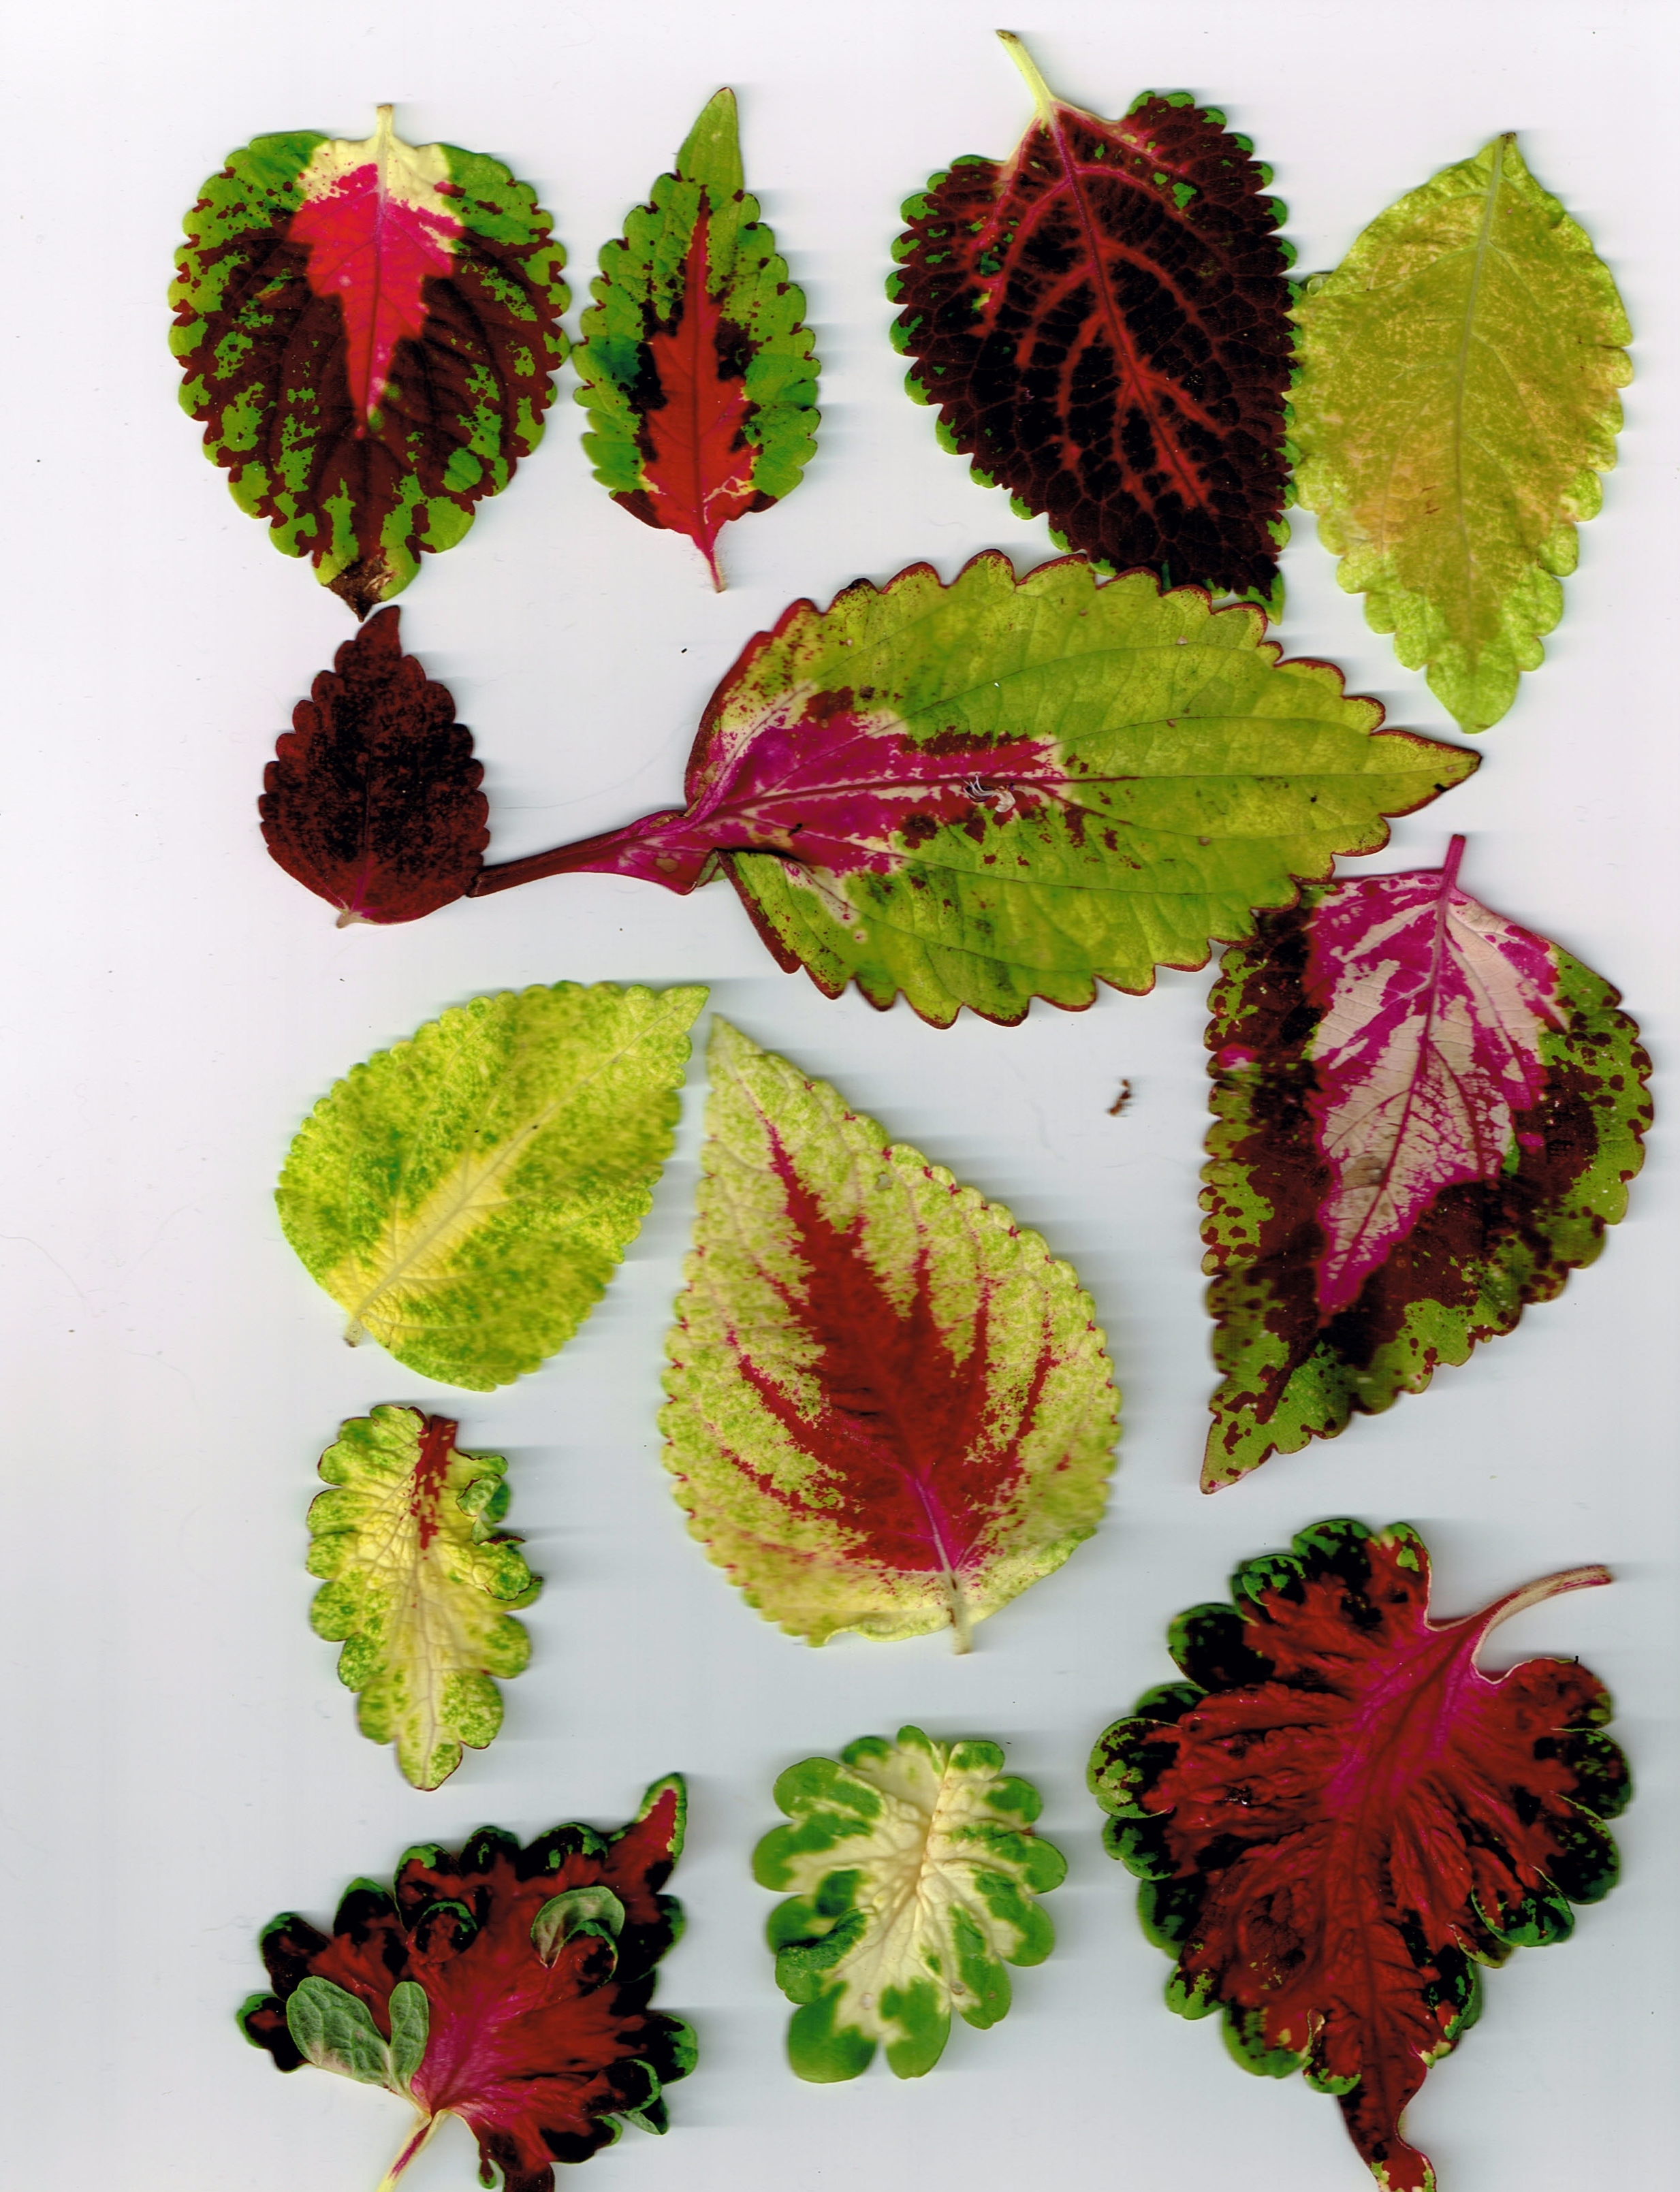
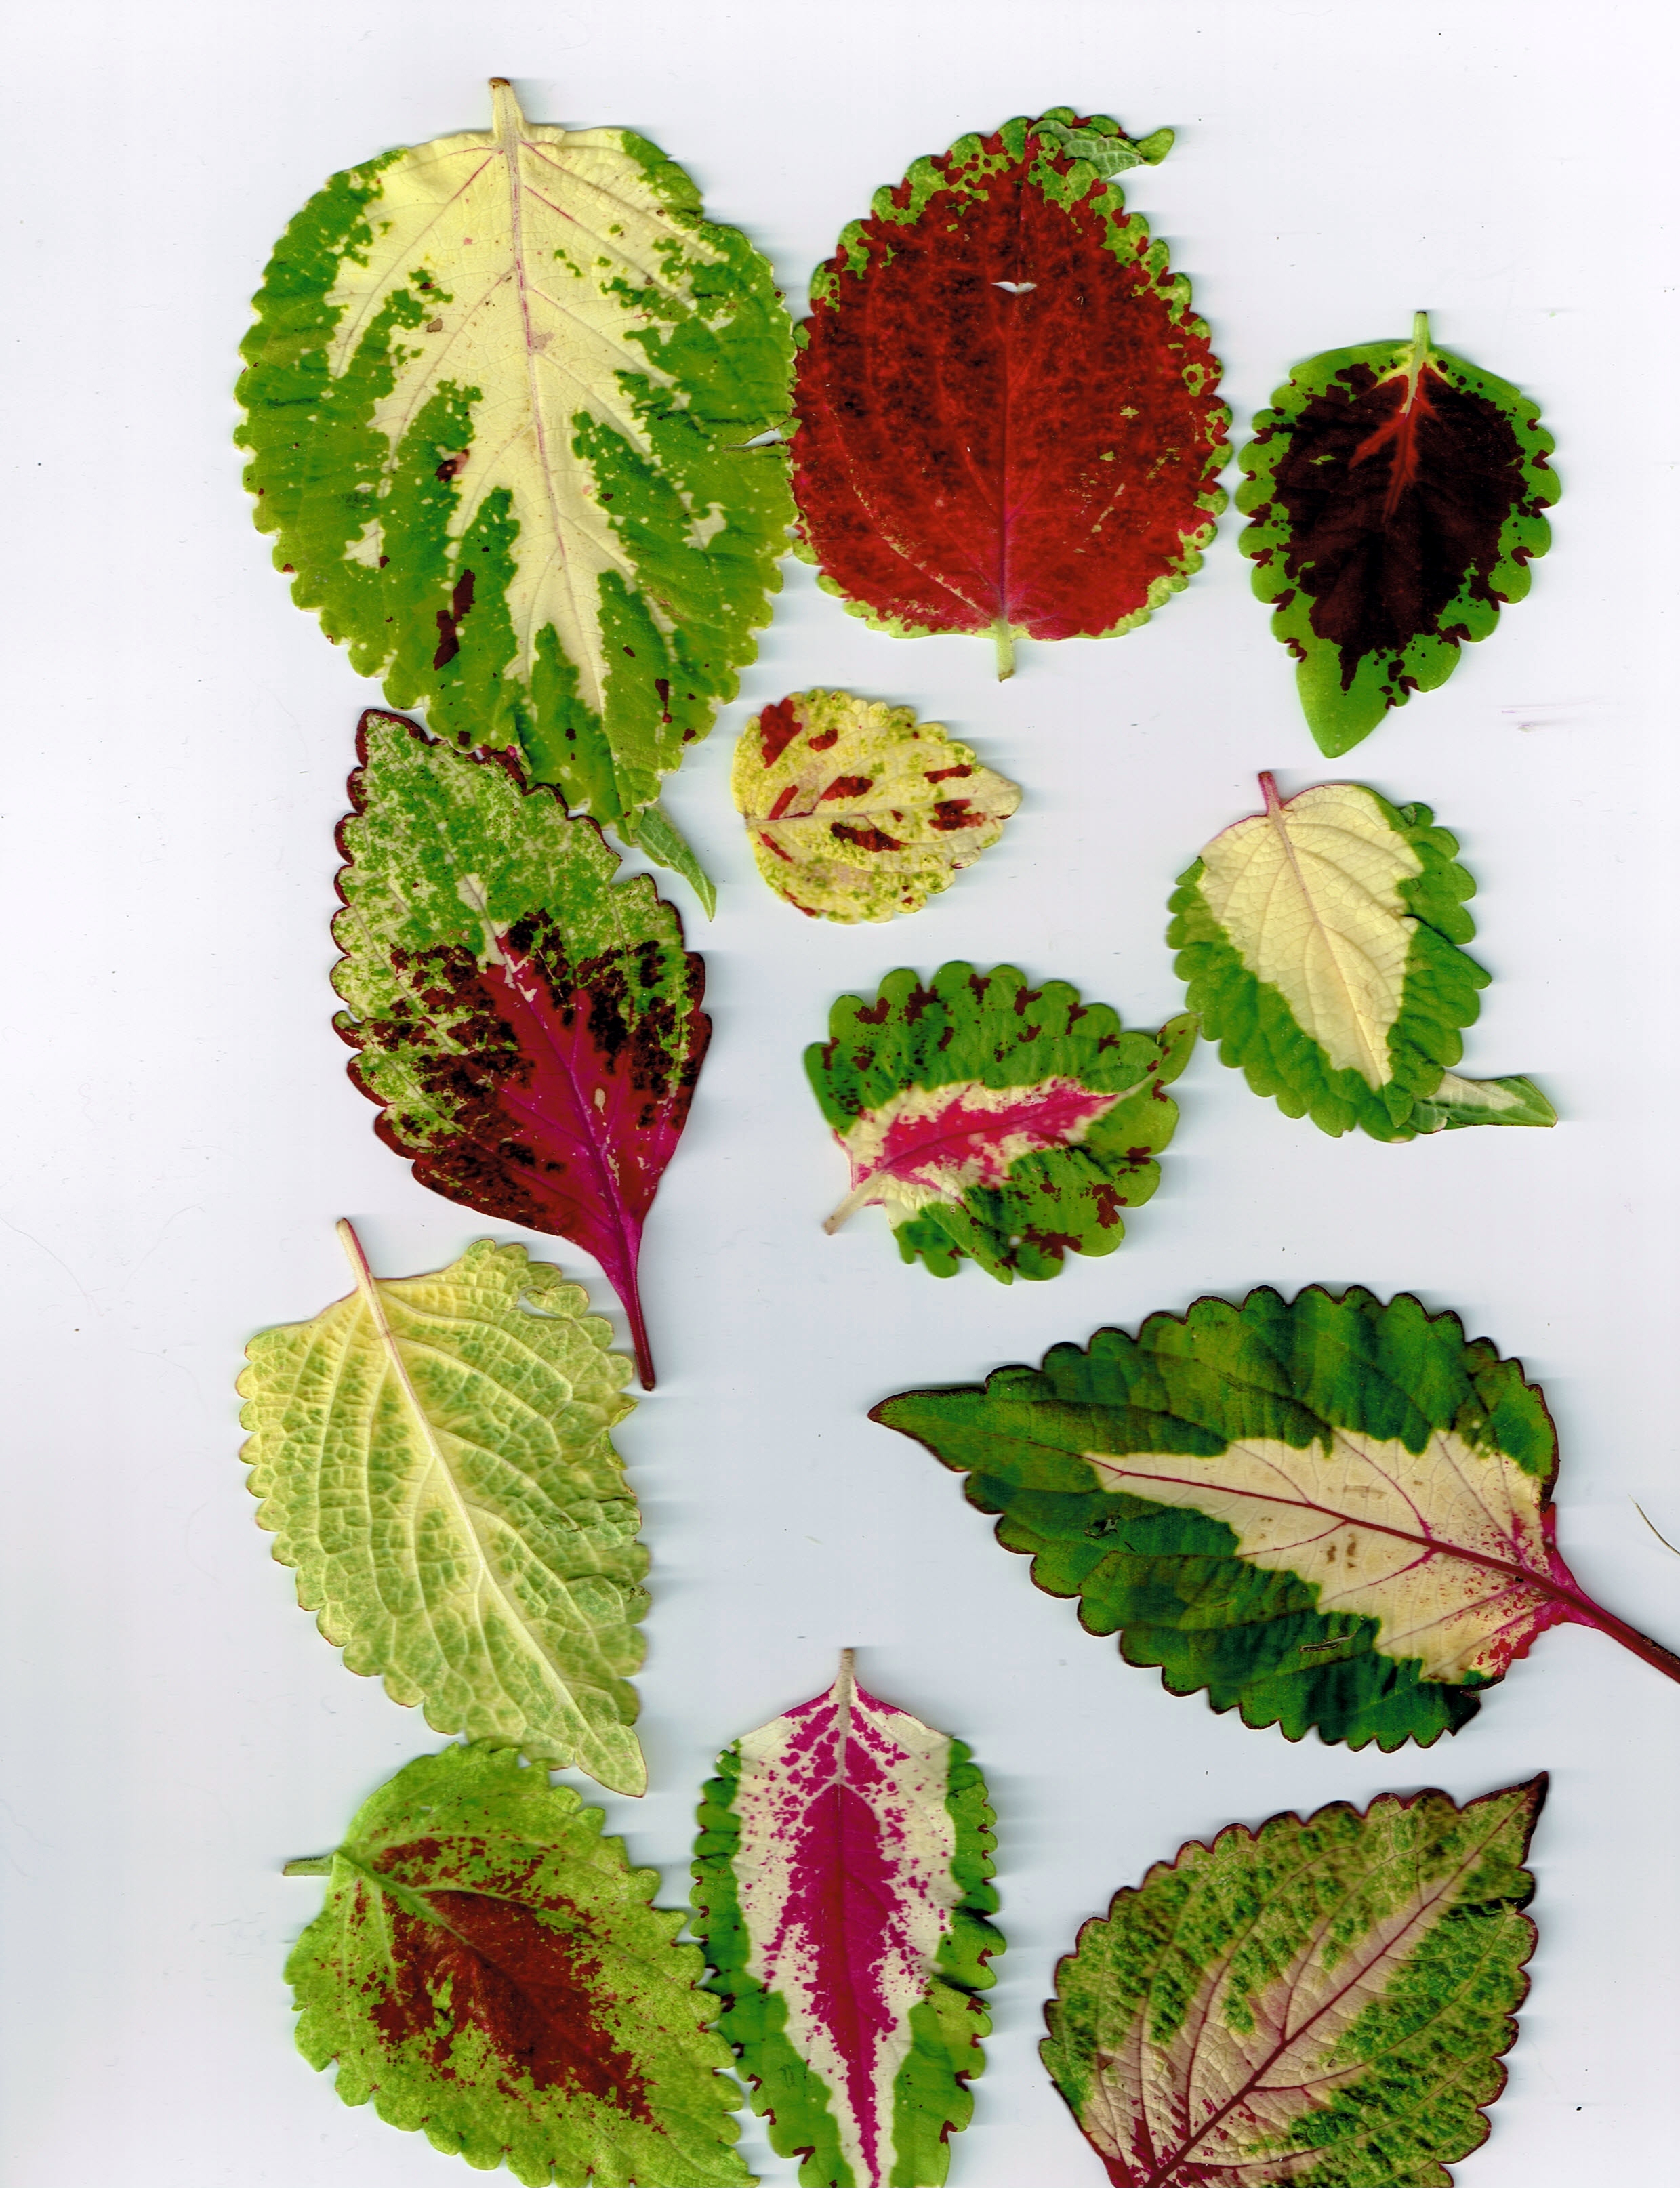
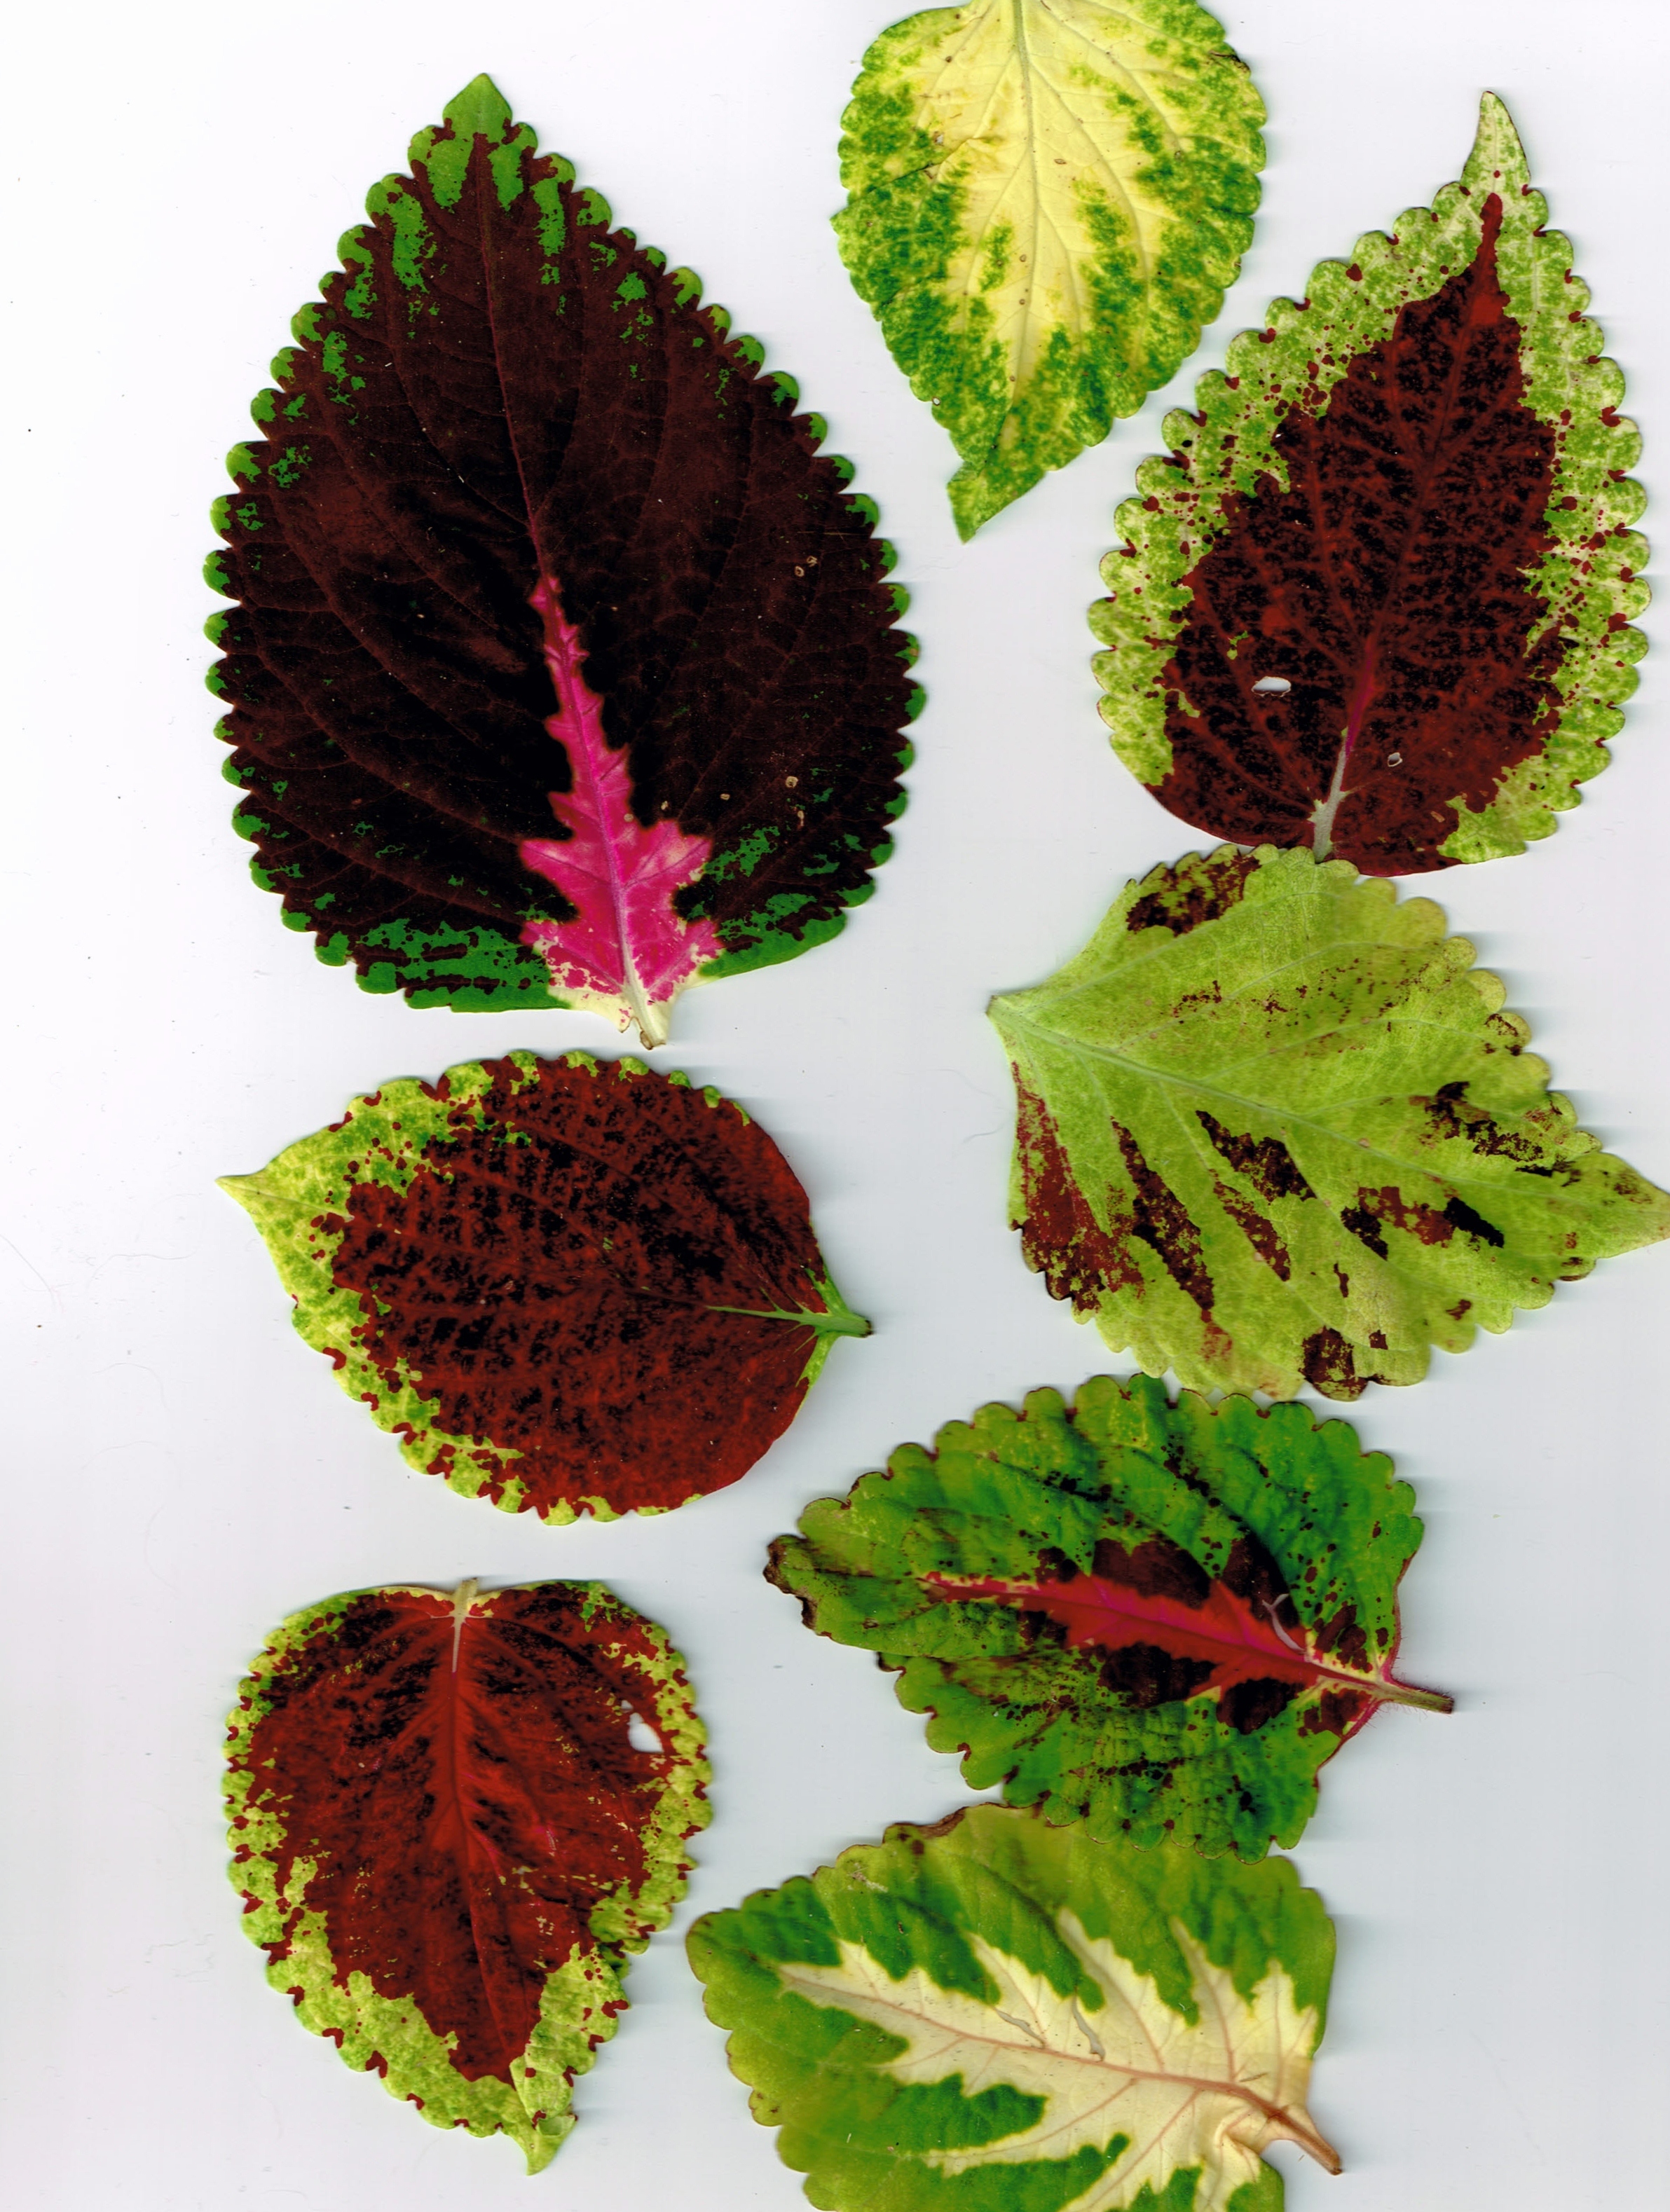
Below you will find some samples of last year’s coleus plants:

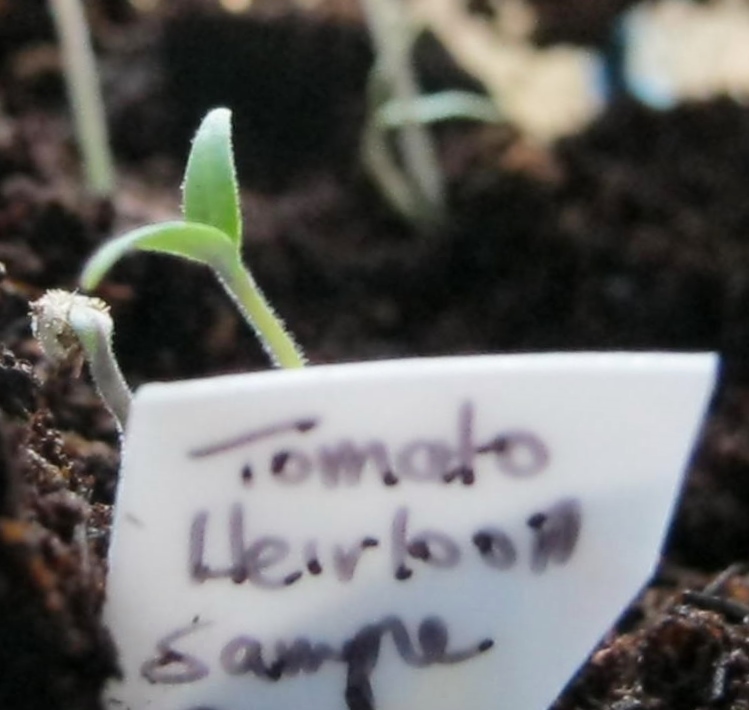
I sowed several varieties of tomatoes and eggplant yesterday. Because these plants love warmer temperatures I decided to forgo winter sowing for them and planted them indoors. Last year, my tomatoes did very well in my sunniest windows, but space on the shelves and tables in front of these windows soon became a problem. Since I save my light table space for lower growing plants, I crossed that option off my list. Instead I decided to put a Pinterest idea into practice.
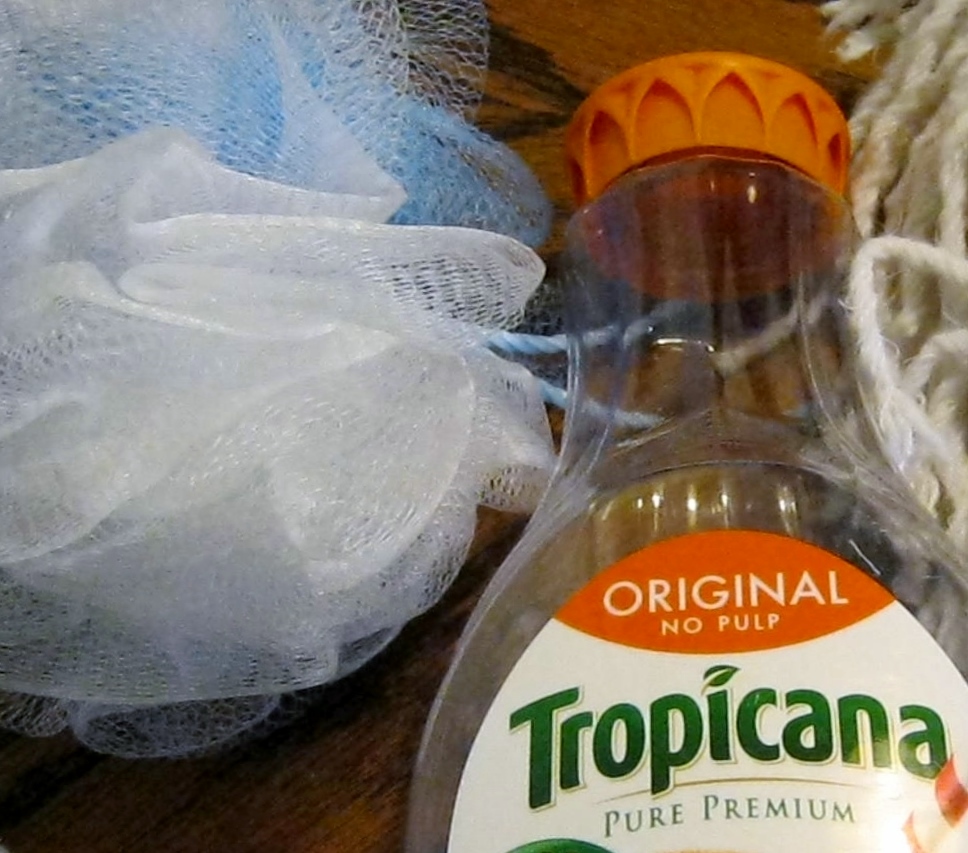
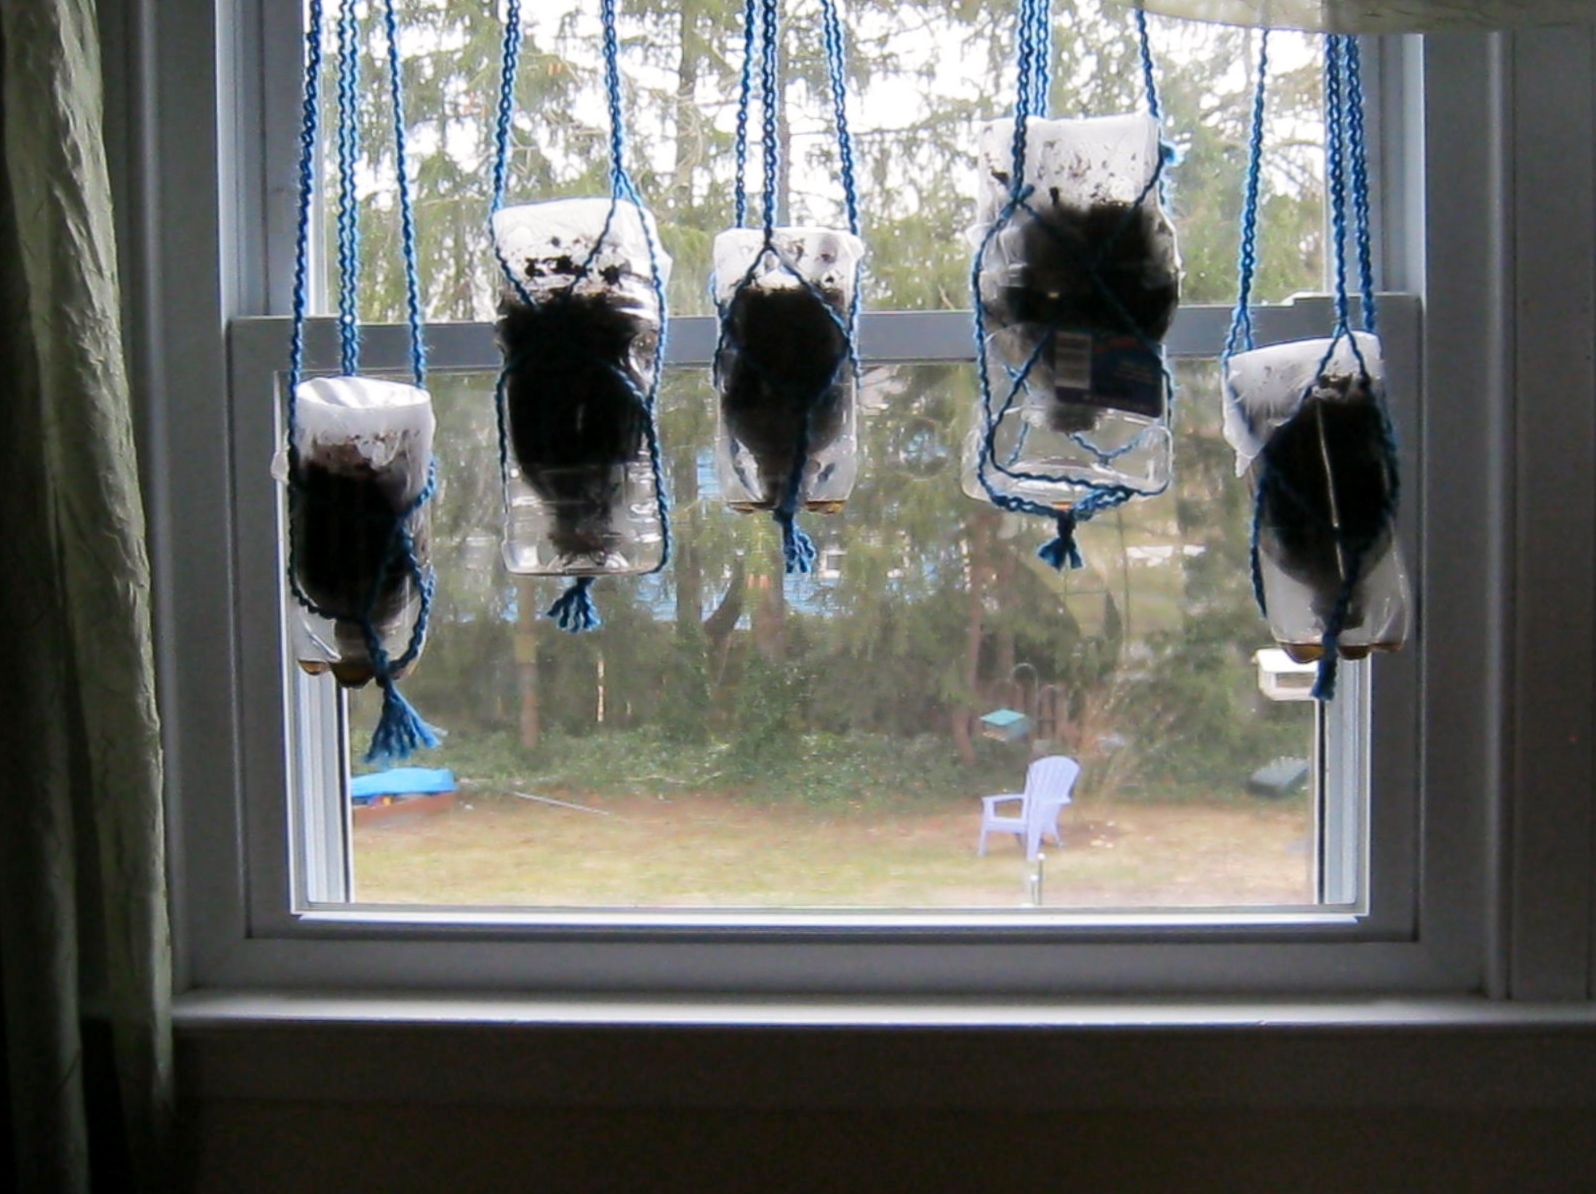
To begin, I gathered together a few of the empty juice containers I have been saving. Since I prefer milk cartons for outdoor winter sowing, I have at least two dozen or more juice containers cleaned and ready to use. I also rounded up an old net scubber, rubber bands, thick yarn, and of course seed starting medium.
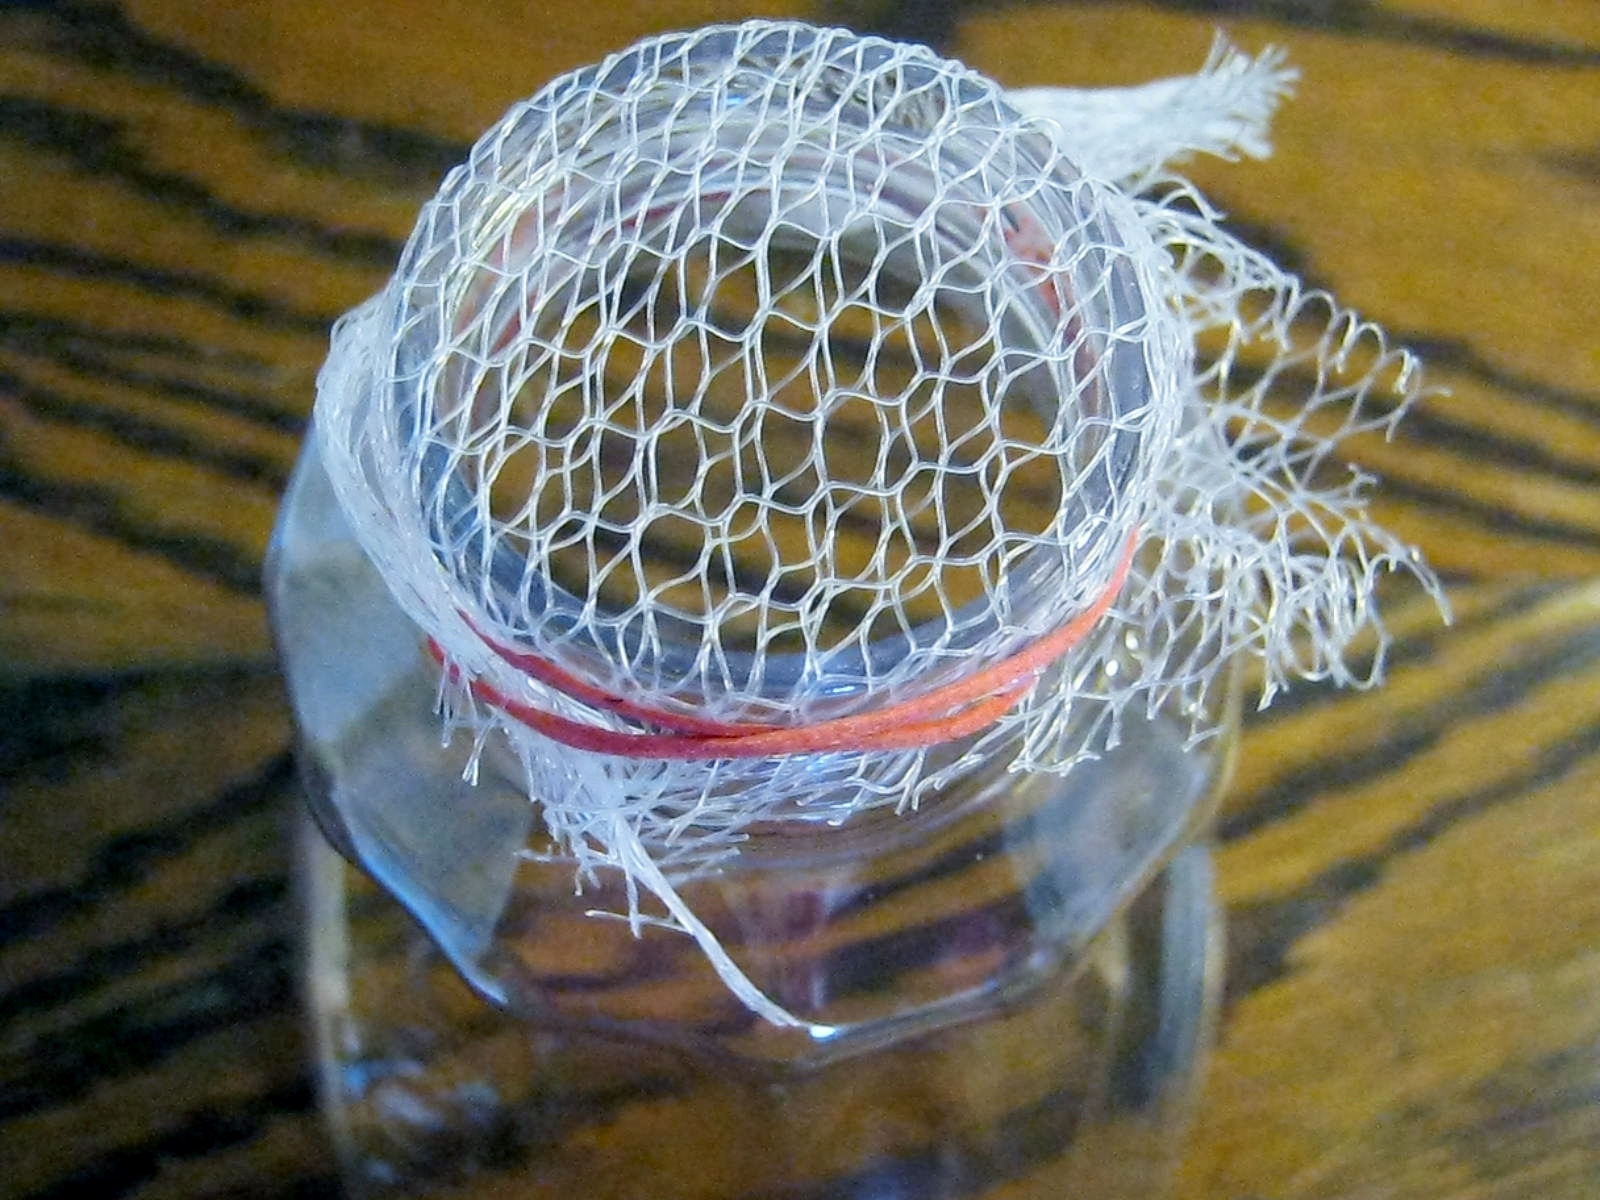
After cutting the juice bottle 1/3 up from the bottom, I was left with a good sized top section. I covered the top opening with a doubled up portion of netting and secured it in place with a rubber band.
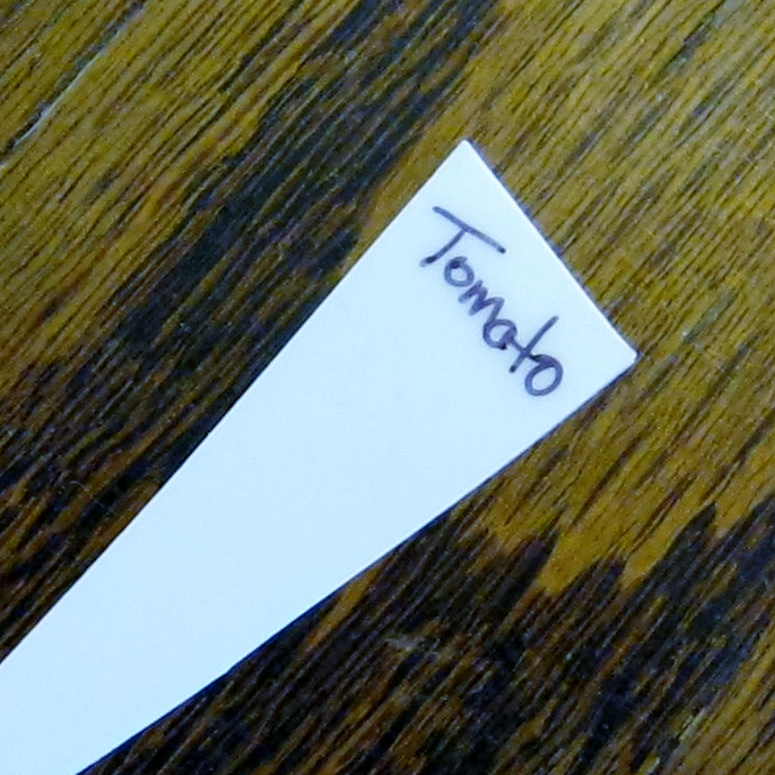
I turned the top portion upside down and added the seed starting medium, planted the seeds, and added a tag cut out of a recycled detergent bottle.
Using a skein of extra thick yarn, I fashioned rudimentary macrame plant hangers over my extra strength curtain rods and hung my gardens. Every time I see them silhouetted in my back window I smile. Hurry Spring!
![]()


In January of 2012 I wrote of my first attempts at Winter Sowing. The original blog post along with a follow-up post can be found here:
Winter Sowing
Winter Sowing 2012
As you can see from the photographs above and below, I have winter sown many seeds again.

Garden web has a forum dedicated to winter sowing. The link can be found below:
Gardenweb Winter Sowing Forum.
Here are a few containers I stored by attaching them with pipe cleaners to coat hangers. I then hung them until they were needed from basement rafters.

Here’s a terrific site I found just today with plenty of good lists on what to sow and when: Terrific Winter Sowing list for what to sow and when. Take a Look.
If you live in a cool climate area there is still plenty of time to winter sow. Give it a try!
![]()


A few weeks ago I received a surprise package in the mail from across the country. I saw by the return address that the package was sent from one of my nieces. I opened up the package and felt a surge of joy rush through me. Not only were the contents of the box amazing, but my joy was multiplied many times because the gift was so suited to me. Over the years my niece had noticed who I was, and the gift said to me that she understands the person that I am. Isn’t that what we all need most…recognition of who we really are inside? Need I say my niece is a beautiful soul! Thanks Natalie!

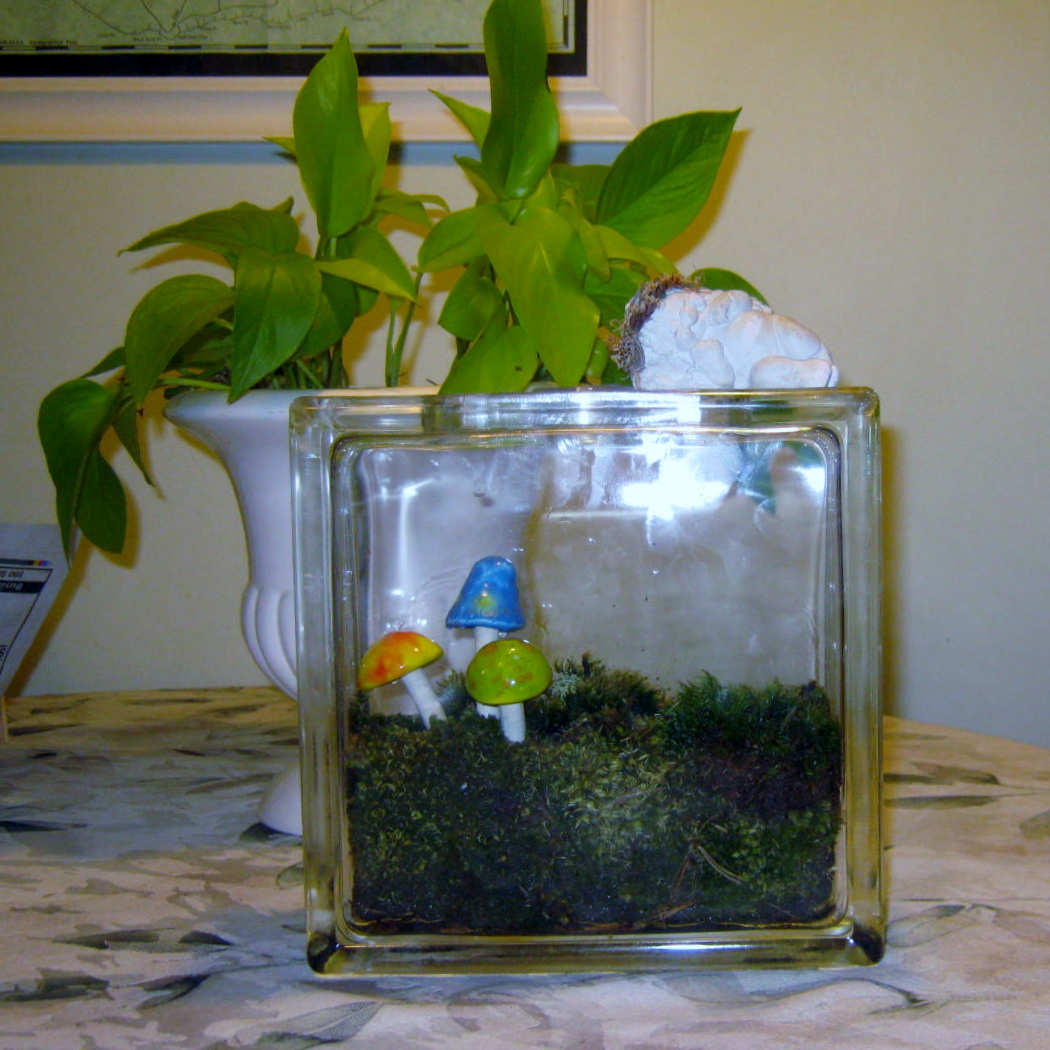
Whimsical and bright, these mushrooms are the perfect component for terrarium decor. This week while walking around my local AC Moore I found the perfect receptacle for my treasures…a sturdy, heavy-bottomed glass block. As an added bonus the block has a lid that that fits perfectly, and is easily opened to add a breath of fresh air to the plantings.

The terrarium turned out really cute, and I still have half of the mushrooms and stepping stones to use outdoors in our fairy garden in the Spring.


I promised to write when a project crashes and burns…for me that project/plant has been the avocado tree I grew from a pit. The photograph below shows the state of my avocado tree today. It seemed to flourish for a few months. I pruned and pinched it at the required stages, gave it a summer vacation on my porch, and brought it inside again in the Fall of the year. Through the late Autumn months and early winter the tree seemed to lag. I cut it back very hard, hoping to prompt better branching and leafing out. I think that idea was a mistake. The tree has become an eyesore and is taking up valuable sunny space I’d rather give to a plant that provides lush greenery all year.
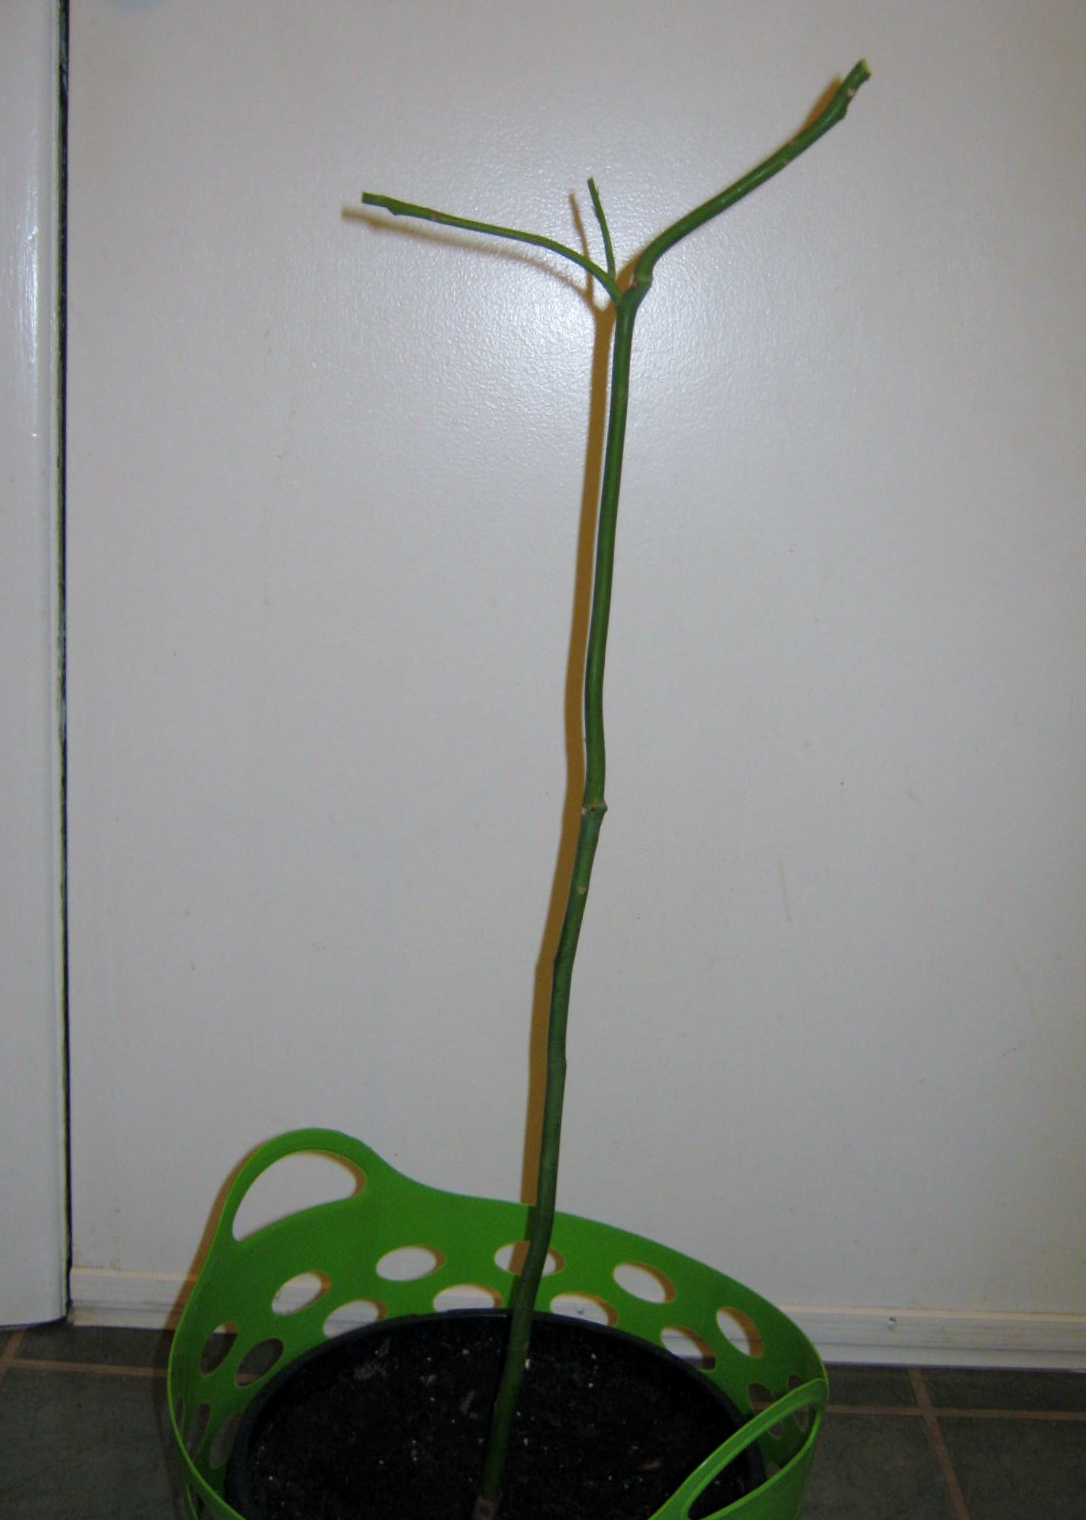
I am beginning to wonder if anyone who grows an avocado gets beyond the sprouting and early growth stage. The Internet is flooded with pictures, blog posts and advice about starting the pit, but I can’t recall finding many pictures or posts on the tree when it matures. Hmmm….perhaps today I’ll go on a hunt to find the answers. For now, I’ve decided this particular tree belongs in the compost heap.
A few weeks ago I threw an avocado pit into the worm bin. Hmmm….I had cantaloupe seeds sprout in the bin. Perhaps the heat from the worms’ super-composting abilities will perform wonders, and I’ll finally grow a gorgeous avocado tree this Spring. I like the old saying, “If at first you don’t succeed, try, try again.” There is often good wisdom in well-known cliché’s.


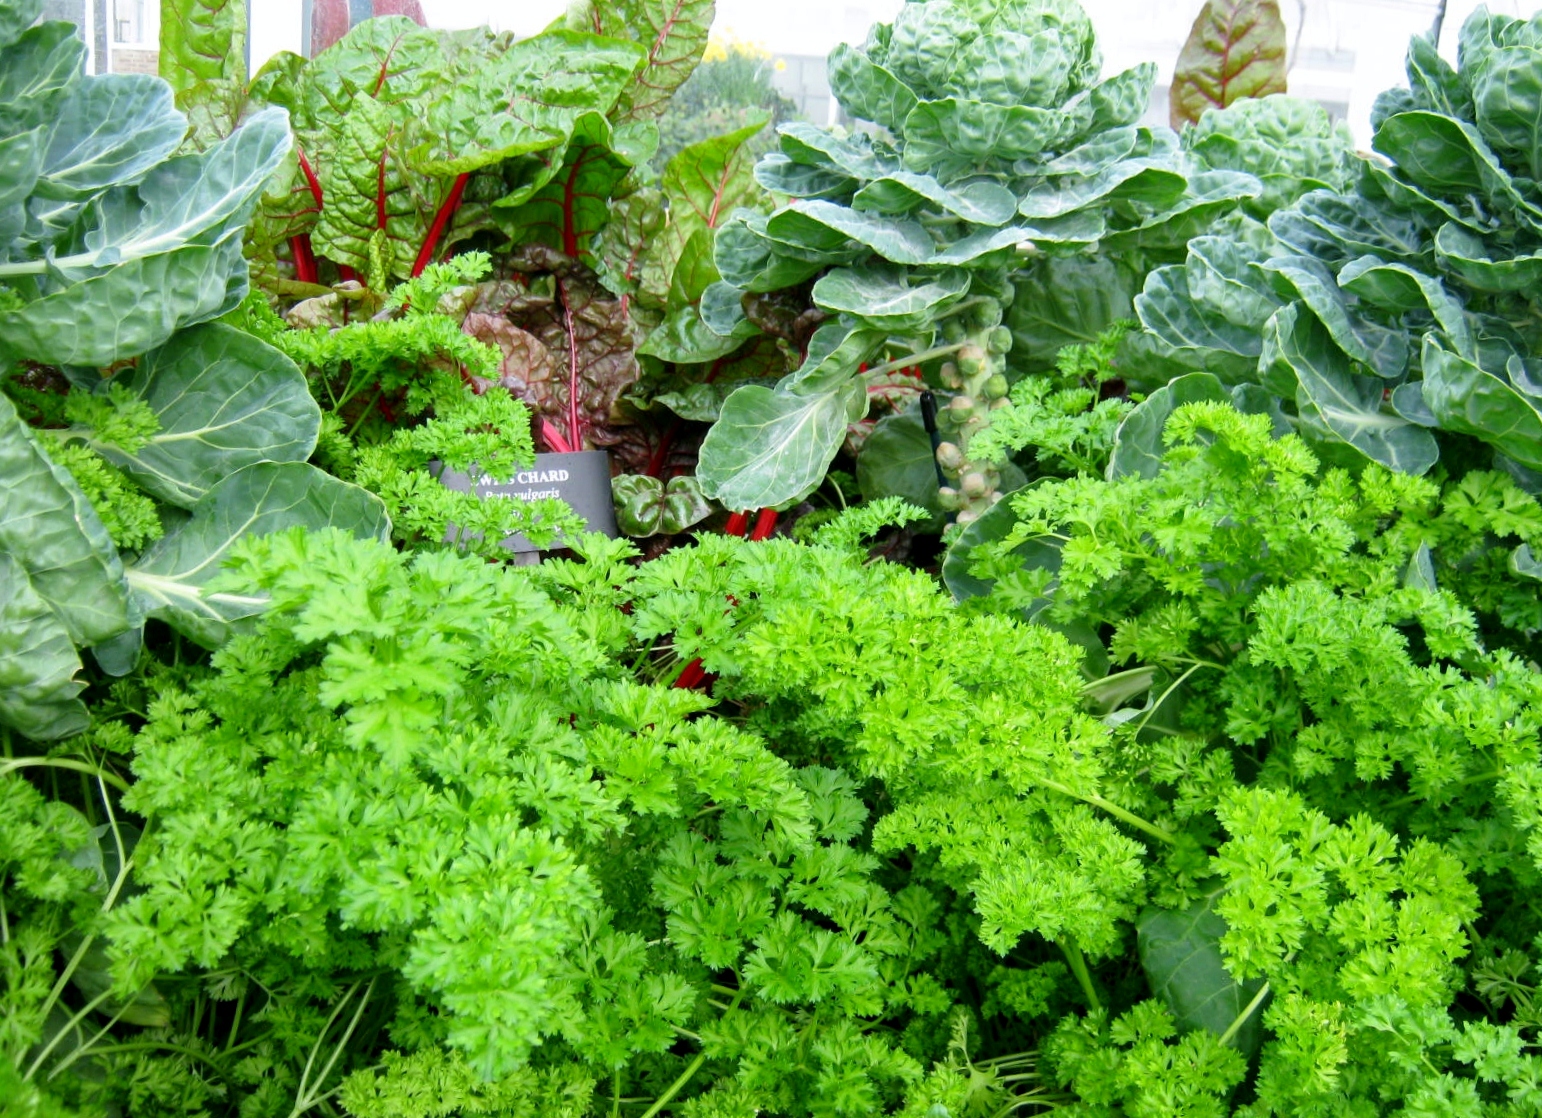
While walking through the Longwood Garden’s conservatory I came upon this amazing raised bed planting box. It brought to mind Mel Bartholomew and Square Foot Gardens. I didn’t see any labeling of the box, but I wouldn’t be surprised if the Square Foot Gardening technique was what the gardeners had planned. The box held a magnificent display of swiss chard, brussel sprouts and parsley. If I ever have a big greenhouse you can be sure I will grow vegetables throughout the winter in just this way.
To read more about Square Foot Gardening check out their website and visit all the links. Square Foot Gardening

I like to include new ideas on my blog. This method of gardening seems to defeat drought conditions. It’s worth a look considering much of the US experienced severe drought this past growing season.
It might be a long way until Spring, but it’s always wise to come up with a gardening plan during the winter months.


A month or two ago my son brought me several empty yogurt containers and clear lids. I was touched that he thought of me and took the time to clean each one. (Thanks to his sweet wife too, who probably cleaned quite a few too.) He correctly guessed that they would make a perfect nursery for sprouting seeds. I planted six varieties of herbs in them. Five of them have sprouted within a week: cress, thyme, cilantro, basil, marjoram…I’m only waiting on the parsley to sprout now. Upcycling trash into treasure is one of my favorite pastimes.


My Square Foot Garden is still going strong. I have replanted my spring section with Fall vegetables. The summer section is bearing fruit, and I am harvesting the bounty. The peppers are delicious, the eggplant are producing fruit. The newcomer, spaghetti squash, is huge and starting to turn golden. The bush beans are quite a thrill. I planted some new varieties and have had so much fun watching them fruit and dry on the vine. I have to check my cucumbers daily to make sure one isn’t hiding away becoming a MONSTER of a CUKE. The photo below might not seem like such a large cucumber, until you realize it is a Kirby pickling sized cuke.

In my garden containers, the tomatoes are cascading over the tops and are bearing quite a bit of fruit. Even though the rascally squirrels steal some of the bounty, I have brought some of the tomatoes inside to my windowsill and they are ripening. (A neighbor has since told me that this is due to the dry drought conditions we are experiencing. The squirrels ease their thirst with the juice inside the tomatoes.)

Black Brandywine, Amish Paste, Cherry Tomatoes & Kirby Cucumber
I’m excited as I daydream about what surprises my Autumn garden might bring.


My Square Foot Gardens are doing great. Except for a few empty squares in the second garden, most of the space is filled with seeds or plants and growing well. I have harvested many servings of lettuce already. In fact, I can’t eat it fast enough and have been taking handfuls to family whenever I visit. The lettuce comes in a wide array of greens, pinks and reds and pairs perfectly with the arugula and water cress I have growing in the herb garden. A new sowing of mesclun is thriving and will soon be ready to begin harvesting. The bread seed poppies are magnificent and I expect them to send up budding stalks any day now. The peas in the back of the garden are in need of quick staking, they are growing a few inches daily.

Here is a closeup of the earliest sown squares. Last week I sauteed a few pieces of kale with olive oil and garlic powder. Ah, so amazingly good; I wish I had begun this type of gardening years ago. This week I tried several leaves of the swiss chard. I chopped the stems and ribs and kept them separate from the leaves.


I gently boiled the chopped stems, and after about three minutes added the leaves along with a little Adobo spice mix, and gently simmered a few minutes longer.

Wow! The taste was beyond my highest expectations. I sprinkled the swiss chard with a squeeze of fresh lime, and “oohed” and “ahhed” with every mouthful. The best thing about both of these greens is they are still producing. I can’t wait to try my hand at cooking and eating them again.


My Winter Sowing has been a wonderful success. A few things did not come up, but I think the seeds I used in those instances can be called into question. The seeds that did not sprout were older, and some came from seed exchanges, and I wasn’t sure about their age or viability.

I am sure that I will winter sow every year from now on. I also will use only the larger sized milk gallons in the future. The juice and soda bottles also worked, but the seeds sown in the milk jugs sprouted and grew better. The stars of my winter sowing are the poppies and andrella asters. I’ve already transplanted the bread seed poppies into my Square Foot Garden. Even though they have taproots, they adjusted within a week, and are growing at a quick rate. The annual poppies I sowed are doing even better. I can’t wait to get them into my garden beds. The Andrella Asters are a huge surprise. The seed came from Baker’s Creek Heirloom Seeds. I’ve tried to grow asters in the past with minimal success. The winter sown aster plants are lush and covered with foliage already. I’m so excited about the beautiful asters I’ll have gracing my gardens in a few months from now.

My Square Foot Garden is producing a bounty of leaf lettuces. I am really pleased with the Black Seeded Simpson variety. This was also winter sown and has been planted out for a few weeks. It is a beautiful chartreuse green color and tastes heavenly in my salads. I am planning to mulch around the gardens soon. I am hoping that it will keep some of the critters at bay. This week there was a gang of five rabbits in my yard. Big rabbits, with big chewing teeth, thankfully feasting on the clover in the lawn rather than my garden plants. I am making up more water balloons today.


I’ve been steadily adding to my cache of winter sown containers. The warm springlike weather of the past weeks has helped many to sprout. As they are HHA (Half Hardy Annuals) and cold tolerant vegetables, I have no worries about the possible onset of colder temperatures through the next weeks. The plastic containers work as mini-greenhouses and protect the seedlings from frost. The cold will only strengthen them and keep them from becoming leggy and outgrowing their containers. I’ve had a lot of fun with this project. I also have set aside a portion of each type of seed so that in the event that some of the containers fail I will have a backup.


A view of some of the sprouts inside their containers. The above photos show my recycled orange juice bottles. These mini-greenhouses are light in weight. To windproof them I wedge them in amongst the heavier milk jugs.


A bird’s eye view through the top of a milk jug. The seedlings inside are asters.

I noticed two of my mini-greenhouses had indications of the dirt drying out. I placed these inside a plastic shoebox filled with water, a perfect fit, and let them soak up a little moisture through the drainage holes in the bottom. This worked perfectly and within a half hour they were thoroughly watered.


Oh My! The Microgreens are a bit ragged in appearance…what happened to my lush crop? I’m afraid to say I have already eaten most of the young greens. I pop the tops off the pea sprouts and eat them like candy. This is reminiscent of the peas I grow outdoors in the Spring. They never seem to arrive on my kitchen table as a side dish. Warm afternoons usually find me standing in the midst of the pea patch, eating the fresh peas out of the pods. Yum! In truth, the microgreens are a complete success. I enjoy growing them, and most of all eating them. The best use so far was garnishing my turkey and Swiss cheese sandwich with a row of them. Oh Happy Day!
The kitchen sink variety is also thriving, and perhaps today I will start grazing on them also. Moo!


My Microgreens are up and growing fast. I can’t wait to try them in a salad.


Sowing seeds and indoor gardening seem to be dominating my January blog posts. I am starved right now for green, tired of the bare branches of trees silhouetted against the sky. I have been sowing seeds in hopes of harvesting Microgreens. Microgreens are harvested from seeds sprouted through the early leafing-out stage. I am using seeds from Pinetree Garden Seeds. This is my first attempt at this type of gardening.
I am growing the Microgreens on my windowsill in plastic throwaway containers from cookies and other snacks. To see how I went about the process, check out the photos below.

I gathered my supplies: antique pots to look pretty, throwaway plastic from cookie containers, corn holder for poking holes in the plastic.

I made sure the containers would fit inside my chosen pots before I added the dirt.

I poked holes for drainage in the plastic with the corn holder.

I filled the containers with organic soil.

I watered containers of soil and let them drain.

I spaced the pea seeds out in rows.

I sowed the Kitchen Sink Mix en masse.

I covered with one of my favorite kitchen tools, Glad’s Press ‘n Seal.
The seeds are already up…they sprouted in less than two days. I will post a Microgreens Part II later this week.

