Project – Salt-Dough Snowmen

Re-blogged from 2014:
IMG_4284

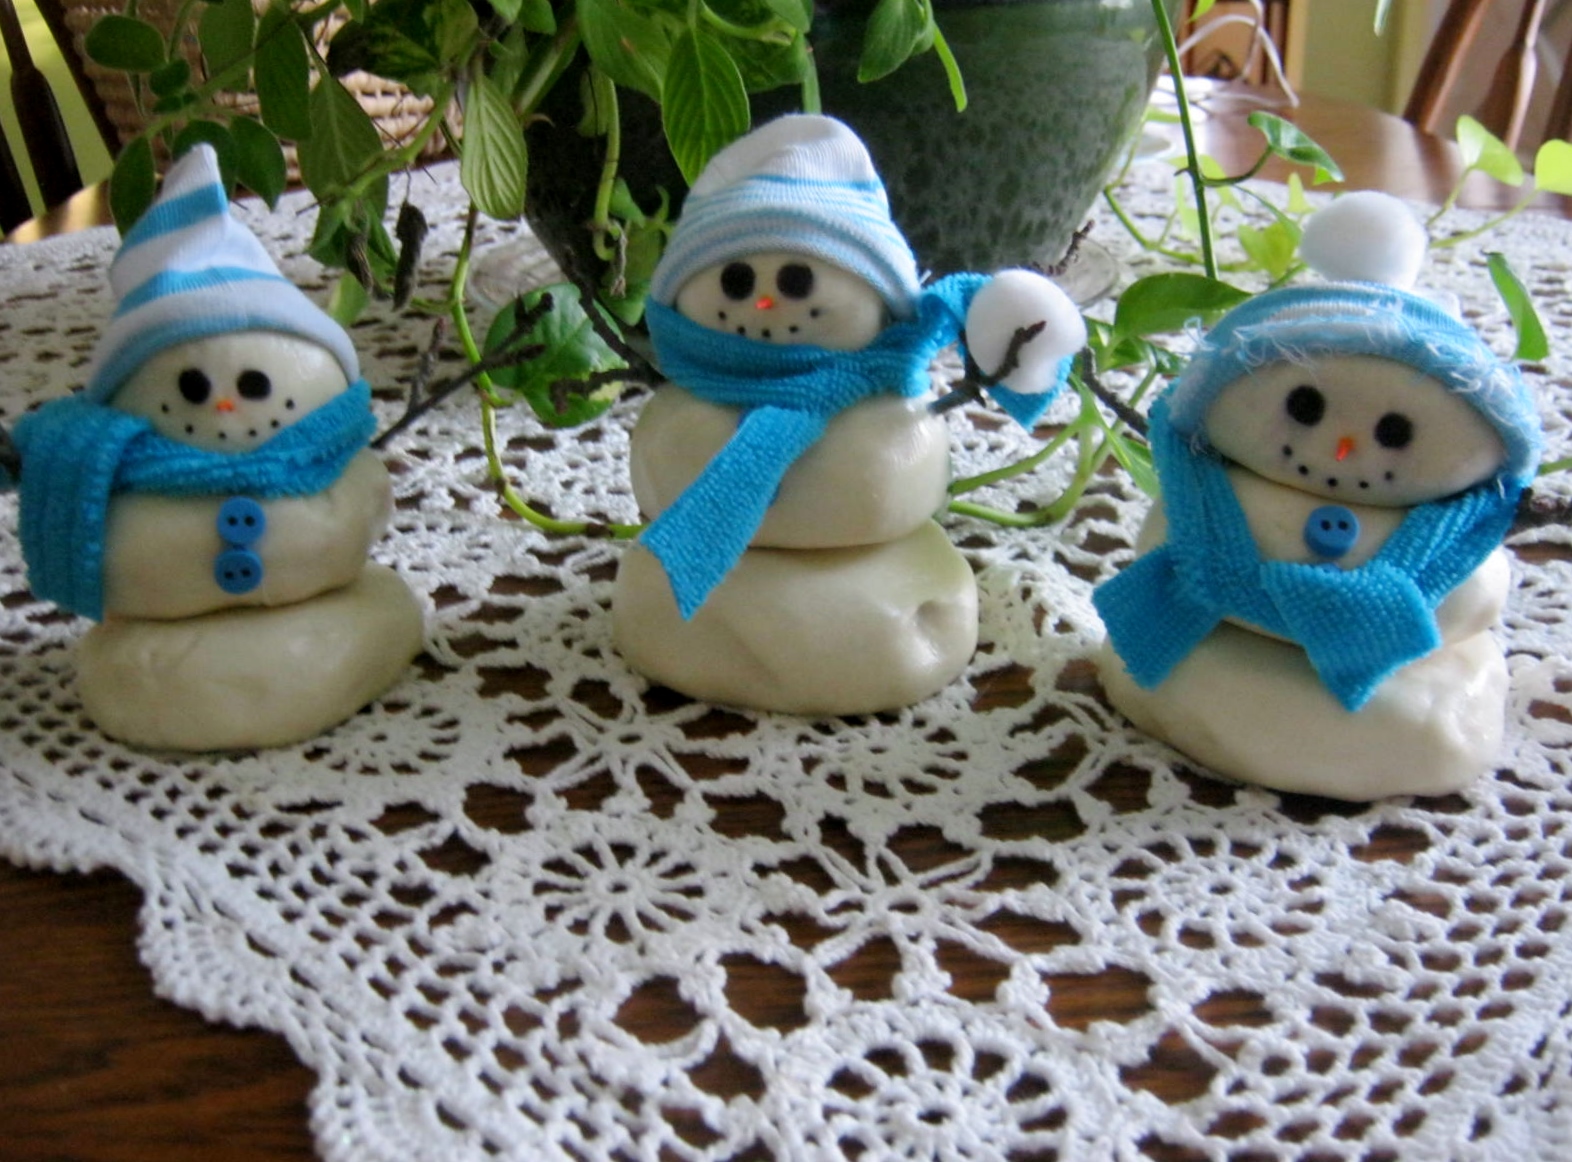
Salt Dough Snowmen are easy to craft. We spent two dollars at the dollar store and purchased a three pair pack of colorful girl’s socks and a microfiber towel that matched the color of the socks. The materials we used at home probably added up to about another two dollars.

The salt dough is so easy to mix up…knead it in a ziptop bag and slowly dry in a low temperature oven. The salt-dough can be used to make Christmas ornaments and other holiday gifts too.
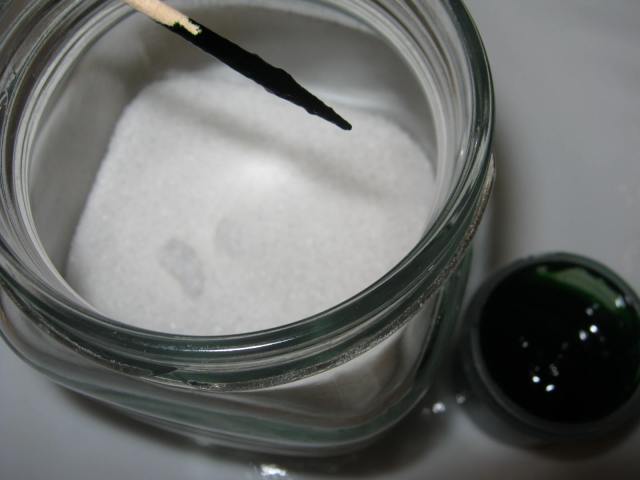
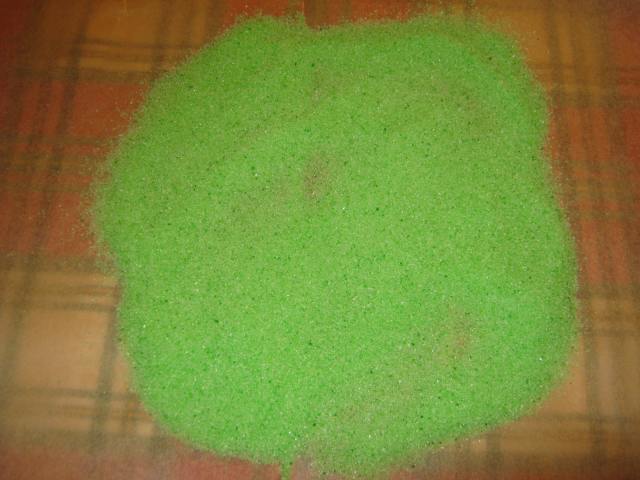
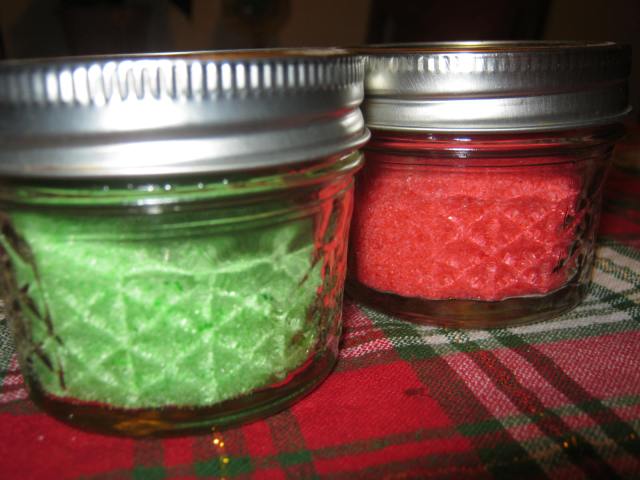
IMG_4265

SALT DOUGH CLAY
2 cups all-purpose flour
1 cup salt
3/4 cup water
2 tablespoons vegetable oil

Mix all ingredients in a large bowl. Place the dough in ziplock bag and knead until smooth. Could also be kneaded on a board or countertop with no problem. A ziplock bag is recommended because it keeps the dough, counter and your hands very clean.
(We doubled the recipe to make three good-sized snowmen)

IMG_4266

IMG_4267

After the dough is kneaded, take out of the ziplock bag and form into three smooth balls. They should be graduated in size, just like a snowman made out of snow.

IMG_4268

Have a plate handy to set them upon as they are formed.

IMG_4270

Place them together in a snowman shape to make sure they sit well. Cover a cookie sheet or flat pan with parchment paper or foil. Take the snowmen apart once more and bake them in a 180 degree oven until they are hard. Ours took about three hours. I checked them constantly for browning. You don’t want any browning to mar the off white color. I also turned them several times as they dried out.

IMG_4272

When they are hard to the touch let them cool. Glue the pieces together. We used a glue gun which did not hold after a few hours. Tacky glue is a better choice.

I made a mistake at this point and added the features with permanent felt-tipped pen before brushing on Mod-podge. (Mod-Podge is the name of a waterproofing glaze, we used the glossy variety.) The foam brush I used smeared a bit of the ink, even though it is supposed to be permanent. I reapplied the eyes after the Mod-Podge dried. I had no problem adding it at this point. Much better to draw the features on after the glaze is applied. (Glaze is a good protection, not sure how well the snowmen would hold up without it.) You also could use acrylic paint to create features. This would add at least a half hour to completion time for drying.

IMG_4280

The salt dough is still a bit pliable at this point. We were able to push small branches into their torsos to create arms. Small buttons were added and a toothpick was colored orange and pushed into the face as a nose.

IMG_4291

We cut the top of the socks off, rolled up a brim, and placed them on the heads of the snowmen as hats. We added pompoms to the top of one. The hats were a little ornery to get on…they kept popping off until somehow they gripped and stayed in place. We cut the microfiber towel into long strands and used these as scarves. We were so very happy with the way our sweet snowmen turned out.

IMG_4288

The boys were able to form the snowmen, but an adult or older child might need to draw the features as was the case with ours.

Plants & Problem-solving – Sage/Treating Powdery Mildew Naturally

I love cooking with fresh herbs. I have several on my windowsill at the ready for use in my favorite recipes.

Sage Powdery Mildew

Recently, I was shocked to find my sage plant covered with powdery mildew. How did this happen so fast? While researching,  I read mildew is spread by water. Oh no! In an attempt to keep the plant spider mite free I had sprayed with water. I should have used a solution of chamomile tea, a natural fungicide, when I sprayed the sage.

Sage Mildew Close Up

The affected leaves could not be saved. Drastic measures needed to be taken.

Sage Powdery Mildew Solution 1

I plucked away all the spotted leaves and discarded them, leaving what I hope are mildew-free leaves. I will check the plant daily, and if I find the same problem I will try a spray of chamomile. Placing the sage alongside a rotary fan will help with quicker drying time. If the plant is still diseased I will be forced to discard it and try again. In the meantime, I must remember to keep it in “plant quarantine.”

Paths – Inspiration Art

amy's shoes

My sister is an art teacher for junior and senior high school. I love this inspirational artwork she created. What words of inspiration do you need to remind yourself of as you walk along your  path?

Pheathers & Quick Tip – Winter Bird Bath Solutions

“Bathing is especially important in cold weather in order to keep feathers in top condition. Research has shown that a chickadee with well-maintained feathers can sustain a 70 degree layer of insulation between the outside air and its skin”. Wild Birds Unlimited

bird bath

I have a bird bath that is over fifty years old. It once sat in the yard of my grandparents in McDonald, Pennsylvania. I remember peering into it, so small that my eyes were level with the rim, fascinated by the mirrored bottom. Leaving this heirloom outdoors in the cold is not an option. The constant freeze and thaw of winter weather would likely crack it. Still, birds need water in the winter as much as they do in summertime. I decided a solution would be to replace the bird bath with a Rubbermaid trashcan lid. The plastic should expand and contract during freezing weather without cracking. The lid is also very light and will be easy to empty out and change. When the water in the lid freezes, I can pour on a bit of hot water for thawing, without worrying about cracking.

The birds accepted the lid as a substitute for the fancier bird bath. Within a hour or two of setting up the bath  a little sparrow took a quick dip. Oh Happy Day

Pots & Pans & Phailures – OOPS!

I found a new flavor of Hershey Kisses…oh my, wait just a minute…I must run downstairs and grab a few before I continue writing this post, or I will be so totally distracted by craving them, I won’t make any sense at all…does that make sense??? I’m laughing…and also in reality…getting up…and finding some Hershey Kisses!

Truffles & Cordial Kisses

Okay, now that I am eating my “Mint Truffle” and “Cherry Cordial” Hershey kisses I can go on with the posting. A week or so ago I found these delicious nougats of joy in my grocery store. I’ve seen beautiful cookies created with plain kisses, I immediately imagined amazing cookie possibilities concocted  with these new flavors. I found a recipe online, softened my butter, gathered ingredients, mixed it all up, baked…and tasted…and grimaced!

IMG_8879

The cookies were horrible. I was so glad the kisses were saved until after baking, at least they weren’t wasted. OOPS! I was going to throw the cookies out, but thought twice, and froze them in a ziplock bag to feed the birds and squirrels.

At least the back yard squirrels appreciated my attempt at a cookie masterpiece.

Squirrel Yummy

Another good use for cookies that are not up to par is grinding them down and using them as the crust for cheesecakes and other pies. I used my food processor and reduced about six cookies to crumbs, added two melted tablespoons of butter, and pressed this in the bottom of cupcake liners in a muffin tin. I baked this for five minutes in a 325 degree oven. When they cooled down they hardened up into perfect little crusts for my mini cheesecakes. The recipe is below. Oreo halves or vanilla wafers are also options for the crusts.

mini cheesecake

MINI CHEESECAKES (12  Mini Cheesecakes)

Cookie Crust or 12 Vanilla Wafers/Oreos for Crust
2   8 oz pkgs of cream cheese softened
1/2 cup sugar
1 tsp vanilla
2 eggs
Any topping desired:  fruits, jam, melted chocolate, sour cream, etc.
(I like them plain!)

Oven preheated to 325 degrees.

Use cupcake liners in muffin/cupcake pan.  Vanilla Wafers or scraped Oreo halves can be placed in bottom of liner. Another option is using 6 cookies (such as my disappointing recipe) and grind them in a food processor until they are crumbs. Mix with 2 tbs melted butter and press in liners, bake for about five minutes to harden.

Beat with mixer, cream cheese, vanilla and sugar until smooth. Add eggs and mix until blended. Fill each cup to about 3/4 full. Bake 25 minutes, or until no longer jiggly in middle. When cool, remove from pan and place in refrigerator until cold. The mini cheesecakes are super-easy and delicious.

Plants & Quick Tip – Amaryllis Blooms & Natural Supports

amaryllis collage

My amaryllis has opened, displaying white petals blushed with pink. Before the plant bloomed, the heaviness of the buds caused the stem to lean precariously to the right. A quick walk in the woods yielded a dead branch from a laurel bush. I prefer to use natural support for my houseplants. The curvy twig was the perfect helping hand for my amaryllis stem, and gives an artsy/woodsy feel to the flower display.

IMG_9118

IMG_9119

Pheathers & Product – White-Throated Sparrow

IMG_8958

I heard loud rustling as I strolled a wooded path in the park yesterday. I was surprised to see a  fountain of leaves  exploding from the mossy ground. A couple of peeps alerted me to the presence of a bird beneath the cascade. He created quite a crackling ruckus as he foraged for insects. Aha, he was exactly my purpose for walking the path. I raised my camera, the new Canon with the super zoom feature, and clicked several shots.

IMG_9000

I have just replaced my old Canon Camera with a newer model. I wouldn’t have chosen any other brand. My old camera has taken thousands of photographs. It has traveled with me everywhere I have gone in the past few years. It has chronicled parties and family gatherings, holiday dinners and the goings-on in my gardens. Over the years, the camera has been dropped, been left outdoors, weathered drizzle and dew, and still…through it all has continued taking photographs.

After one of the more recent drops, the battery and SF card compartment stopped shutting correctly. No worries, and no replacing it right away, duct tape held it together for a time. Recently though, even the strongest tape, the addition of a rubber band, and the hardest grip of my thumb would not keep the batteries connected. It was time for a new camera. The brand  has performed for me so well, I knew another Canon was only choice. I replaced the old camera with a  PowerShot SX400 IS.

IMG_8962
Eye-Spy a White-Throated Sparrow.

Oh the joy of it. On my first outing I zoomed in on the foraging sparrow. Imagine my surprise when I downloaded the photographs and found that the sparrow was quite a fancy fellow. The yellow streaks and white ruff under his chin soon had me goggling, and I was able to identify him as a White-Throated Sparrow.

I have probably seen these birds over the years, but until I was able to zoom in close, I had no idea such beautiful little sparrows visited our area in the winter. Final thought: if you are in the market for a new camera check out Canon brand. They are reasonably priced,  set up easily, take amazing photographs, and best of all…last and last and last.

Projects & Phun – Children’s Christmas Tree

IMG_8913

It’s always good to prepare a few projects to have on hand if young ones are going to be your guests over the holiday season. Younger children, 2 1/2 – 6 years, will find this project easy and satisfying. The materials are easy to gather, cut into strips, and store until needed. The creation of the tree is pretty much self-explanatory. All you need to do is follow the lead of the photographs.

MATERIALS:
* Strips of colorful papers, cut into 1/2 inch strips. (2 inch, 2.5 inch, 3 inch, 3.5 inch, 4 inch, 4.5 inch, and one brown strip 8.5 inches in length.)
* A background piece of paper at least 8.5 x 11 inches.
* Glue stick
* Small colorful foam stickers with sticky backing.

Follow along:

Dom's Tree

Colorful magazine strips can also be used. Light items that are bright, shiny or glittery, can be glued down and will work as ornaments. (Buttons, beads, glitter) Have Fun!

Planting – Looking Ahead/Creating a Garden Bed

IMG_8882

The removal of our large oak tree has broadened the area of sunshine in the back yard. I want to expand my herb garden in the Spring. Now is the time to take action to clear away the grass. I placed some packing paper( black and white newspaper works fine too) on the ground in the shape I want, and covered it over with a few inches of garden soil. The grass, shielded from the sunlight, will yellow and begin to decompose into the soil. If there are any remains of the lawn when I am ready to plant my garden, I can easily turn the sod over with a shovel or garden rake.

Praise – Mary’s Song

Mary’s Song – Written by Wellington E. Watts/Soloist Nancy Watts
The beautiful photographs in the video, several photos of the National Cathedral, were taken by Lyons Photography. The link below leads to an e-card of the video that can be sent to family and friends.

Send “Mary’s Song” as a Christmas E-Card

Place – Under the Boardwalk/Transition

IMG_8729

I ran into another example of transition on my weekend getaway to Ocean City. The boardwalk is under construction, transitioning to a brand new set of boards for several blocks in front of Gillian’s Wonderland Pier. It was eye-opening to see the thick concrete grid that supports the steps of hundreds of walkers and the wheels of bicycles and surreys.

IMG_8731

Quick Tip – Repelling Fruit Flies

fruit bowl with rosemary

This year, the usual horde of fruit flies swarming our fruit bowl seemed non-existent. I realized this is probably due to the herbs we have on our kitchen windowsill. Strong-smelling herbs, oregano, rosemary and others, repel fruit flies. Even in winter months a few stray fruit flies make their winter abode in our home. To keep them out of the fruit bowl I’ve placed a piece of rosemary amidst the fruits.

Herbs that Repel Insects

Pots & Pans – Creating Rainbows/Sanding Sugars

It’s Christmas Cookie Time! Hooray! Time to unpack my cookie cutters and whip up  a new batch of sanding sugars. Creating your own colorful sugars is easy to do, even better, homemade sugars cost a fraction of what you pay at the grocer or specialty store.

IMG_8833

Ingredients & Supplies:

1/4 C of sugar

Food Coloring – Gel or Liquid

Jar or Plastic Bag

Toothpick if using gel

  • Cornstarch (sometimes needed if using liquid food color)

IMG_8834

Measure out your sugar into a jar or plastic bag. Add gel with a toothpick or drip 12 -24 drops of liquid food coloring into sugar. Start small, more color can  be added later. I found with the gel food coloring, mashing the colorant into the sugar through the baggie combined it quicker than shaking it in a jar. Liquid food coloring might work better with the shaking technique.

IMG_8841

Let the  sugar dry for a few hours. I spread mine on a piece of parchment paper. The flexibility of the parchment made it very easy to lift and pour the sugar into a jar. You can also use a plate or bowl. A funnel is a good tool for pouring the sugar into the jar without mess. If you used liquid food coloring, you  might need a 1/4 tsp of cornstarch worked into the mix  for dryness. I didn’t need any cornstarch in my sugars.

IMG_8842

I think the finished sugars have a brighter appearance than many of the decorative sugars available in the supermarket.

IMG_8847


Photographs – Riding the Waves

IMG_8703

Today was the perfect day to put our bicycles in the back of the truck and head for Ocean City, NJ. Quite a few people took advantage of the warm temperatures, and although the sky was overcast, the boardwalk had a good crowd walking its length. In the distance you can see Atlantic City in a haze of foggy mist.

IMG_8690

The surf was rough today…according to the Ocean City Surf Report the waves were 7 to 7.5 feet, and the water temperature was between 52-55 degrees. Dozens of wetsuit-clad surfers were gathered in the water waiting for the perfect wave.

IMG_8741

I’ve never seen the waves so large in Ocean City.

IMG_8764

It’s mesmerizing to watch the surfers “TRANSITION” from calmly waiting to flying across the face of the wave.

water spin

At times the transition means wiping out.

IMG_8770

No big deal, the surfer paddles back out and begins again.


Photograph – Foggy Enchanted Trio

IMG_8640

IMG_8642

“Trio”

“What comes in threes? Submit an image for this week’s photo theme, Trio.”

Between five and six this morning, I ventured outdoors with my camera to take some photographs of the gorgeous moon illuminating the sky. My moon shots were blurry, but while I was attempting to photograph its luminous face, my camera flash bounced off the moisture in the air and captured a sense of the magical within the foggy skyscape.

IMG_8646