Paths – The River Path, Martha Brae River, Jamaica

IMG_0704

On a recent vacation to Jamaica my husband and I took a river rafting trip down the Martha Brae. The river water is normally a bit clearer, but due to heavy rains was a bit stirred up and cloudy. Captain Spence, who has worked on the Martha Brae for 40 years, was our guide. It was a delight to sit back on cushioned bamboo and listen to Captain Spence’s stories of the Martha Brae and his history with river rafting.

IMG_0727

As he poled us down the river Captain Spence explained the technique the captains use in building their own rafts. He also pointed out different plants and sights along the trail of the river. I loved seeing the banana trees growing along the banks while the tropical bird cries serenaded us with sweet songs.

IMG_0759

There were many little souvenir stops along the way, but there was no pressure to buy, just an offer of merchandise if we were so inclined.

IMG_0720

The trees formed a beautiful canopy above us. I was completely awestruck by the size of the mimosa trees. These grow in my part of the USA, but they stay rather smallish, the mimosas in Jamaica appear as large as oak trees.

IMG_0742

These gravestones along the way were removed from other areas of Jamaica as a historical display. They are quite old according to Captain Spence.

IMG_0740

The only drawback to the trip was the size of the raft. We went with our friend Crystal, but only two people can fit on each raft.

IMG_0732

The captains of the rafts carve calabash gourds in their spare time while awaiting their next passengers. The gourds are amazing with many intricate details. We were happy to bring one home with us. It is already one of my favorite treasures from Jamaica. Thanks so much Captain Spence.

IMG_0888

Information for rafting the Martha Brae: Rafting the Martha Brae

Paths – Theme Word for May

I read Bible verses in Psalms each day. As I read, I jot down phrases that I like alongside my to-do list. When I cross off errands and tasks from my list my eyes will fall upon the words from Psalms. I immediately feel renewed and recharged by the promises and blessings contained in this beautiful book of the Bible. Try writing a snippet of a Bible verse or an uplifting quote alongside something you will see several times throughout the day. The instant pick-me-up will do you good. 🙂

IMG_0874

At the end of the month, from where I am reading in the Psalms, I choose a word of virtue to study and try to incorporate into my life in the coming month. I will search out additional verses in the Bible that also speak of the same virtuous word and list these to read and study. Some of my recent words have been: faith, joy, hope, purity…whatever word I land on, that is the word I study.

For the month of May 2014 I felt led to take a bit of a departure, instead of a virtuous word, I chose a virtuous action to study: following the path God leads me on. Sometimes that path is hard to discern, but I have faith that for those who love and have given their life to the Lord Jesus Christ, he gently leads us, time and time again, to what is best for our life.

I’ve decided to also make PATHS and PATHWAYS of all sorts a theme for my blog this month. We’ll see how many trails and detours I can come up with to fill these days of May.

Pleasure – Happy May Day

Jamaica

I’ve just returned from a wonderful trip to Jamaica. We had a bit of a bumpy ride back as we flew through the storms on the East Coast, but would I go again, bumpy ride or not? YEAH MON!!!

I’ll look through my photographs and share a few in the next few days.

Thank you to everyone who commented on the blog posts while I was away. I’ll be responding as soon as I catch up with the houseplant watering, unpacking and the LAUNDRY!

Problem-Solving – This is War Parts I & II

Recharging…Resting…Rejuvenating… In the meantime, I’m re-blogging some of my best garden posts. Happy Spring!

I hope the photograph shows the deep hole in my Square Foot Garden. My peas were just beginning to sprout when some type of marauding critter decided to make them a meal.

Something large and furry had to be the culprit, or could it have been something large and feathery? My first impulse was to blame the squirrels, but they have been in the yard with my Square Foot Garden for several weeks and have not ventured past the chicken wire enclosing it. The same day I saw the devastation in the garden, I spotted a large chipmunk running around the yard. I know they are cute, but chipmunks are tops on my problem wildlife list. They are voracious and destructive and actually can be dangerous. My neighbor broke her wrist a summer or two ago by catching her foot in a chipmunk burrow and falling. One summer our yard became so overrun the chipmunks scavenged relentlessly even when we were only a few feet away. Wild turkeys have visited my yard too, but thankfully, only once. Yesterday I saw the mallard ducks. They are back. Every spring they return to my yard. Why? To eat beneath the birdfeeder, and then for dessert feast on every fish they can scoop up in my pond. The ducks have become a pest too and are able to easily fly over the chicken wire and gobble up my sprouting peas and greens.

So the big question is what to do to fight them. I have had mixed results in past years. The bug spray I made a few days ago might repel the animals, but the ducks don’t have a sense of smell and will not be stopped by a repellent scent. I also must reapply every time it rains, and if I don’t get out there and re-spray within five minutes of rain stopping, the hungry pests might get there first.

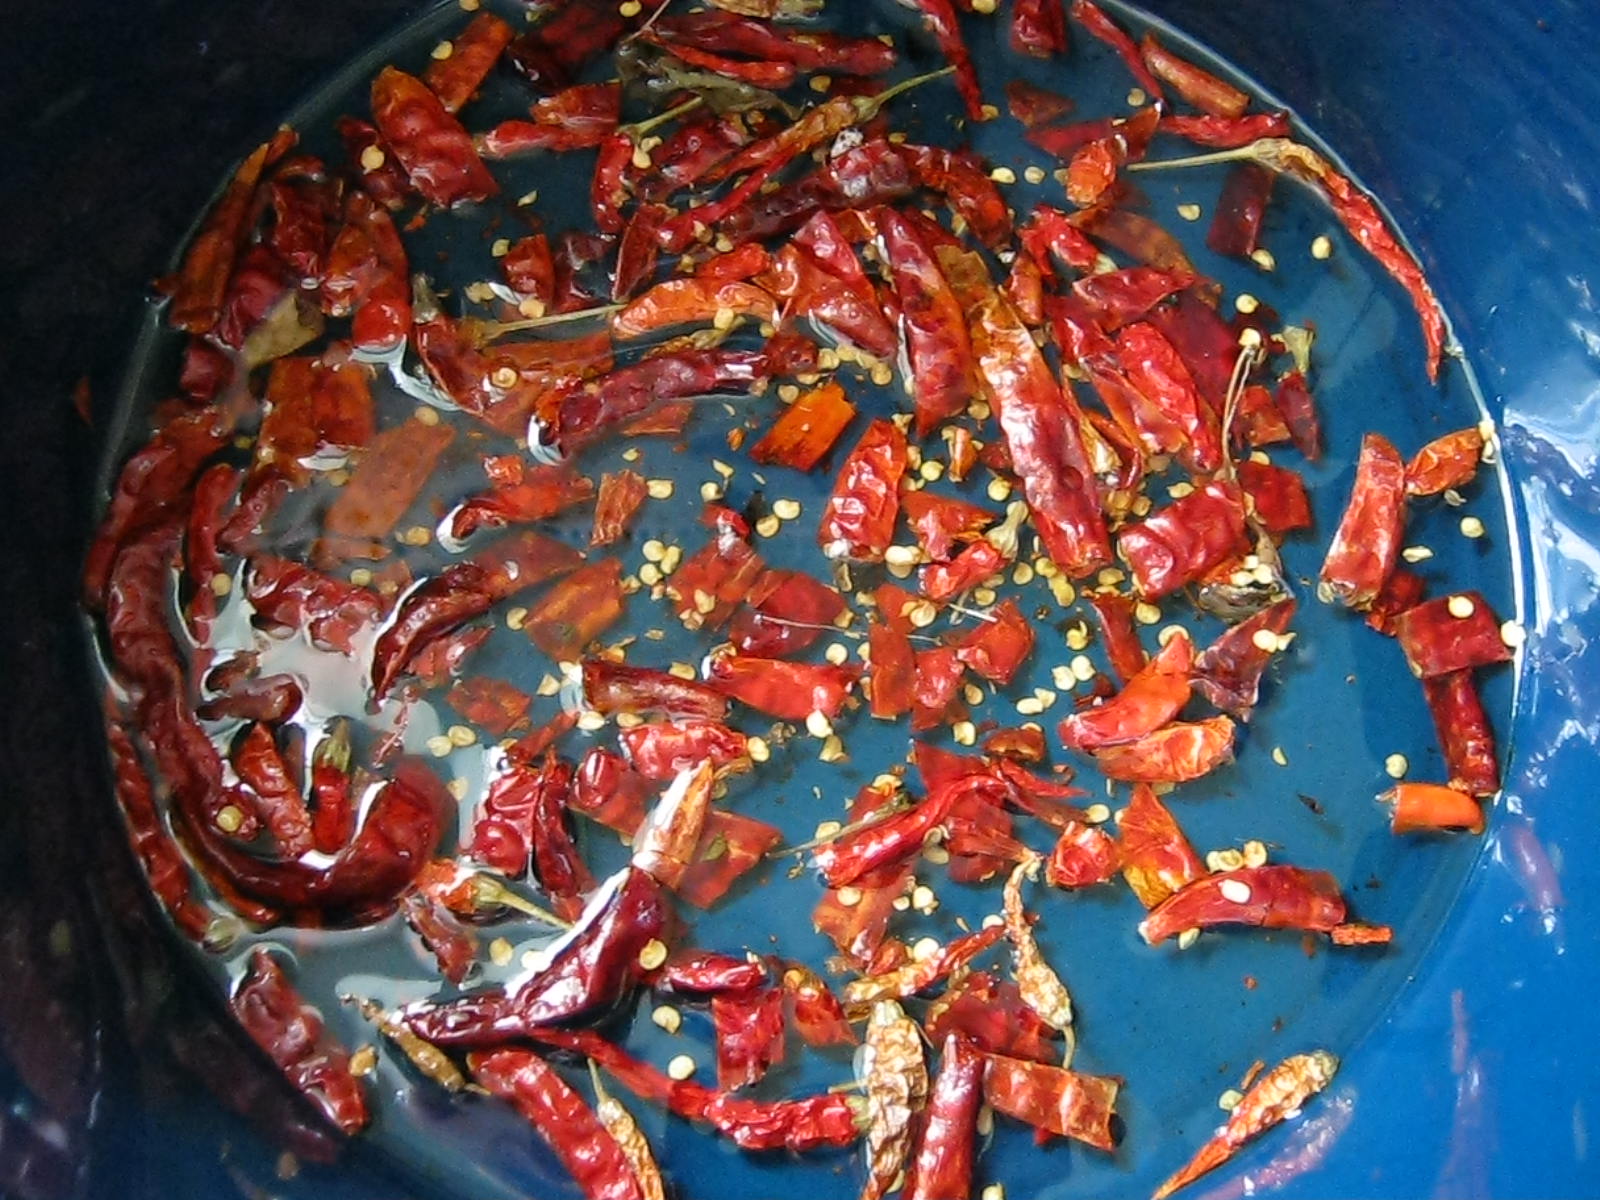
My first weapon was applied immediately, chile powder straight out of the bottle. I have some dried chiles still on hand, and I will blend those and keep at the ready to spread around. So far this has repelled whatever it was that dug up the peas.

I am also a firm believer in scare tactics. Anyone who has lived beside me might know that when I see something near sprouting plants I might run outside roaring like a lion in attempts to scare them away. It works. It also sends my heart rate pounding. I don’t know how wise it is to sprint and roar like this, but hey, it works. I also came up with a few temporary and permanent solutions. Tomorrow I’ll post the permanent solution, but for today, the temporary solution is the focus.

Water balloons. They are at the ready in a basket, filled with water and bit of garlic powder for a little added punch. If I see one of the culprits in or near my garden, they are in for a surprise. Tee-hee! I just hope tomorrow’s newspaper headlines don’t read: “Grandmother falls out second story window lobbing water balloons at wildlife.”

IMPORTANT CAUTION: Balloons can be lethal to small children because they are a choking hazard. Make sure to remove all shreds of balloons out of your yard.

Follow Me on Pinterest

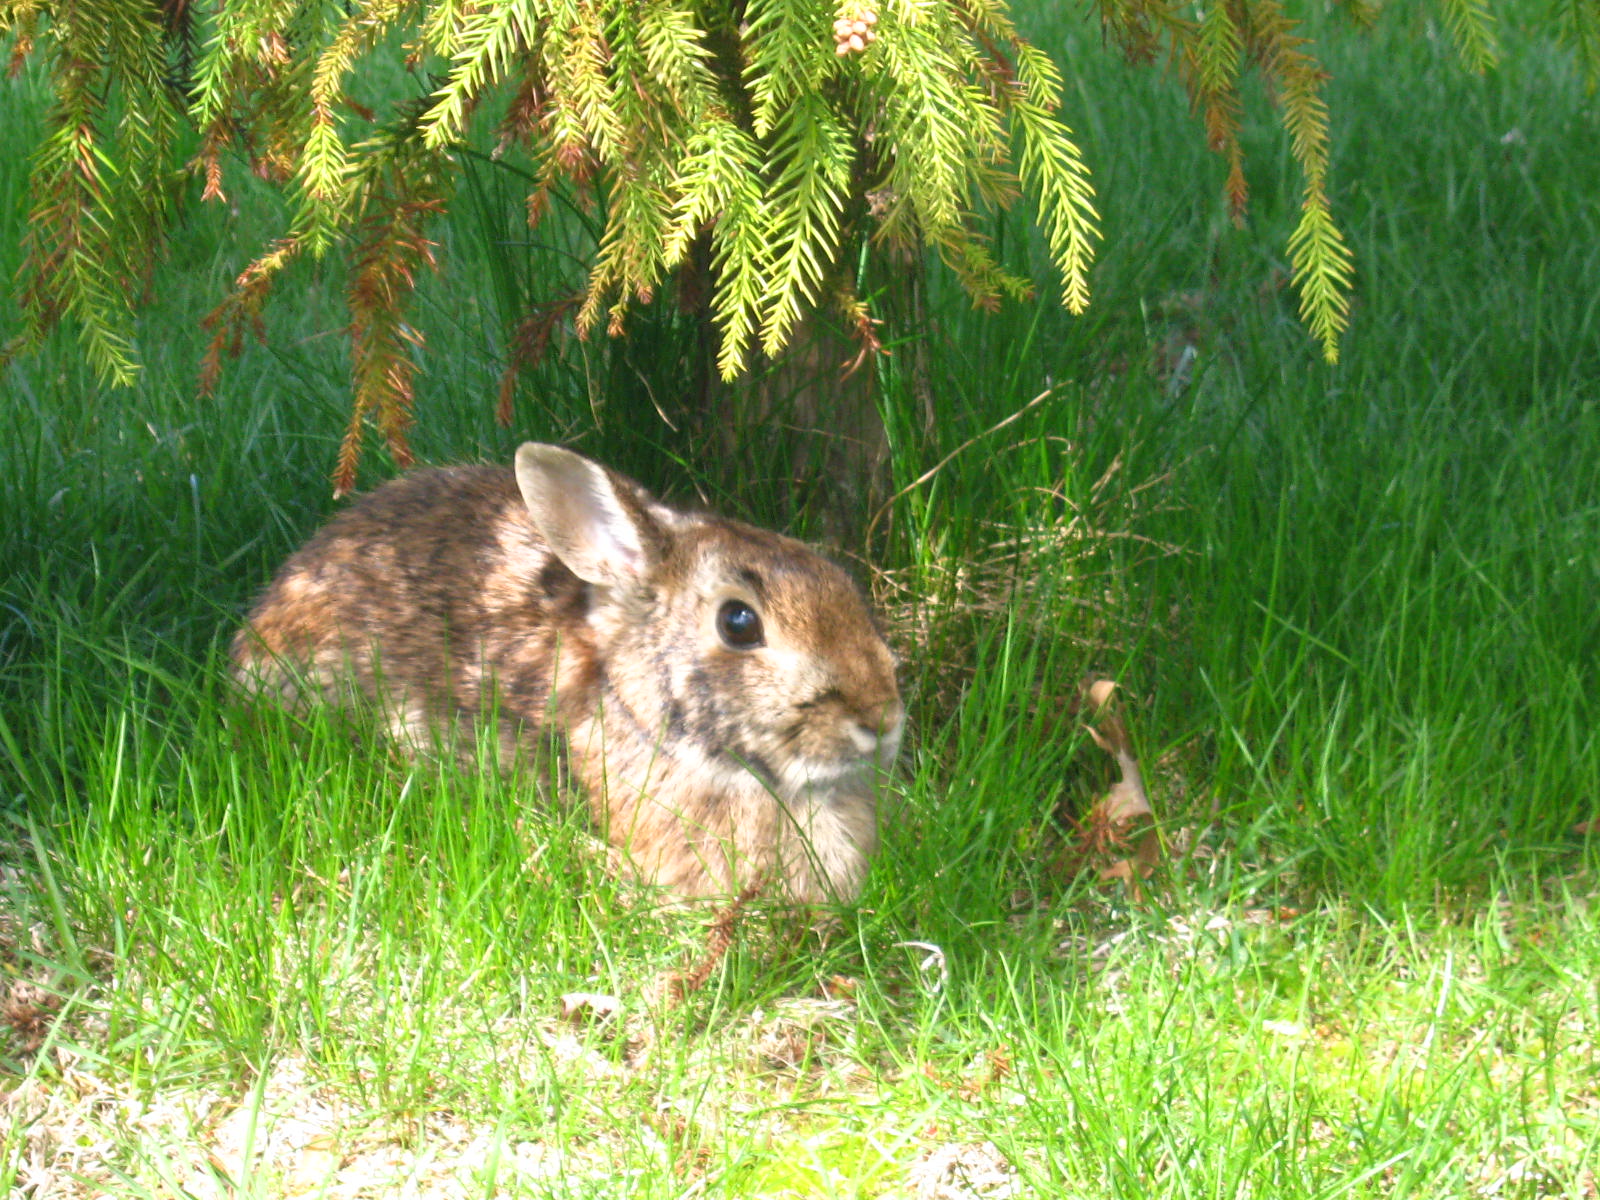
Update on Water Balloons: Lobbing them out of the upstairs window didn’t work. I couldn’t get enough “oomph” behind my arm to really launch them well. I moved the basket of balloons out onto the back porch. I had decided that the marauding critters get “baptized” with the water balloons only if they get in the vicinity of my gardens. Uh-oh, sooner or later the nibbling rabbit got too close. Tee-hee! I let a balloon soar through air. It bounced down and burst near enough to him to spray him with water. He ran…hooray! It works. The bunny was very surprised…not hurt. Next was a squirrel. He moved much quicker than the bunny. I think he saw the water balloon coming, but he was sprinkled with a few drops too, and I did not see him back, at least not yet.

Garden Wars weapon number two is recycled CD’s. I strung glass beads, a few metal bells, and some old crystal necklace beads onto wire. I then loaded the inside of a computer CD with goop, put a paper clip at the top, extending a bit past the edge, and added three seven to nine-inch wires to the bottom of each CD. I pressed a second CD onto this arrangement, making sure the iridescent side of both CD’s was facing out, clothespinned the edges, and let them dry overnight. Actually, I thought they might look junky, but after I hung them on mini shepherd’s hooks beside the garden I was pleased with the way they looked. The slightest breeze sets them spinning. The reflections on the front change and swirl, the beads click a little, hopefully sounding a bit like a rattlesnake to the little critters raiding my gardens. All in all, I feel good about my preventative measures. I’ll update in a week or two and record my results. I wish you, “Happy Gardening,” and “Victory” in the “Critter Wars!”

Plants – Zinnias

Recharging…Resting…Rejuvenating… In the meantime, I’m re-blogging some of my best garden posts. Happy Spring!

002

Last Saturday night my husband went to the races. In honor of Mother’s Day the racetrack, and a local garden center, provided a zinnia plant for the mothers present at the race, and for those who stayed home. I was delighted when I found this extra small flower pot on my kitchen table.

I adore zinnias. I think it is genetic. My maternal great-grandmother grew a large bed of zinnias in the summertime. I am named for her, so perhaps, a little extra of who she was lives on in me.

I recently found quite a few zinnia seed packets on sale. I had already planted the larger varieties, 36 inches and taller, throughout my garden. Still, I could not resist the smaller sizes. I bought four packets, and I am full of purpose to place a few in every bare spot I might find in my garden. I am also planning on growing a dozen or so in pots so that when I have the invariable bedding plant catastrophe, I will have a few replacement plants on hand.

001

Zinnias are a favorite of mine to watercolor.

Image (17)

I love the second ring of yellow flowers lying deep within the larger petals. These small yellow flowers are where the nectar hides. Hummingbirds and butterflies will visit your yard daily, more than once, to sup on this treat. Here are a few of my zinnia reference photographs with some of their visitors. All artists and crafters are welcome to use any of my reference photographs for inspiration. Happy Painting!

August 11 002

August 19, 2011 038

August 19, 2011 059

Copy of Picture 133

Plants – Nasturium

Recharging…Resting…Rejuvenating… In the meantime, I’m re-blogging some of my best garden posts. Happy Spring!

It’s time to plant these versatile flowers…

cardinal 011

My nasturiums are coming into bloom this week. I have these beauties planted in my Square Foot Garden. You might wonder why these flowers are planted in a vegetable garden. The answer is that all parts of the plant are edible. Here is a good link on how to use nasturium flowers, leaves and seeds in your salads and other dishes. Happy Dining!

Wikihow’s Tips On Using Nasturiums In A Salad

Follow Me on Pinterest

People – C. Austin Miles

Recharging…Resting…Rejuvenating… In the meantime, I’m re-blogging some of my favorite posts. Happy Spring!

The first meeting in the tabernacle in Pitman, New Jersey, was held in 1871. A history of the town and the camp meeting can be found here: History of Pitman, New Jersey. The tabernacle is at the center of twelve paths, or spokes, reminiscent of the twelve apostles.

C. Austin Miles, a prolific songwriter, wrote the hymn, “In the Garden,” while staying in the grove area. He said of himself, “It is as a writ­er of gos­pel songs I am proud to be known, for in that way I may be of the most use to my Mas­ter, whom I serve will­ing­ly al­though not as ef­fi­cient­ly as is my de­sire.”

Here are a few pictures I took Sunday at about 10:00 in the morning.


These small cottages are just a sampling of the dozens and dozens that surround the tabernacle.

Many years ago when I first moved to the area with my parents, I called this cottage on the fringes of the tabernacle wheel my home. What I remember most about it was the amazing attic it had. When I lived there it had a long front porch which has since been enclosed.

Problem-Solving – Critter Prevention

Recharging…Resting…Rejuvenating… In the meantime, I’m re-blogging some of my best garden posts. Happy Spring!

pictures test 004

At first glance this photograph resembles goldfish swimming in a large school. In reality what you are seeing is a layer of hot peppers, covered with oil, simmering OUTSIDE ON THE PORCH in a crockpot. Only adults wearing protection on their hands, and possibly a mask over their mouth and nose, should concoct this brew. After a few hours simmering, I strain out the peppers and keep the resulting oil in a jar. The oil itself did not cause me any distress when I gingerly sniffed it, but when I cleaned the crockpot in water, the steam from the hot water rinse made me gasp a bit as it was loaded with hot pepper particles.

I have been using this on the edges of pots of sunflowers that I am growing outdoors until time to plant in the ground. Every year most of my sunflowers and many other seedlings are nipped off by squirrels, rabbits and chipmunks. To combat this in the past I have tried chili powder sprinkled around my plants, but as soon as rain or heavy dew falls, “Nip, Nibble, Nip,” and all my careful plantings are ruined. There is no cruelty to the animals in using this oil. Their noses are so ultra-sensitive they should be able to smell the heat at least a yard away. I do have to make sure I explain to my grandsons why they must not touch or even walk near the pots. The smallest drop on a fingertip could seriously irritate their eyes.

This method of pest control is organic. Take precautions in using and it should help in repelling rodent and other pests.

Follow Me on Pinterest

Painting – Here’s Mud In Your Teeth/Longwood Anemones

IMG_0555

About twenty years ago, my then teenaged son purchased a moped. The first time he took it out to ride was after a rainy day. When he walked in the house after the ride he was covered in mud, and when he smiled his teeth were covered in mud splatters too. What joy he must have felt as he rode. I still imagine him in my mind riding through those puddles while the mud flew in an arc of earthly joy all around him. The photograph is a favorite of mine, as is the memory.

IMG_0553

I had the best time painting these anemones. Although there are quite a few flaws, the painting is full of life and I think captures a bit of the enthusiasm I felt while I painted it. You see…I love to paint. I have decided it does not need to be perfect, my joy will not be diminished by what others may think, or if I deem it perfect or flawed. What matters to me is the GRAND time I had painting it. I hope I smiled as big as my son as I splashed the paint onto the paper.

I wonder if that is why historians think Vincent Van Gogh ingested his paint. I have read more than once that many attribute some of his health problems, physical and mental, to paint being internalized. Perhaps he did not nibble his paint, but loved painting so much he smiled with joy when he painted, and the paint somehow got into his system. Oil paints at that point in time contained many dangerous chemicals and metals. Since I love Van Gogh’s paintings and his words in the numerous letters he wrote to family and friends, I hope this is the case. His joy in creating overrode his caution. By no means is this in any way a fact, just a theory I like to daydream about.

I wish I could paint like Van Gogh, but I will always be me in everything I do, and a Van Gogh I am not. But I do love to create and I do love to paint. If you are interested here is a short step by step video of the creation of my Longwood Anemones. I wish I could have videoed the wild background as I painted. It is wet into wet and was SO much fun to paint.

Longwood Anemones: 12 x 14, Winsor & Newton Watercolors, Arches Hot Press 140 lb Paper

You can find the thread to the April Plant Parade here: April 2014 Plant Parade

Take a look at the gorgeous paintings the other artists have created.

Planting – Square Foot Gardens

Recharging…Resting…Rejuvenating… In the meantime, I’m re-blogging some of my best garden posts. Happy Spring!

My Square Foot Gardens are doing great. Except for a few empty squares in the second garden, most of the space is filled with seeds or plants and growing well. I have harvested many servings of lettuce already. In fact, I can’t eat it fast enough and have been taking handfuls to family whenever I visit. The lettuce comes in a wide array of greens, pinks and reds and pairs perfectly with the arugula and water cress I have growing in the herb garden. A new sowing of mesclun is thriving and will soon be ready to begin harvesting. The bread seed poppies are magnificent and I expect them to send up budding stalks any day now. The peas in the back of the garden are in need of quick staking, they are growing a few inches daily.

Here is a closeup of the earliest sown squares. Last week I sauteed a few pieces of kale with olive oil and garlic powder. Ah, so amazingly good; I wish I had begun this type of gardening years ago. This week I tried several leaves of the swiss chard. I chopped the stems and ribs and kept them separate from the leaves.

I gently boiled the chopped stems, and after about three minutes added the leaves along with a little Adobo spice mix, and gently simmered a few minutes longer.

Wow! The taste was beyond my highest expectations. I sprinkled the swiss chard with a squeeze of fresh lime, and “oohed” and “ahhed” with every mouthful. The best thing about both of these greens is they are still producing. I can’t wait to try my hand at cooking and eating them again.

Planting – Growing Squash Upright

Recharging…Resting…Rejuvenating… In the meantime, I’m re-blogging some of my best garden posts. Happy Spring!

blog 008

I find squash and zucchini blossoms beautiful. Even better is the fact that a delicious vegetable will grow after the blossom falls away from the plant. Squash plants take up a large amount of room in the garden. Since I grow my vegetables in the Square Foot Gardening method I don’t want to give up many squares to one plant. I was happy this year to find some good information on Pinterest that led me to good articles on how to grow squash upright. Here are a few of my finds:

Growing Winter Squash and Pumpkins

Growing Squash


Happy Gardening!

Follow Me on Pinterest

Pleasures and Problem-Solving – Bunnies

IMG_0524

Years ago I transplanted some violets to my gardens. They are very prolific…almost becoming weedlike in spots. They are even scattered throughout the lawn. I love them though…they are welcome in my yard.

IMG_0527

Recently, I spotted this little bunny under a pine. I have mixed feelings about bunnies, squirrels and chipmunks. I love them and enjoy watching their antics in the yard, but they also can be invasive and cause quite a bit of damage in the yard and gardens. I guess I will have to develop the same love for their invasiveness as I do for the violets and learn to battle them gently, but also enjoy their presence.

Posies – Dandelions

IMG_0514

My grandson picked these dandelions while walking around the block with his grandfather. He brought them to me and we found the perfect vase…a dixie cup, the best spot for dandelions plucked away from their stem. He was so excited over the flowers he walked around the block again, this time with me to show me where they grew. He stopped and bent down to exclaim over each yellow flower, “They are beautiful Nanny, aren’t they?”

Yes, oh yes, they are beautiful my Derek. I remember loving dandelions as a child and blowing their fluffy tops into the air with a wish. I hope I remember this small dixie cup of sunshine and the walk with my grandson forever.

Planting – Garlic Bulbs

IMG_0485

I recently bought several bulbs of sprouting garlic off the salvage table in a local fruit stand. I have blogged about growing garlic cloves indoors in the past, but this time, since it is Spring, I am going to try growing them in my Square Foot Gardens. Each clove of the garlic bulb will grow a new bulb, multiplying my initial investment many times over.

I researched planting the cloves and found that in a Square Foot garden there were many varied spacings…between four to nine cloves per square. I opted for the larger number since I have so many of the sprouting cloves.

IMG_0492

Here are the nine placed in a square foot, ready to be covered over with soil. Inside the garlic bulb were several smaller cloves that had not sprouted. I decided to use these as a rodent repellent and smashed and smeared several on the edges of my square foot borders.

IMG_0490

I also placed a few smashed cloves within some squares planted with spinach and kale. So far they have not been nibbled or dug up by hungry critters.

IMG_0493

I’m not sure what kind of results I will have, but even if the resulting bulbs aren’t good for cooking, it will still be worth growing the garlic to use as organic repellents and insecticides.

Paths – The Path/Winter Video

Here is a quick minute video of the path in winter. The still version photographs of “The Path” can be found by clicking the tab at the top of the page. Thanks for looking!

Plantings – Garden Growings-On

Seedlings, Seedlings, Seedlings! They are EVERYWHERE! Last night I had to bring them into the house instead of overnighting in the garage…it is going to be very cold during the next twelve hours or so. I also covered the spinach and the kale I planted Sunday with overturned terracotta pots. They would probably be fine without the protection, but why risk it?

IMG_0510

My dining room table

IMG_0508

Coleus galore! I have more in other rooms, and I started another batch a few weeks later for those bare spots left by poppies, bleeding heart, spring bulbs and other plants that die away near the end of June.

IMG_0480

Gorgeous tomato seedlings…I tried many varieties this year.

Pressed Flower – Tissue Paper Easter Egg Card

I blogged on February 24th of this year about pressing an early season crocus. This week I created an Easter greeting card with the flower and leaves, and also created a few cards with buttercups and a four leaf clover. The cards were quick and easy and turned out very pretty.

IMG_0501

* Tip for finding four leaf clovers at bottom of post.

To begin, I found an egg-shape on the web in Google Images and traced it with tracing paper. An egg-shape seems easy to draw free-hand until you attempt to have both sides perfectly even…not easy! After I found and traced an egg-shape, I cut it out and then traced the shape onto cardboard. I traced the shape onto a piece of Coverseal, a very clear type of contact paper, made four outlines on plain white computer paper, and then traced yet again onto robin’s egg blue tissue paper. I cut the tissue paper eggs out around the outline.

I removed the backing from the Coverseal and placed it, tacky side up over the computer paper outline. I placed each of these onto a cork bulletin board and tacked the outer edges down with push pins to hold it steady.

IMG_0494

Now you can wing it and compose your card without a pattern, or you can sketch out a quick little design to follow. Be aware, your finished design will reverse itself when you place the Coverseal onto the card.

IMG_0500

Place the flowers  onto the Coverseal within the egg shape. BE VERY CAREFUL TO PLACE THEM FRONT SIDE DOWN. Start with the flowers first, the foliage second, unless your foliage takes center stage as the four leaf clover does in one of the card designs.

IMG_0495

IMG_0497

When you are finished designing, place the tissue paper egg over the design, and cut out the excess Coverseal directly around the outer edges of the tissue paper. You will now have a beautiful pressed flower egg in your hand.

IMG_0498

Turn the egg over and cover most of it, especially the edges, with glue stick. I use a glue stick that goes on purple and turns clear. The purple makes it very easy to make sure you have all the edges covered. Place egg on waiting greeting card and let dry. Voila`…a beautiful handcrafted Easter greeting card.

IMG_0499

I was very happy with my finished eggs. Happy crafting!

*Pressed Flower Tip – Finding four leaf clovers. It is easier to find a four leaf clover if you stand and scan a patch of clover with your eyes. The human eye will spot differences in patterns. If you see something that looks different in the patch, take a closer look and perhaps you will spot a four leaf clover. If you find one four leaf clover look for more. The mutation that caused one will most likely have created a whole patch of four leaf clovers. Here’s a terrific article on how to find four leaf clovers: How to find a Four Leaf Clover