Quick Tip & Plants – Over-wintering Geraniums

IMG_8531

I am overwintering my geraniums in cardboard boxes this year. If you have room in your garage or basement, consider saving your geranium plants too. I lift my plants from the ground with a spading fork and brush away as much soil as possible. After they are stored in boxes, I will check the plants each week to remove dead leaves. It’s also a good idea to inspect the geraniums every few weeks for the development of mold or mildew.

Susan’s in the Garden,”video tutorial demonstrates two techniques for over-wintering your geraniums.

Plants – Autumn Volunteers

IMG_8445

While cleaning out garden beds today I noticed some volunteer dill seedlings. When I harvested the dill seed this summer some must have fallen to the ground and sprouted. I love volunteer plants.

IMG_8449

I placed a few of the sprouts in a pot, watered them, and in a day or two will bring them in to grow through the winter on my kitchen windowsill. Check your garden beds to see which of your plants might have a squadron of volunteers growing there.

Plant – Croton

IMG_8320

Crotons are a perfect Autumn houseplant. I purchased mine a few years ago at the local grocer. The croton has grown steadily, and after spending summers outdoors in bright sunshine, is near twenty-four inches tall, eighteen inches in diameter. The leaves of the croton are definitely the star of the show. The brighter the light, the more variegation they exhibit. Giving a croton a vacation in summer sunshine will bring out gorgeous colors in the leaves.

IMG_8319

This week, due to a forecasted heavy frost,  I brought my croton indoors. I will have to check the plant diligently over the next few weeks to make sure it does not develop spider mites. I do this by spraying a light mist of water around the new growth near the top. If the plant has a mite problem the webs will catch the water droplets. I can eradicate a light infestation of mites with a daily dose of heavy water spray. If the infestation involves the entire plant I will need a systemic insecticide to battle the problem.

HOW TO GROW A CROTON
Light: Strongest Sunlight Possible
Temperature: Day – 70 degrees (minimum)
Night – 60 degrees (minimum)
Moisture: Evenly Moist – Do not overwater or allow to become too dry.
Common Pests: Spider Mites

Plants – Coleus – The Secret of Vibrant Colors

IMG_8116

My favorite coleus is one I grew from seed several years ago. I call it Raspberry Twizzle. A progeny of several years of cross-breeding coleus in my garden, Twizzle is vibrantly hued, rippled, and boasting scalloped edges. The beautiful color is not guaranteed. The plants in the photograph above are all from the same mother plant. The reason for the lackluster color of the middle coleus: the wrong light conditions. Coleus grown indoors must have very bright morning and early afternoon light. If they are grown in too much shade their colors will fade, even though they retain their fancy frills and ripples. Strong afternoon light will have the opposite effect, and make for faded color.

IMG_8117

Coleus root in plain tap water. This cutting is only a few weeks old and is ready for planting. If you have coleus growing outdoors, bring a few sprigs in and keep your plants alive for planting out next Spring.

Plants & Phavorites – Lemon Grass

Summer is at an end. I thought it would be good idea throughout this week to take time for some reflections on the garden…successes and failures, and make note of what I want to plant again next year.

IMG_8000

At the top of my list is Lemon Grass. I found this plant in my local Amish Market. I must have planted it in the perfect spot this year for it has thrived and grown to about a thirty inch height in the afternoon sunshine.

I found some terrific information on WebMD on the benefits of Lemon Grass.

“Lemongrass is a plant. The leaves and the oil are used to make medicine.

Lemongrass is used for treating digestive tract spasms, stomachache, high blood pressure, convulsions, pain, vomiting, cough, achy joints (rheumatism), fever, the common cold, and exhaustion. It is also used to kill germs and as a mild astringent.
Some people apply lemongrass and its essential oil directly to the skin for headache, stomachache, abdominal pain, and muscle pain.
By inhalation, the essential oil of lemongrass is used as aromatherapy for muscle pain.
In food and beverages, lemongrass is used as a flavoring. For example, lemongrass leaves are commonly used as “lemon” flavoring in herbal teas.
In manufacturing, lemongrass is used as a fragrance in soaps and cosmetics. Lemongrass is also used in making vitamin A and natural citral.

How does it work?
Lemongrass might help prevent the growth of some bacteria and yeast. Lemongrass also contains substances that are thought to relieve pain, reduce fever, stimulate the uterus and menstrual flow, and have antioxidant properties.” ~ Webmd.com

There are some side effects and dangers when using Lemon Grass –
LEMON GRASS IS UNSAFE DURING PREGNANCY – It can start menstrual flow.
From my own experience I can caution you to be aware of the sharp edges when you gather the grass. I experienced a painful cut, pretty much like a deep paper cut while picking the grass to use in tea.

“Lemongrass is an aromatic storehouse of essential nutrients providing a wide array of health benefits. It is a source of essential vitamins such as vitamin A, B1 (thiamine), B2 (riboflavin), B3 (niacin) B5 (pantothenic acid), B6 (pyridoxine), folate and vitamin C. It also provides essentil minerals such as potassium, calcium, magnesium, phosphorous, manganese, copper, zinc and iron, which are required for the healthy functioning of the human body. It offers no harmful cholesterol or fats.” ~ Organicfacts.net

I was astounded by all the benefits of this plant as I researched facts for this post. Lemon grass is widely available as an ingredient in herbal teas. Check out the labels in the tea section and drink more tea this winter!
Benefits of Lemon Grass

Before the grass falls victim to Autumn frosts, I plan on gathering and drying more of the grass to use throughout winter. I have had great results harvesting the grass, gently washing off any garden debris, cutting into 1/2 – 3/4 inch lengths, and drying for a day or two in the heat of my car.

Preparation & Plants – Saving Heirloom Tomato Seeds.

IMG_7306

Every Spring/Summer the garden beds are full of the previous year’s fallen tomatoes. These forgotten tomatoes self-seed and send up new sprouts by the dozens. Why then are tomato seeds so notoriously hard to save?

Tomato seeds are surrounded by a gelatinous sac that allows them to adhere to the garden soil for sprouting. This same gelatin works against growing the same seeds in pots. The gelatinous moisture is a perfect environment for disease to thrive in.

This year I decided to mimic nature and save the seeds without spending time, or dealing with the mess of fermentation.

IMG_7557

The steps I followed are explained in this short video.

For more information on different ways to save tomato seeds visit this link:
Saving Tomato Seeds

Plants – Final Update/Straw Bale Gardens

IMG_7540

I have enjoyed reaping the benefits of my experiment in Straw Bale Gardening this year. Even though I made a mistake and placed the bales on pallets, the tomato plants adapted. As the hay decomposed and fell between the spaces, the tomato plant roots followed the trail of soil. In the photograph, you can see the plants grew to a terrific size. Their growth rate was so fast, I had to change my mind about letting them grow on the straw as vines, and used standard wire tomato cages instead. The fruit the plants produced was large and flavorful. They are beginning to decline now, but so are the tomatoes in the gardens of friends and family. If you have the space, consider giving this unique way of growing vegetables a try next year.

Plants – Straw Bale Gardening Update

IMG_7306

The Straw Bale Garden experiment has been a bountiful success. These are just the latest harvest of tomatoes. I’m on my way out after I post to take a few of these beauties to my father. He is a fan of tomato sandwiches for lunch! I love having an overabundance of harvest to share. O Happy Day! What a blessing.

Plants – Dill/Part I

IMG_7247

Dill, a type of herb, has thrived in my garden this year. The slender leaves can be harvested at any time and used fresh, or dried for later. Swallowtail butterflies use dill as a host plant for their eggs. I often find caterpillars dining on my dill. I never pick them off as I plant more than enough dill for both the caterpillars and myself. A little dill goes a long way; the herb is very pungent.

IMG_7250

After flowering, the dill will form seed. Allow the seeds to dry, but keep a close watch, and when they easily pull away from their slender stems it is time to cut and harvest. I prefer to do this indoors over a plate to gather every seed.

IMG_7251

Allow the seed to sit in the open air for a few days to completely dry out. Save a little to plant next year, and store the rest in a jar for culinary uses.

IMG_7245

As with so many herbs, dill is a powerhouse food for your health. According to George Mateljan Foundation: Dill is one of nature’s healthiest foods.

Dill florets are a stunning addition to pressed flower arrangements. Press between books and in a week or so they will be ready to use for crafting. The flowers are delicate and add an ethereal air to pressed flower compositions

Cucumbers and dill are perfect together. I’ve included a very basic salad I make throughout the summer. Enjoy!

DILLED CUKES (can be halved)

4 medium cucumbers
3/4 C. white vinegar (I’ve used apple cider vinegar in a pinch, works fine)
1/4 C. sugar
2 tsp. salt
1 tsp. Dill leaves (less if using dried)
1/4 tsp crushed red pepper (I sometimes leave this out)
1 1/2 C. water

Cut cucumbers in chunks, or slice in medallions, or cut lengthwise and slice in half moon shapes. In a bowl combine cucumbers with all the ingredients and stir gently. Cover the bowl, refrigerate for 4-6 hours. If possible, give the salad a gentle stir a few times. Drain before serving.

Plants – Dry Your Herbs the Super-Easy Way

IMG_6932

I love Lemon Basil. Not only does this wonderful herb have the kick of basil, it also has a lemony taste and smell. Lemon Basil thrived in my garden this summer and the time for a first harvest soon arrived.

I dried a good portion of the lemon basil in my turkey roaster, on low heat, as I’ve mentioned in previous posts. Experimenting with an interesting technique for drying herbs was my choice for the remainder of the basil. In an online article from Mother Earth Living, I recently read of drying herbs uncovered in the fridge. I decided to give it a try. Mother Earth Living – Dry Your Herbs in the Fridge.

IMG_6935

I placed the basil in a dish…

IMG_6937

…And wedged it in the back corner of the fridge. Within a few days the basil was completely dried out.

IMG_7009

The two techniques, after drying, side by side.

IMG_7010

When mixed together, there are no obvious differences in either basil. Both are nicely dried and ready to be stored for using at a later date. Both techniques have their pluses: drying in the turkey roaster is quick, although you run the risk of over-drying and destroying the flavor. Drying in the fridge takes a few days, but there is no danger of burning your herb. Experiment and let me know if the fridge-drying technique works for you.

Plants – Spearmint

IMG_6608
Spearmint Mentha spicata

My spearmint patch has spread around the borders of my Square Foot Gardens. I love the fragrance the plants release as I work in the raised beds. It’s impossible to dislike weeding when a cloud of spearmint-scented air wells up around me as I pull out crabgrass and other persistent weeds.

spearmint

I’ve posted in the past on making delicious teas with fresh spearmint leaves. Place a few sprigs in a teacup, add boiling water and a bit of honey, and you have an invigorating cup of tea. Seriously though, I have to be aware of the time of day when I drink Spearmint tea. The herb is a stimulant and can keep me awake if I drink it too late in the day.

IMG_6613

My spearmint reached the flowering stage this week. To enable the plants to branch out I harvested the tops of the tallest stems. I decided it was the perfect time to try a new idea I recently stumbled across: making my own herbal extracts.

IMG_6617

The first step is to buy a good vodka. I was thrilled to find an organic variety.

IMG_6622

After a gentle rinse and drying time, chop the spearmint leaves (or whatever herb you are using) into small pieces, place in a glass jar, and cover with the vodka. I found a great tip that advised on putting a plastic bag between the lid and jar. If rust forms on the lid it can contaminate the extract. The plastic keeps this from happening. Let the jar sit in a dark place, shake it every now and then, for four to six weeks. Strain off the herbs and place the finished spearmint extract into dark bottles. The extract will keep for three to five years.

Terrific directions and information can be found at this site: Mountain Rose Herbs: How to make your own liquid herbal extract.

IMG_6624

I had quite a few sprigs of the spearmint left over. I removed the leaves from the stems and placed them on a parchment-covered drying rack in my turkey roaster. I set the temperature on the warm and let the herbs sit for twenty-four hours. This is a quick way to start the drying process. You can read about other techniques for drying fresh herbs at: Mother Earth News – Six Ways to Dry Fresh Herbs.

IMG_6635

The leaves dried nicely, most retaining an appealing green color.

IMG_6636

I put the leaves in a brown paper bag. A good place to continue the drying process is in a dark closet. When completely dry, I can store the spearmint in glass jars until I am ready to use it.

Plants – Nasturtium

IMG_6434

The Nasturtium in my photograph was not only beautiful, but tasted yummy too! Nasturtium flowers and leaves can be used in salads and as edible garnishes. The leaves and flowers have a peppery taste, and blend beautifully with other fresh greens for a spectacular salad. The flowers when newly blossomed and small, can be frozen in ice cube trays. The leaves resemble small lily pads and work as pressed foliage for those who enjoy pressing flowers.

How to Grow NASTURTIUM

Plants – Wordless Wednesday/Climbing Rose

Climbing Rose Against Chimney
Climbing Rose Cascade
Climbing Rose Close
Climbing Rose Close-Up

Plants – Mid-Spring Garden Update

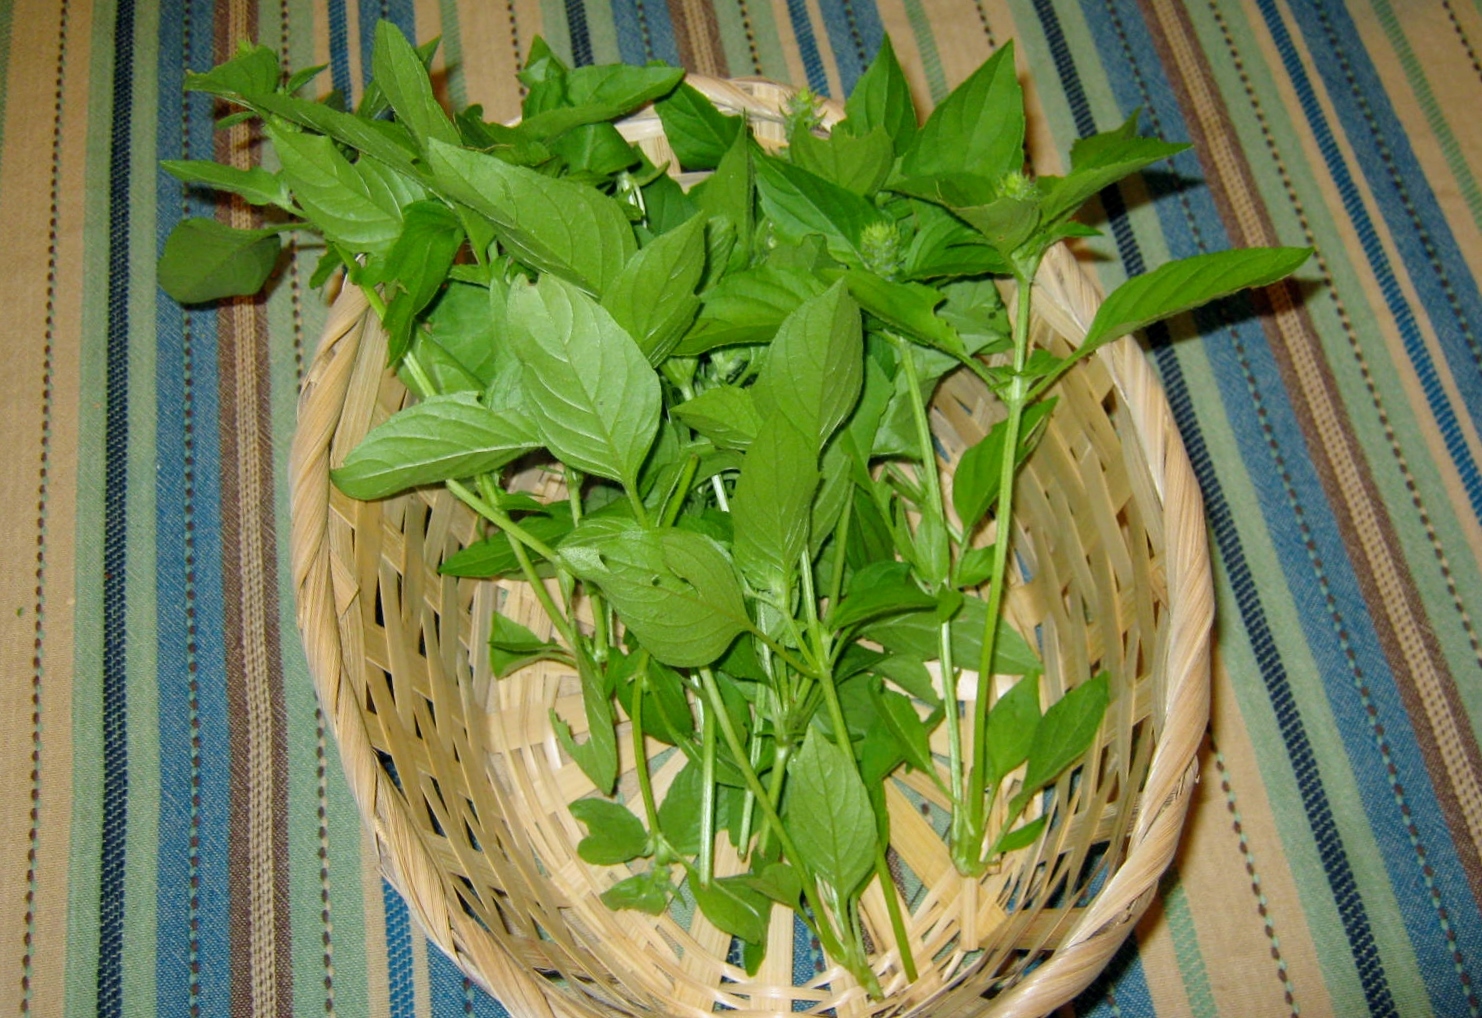
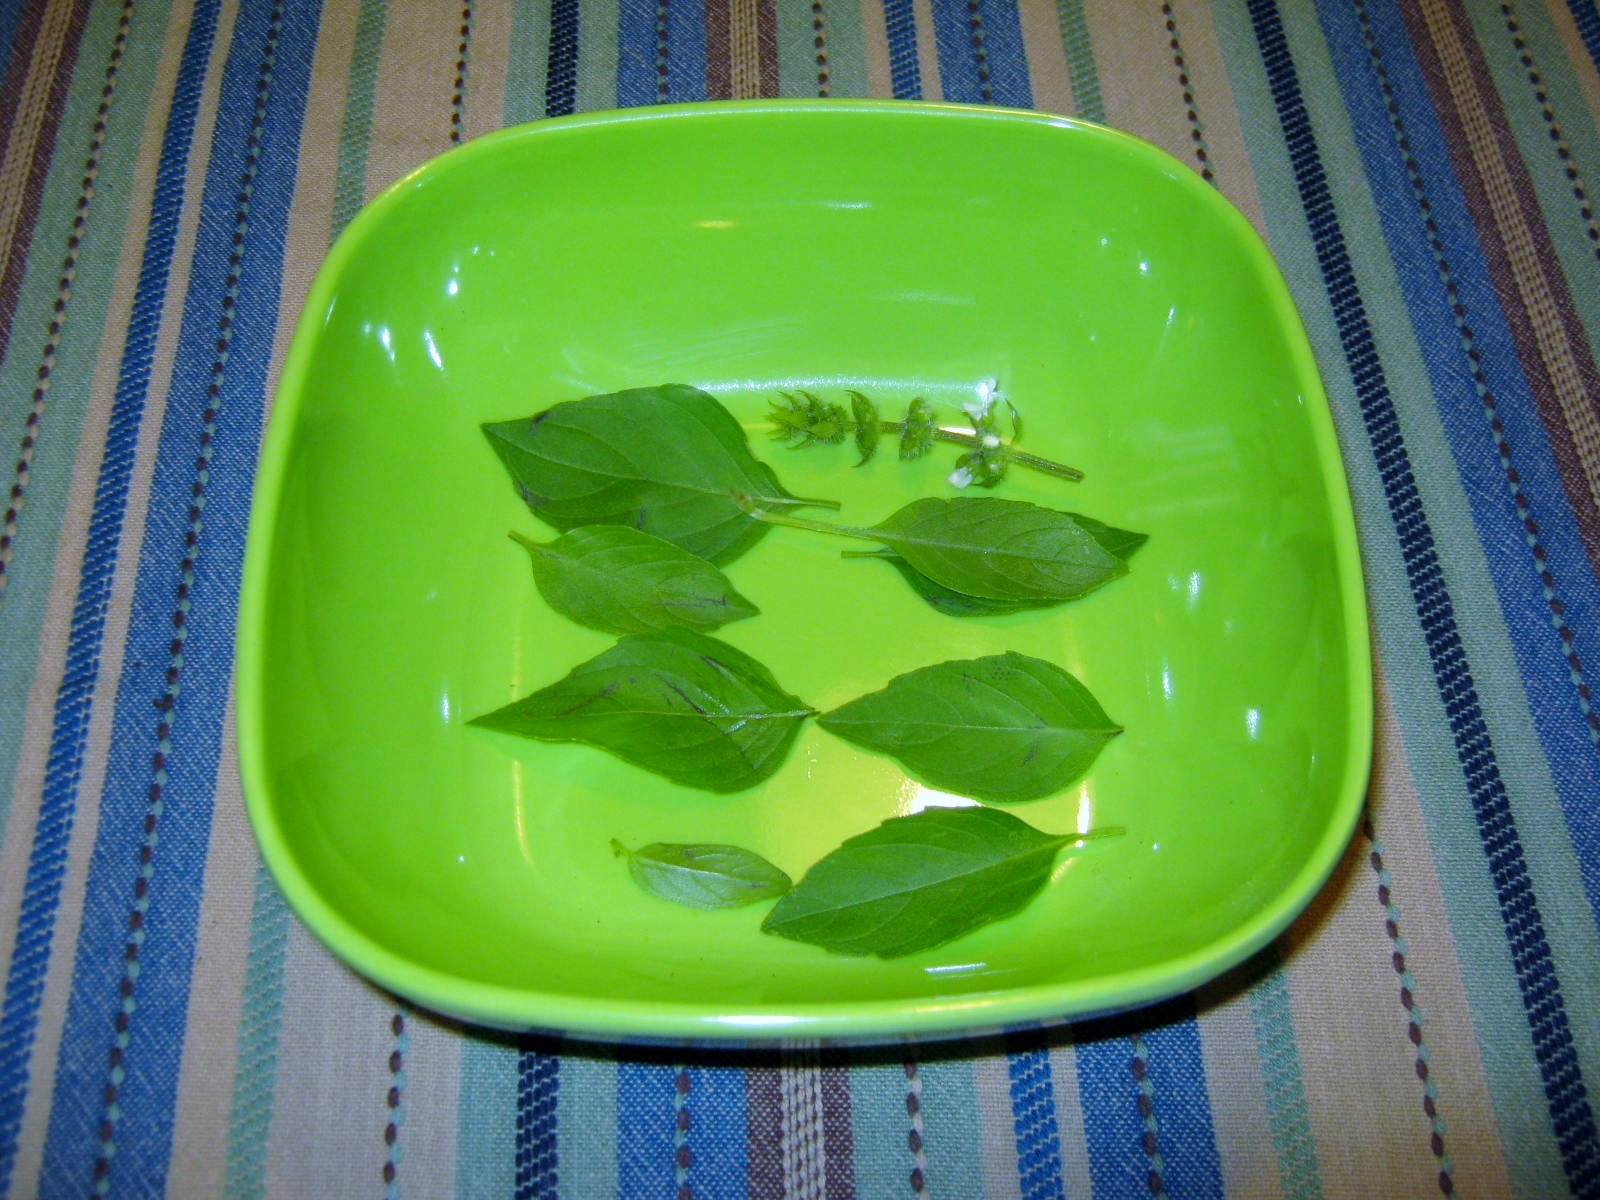
I’ve been spending a lot of time in the garden: planting, weeding, watering and tidying up. Likewise, the garden has been the subject of quite a few recent posts. Here are a few quick updates on some past posts, and then I’ll try to turn my blogging intentions elsewhere, at least for a few days. 😀

Birdie, birdie in the tree

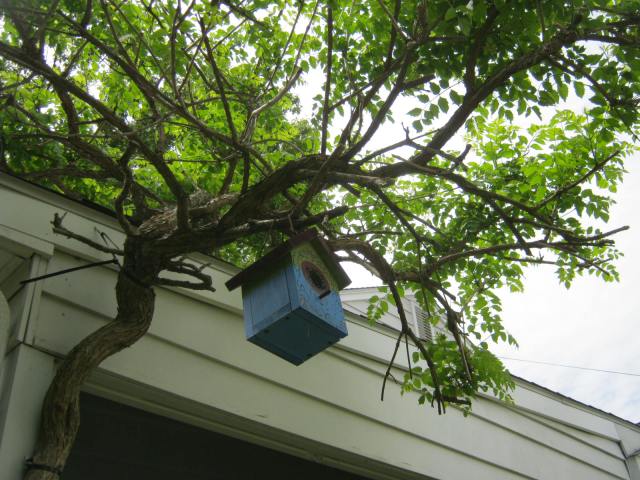
Sparrows made use of my birdhouse and the tree has been a-twitter with the chirping of baby birds for over a week.

Koi in Pond

I’ve been enjoying the pond, it is on the small size, but the koi are huge. They don’t seem to mind the small confines. Two have grown to twelve inches from three/four inch sized babies.

IMG_5860

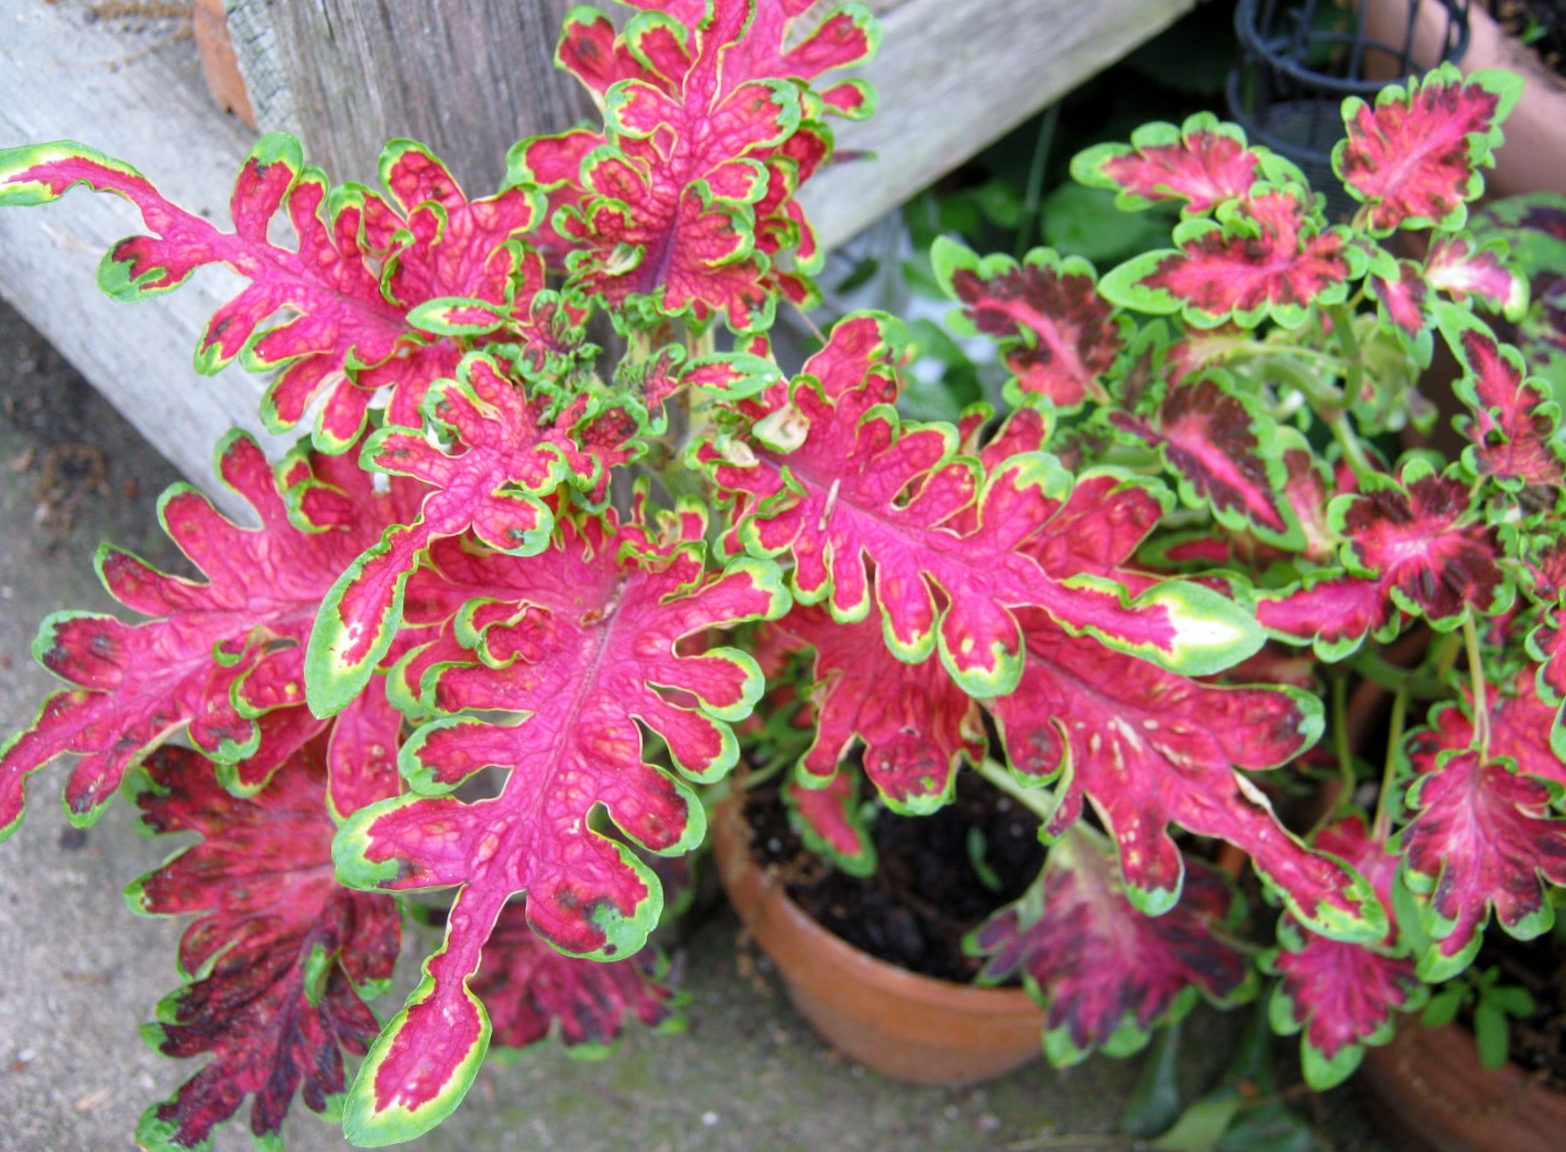
A coleus grown from my own gathered seed has finally, after years of pampering, become a beauty. I love the finely edged leaves and vivid pink color. I named it Raspberry Twizzle. It has the characteristics of other coleus I have grown, but I have never seen such a brilliant pink in other coleus. I love it.

IMG_5875

IMG_5874

I love my potted pansies and dahlia near the front porch.

IMG_5873

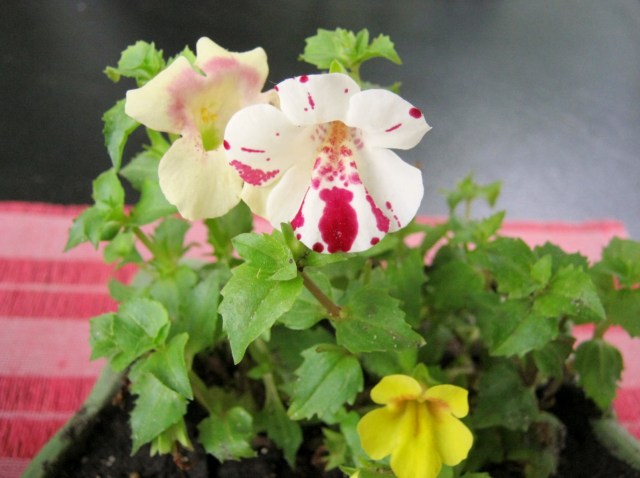
I found an old favorite, Mimulus, or monkey flower at a local nursery. The plant is heat intolerant, so I am growing it in pots on the porch.

IMG_5872

IMG_5871

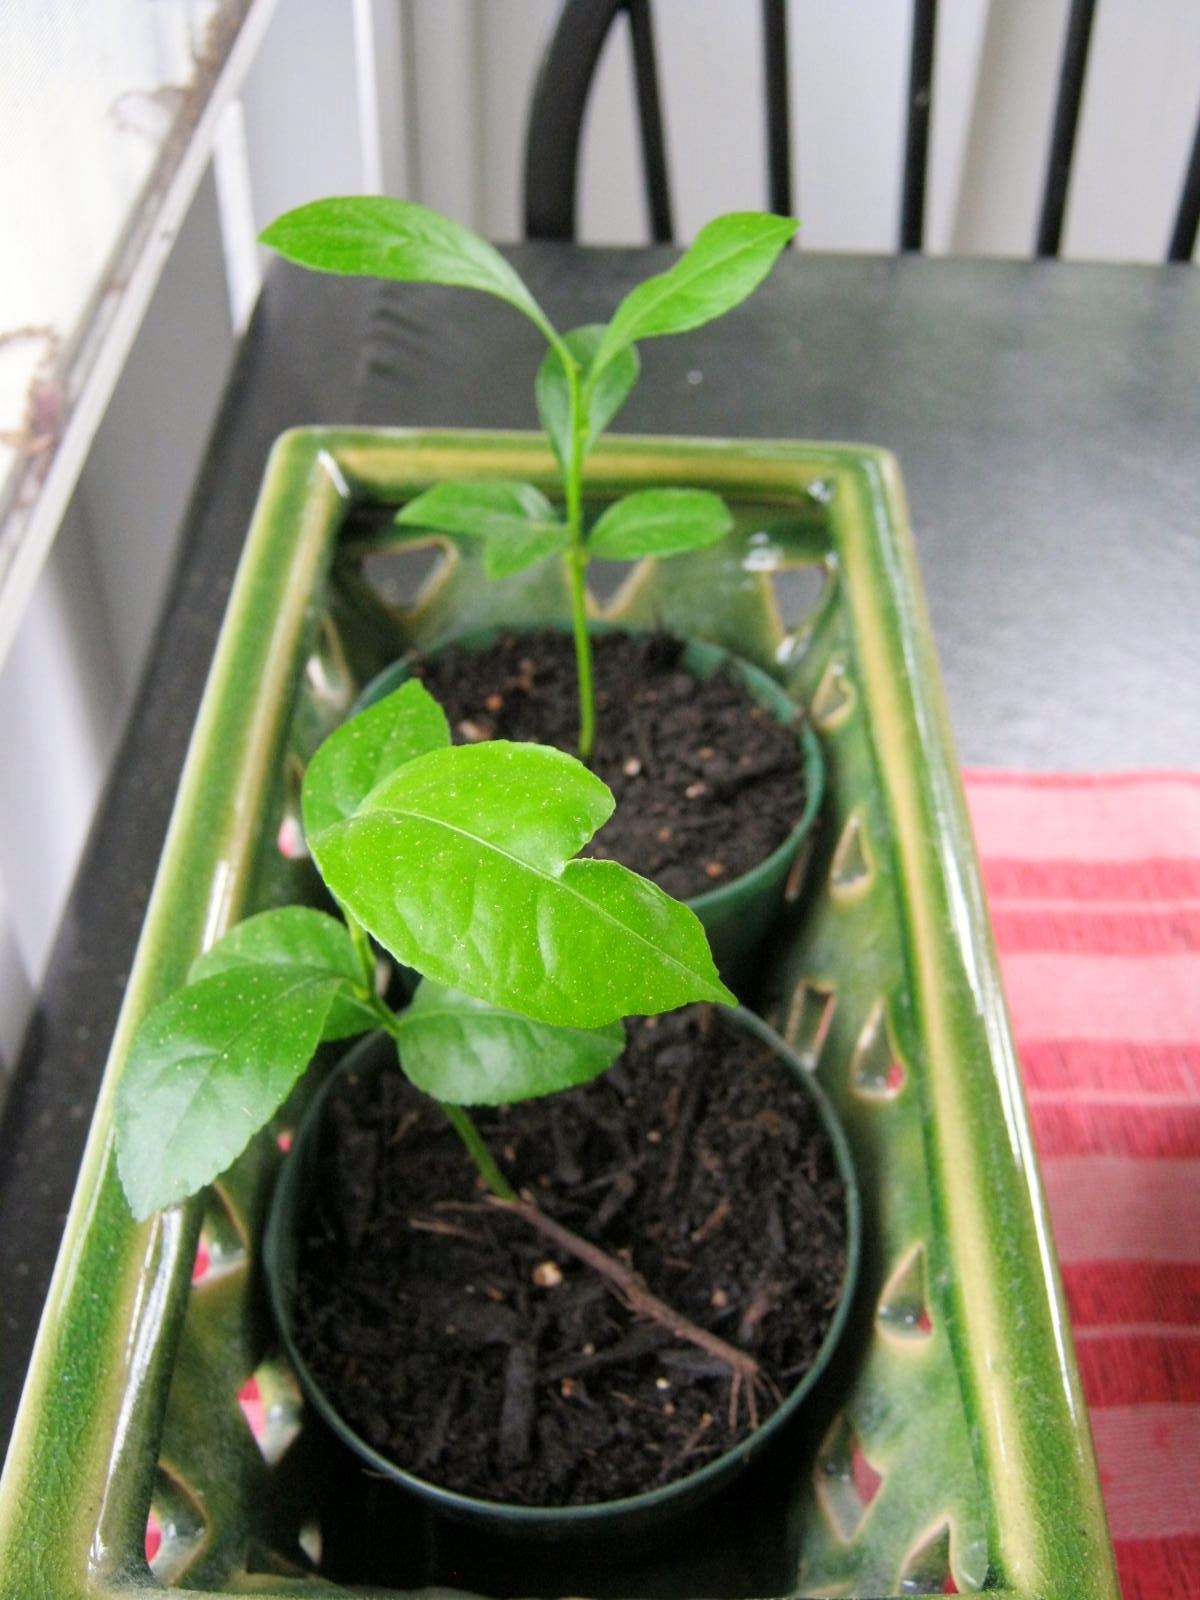
My Meyer Lemon and  Carambola sprouts are also vacationing on the porch for the summer. At some point I am going to have to decide which to keep and which to give away or discard.

IMG_5858

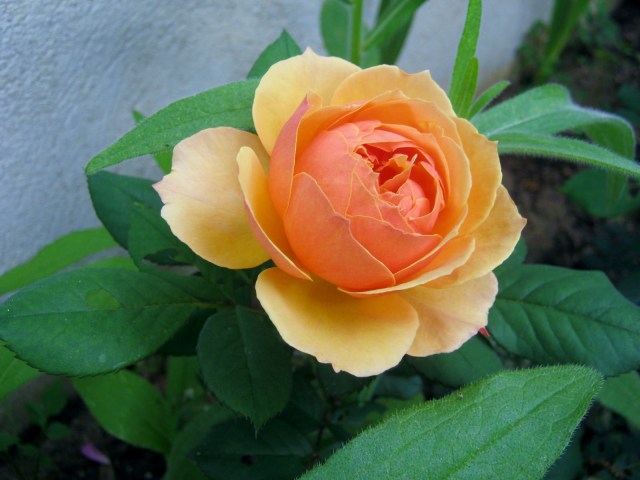
I replaced a rose that didn’t make it through our long winter with one of the Hasslefree Roses variety. I love this beautiful apricot beauty called: About Face.

IMG_5855

IMG_5853

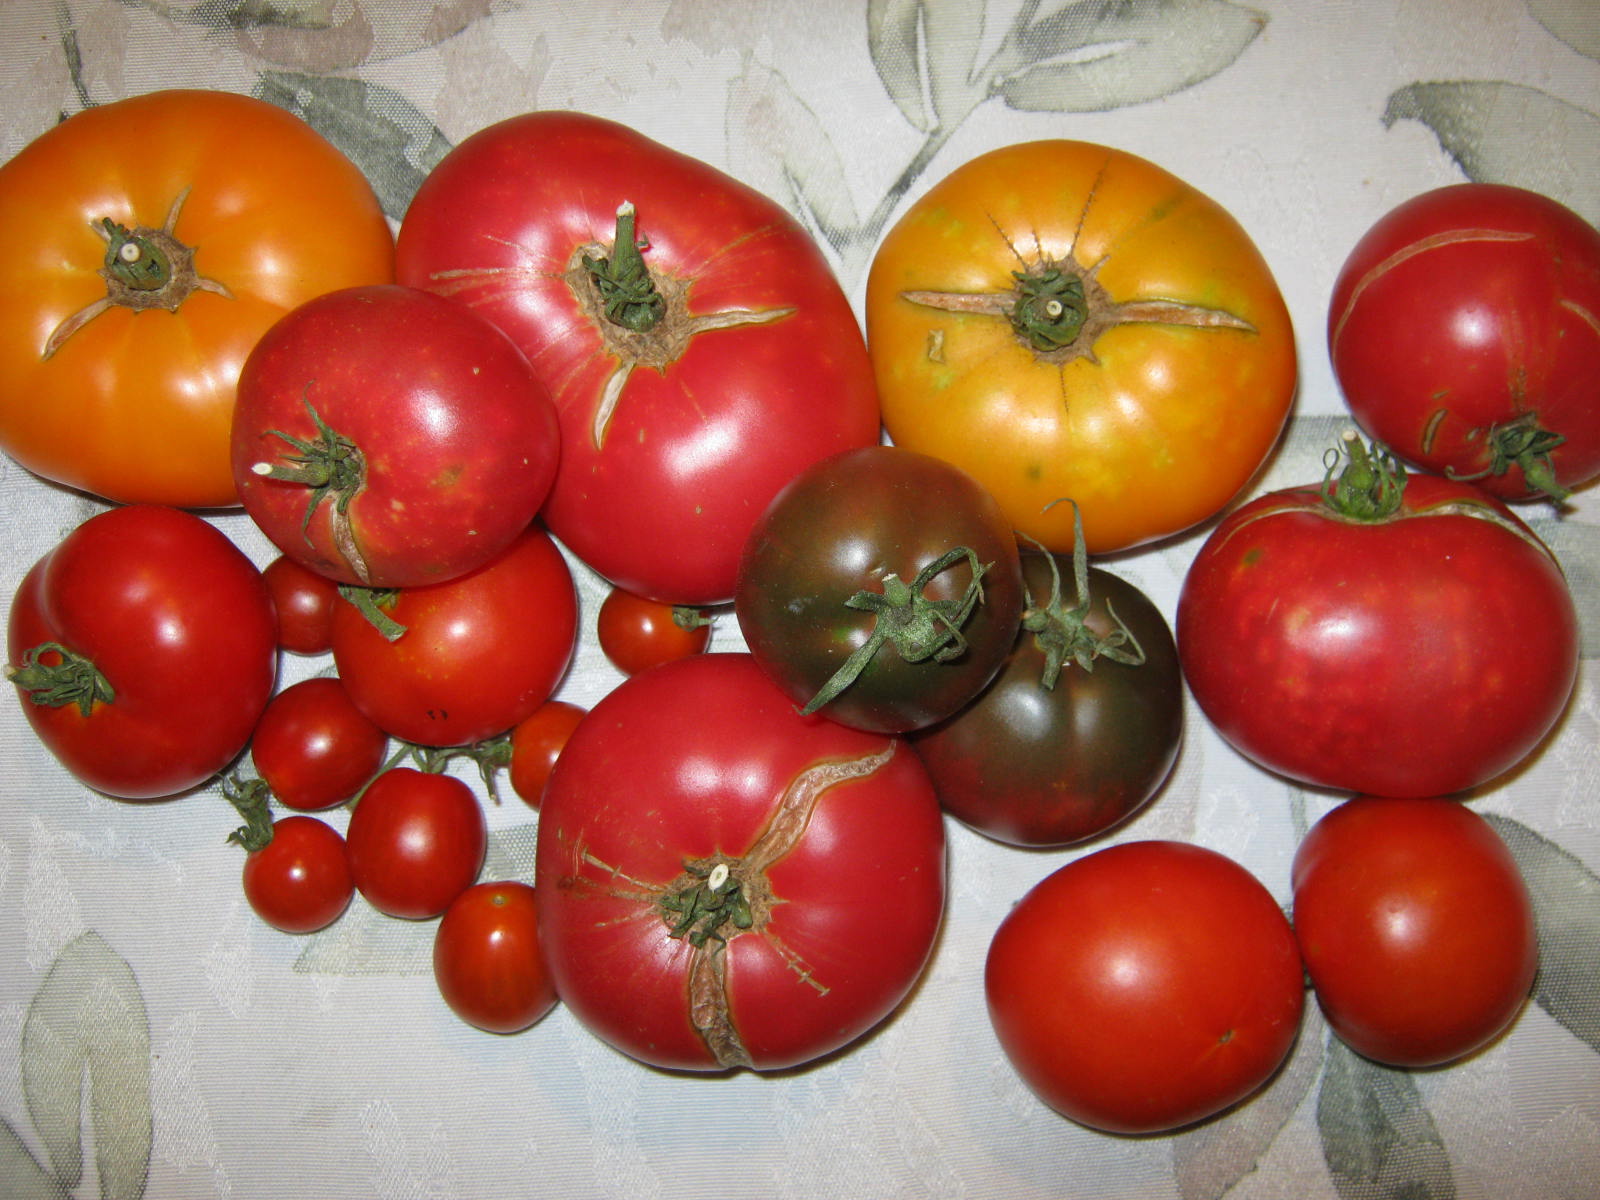
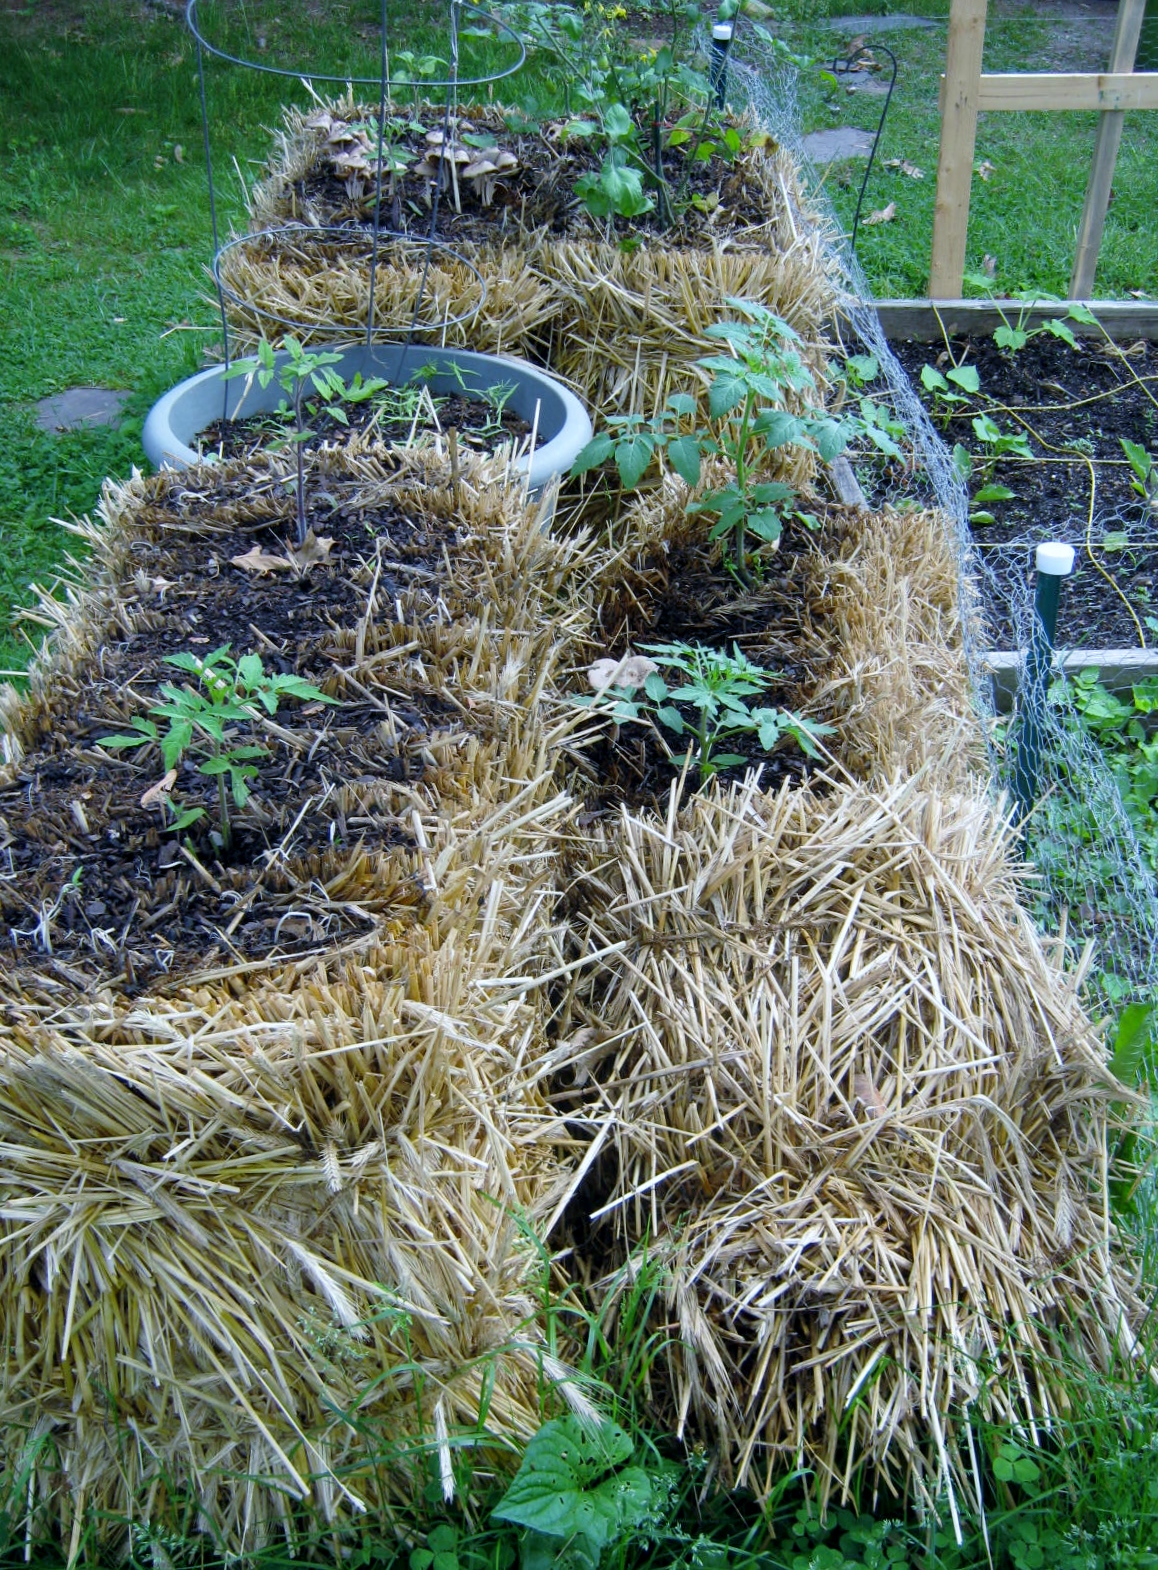
The Tomato Transplants in the Straw Bales are doing very well, so are a crop of mushrooms. The mushrooms sprout up overnight and succumb to the heat of the afternoon sun. They don’t seem to be doing the tomatoes any harm. This new technique of growing tomatoes has been a lot of fun.

IMG_5856

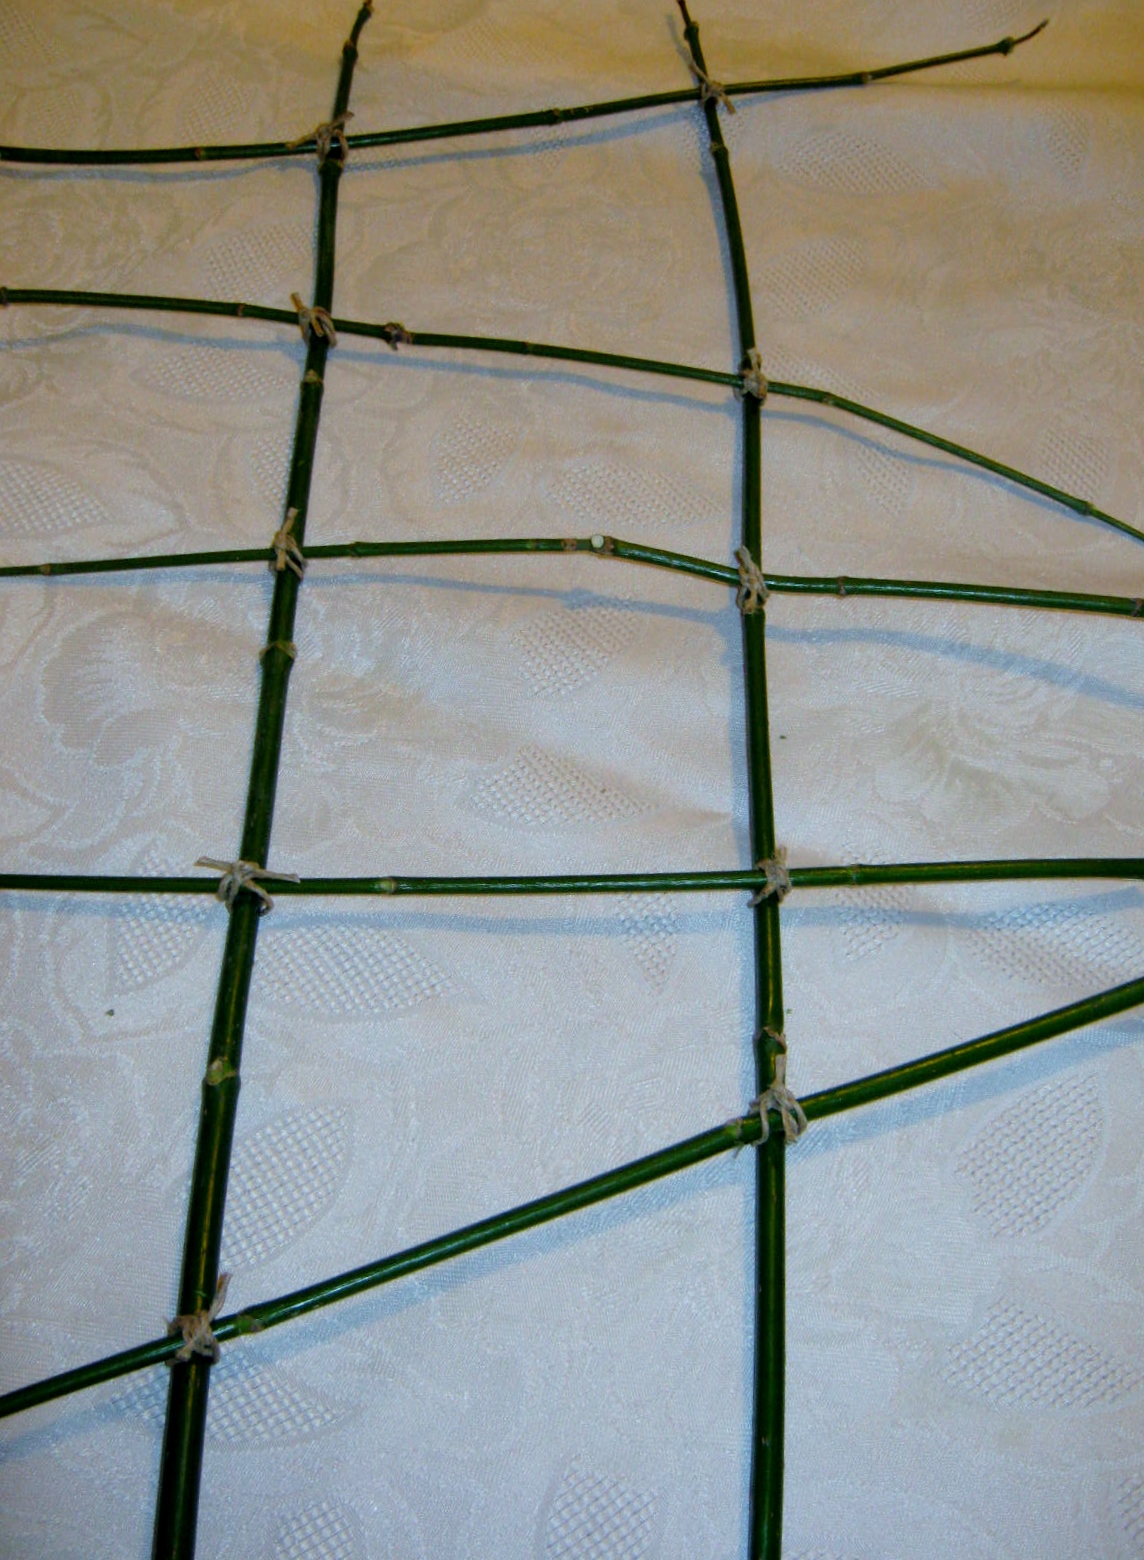
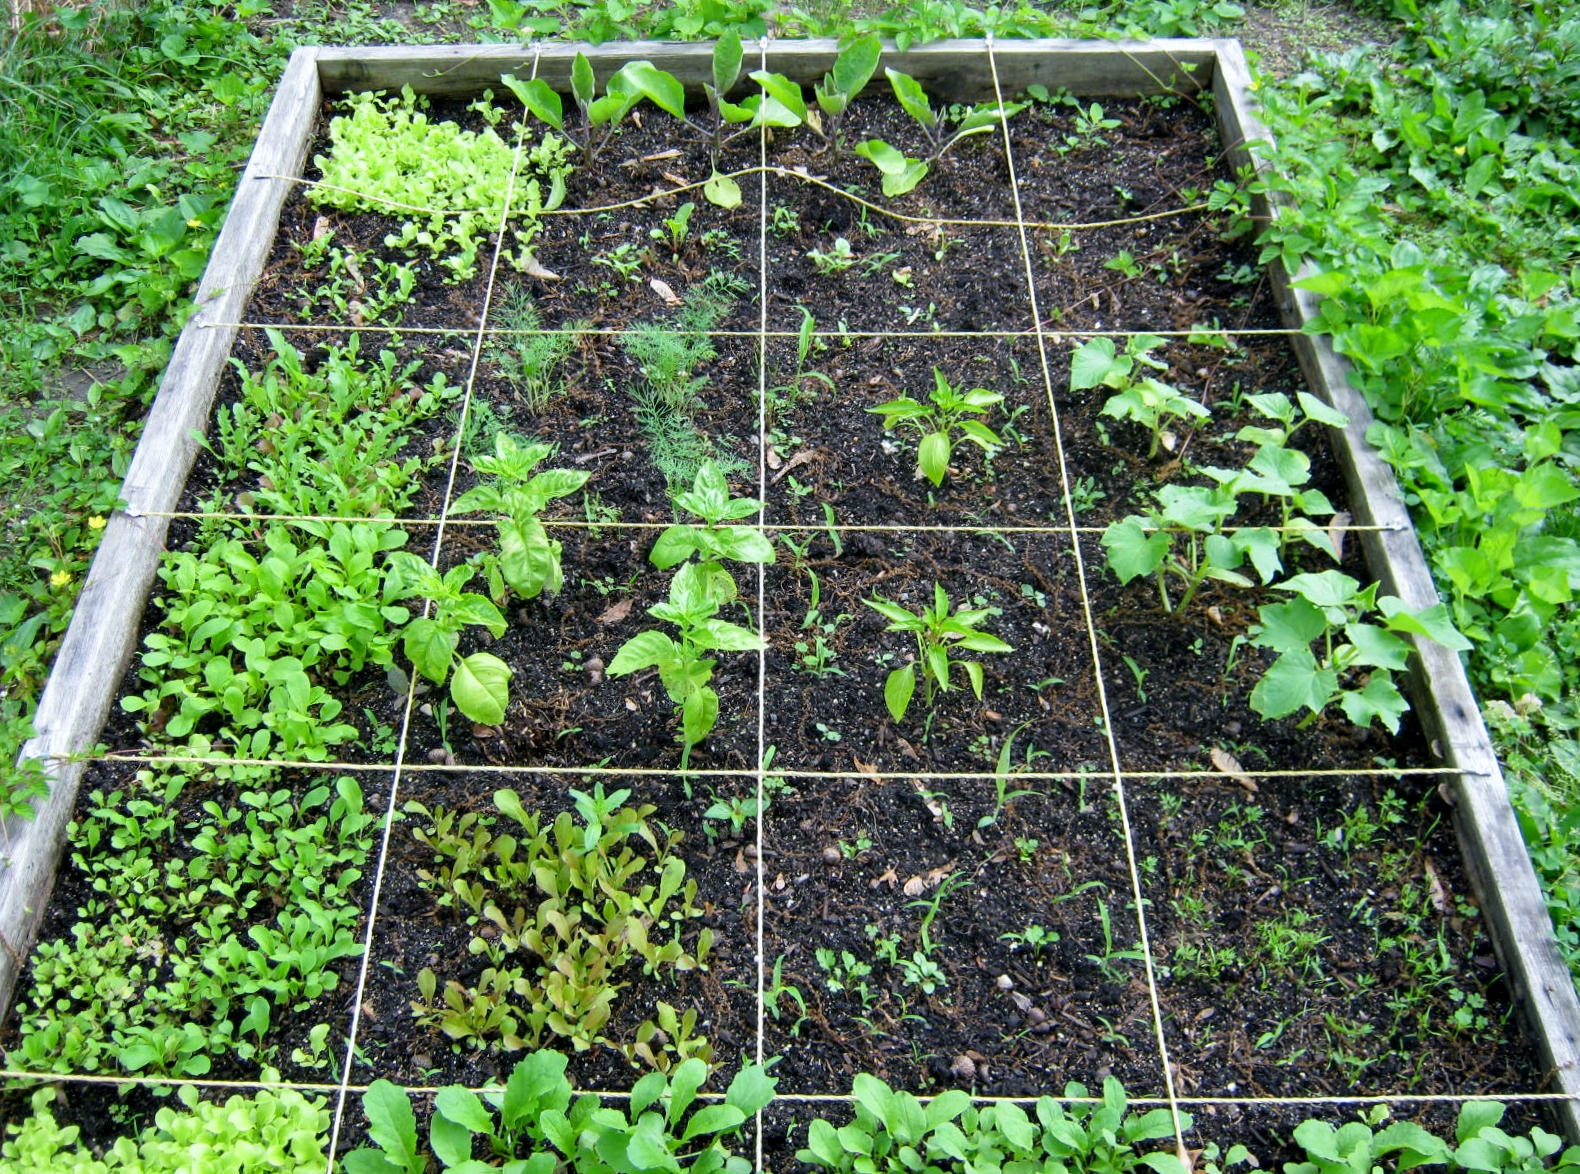
The Square Foot Gardens are up and doing well.

IMG_5936

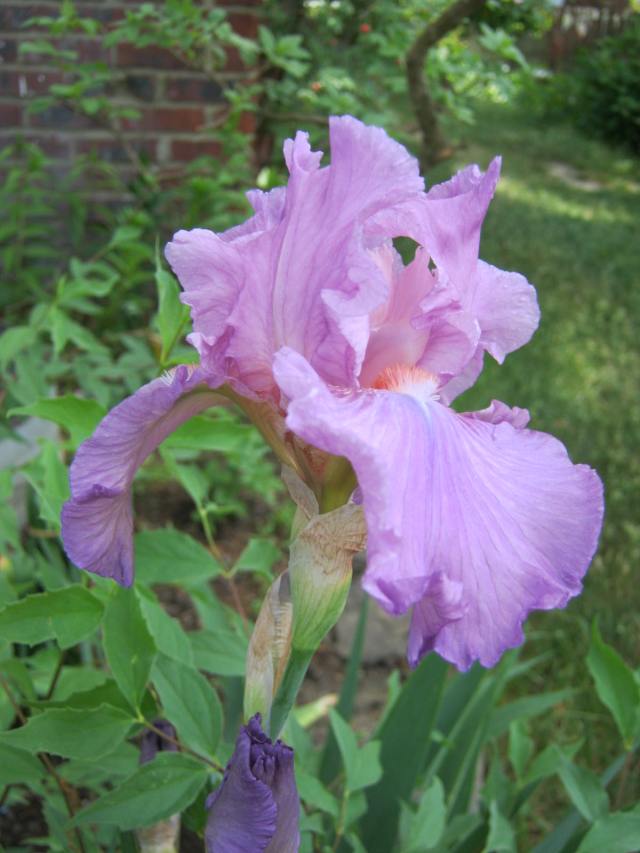
Our Iris plants in this area are blooming weeks later than usual. Here is my favorite. I can’t remember the name, but oh the joy I feel when it unfurls its amazing pink petals. The blooming of this beauty prompted me to go on my yearly “Iris Hunt.” My “hunt ” is a long, circular bike ride through all the surrounding neighborhoods to find and photograph as many gorgeous Iris as possible. More on this at a later date. Thanks for looking, and thanks to those who have been asking me for this garden update. Blessings on your day!

Phlowers, Plants and Pressing – Scented Geranium

Scented Geranium in Hanging Basket
Scented Geranium in Hanging Basket Pot

I grew a scented Geranium last year called “Grey Lady Plymouth,” a rose-scented pelargonium.

“Pelargonium graveolens ‘Grey Lady Plymouth’. A wonderful rose-scented variety whose large, sage-green leaves have a hint of white around their margins. Height is 2 to 3 feet. Lavender flowers.” ~ DeBaggio’s Herb Farm & Nursery

Because I was so in love with the plant I brought the pot indoors in the fall, and also took some cuttings. The rooting did not take, but the plant thrived all winter in a sunny window. Grey Lady Plymouth is hanging on the porch now for a summer vacation. The plant is perfectly placed for rubbing the leaves as I walk out the back door

“Scented geranium care is pretty basic. You can grow them in pots, indoors or out, or in the ground. They prefer lots of sun, but may need some protection when the sun is at its strongest. They aren’t fussy about soil type though they don’t like wet feet.

Fertilize them lightly and sparingly while they’re actively growing. Scented geranium’s biggest downside is they tend to get leggy and need to be trimmed back to promote bushiness. Over-fertilization will only increase this problem.” ~ Gardening Know-How / Additional tips on growing scented geraniums.

Scented Geranium Flowers and Buds

Scented geranium are grown for their foliage, but I love their small, nickel-sized pink flowers too. They are unique and press perfectly for pressed flower crafting. Because they bloom sparsely, each blossom is worth saving. I press these inside absorbent old books, and also use the microwave method of pressing. Microwave the flowers inside rubberbanded books for only 15 seconds. The foliage of scented geraniums does not press well for me using any method.

If you have a chance to purchase a scented geranium this growing season, I guarantee you won’t be disappointed.
Martha Stewart’s tips on using scented geraniums.

Plants – Updates/A Bit of This and That

Several of my past projects are thriving, or at least still growing.  The Meyer Lemon Seed sprouts are deep green and perky in appearance, but growing very slowly.

IMG_5544
Growing a Meyer Lemon Tree from Seed

One of my Carambola seeds finally sprouted after many weeks sown in potting soil. I was about to give up on this planting attempt, but saw green just in time.

IMG_5540
How to Sprout a Carambola Seed

In a day or two after sprouting the seed fell away and tiny fronds emerged.

IMG_5547

My Coleus seeds, sown in January, are showing many colors, but in sync with the carambola and lemon sprouts, growing slowly. This week I will take the seedlings outside to the screened in porch and let them begin the hardening off process. If there is a forecasted frost I will keep them in the garage overnight. Coleus are extremely susceptible to cold temperatures.
How to Grow Small Seeds/Coleus

IMG_5548

Are my Morning Glories blue or pink? The stray pink Morning Glory was a fluke, most of the flowers are blue. Unfortunately, in their quest to face the sun, the plants and flowers grew toward the window. I decided they would create a better display outdoors.

IMG_5513

I had to be ruthless and cut the vines and flowers off at the top of the pot, leaving many inches of vine to wither on the venetian blinds. The Morning Glory plants will be better for the harsh pruning. Each cut vine will branch out in many directions.

IMG_5541

This weekend I gridded and planted a few squares in my Square Foot Gardens. I forgot to take a picture afterwards, so the only image I have is from this morning, taken from my upstairs window in pouring rain.

IMG_5546

Happy Gardening my friends!

Plant & Painting – Dahlias/Update & WetCanvas April Plant Parade

IMG_5519

My Dahlia Experiment is succeeding at an astonishing rate. One of the tubers has grown into an eighteen inch plant with many of the others following close behind.

IMG_5522

All six tubers have sprouted. It’s time to repot one more time into individual containers. I will grow the dahlias on in these containers until there is no danger of frost. At that point I will transfer them into my garden beds.

IMG_5521

As I stated in an earlier post, my reason for starting the tubers indoors is the dahlia in the photograph below. I purchased this plant from a nursery several years ago. I’ve never had a better blooming dahlia, and I’m hoping for the same success with the tubers I started early.

IMGP3405

The WetCanvas plant parade flower for April is the Dahlia. Here is a link to the thread and the information.

WetCanvas Plant Parade – April 2015/Dahlias

GUIDELINES FOR POSTING IN THE WETCANVAS PLANT PARADE


“Please don’t post your paintings until 25th April, which is “reveal day”. It’s much more fun if we all post our paintings on more or less the same day. So when the 25th rolls around wherever you are…post your painting/drawing of Dahlias then.

You can draw, paint, sketch etc, use any medium you wish and change the photos as much as you like. You can zoom in add 2 photos together etc but make sure your flower is this months’ subject THE DAHLIA

You can ask any questions, discuss anything to do with this Plant Parade and generally enjoy talking to other members about it BUT please don’t post your artwork until 25th April.”

Here are two of the reference dahlias for the April Plant Parade courtesy of Vivian Maloney.

Dahlia - Courtesy of WetCanvas and Vivian Maloney
Dahlia – Courtesy of WetCanvas and Vivian Maloney
Dahlia - Courtesy of WetCanvas and Vivian Maloney
Dahlia – Courtesy of WetCanvas and Vivian Maloney

Perspective, Plants & Quick Tip – Delightful Dilemma/Geraniums

IMG_5499

I have a delightful dilemma for this coming gardening year. Do I keep my geraniums indoors or let them have a grand vacation outdoors? This would not be a question in past years. Previously, I have stored my geraniums in the winter with bare roots boxed and in a cool place. They often live in this dormant state, but they don’t thrive as they have done this year.

IMG_5498

In the summer of 2014 I grew all my geraniums in pots and decided against pulling them out of the soil for storing. I saved the plants by growing them over the winter in my sunniest window.

IMG_5497

One of the geraniums has reached amazing heights, and I don’t want to cut it back, but I know if placed outdoors the summer winds and storms will certainly knock it over. And there you have my delightful dilemma, do I take all of the plants outdoors, or do I keep the best ones inside and maintain their pristine condition? Hmmmmm….maybe I will split them up and take note of the results for next year. Updates will follow.

Quick Tip: When your geraniums bloom indoors they will eventually lose all their flower petals. Be very careful not to vacuum these with the vacuum flush to the floor. The geraniums will stain your carpet and the color is hard to remove. I know this from experience of course! 😦 Walking on one accidentally will have the same effect.

Plants – Morning Glory Blossom

Morning Glory Flower

In January, I posted on “Sprouting Morning Glories.” Today the first flower burst into bloom.

MORNING GLORY BUDDING

The vines are covered with buds. The fact behind this surprising abundance is morning glories grow lush vines in good soil, and produce more blooms than foliage in poor soil. Since each pot has five plants crammed into it, root space is at a premium, consequently the plants feel their survival is in jeopardy and they bloom for seed production, rather than wasting their energy on leaves.

MORNING GLORY BUDS

The vines are using my venetian blinds as support and are happily climbing and twining up the slats, strings, and closure fixture.

MORNING GLORY VINE

I was surprised when the “Heavenly Blue” variety of morning glory bloomed pink. This could be due to growing indoors, or it might be the blossom of the one “sport” seed that grew different shaped leaves.