Pleasures & Plants – Volunteers 2014

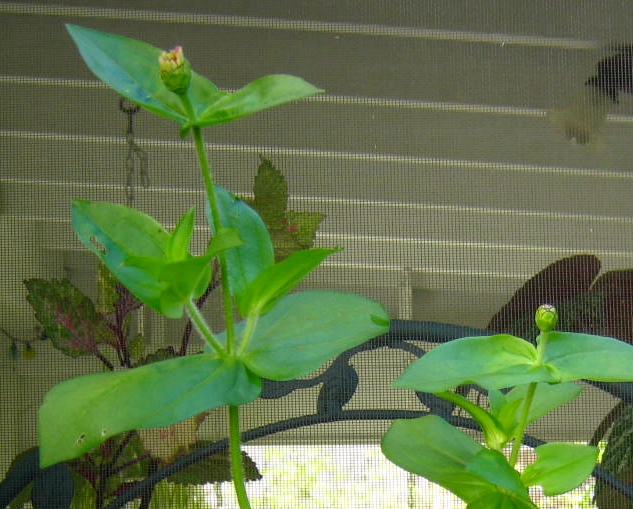
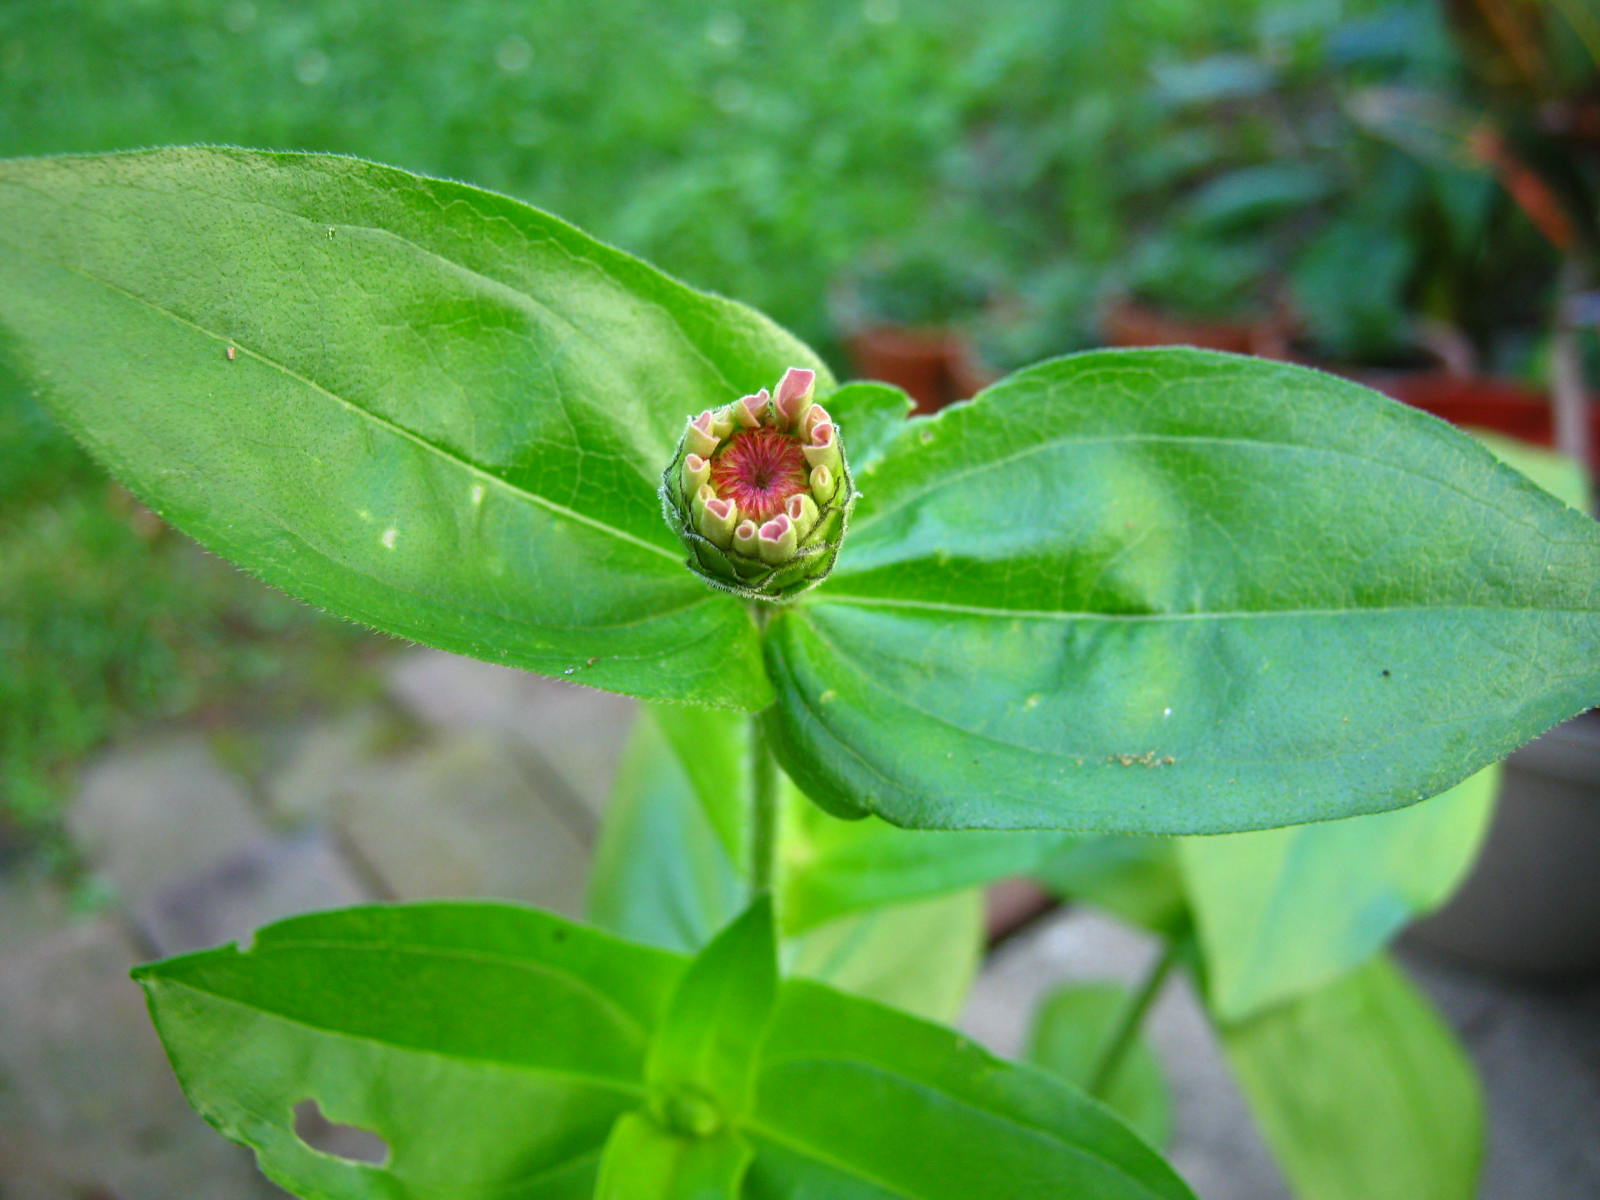
In blog posts of past years you will find me praising the season’s “volunteer” plants. Volunteer plants are those whose seeds have slumbered in the earth through the winter. These seeds spring to life when the temperatures become warm. Volunteer plants are one of the top reasons I don’t mulch my flower beds. Besides being filled with unwanted chemicals and dyes, a heavy layer of mulch smothers any hope of volunteer sprouts seeing the sun.

IMG_1439

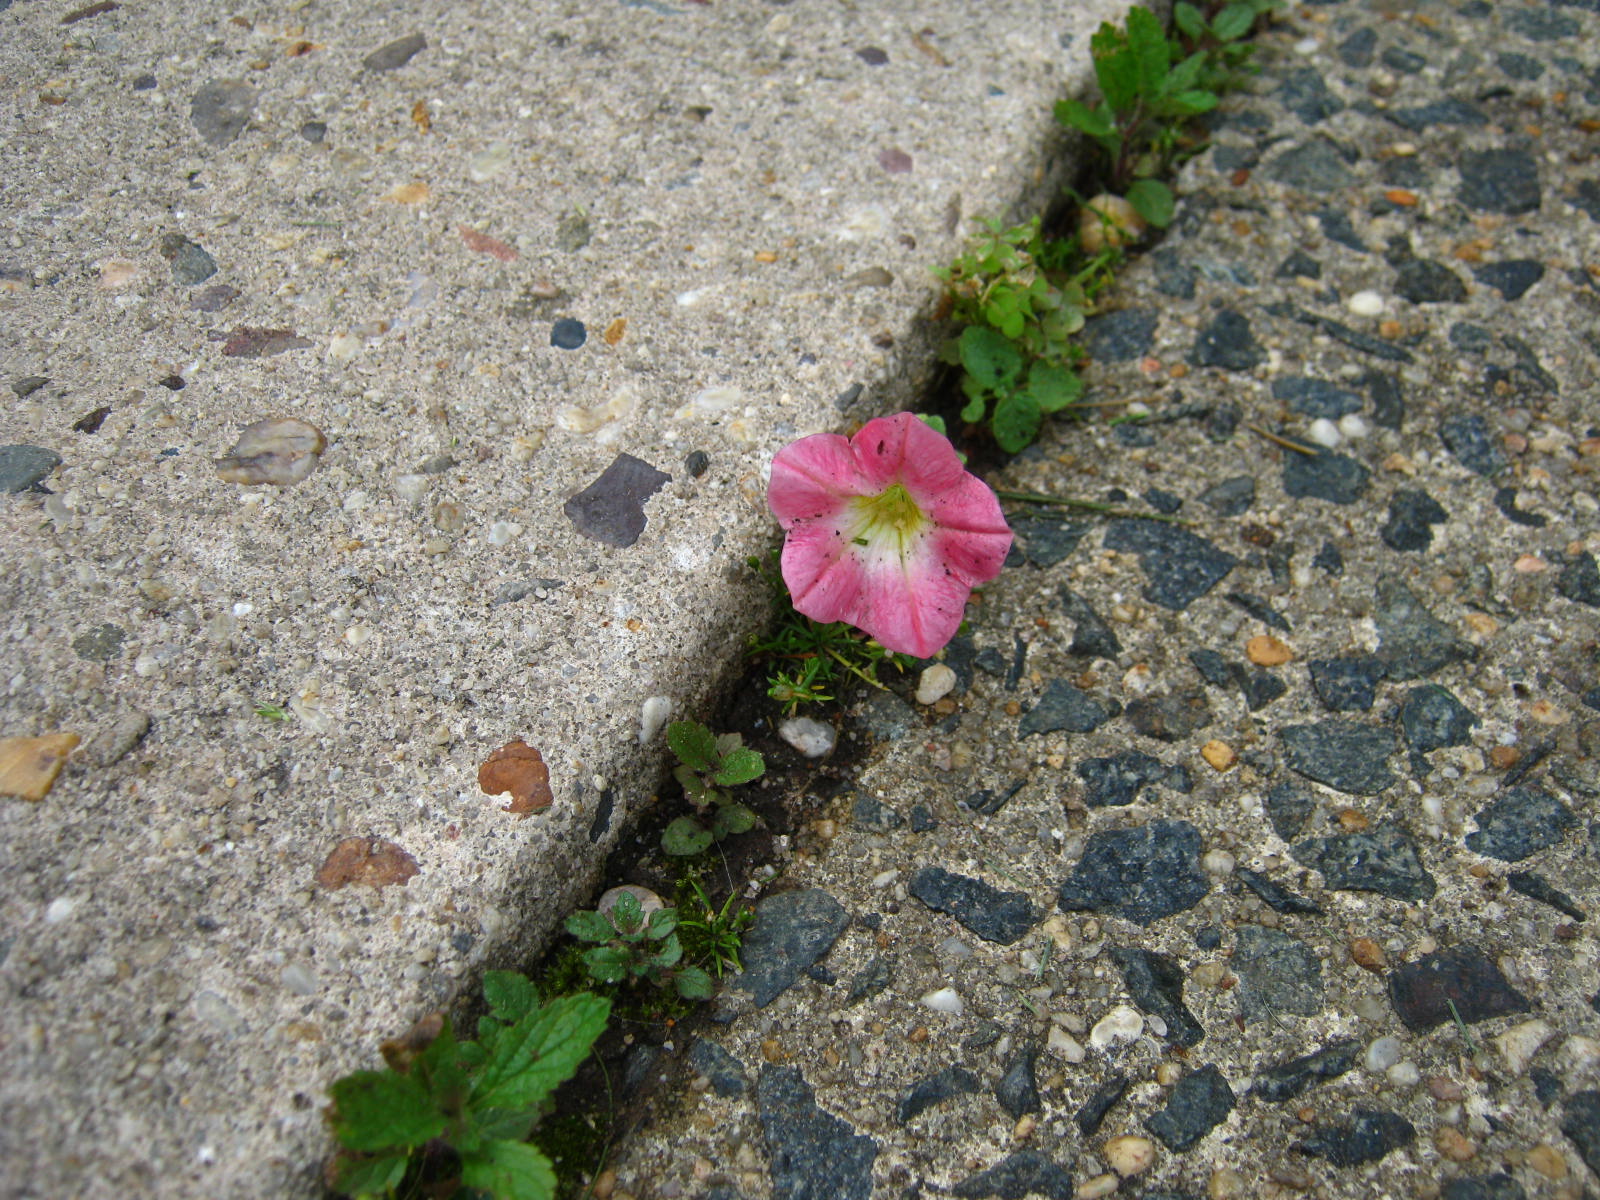
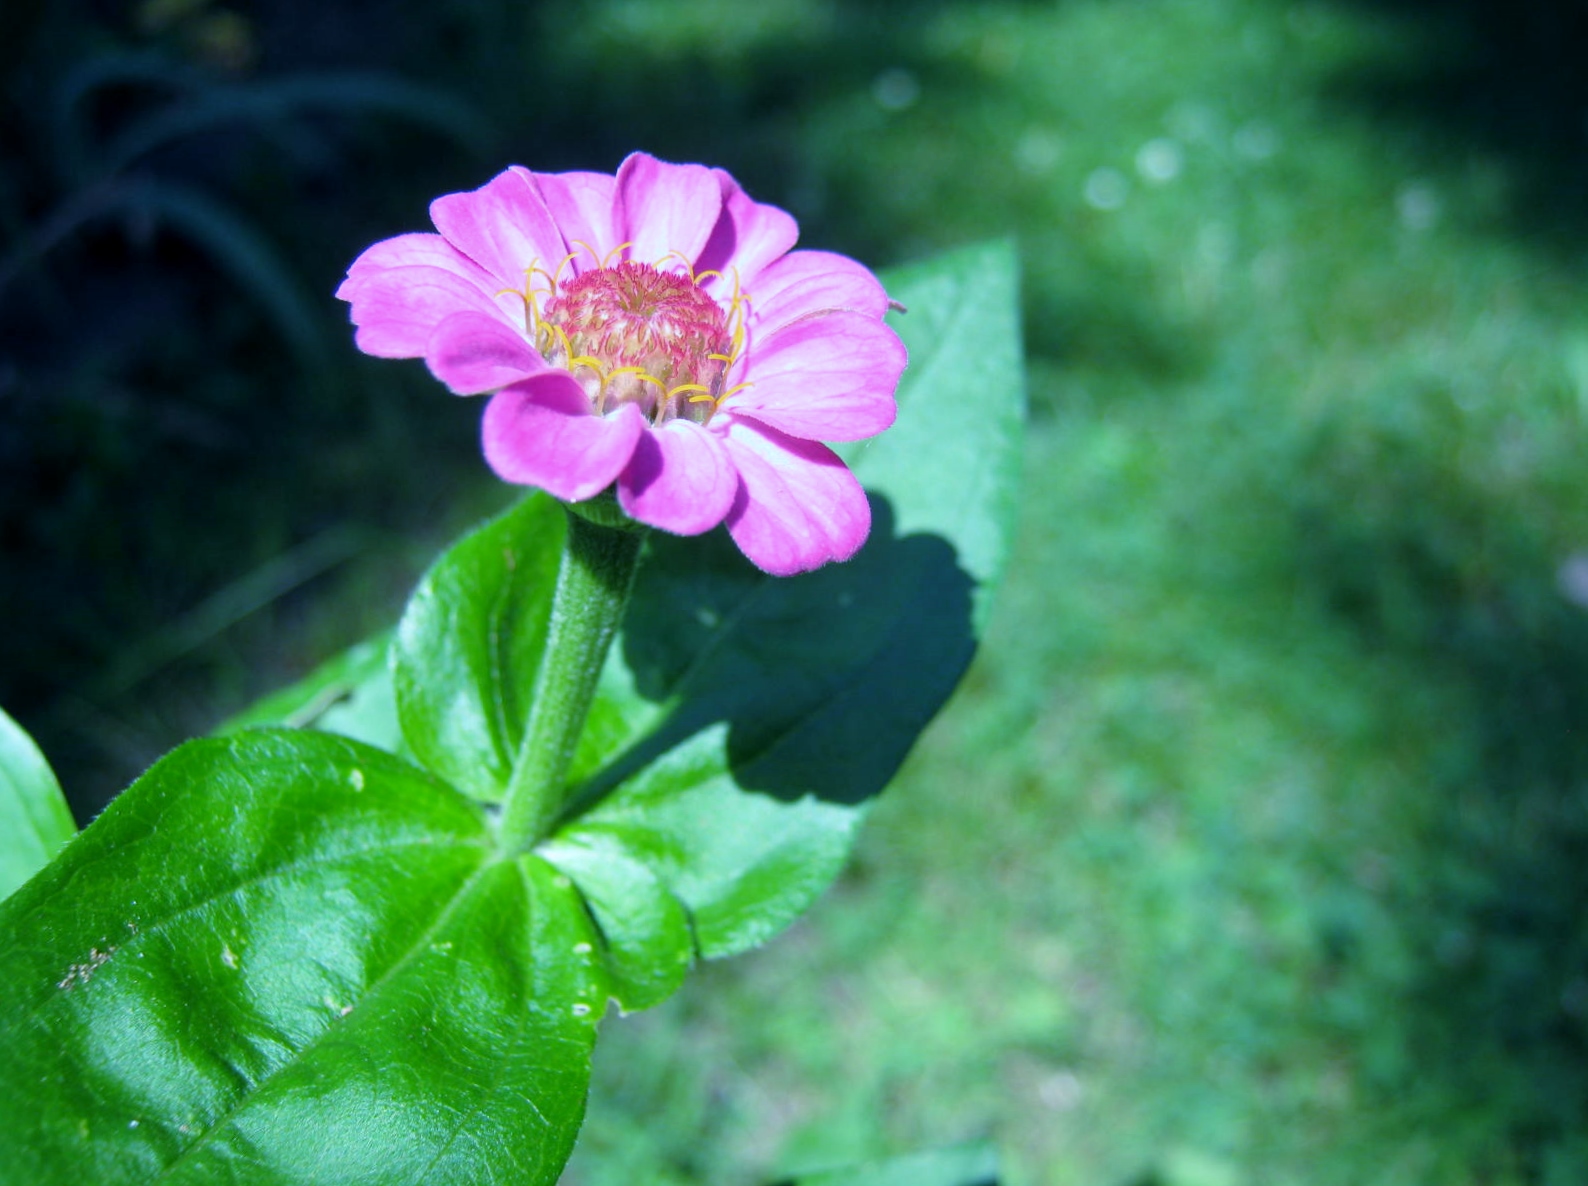
When I spotted the pink trumpet of this petunia growing in the crack of my front sidewalk I was astounded. How had the small plantlet survived the tromping feet of my grandchildren, the mailman, myself and my husband, and other visitors who come to my front door? I knew I had to try and save the petunia. It was definitely living on “borrowed time.” Sooner or later the sole of a shoe would smash it’s tender blossoms and leaves into the unyielding surface of the concrete.

I knew that pulling the petunia from the scant dirt between the sidewalk blocks would be doom. The roots that it had so steadfastly sent into the soil would be torn away and the plant would wilt and die within an hour. What was the solution? Perhaps I could loosen it a bit with a plastic knife, and then gently tug until I could pull it away from the confines of the concrete.

IMG_1440

IMG_1441

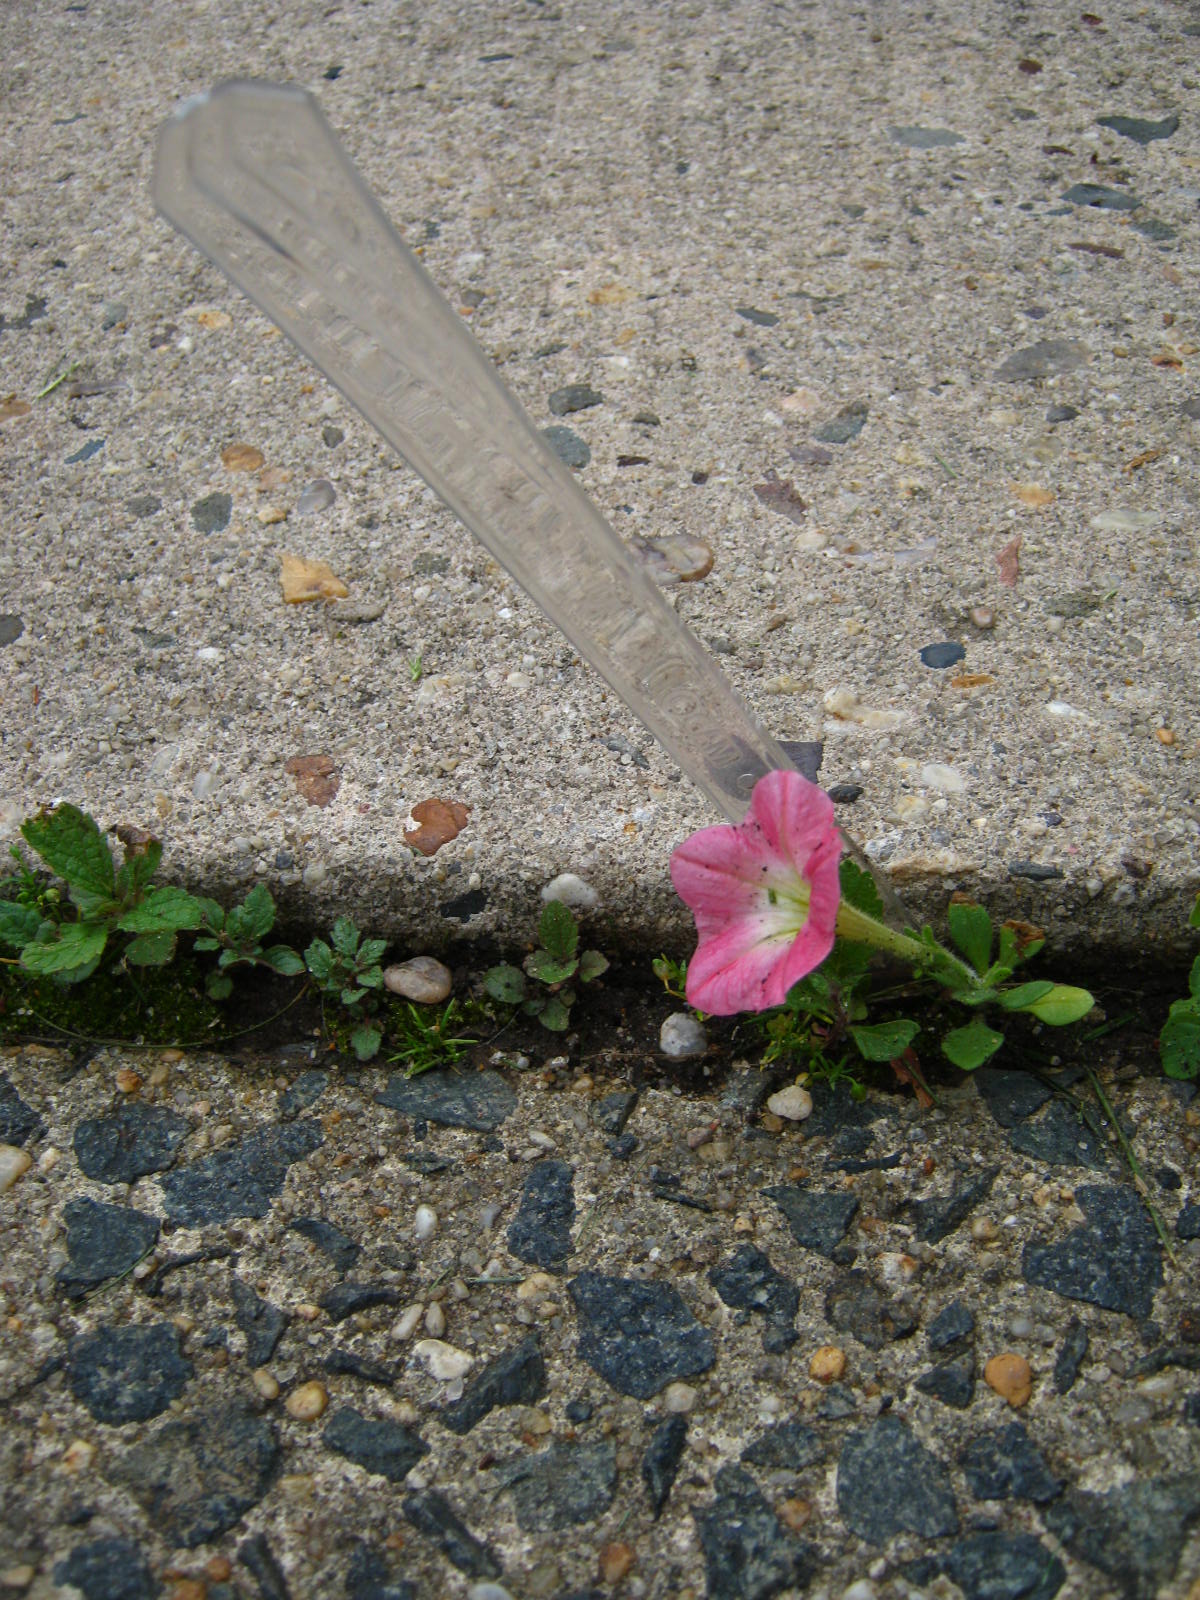
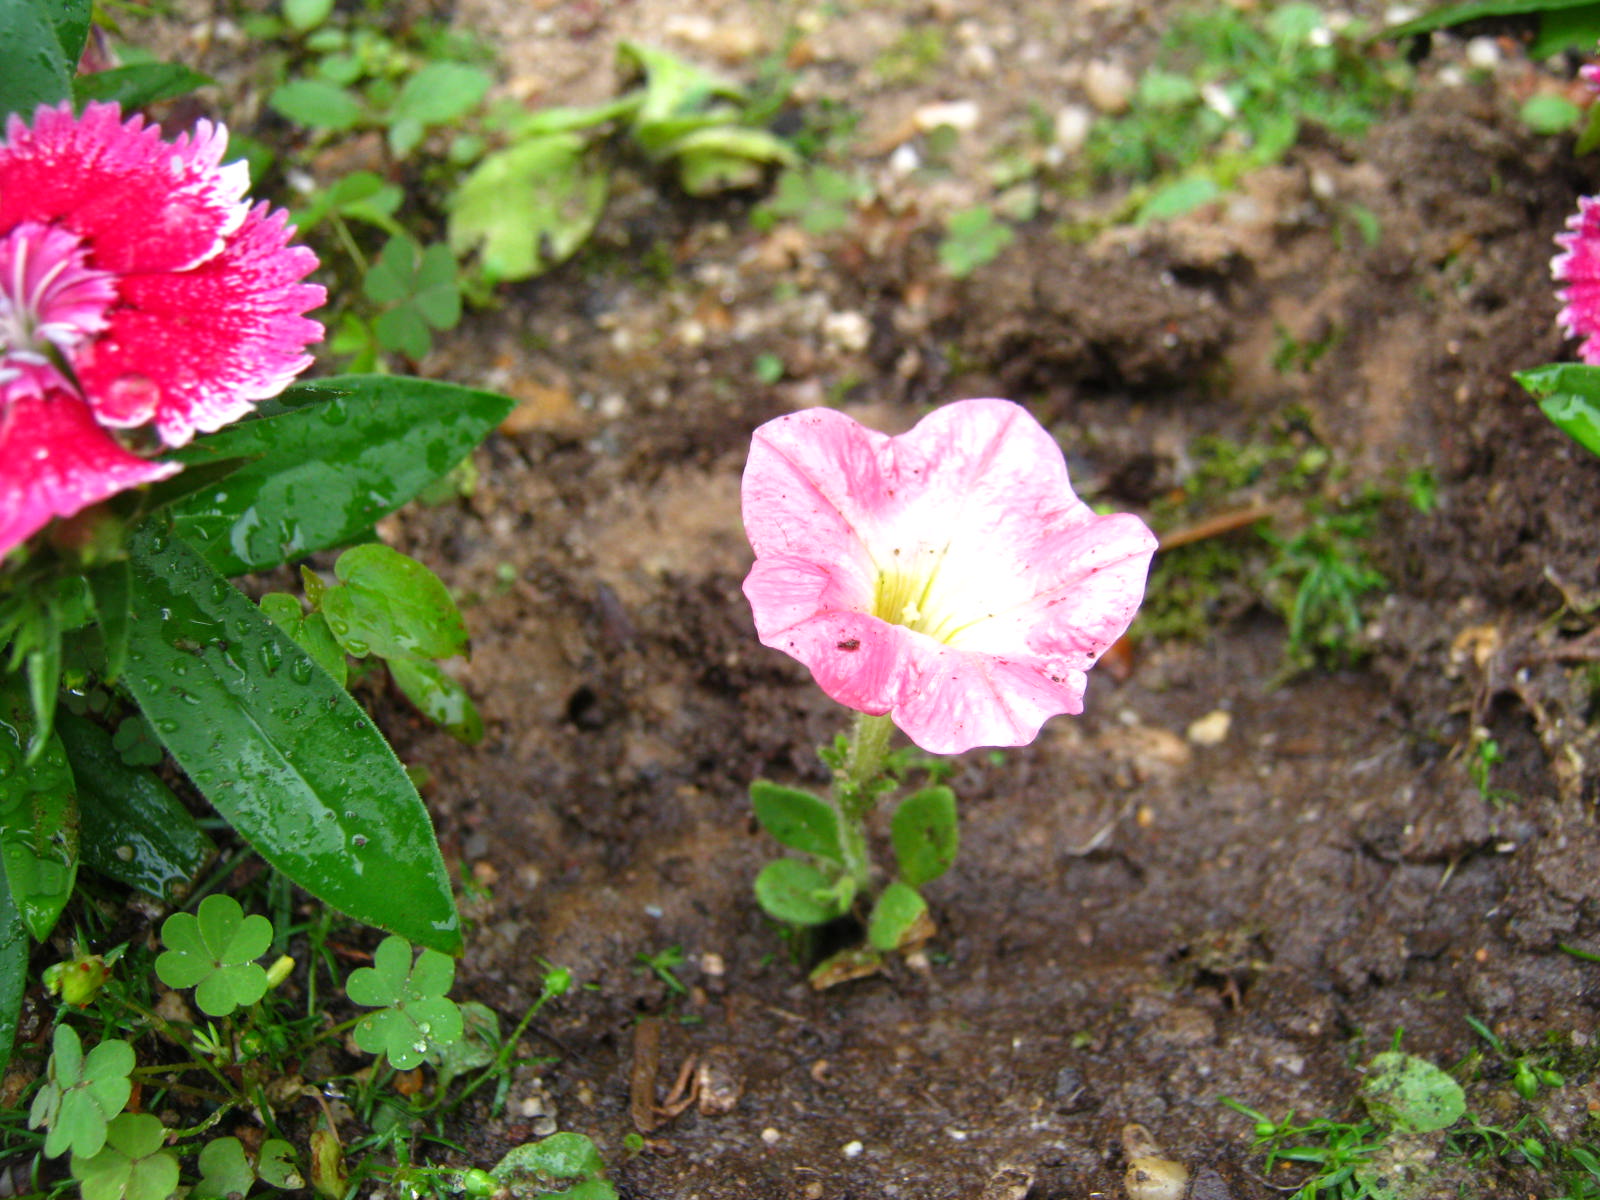
Happily, for both of us, the knife worked. The plant loosened its grip, I tugged, it left its first home. The small petunia is now planted in a bare spot in my front garden. After the passing of several days, it is still alive and thriving in the hot summer sun of June.

IMG_1444

I have dozens of volunteer plants springing up in my gardens. At times I let them grow where they have begun, but often I dig the sprouts up and move them to bare spots. Happy Gardening!

IMG_1450

IMG_1447

IMG_1460

Check out this terrific article on the Mother Earth News Website: Volunteer Plants: A Garden Bonus

Planting & Pleasure – Anticipation

I grow the type of garden kind people would label a “tapestry” garden. Acquaintances who are blind to the charms of my flower beds might call it a tad “unruly.” Those who are hard-hearted garden snobs would snort and pronounce my gardening endeavors as being in serious disarray, not well-planned or color-coordinated.

Perhaps all of the above are correct, except for the accusation my gardens are not well-planned. They are very well-planned indeed. You see, I LOVE not knowing exactly what color most of my annual flowers will be when they burst into bloom. Case in point, the zinnia in the photographs below. As the tips of the petals emerged, the joy and anticipation that filled me was intense. In a few days I knew I would see the color of the zinnia. I love a surprise! I wasn’t disappointed when the zinnia bloomed. What a gorgeous shade of pink. I’m thrilled for I have several weeks to enjoy watching annuals and wildflowers burst into bloom. Oh my…I could shout aloud a “Hallelujah!” for the joy of it. Happy Gardening!

IMG_1473

IMG_1472

IMG_1527

Photographs – Welcome Summer/A Bird’s Eye View

IMGP3737
Welcome Summer! I love this view from the bridge that crosses from Corson’s Inlet State Park to Strathmere, New Jersey.

IMGP3738

Pots & Pans & Plants – Crockpots and the Joy of an Herb Garden

IMG_1433

Over the years I have grown herbs, both culinary and medicinal. I use my fresh herbs constantly. During the last few winters I have been able to purchase organic herb plants in the produce section of my local grocery store. I now use fresh herbs year-round.

In the summer I am often busy and need to make a quick meal that will not heat up the house. To cook a delicious and super-easy dinner, I place four turkey legs and a dozen small red potatoes into my crockpot. I add about a cup of water to these ingredients. As the turkey cooks juices will mix with the water and create a delicious broth for gravy. Salt, pepper, a touch of garlic powder, and some wedges of onion complete the meal. Cook on low for 7-8 hours, or at high for 5-6 hours. The house will smell like Thanksgiving even if it’s summertime. An added bonus for me is heaping the top of my food with freshly-picked herbs. The herbs in this photo are: chervil, oregano and thyme. (Sage & parsley are great additions too.) The smell is intoxicating. Happy Cooking!

⭐ This crockpot meal will feed four adults. It is easily halved for two people. The amount of water added should stay the same.

Follow Me on Pinterest

Plantings – Fruit and Vegetable Seeds/Pineapple

IMG_1302

My older grandsons love planting different seeds and plants with me. I thought as a goal this summer we would try growing a seed, tuber or sprout from every fruit and vegetable we eat. A good fruit to start with is a pineapple. I bought a large and succulent beauty this week, on sale for $1.99 at the local grocery store.

For tips I went to Pinterest first and discovered a wealth of information. You can check out the many “pins” on pineapple planting here: Pinterest Search on Pineapple Planting

I found there are two ways to plant a pineapple top…directly in soil, and by soaking in water. Here are links to both ways:

Growing Pineapple Top in Water
Planting a Pineapple Top in Soil

We will attempt to plant in dirt first. This involves cutting off the bottom of the pineapple (eating the yummy fruit afterwards as baked pineapple casserole,) soaking in a bit of water, finally placing the stem end in potting soil.

IMG_1304

I cut the top off and let the fruit dry for a day or two. The next step was to soak the dried out bottom in water. When I checked the progress a day or two later the fruity portion still left on the stem promptly fell off.

IMG_1307

I soaked the bottom of the stem in water for a few more days.

IMG_1362

When the time came to plant the stem my grandsons helped me remove more of the bottom leaves. PSHEW! There was a bit of a rancid odor when these leaves broke away. I think a bit of decay might have set in while the stem soaked in water. Perhaps I should have shortened the soaking time.

IMG_1364

Denuded of bottom leaves, the stem had a promising look.

IMG_1366

Now for the fun part, planting the stem in the potting soil. We used a big pot. The pineapple will grow very large and bushy. I want plenty of weight on the bottom to keep the plant from tipping over.

IMG_1368

We were pleased with the finished appearance of the potted pineapple. Even without new growth it is an interesting plant. Updates to follow on the progress of our experiment.

Follow Me on Pinterest


Prose – Chosen by a Horse by Susan Richards

susan richards

I loved this memoir written by Susan Richards telling the story of her rescue horse Lay Me Down. A terrific book.

People – Oswald Chambers

Excerpts from the June 14th devotional in Still Higher for His Highest:

“The prayer of the feeblest saint on earth who lives in the Spirit and keeps right with God is a terror to Satan. The very powers of darkness are paralysed by prayer…”

“No wonder Satan tries to keep our minds fussy in active work till we cannot think in prayer.”

“The philosophy of prayer is that prayer is the work.”

Image (2)

I have read devotionals written by Oswald Chambers for a few decades now. Chambers was born, the son of a Baptist minister, in Aberdeen, Scotland in 1874. He originally trained at London’s Royal Academy of Art, but felt called into the ministry. His life story is told in the book, Oswald Chambers: Abandoned to God. He died in November of 1917. His books are still in print all over the world. My favorites: My Utmost for His Highest and Still Higher for his Highest.

Here is a link to the bio on the official website: Oswald Chambers Bio

Peculiarities – Horseshoe Crabs

My beautiful picture

Horseshoe crabs are becoming a common sight once more along the beaches of the Delaware Bay. At one point in time they were severely endangered due to being used as fertilizer and bait for eels and whelks.

myrna 002

A female lays between 60,000 to 120,000 eggs in a season. These eggs are important not only to further the population of horseshoe crabs, but also to provide food for endangered migratory shore birds.

Horseshoe crabs breed in shallow waters and lay their eggs along the beach. They easily upturn in the surf and it is not an uncommon sight to see dozens on their backs along the shoreline. Volunteers gather during mating season to turn the horseshoe crabs right side up again. You can read about their efforts here: Volunteers Saving Horseshoe Crabs

Although we weren’t part of a group, last year my cousin and I flipped all the upturned crabs we found back on their feet, or would that be legs…or claws? Anyway, we turned them right side up again. Unfortunately, several flipped onto their backs again with the next incoming wave. Still, I’m sure a few survived because of our efforts.

blog 001

We were really hungry after our rescue mission, and went to a terrific little bayside cafe called “The Landing.”

Plants – Bougainvillea

IMG_0584

I love Jamaica and the beautiful tropical plants and bushes that grace the landscapes and beach areas. One of my favorites is the bougainvillea. Last year I was able to purchase plug/starter sprouts of bougainvillea. Each plantlet was about twelve inches with a spray of flowers on the end. I planted them in a garden bed where they did fairly well. When the weather turned cold I brought them indoors. The bougainvillea are planted in pots this year, happily growing on my back porch.  New growth is beginning to form on the ends of their branches.

IMG_1330
My garden bougainvillea

Bougainvillea grow outside year round in some of the sub-tropical regions of the US. Here is a website with terrific facts and tips on how to grow this beautiful plant. How to grow Bougainvillea

Jamaican Bougainvillea plants

IMG_0788

IMG_0789

IMG_0787

The plants can also be found in some nurseries and garden centers. If you are lucky enough to run across one of these plants give growing one a try.


Planting – The Great Tomato Saga Part III – To Fertilize Or Not To Fertilize?

IMG_1340

I have over a dozen tomatoes planted in my Square Foot Garden. I started them from seed in the house this year. The tomatoes are doing okay, but not producing growth to rave about.

IMG_1338

The potted tomatoes were sown from the same seed packets, and grown in exactly the same conditions. The only difference is that these tomatoes are planted in pots of Whitney Farms Organic Potting Soil. This is a terrific soil loaded with natural fertilizers. OH MY! Compare the color of the leaves to the first photograph, and take a look at the size of the plants. The tomatoes in the pots are much greener and in some cases more than double the size. The potted plants are already setting blossoms. In hopes of helping them catch them up, I side-dressed the Square Foot Garden plants with organic fertilizer. I think in the case of the tomatoes I need to do a little bit more than the manual recommends. I’ll update in a few weeks.


Quirkiness – The Great Tomato Saga Part II – The Junque Trellis

I was inspired by the video I posted yesterday on suckering and stringing tomatoes. Over the weekend I decided I MUST try stringing, suckering and fertilizing my tomatoes more diligently this year. The fertilizing was easy. I already had an organic tomato and vegetable fertilizer from Whitney Farms on hand. I side-dressed the tomatoes with the fertilizer, tilled the soil a little, and the first part of my goal was complete.

Suckering turned out to be pretty easy too. After watching the video I easily suckered every plant in only a matter of minutes. Figuring out how to string them for growing…hmmm…not so easy.

I didn’t want to spend a lot of money on creating/building a permanent trellis. I gave the problem some thought and remembered the mop handles I had saved from another project for garden stakes. Would these work? No, when driven into the ground they would be too short. What if I attached two together? I’d have plenty of height if this solution worked. How to attach them together though? Aha…DUCT TAPE!

IMG_1337

I went to the dollar store in search of more mop handles. I couldn’t find them, but I did find brooms that would unscrew easily leaving a handle for me to use. I also purchased some plastic spoons and two packets of thin little screwdrivers. This all cost me less than $20.00. The duct tape I had on hand.

IMG_1336

I constructed the trellis piece by piece from the ground up. I had no plan to follow, the process was a little bit like putting together Tinker Toys. (Oh my, I’m giving away my age) To strengthen the structure I added some old curtain rods taped on at the diagonal. My son, who is a builder, told me I needed to do this to keep the base steady. I also used curtain rods across the tops of the handles. Duct-taped again! An old sectional window frame was taped on top of the structure for stringing the tomatoes.

IMG_1341

My junque trellis is not pretty, but oh my, it is interesting! Best of all, the basic concept works perfectly. We have already had heavy rains and not a curtain rod or handle has budged a millimeter. I LOVE DUCT TAPE!

IMG_1343

How to anchor the sisal string beside each tomato plant was my next problem. I used spoons for the soil. I looped string onto the window frame first with a type of slip-knot then let the free ends dangle down and tied them to a spoon. I pushed the spoon into the soil beside the tomato and the string was anchored. I used small screwdrivers driven into the wooden slats for the tomatoes near the border of the garden.

IMG_1340

I’m hoping for hundreds of tomatoes. I want to give them away to everyone I know. If this one-season fix works for me then I will consider spending a larger amount of money for a more aesthetically appealing structure. Something portable, but also permanent in durability. I know that what I’ve built for this season will not last forever. Happy Gardening!

Follow Me on Pinterest

Gardening Tip: Dollar stores are terrific places to find unusual items to use in gardening. Take a look around your home too…you’ll be surprised at some of the “stuff” you have stashed away that will work as trellises, etc., in the garden.

IMG_1344

IMG_1345

Planting – The Great Tomato Saga – Part One

To all the fine bloggers out there in Blog-World, I thank you. You never know when a post might absolutely consume one of your readers. In the case of this past weekend, that blog reader was me. I happened upon a post on the blog Over the Fence Urban Garden and was completely captivated by a Youtube video they had embedded in their post titled, “Tomato Fingers.”

You can read the blog post here: Over The Fence Urban Farm/Tomato Fingers

IMG_1360

A little of my history in regard to tomatoes: Until I was forty or so I detested the look, smell and taste of tomatoes. A sandwich with just one tomato seed accidentally placed upon it was, in my opinion, RUINED. I am not alone in this. I married a man who felt exactly the same way. We both loved tomatoes in the form of cooked sauce, but raw…”Phooey!” Then…the strangest of strange events occurred. Where once I abhored raw tomatoes, I suddenly could not get enough of them! (Unfortunately, my husband’s taste buds have stayed the same. 😦 ) I bought them by the pound, and became an avid grower of them too. Tomato plants have never done that well for me though. I assumed all I needed to do was plant tomatoes in a decent soil and location, and they would grow. No…I have found tomatoes need a bit of coddling.

I grow my tomatoes from seed. They quickly sprout for me in a sunny window. They don’t grow fast in the house, but they do grow steadily. This year I had great success with my tomato seedlings, many of them heirloom varieties, and hated to give up even one to the compost heap. (Please read important note at the end of blog post on the composting of tomatoes) Instead I planted as many as I could into the soil of my Square Foot Gardens. Since all but one of the varieties I grew were indeterminate, (vining) I was able to plant one to a square. I figured I would use tomato cages again for support, as I did every other year. Then I came upon the terrific youtube video posted on Over the Gate Urban Garden. Maybe I have never had good luck growing tomatoes because I have never “suckered” them or “strung” them.

I have spent the weekend “suckering” and constructing a trellis to “string” my indeterminate tomatoes. The video is a little long, but absolutely full of information you might not have heard in the past about how to grow the perfect tomato. More to come on my “stringing” adventures in parts two and three of my tomato saga.

* Don’t compost any foliage of tomato plants unless you are SURE they are free of disease. Tomato plant disease is easily spread this way. Smokers should also not touch tomato plants unless they wash their hands first as tomato mosaic virus can be spread this way.

Place & People – Normandy France

NormandyPhotograph courtesy of Pampe/WetCanvas Reference Library

Today is the anniversary of the Invasion of Normandy. Gratitude should fill all our hearts today for those who served. You can read a brief history of Normandy here: Normandy

Pets – Grumpy People and Pets

IMG_8702

Rusty, our Maine Coon Cat, is a beautiful animal…but unfortunately when he isn’t hiding from the ringing of the doorbell or other “intrusive” noises, he is rather grumpy.

IMG_8695

My grandsons, even though they’ve received nothing but hissing and growls from Rusty, can’t seem to give up on him. Sweet boys…they create toys for him out of pipe-cleaners and talk to him with soft voices, precious overtures in hopes of making friends with him. Rusty’s response…well the old cliche a picture says a thousand words is the perfect explanation.

IMG_8699

Oh dear…it’s sad but true, you are never going to please some pets, just as you won’t please some people. Love them…but get over attempting to make them happy and move on. Happy Thursday to You!

Pots and Pans – Fresh Pineapple and Cheese Casserole with a TWIST.

IMG_1248

Pineapple on sale…only $1.99 apiece. Terrific! Only problem is I don’t like eating pineapple by itself…hmmm…grandchildren over for dinner, how best would they like to eat the pineapple? I decided on baked pineapple casserole. When I looked for a recipe on the Internet all I found were recipes for canned pineapple. Not an option when you have a gigantic pineapple waiting to be eaten. Finally on the site Big Oven, I found a recipe for a fresh pineapple casserole. You can find that recipe here: Fresh Pineapple and Cheese Casserole

I cut the pineapple up into small chunks as instructed, and began putting the casserole together, only to discover I did not have the proper ingredients. I had no Ritz crackers, and my shredded cheese was flavored for Tacos. RATS! What to do with all the pineapple I had cut? I decided to use what I had on hand. Soda crackers and the Taco flavored cheese would have to stand in for the proper ingredients. I also chose to add a bit of brown sugar to the recipe to mimic the richness of the Ritz Crackers.

Oh MY! The casserole was delicious. Everyone from young to well, hmmm…older, enjoyed the pineapple cheese casserole and asked for more. Here is my altered recipe. I am sure Big Oven’s recipe is terrific too since most of the ingredients listed were also in my casserole.

1/2 c Sugar
1/2 c Butter (melted)
1 c Fresh pineapple; chunks ( make the chunks smaller rather than larger, a few of mine stayed a little hard)
3 tbs Flour
1 1/4 Cups soda crackers; crushed into small and large crumbs
1 Cup shredded Taco seasoned cheddar cheese
2 TBS brown sugar

Preheat oven to 350 degrees and grease a 13 x 9 baking pan or dish. Mix sugar and flour together. Stir pineapple into the flour and sugar. Pour into a greased baking dish. (I like glass for this recipe, you can also use a large round casserole dish) Sprinkle with taco cheese in an even layer on top. Add 1/2 cracker crumbs dry, spaced evenly. Drizzle with half the melted butter. Mix remaining crackers and butter in small bowl. Sprinkle this evenly over top of casserole. Sprinkle 2tbs brown sugar evenly over the top of casserole. Bake at 350 degrees for 35 minutes until the topping is crispy and slightly golden brown with bubbly edges. Remove and cool till set. (10-20 minutes) The casserole can be served hot or at room temperature. This recipe reheats easily in microwave or stovetop. You also could bake it a bit, but it might dry out.