Problem-Solving – Repairing Resin Figurines with Bread Dough

IMG_4932

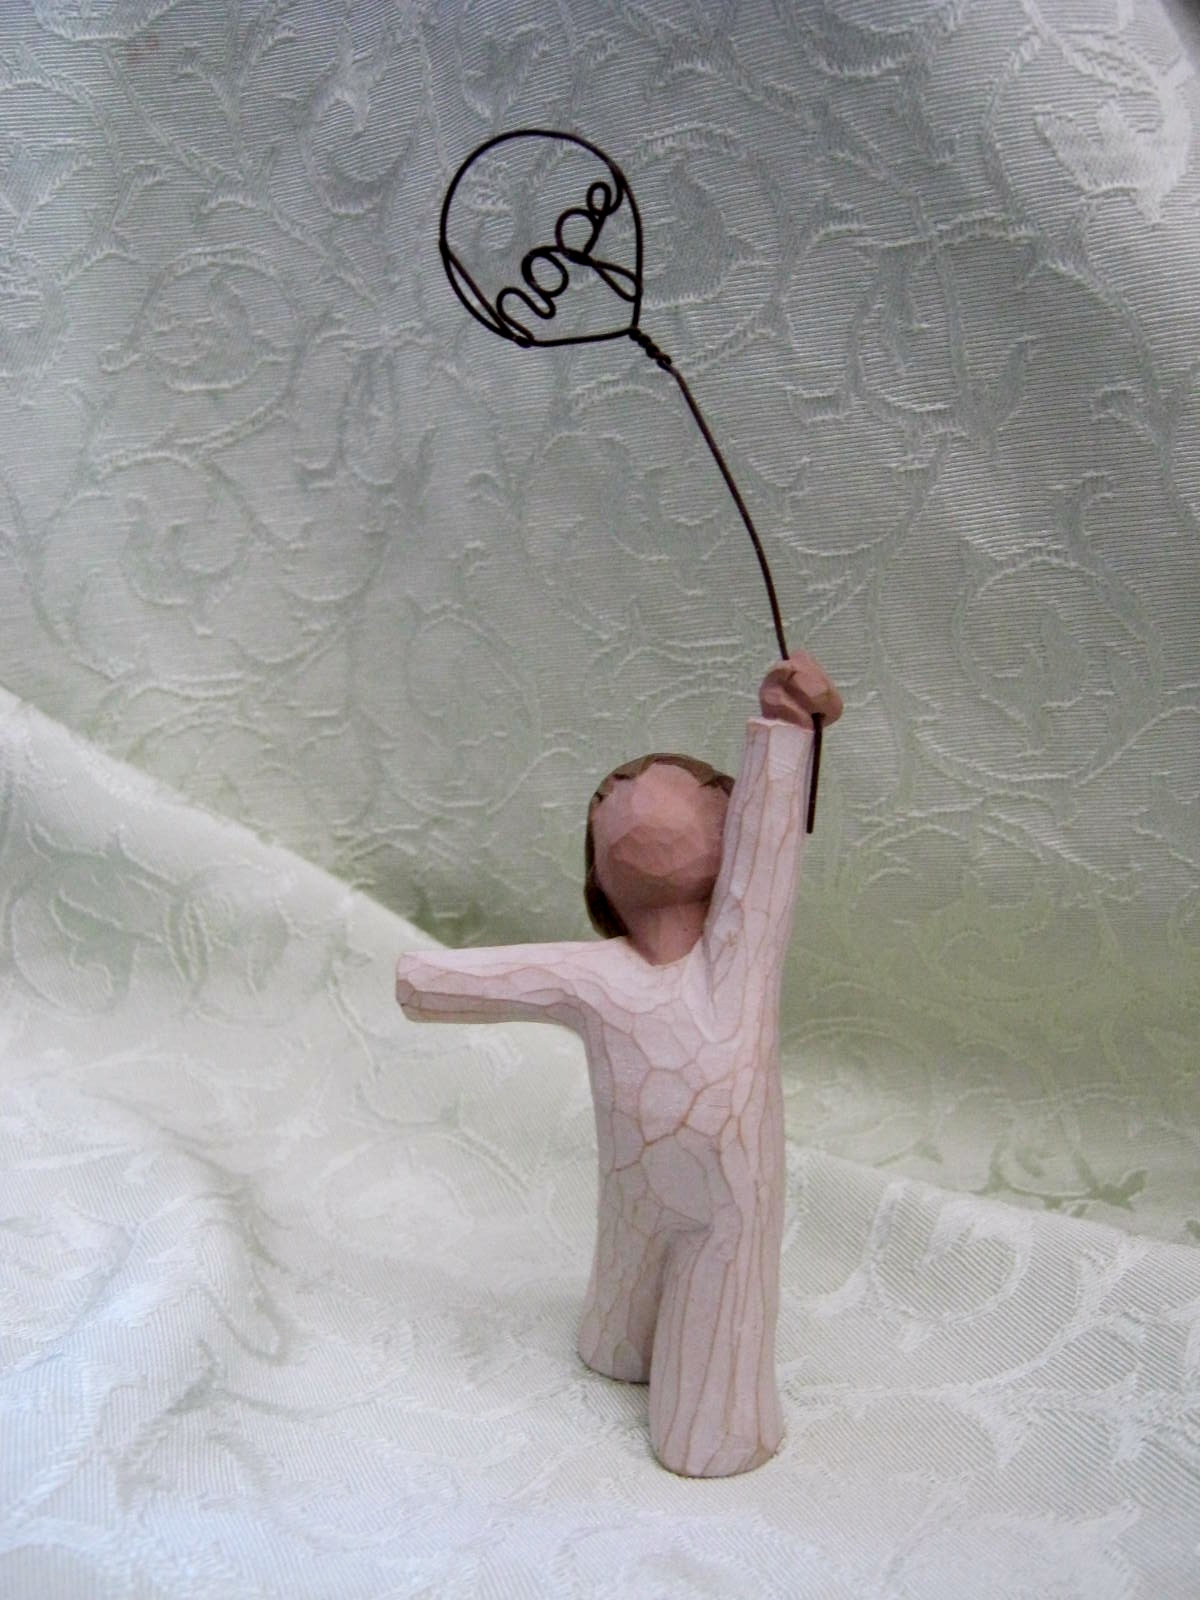
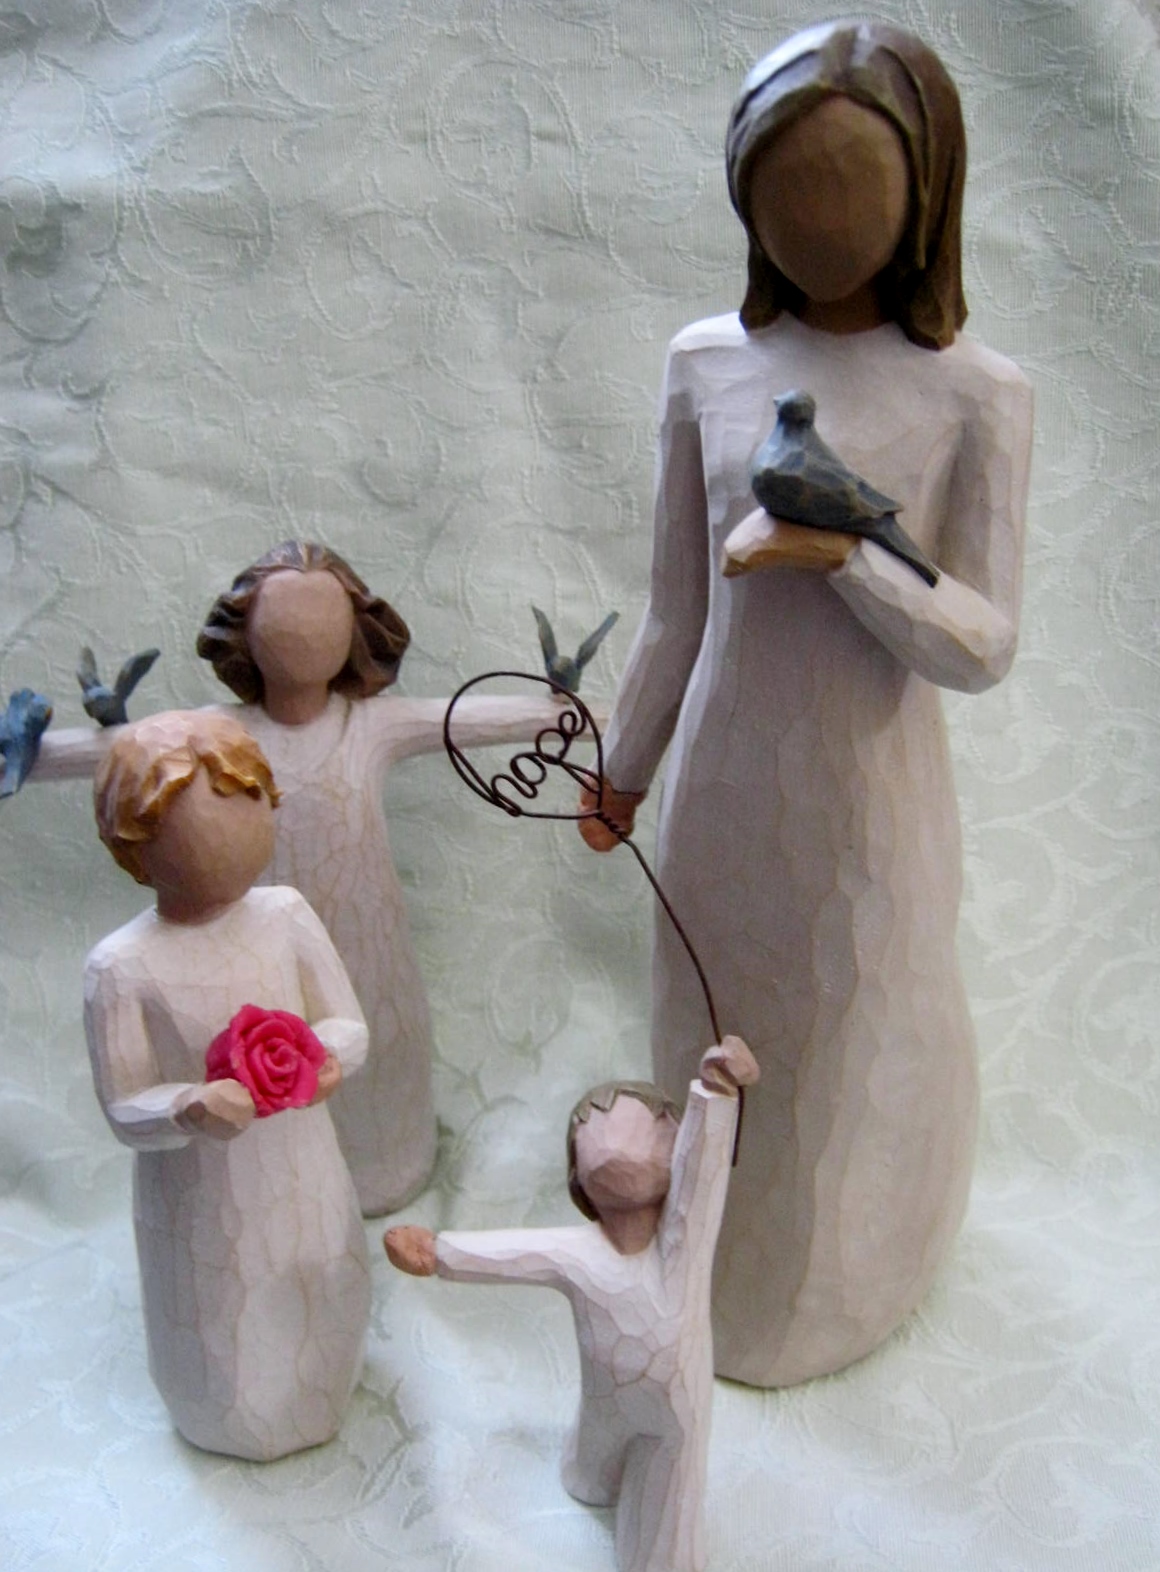
I love Willow Tree Figurines . I have quite a few and display them on a living room shelf.

Willow Tree is a line of figurine sculptures created by artist “Susan Lordi in January 200. The Willow Tree line specializes in rustic faceless people and angels intended to represent feelings or life events. The figurines are made from hand-painted resin which is cast from Lordi’s hand-carved wooden sculptures.” ~ Wikipedia

IMG_4933

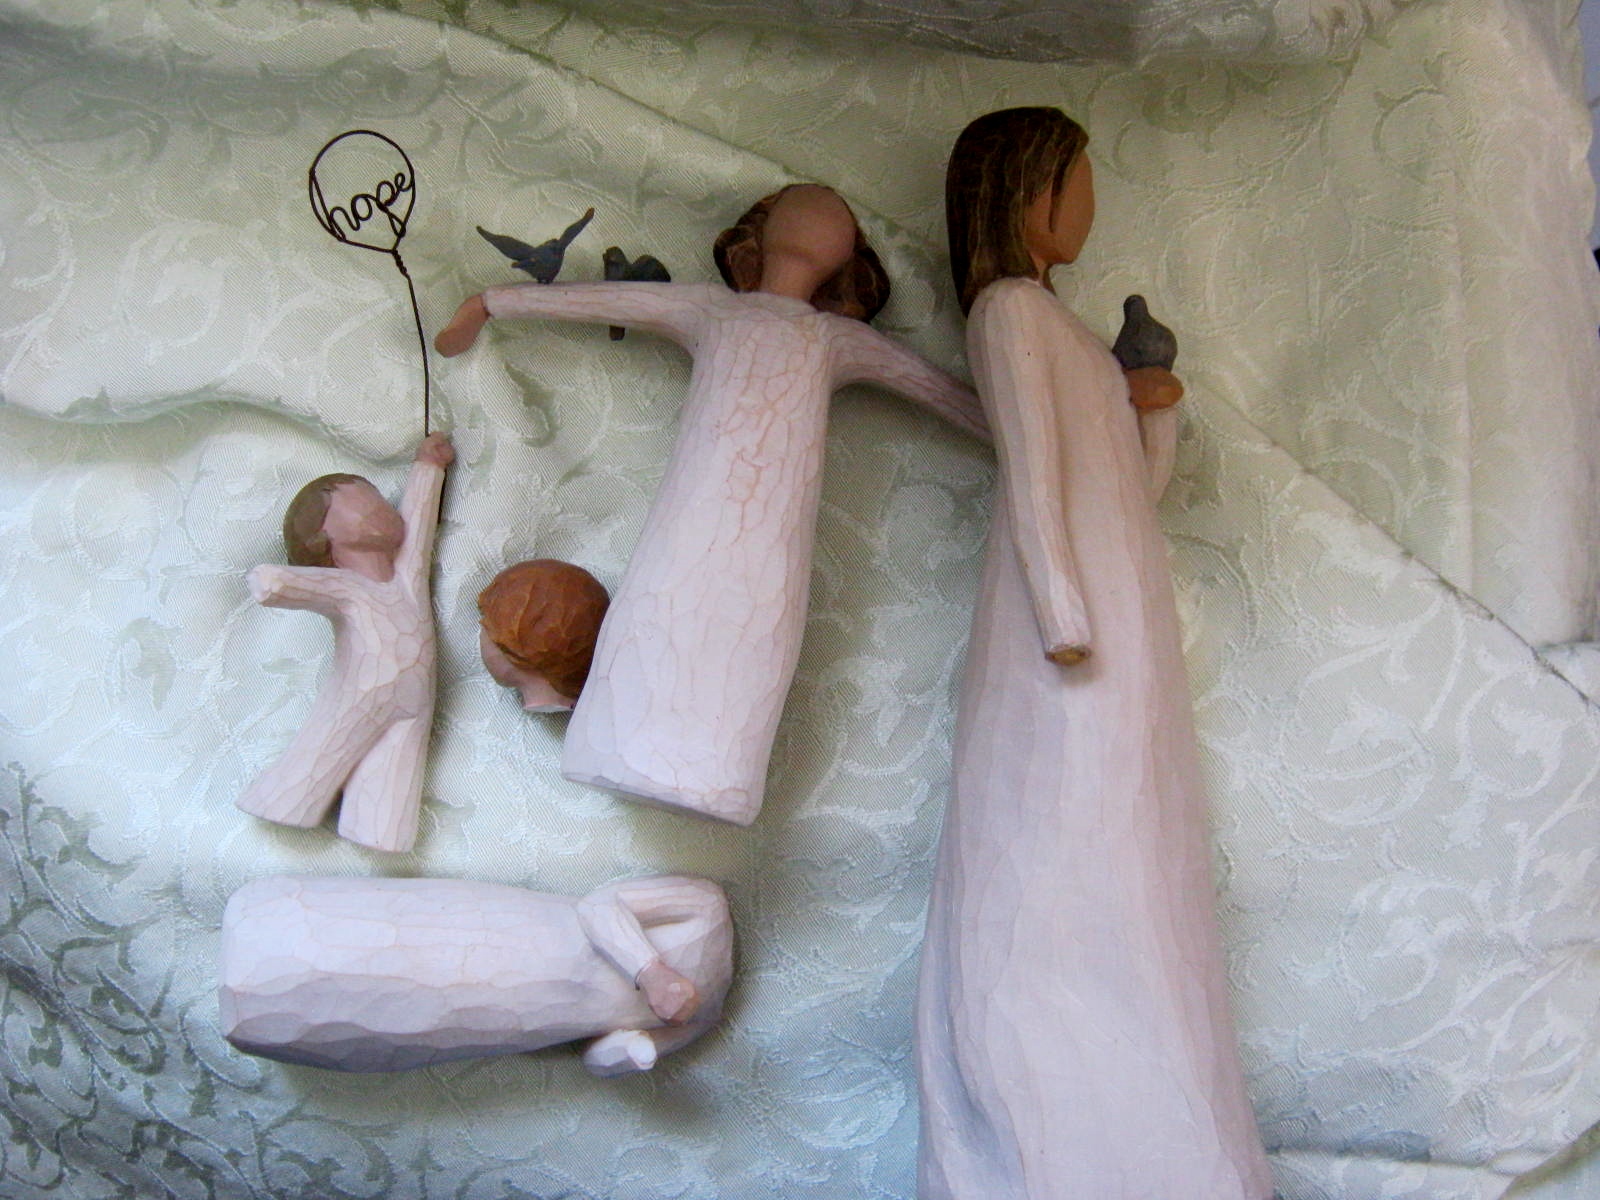
Because of their delicate nature, Willow Tree Figurines will lose a hand if dropped or knocked down. Because of my nature, I lay the loose hand aside, promising myself to glue it back on soon, and often lose the hand. I could buy craft-store clay and fashion a hand, but why spend money when I have what I need at home?

IMG_4935

Aleene’s Glue and Bread Dough Technique is the perfect medium to sculpt and repair my broken Willow Tree figurines. This technique will also work on other resin pieces. Aleene’s directions recommend using white bread for the bread dough clay. For this project I used honey wheat bread since the Willow Tree is created from molds of hand-sculpted wood and is very textured in appearance.

IMG_4937

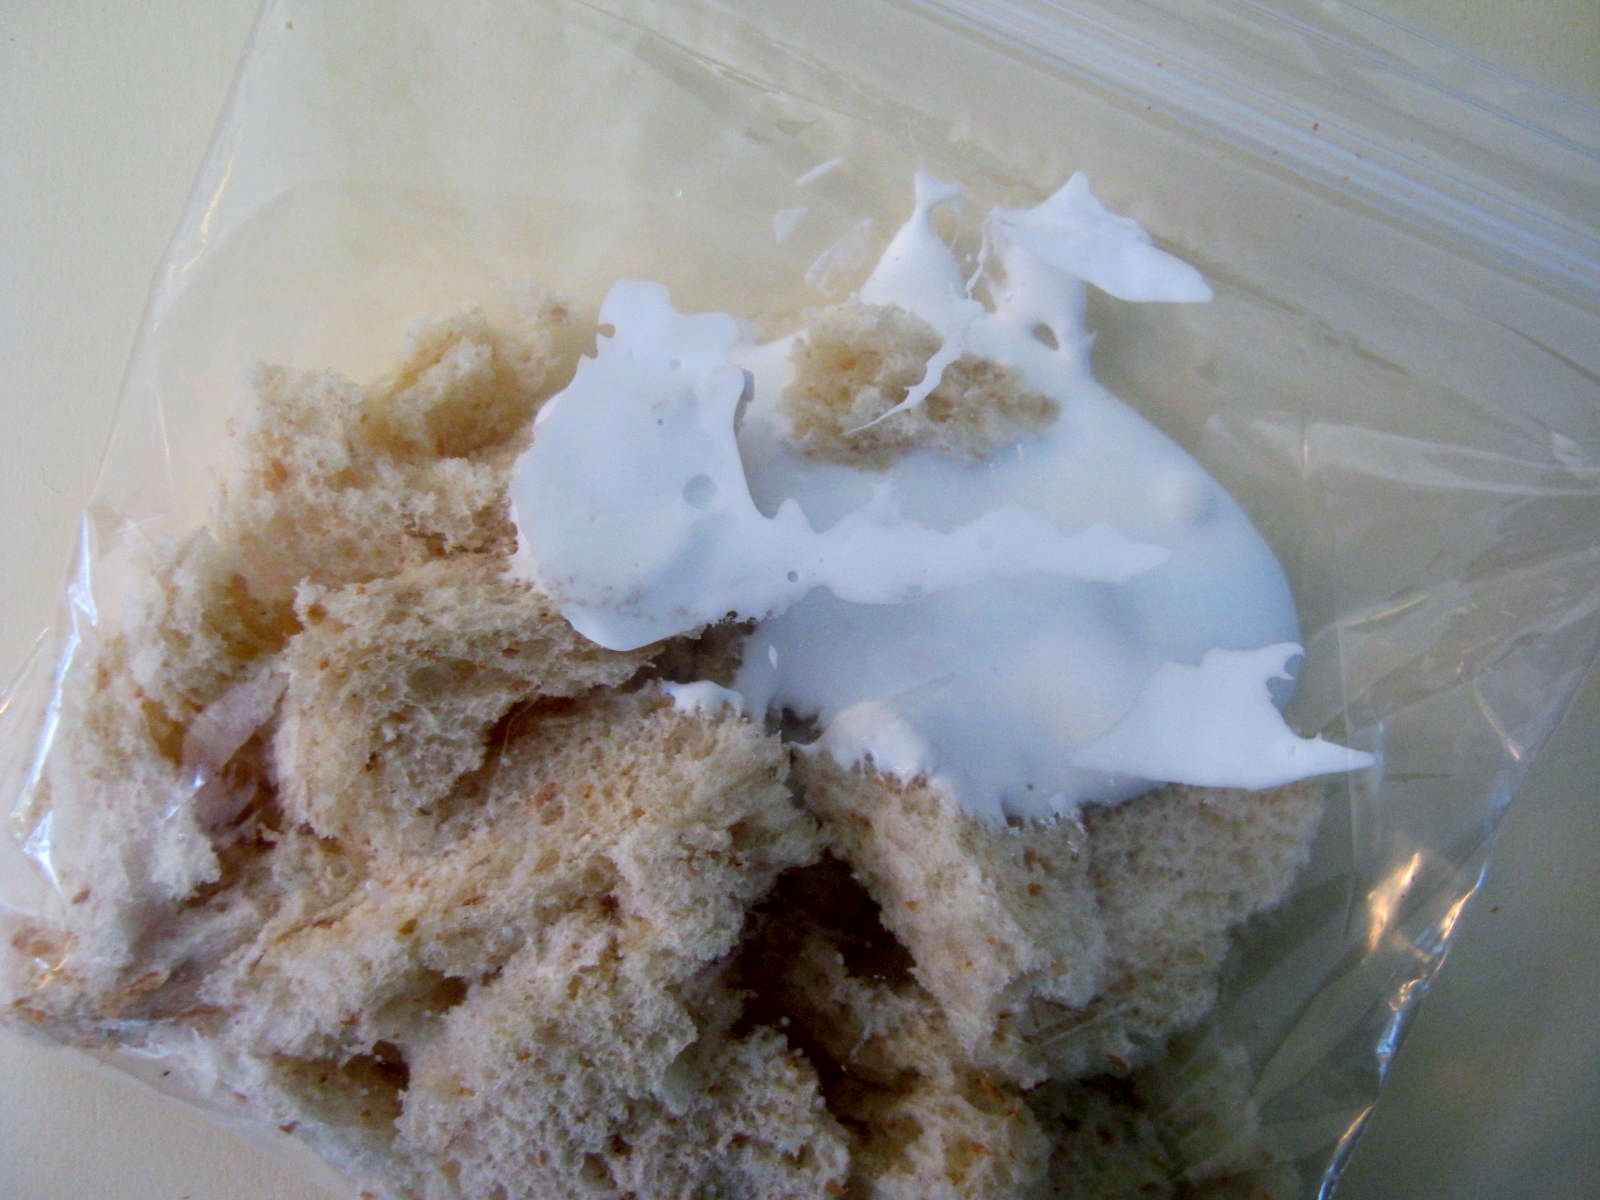
Break off the crusts from two pieces of bread.  Tear the bread into pieces and place in a zip top sandwich bag. Next add two tablespoons of Aleene’s Original Tacky Glue and mush all this up.

IMG_4938

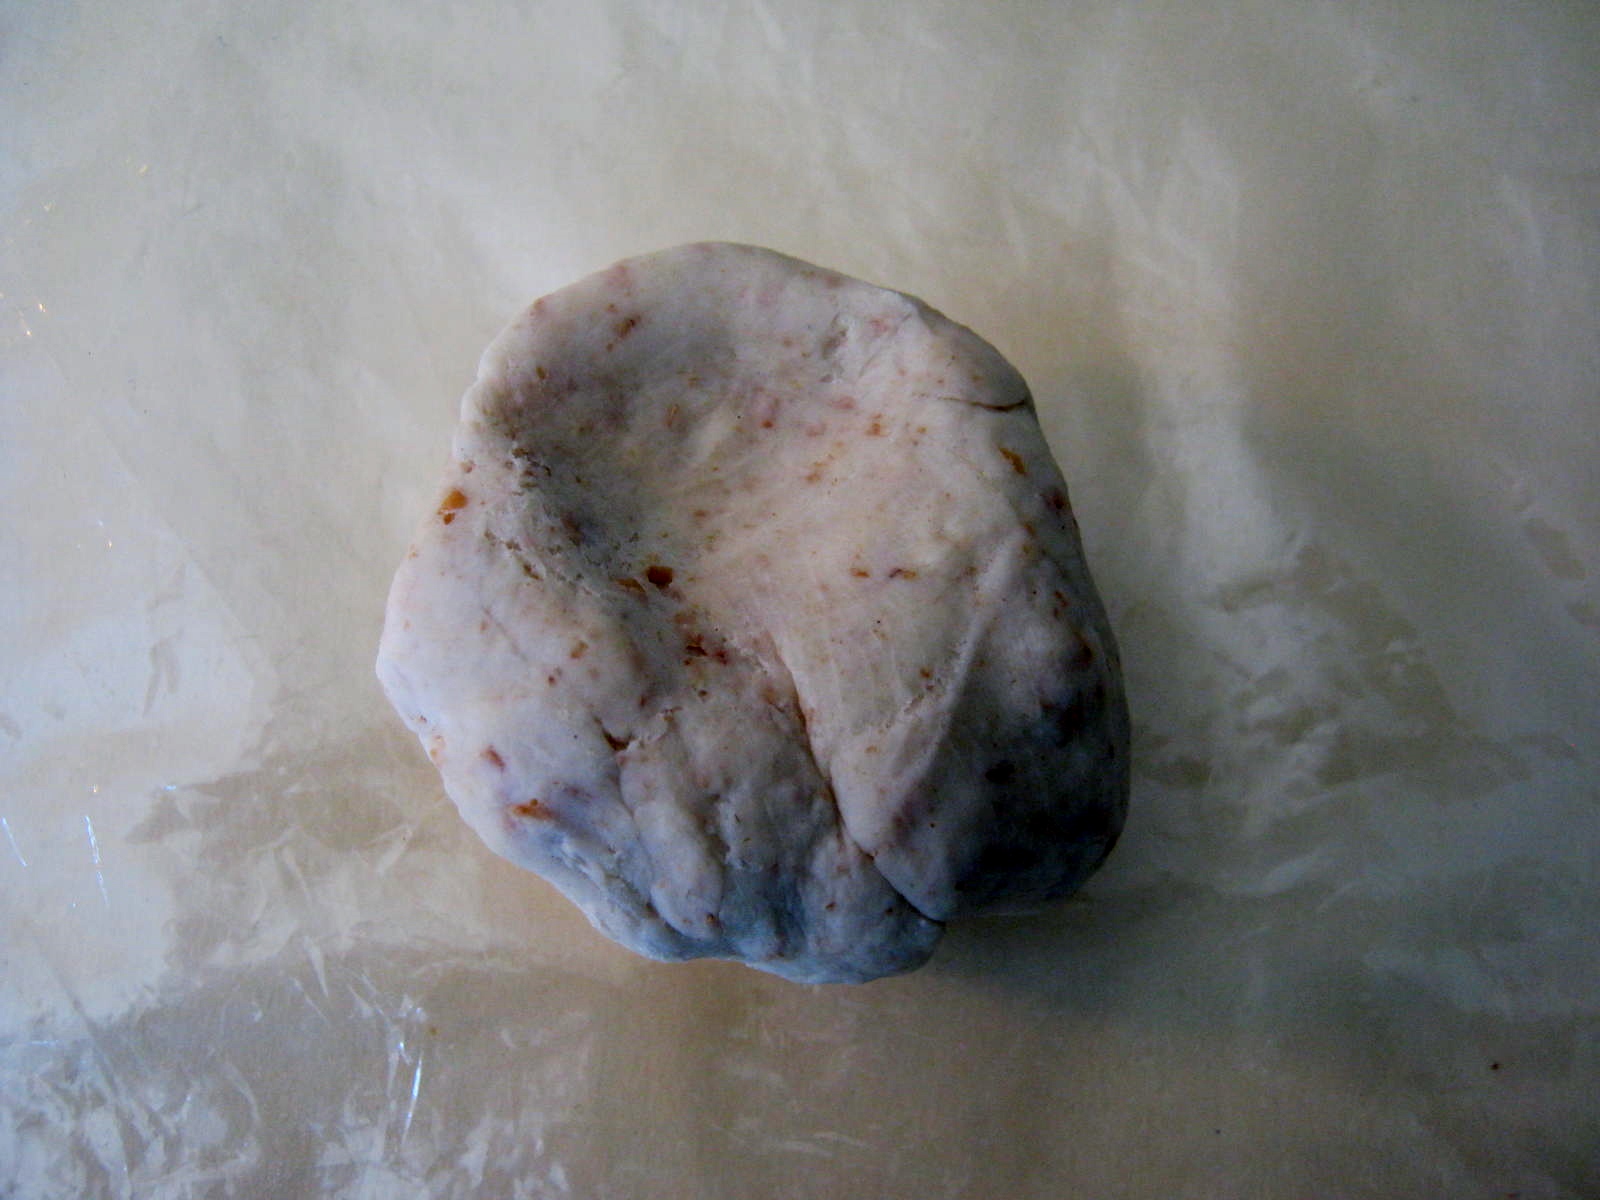
At some point you will have to take the dough out of the bag and fnish kneading it. I recommend you take off rings at this point. Knead the dough until it is smooth and has pulled all bread dough residue from your hands. This is how I know it is ready to use.

IMG_4939

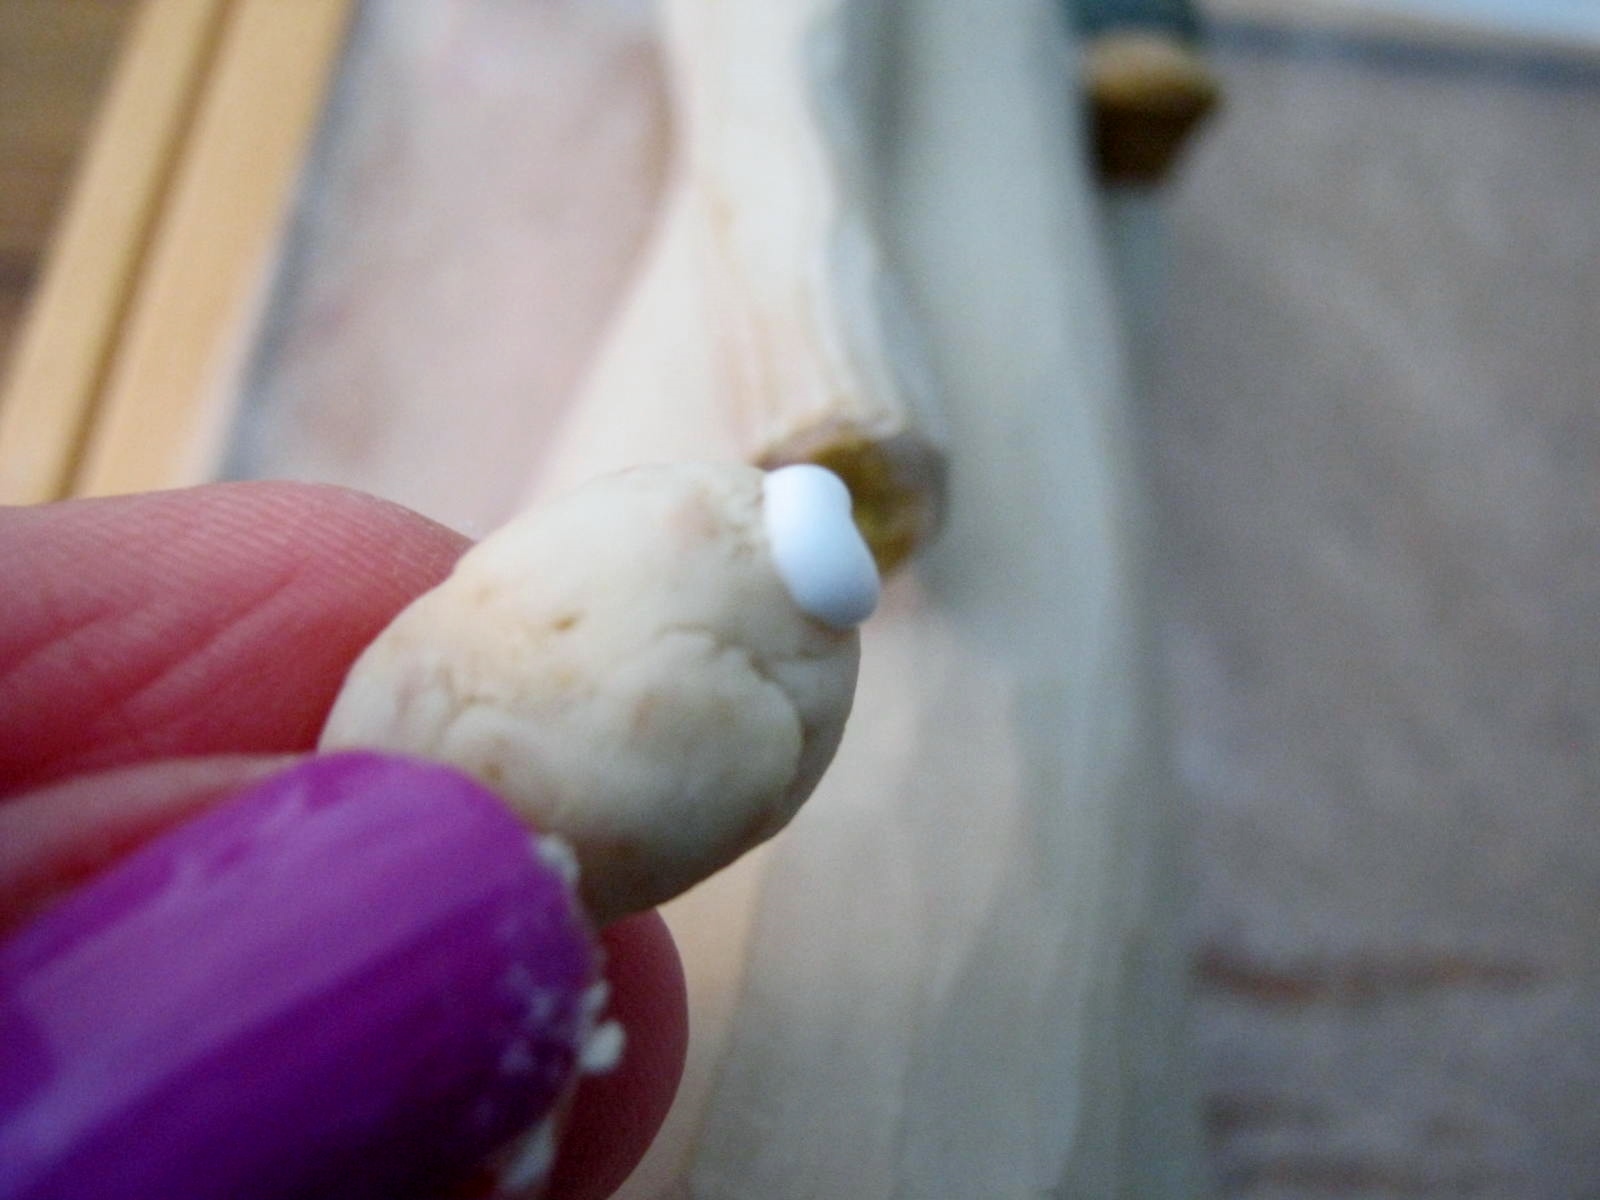
Sculpt/Form the dough into the shape you need. I glued it to the Willow Tree figurines at this point with an additional drop of glue.

IMG_4945

I also created an easy rose out of the bread dough. Add a few drops of acrylic paint to a small piece of dough and mash it in until the color is uniform.

IMG_4946

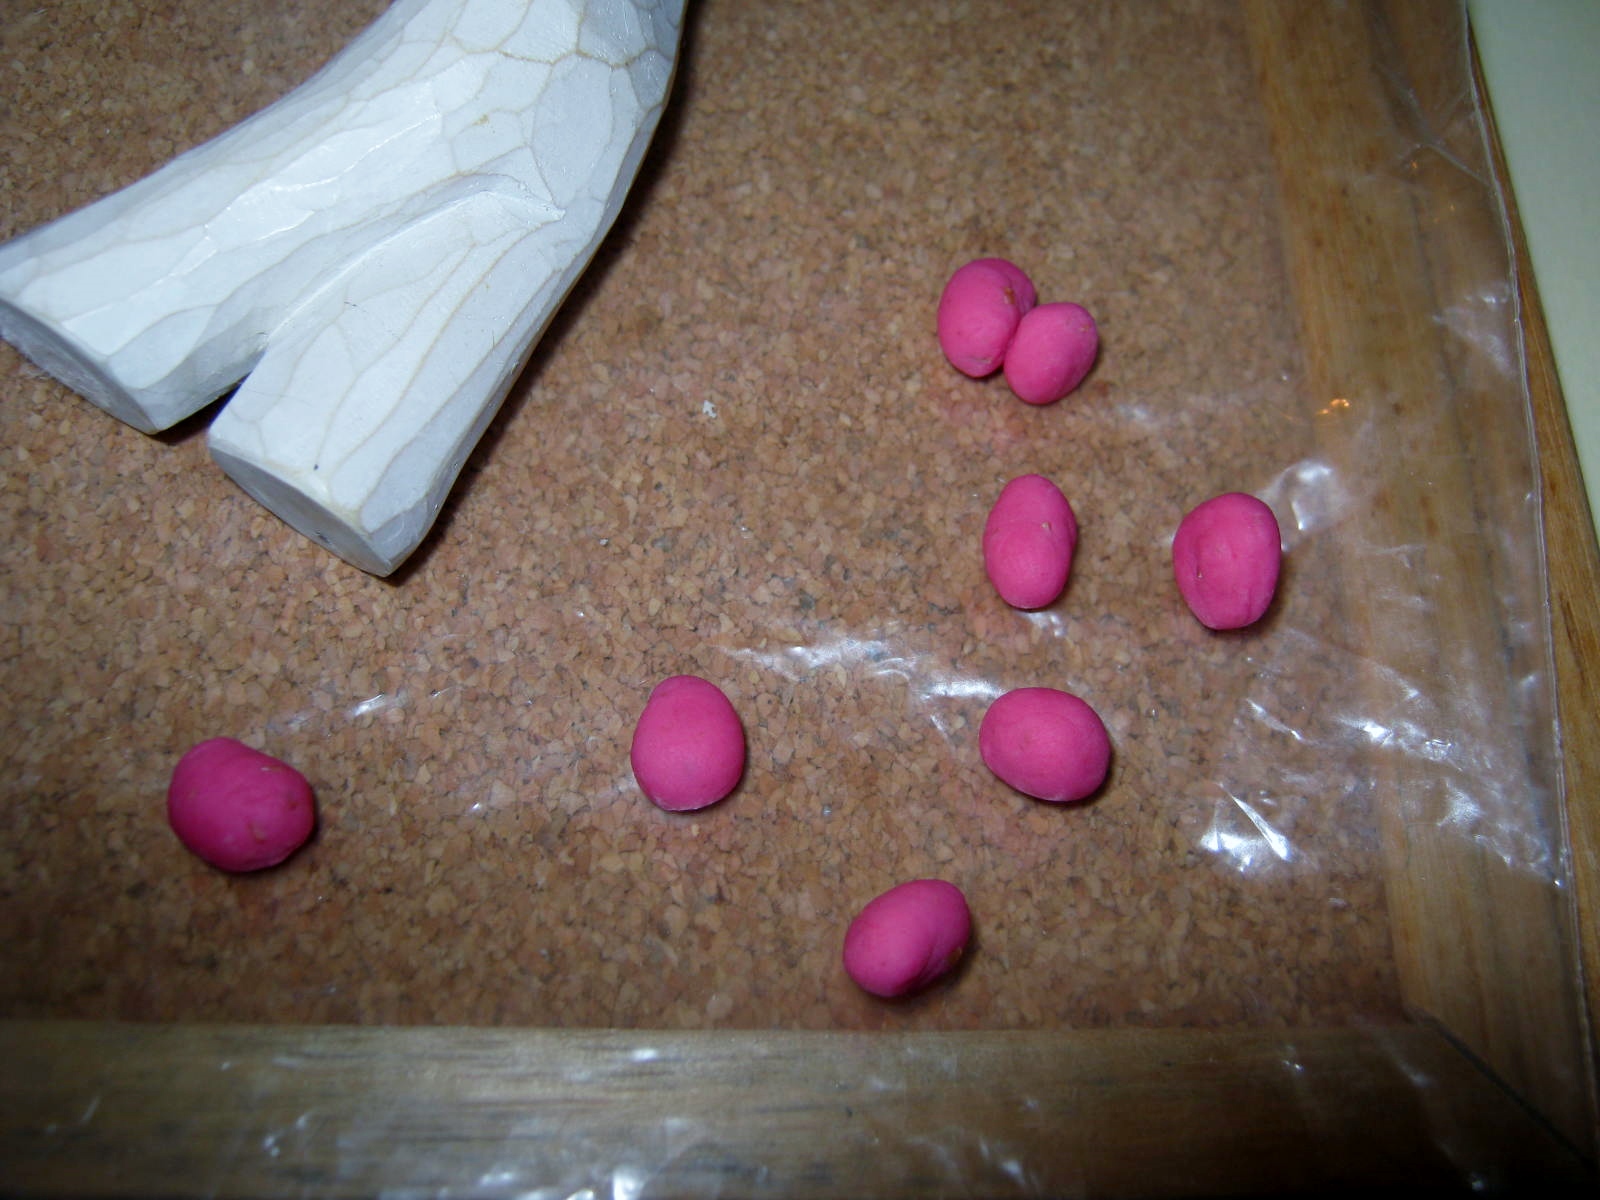
Form small pea shaped balls.

IMG_4947

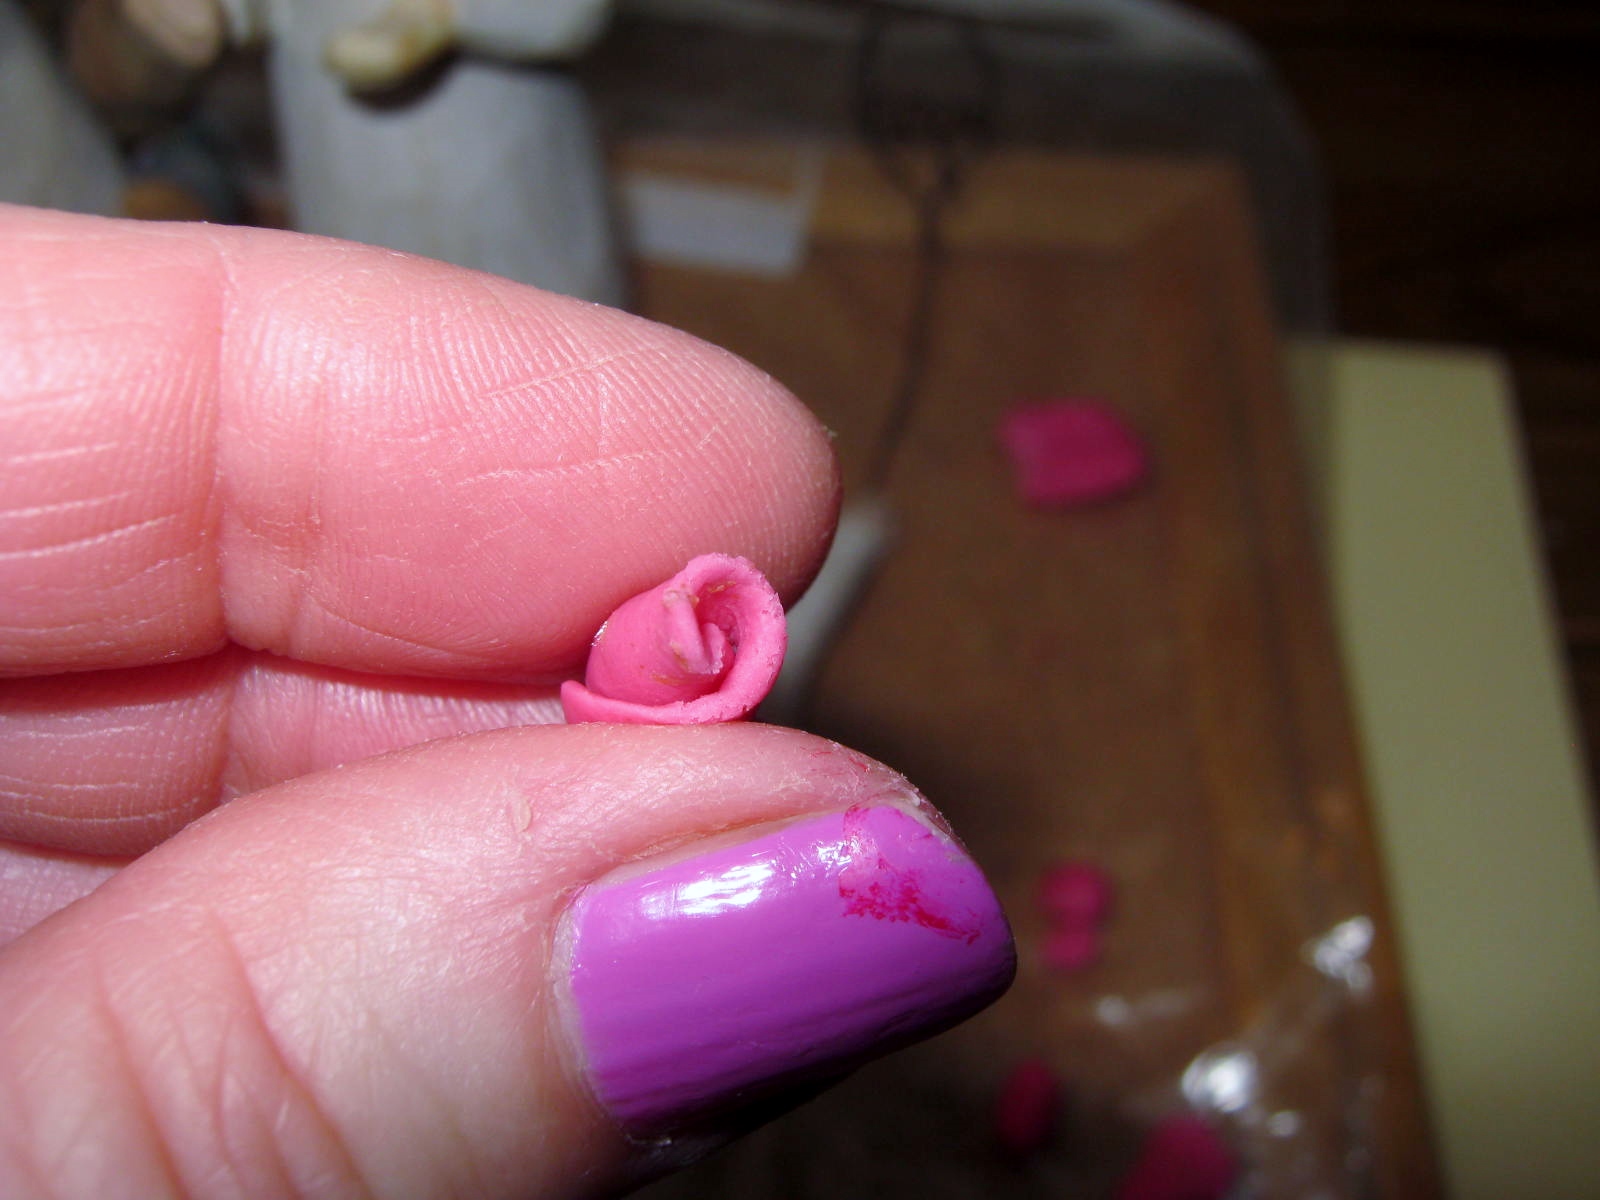
Flatten the first pea, twirl into a cone shape.

IMG_4948

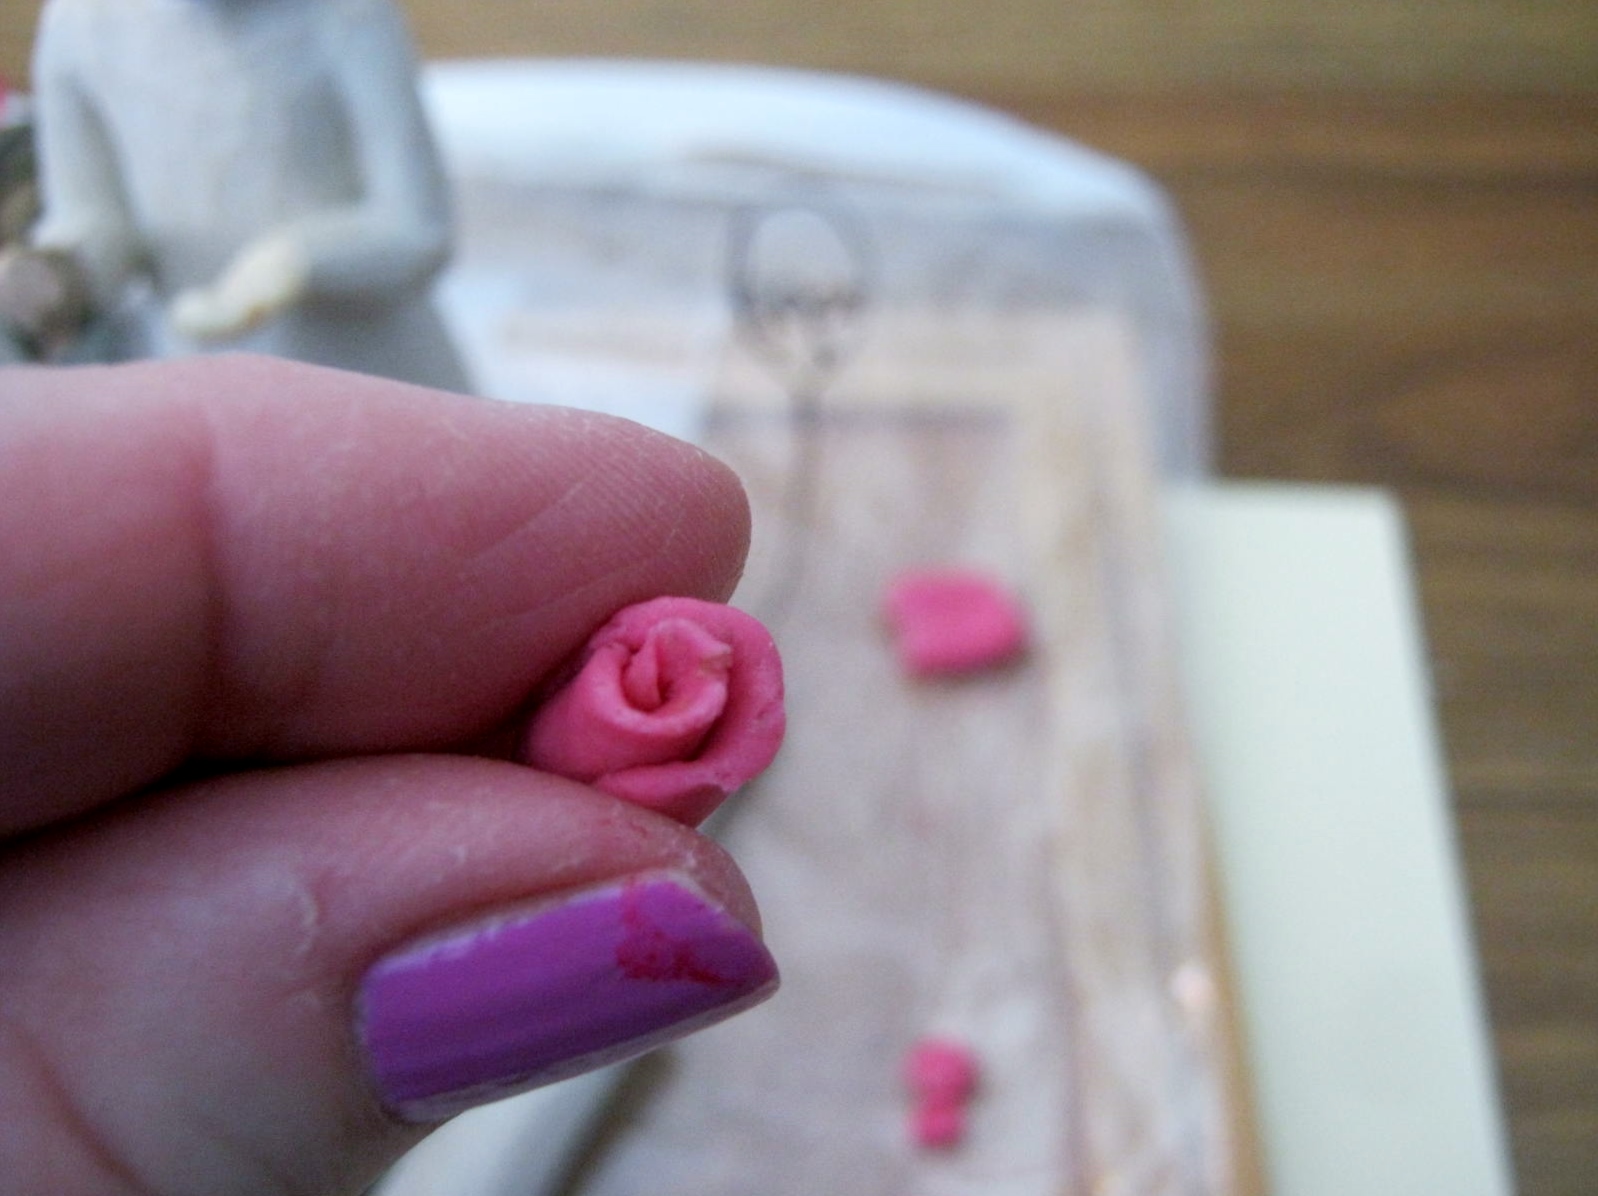
Continue flattening pea shapes, add these in layers until you form the rose. I usually clip off the bottom with scissors to help the finished rose lie flat.

IMG_4971

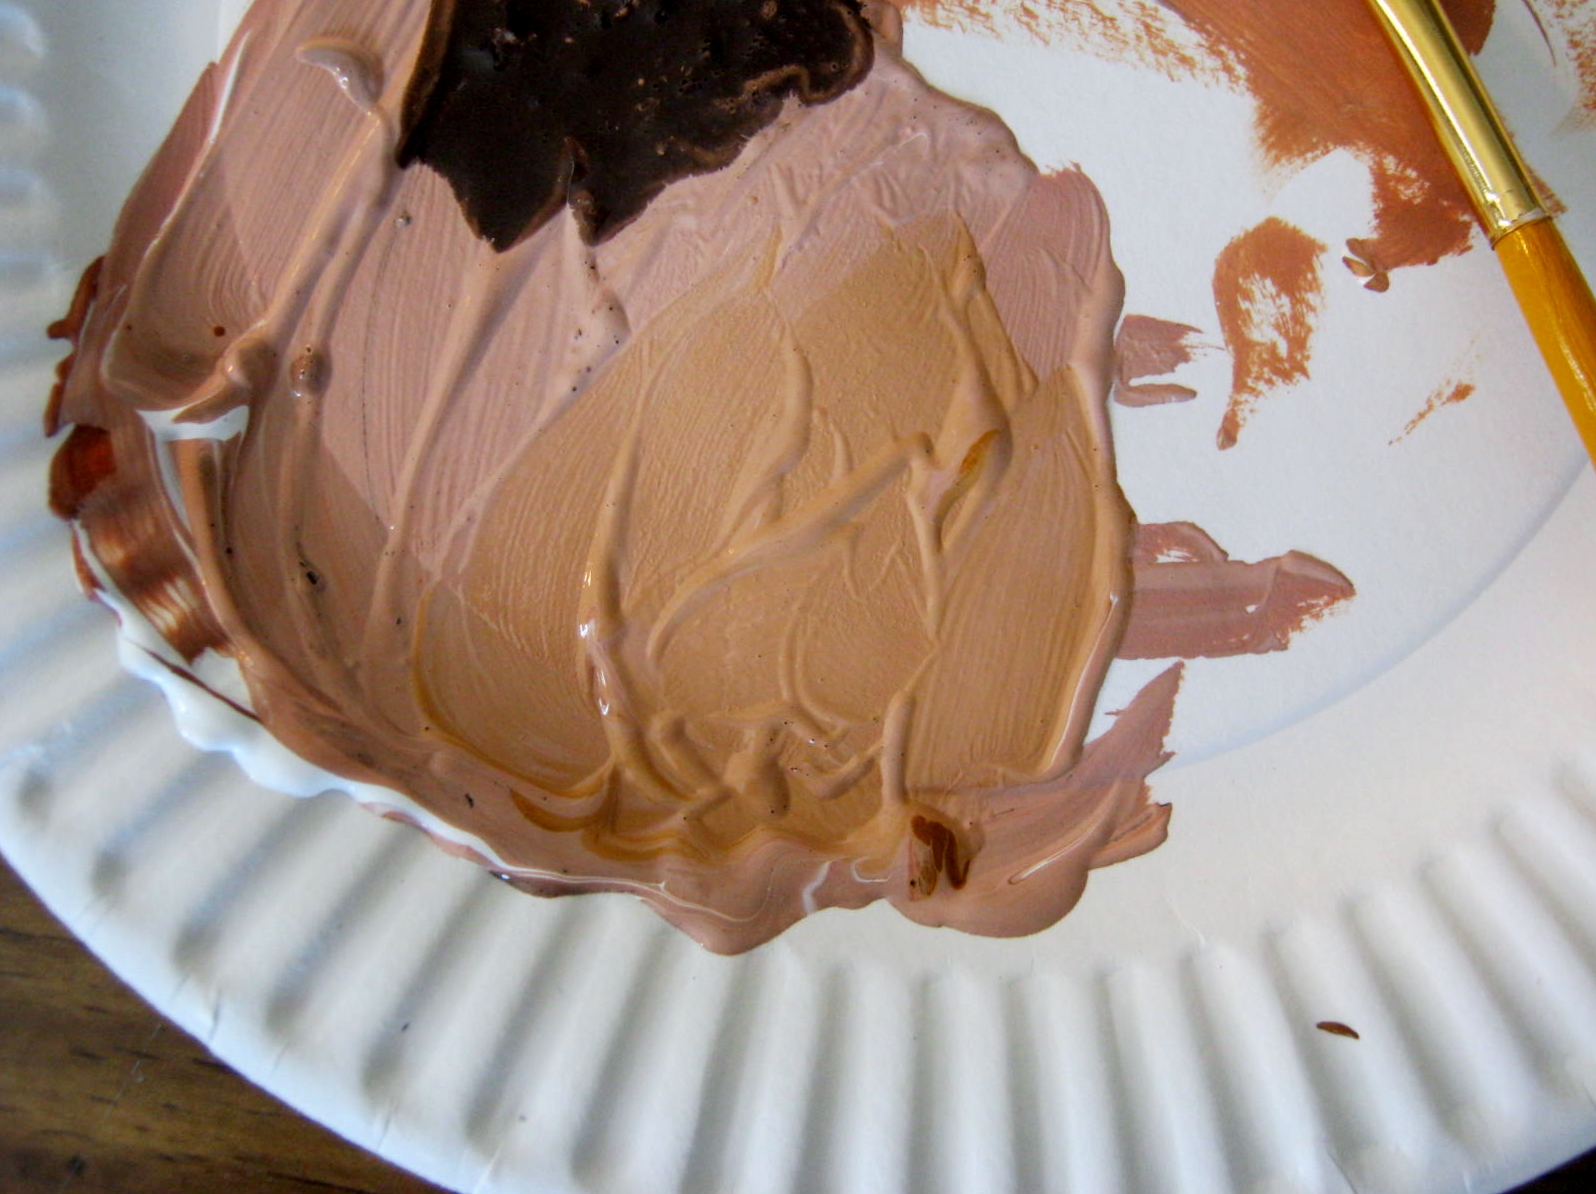
Let the repaired resin dry 24 – 48 hours. Paint with acrylic paints. Remember, you might not be able to find an exact color of fleshtone, add white or black to darken or lighten. Also, acrylic paint will be a shade or two darker when dry. I didn’t need to glaze in any way as the paint matched the matte appearance of the figurines.

IMG_4977

Here’s a great video on how to create roses out of bread dough.

Problem-Solving – Cleaning Ugg Boots

I often will re-blog a timely post…this is one for the ladies…cleaning salt stains from Ugg Boots. This technique will also work on other suede items.

IMG_9231

My Uggs Boots were stained by salt last year. I don’t know why I waited a whole year to clean them off, I suppose it is the classic, out of sight, out of mind syndrome. Thankfully, I do know a good way of cleaning them by applying shaving cream and rubbing with a soft cloth. Below you can see my progress. As I write, the boot I treated is sitting beside a heater vent drying. If there is any residue still left I will repeat the steps.

IMG_9233

Dampen the entire boot so there is no line of demarcation when they dry. Apply the shaving cream and gently rub the soiled area with a soft cleaning cloth. Spread the shaving cream lightly around the entire boot with the cloth. No need for a heavy coat, just a light touch of the shaving cream will keep the color and texture of the boot uniform.

IMG_9234

The boot on the right was previously treated. You can see the slightest bit of salt stain around arch of the boot, but all in all, unless someone was looking for the problem area, I don’t think it is very noticeable. Give this money saving tip a try. It certainly beats spending near $15.00 to have your boots professionally cleaned.

Follow Me on Pinterest

Plants, Problem-Solving and Pleasure – Tomato

IMG_2326

My tomato plants have thrived this year. I have been diligent in removing suckers on the indeterminate plants, and now I am reaping the rewards of the time spent caring for them. I am pleased with the heirloom varieties and also the varieties I planted that are said to contain high amounts of the antioxidant anthocyanin. Indigo Apple, along with Gypsy (another dark tomato) have been welcome additions to the garden.

IMG_2321

I’ve had a few problems, this stem at one point in time had several leaves, now it is bare. I never found the culprit, but I am pretty sure it was a tomato hornworm. I am crossing my fingers that he fell victim to a predatory wasp. Hopefully, he is the only one of his kind to visit my plants this summer, and I won’t feel compelled to whip up an organic spray. I’d much rather hand-pick the pests away or let nature’s predators help me out.

IMG_2324

This is the largest tomato I have ever grown. To protect if from squirrels eager to sample its lushness I surrounded it with hair from my cats. I know it looks ugly, but it worked. Here is the harvested tomato, finishing its ripening process in my kitchen. Success!

IMG_2401

If you don’t have cats or dogs, I’ve read that human hair will also repel critters. Happy Gardening!

Problem-Solving – Gone to Seed Part II

IMG_2028

My Black-seeded Simpson recently went to seed due to the heat. Instead of pulling all of it out for the compost heap, I am leaving a few squares to grow on and form seeds. This will allow me to use the lettuce seeds they produce as microgreens and also give me plenty to sow in next year’s garden. A square of Cimmaron lettuce and some Arugula are now in the process of setting seed too.

IMG_2029

On my potting bench I have set up a seed farm to make the most of the last of my microgreen seeds.

IMG_1691

Most of these seeds are dated 2011, but still sprouted for me within a week. I am especially fond of the sprouting peas on top of my salads. I will let a few grow on and set some seed to harvest.

IMG_2030

If you’ve never heard of microgreens check out this post: Minding My P’s with Q – Microgreens

IMG_2031

Another good article on the nutritional aspects of microgreens can be found here: WEBMD report on Microgreens

IMG_2032

Follow Me on Pinterest

Problem-Solving – Gone to Seed Part One

IMG_1937

Such a sweet and delicate pink flower…lovely to look at, but irritating if you are trying to grow a root crop from the plant. This blossom was not supposed to show up in my garden. It is atop a radish plant. Instead of a flower the stem was supposed to yield a large and juicy radish buried beneath the ground. This year, I only harvested a piddling few radishes and they were small, very small.

I don’t feel so bad, my neighbor, who I’ve mentioned before is a terrific gardener, told me he never harvests the large-sized radishes the grocer offers. Perhaps it was the cool Spring that jumped past warm into hot weather. Anyway, long story short, my radishes have gone to seed.

IMG_1939

Most gardeners would pull up the plants and resow another late summer crop. I will probably do that at some point, but until then I am nurturing the seedpods…why? Well that is tomorrow’s tale. Until then…

Problem-Solving – Waiting for Perfect Conditions

“If you wait for perfect conditions,
you will never get anything done.”
Ecclesiastes 11:4

IMG_1796

I’ve read this verse in Ecclesiastes many times, but do I follow it’s perfect advice? Well, I’m sorry to say…not usually. And do I get anything done? Well yes, the things that matter, but do I reach for my dreams? Hmmm…sorry to say, sometimes yes, but more often than not I postpone them for fear conditions are just not right.

The cover of the scrapbook in the photo above was created by gluing squares of discarded watercolor paper to the front. Each piece is from a painting that I rejected after deciding it was just not good enough. I thought, and still think, that the effect of the squares is quite pretty. So pretty in fact that after years of having the book ready for scrapping bits and pieces of prose and art it still stands empty. I don’t want to risk messing it up.

IMG_1614    IMG_1615

I did have one or two pages inside devoted to my art, but I deemed them unworthy and pulled them out. WHAT am I waiting for? I am determined to start gluing and drawing and writing inside the pages of this book…this week…perhaps today!

Plant & Problem-Solving – Campanula punctata

IMG_1453

I’m a little embarrassed to admit an error I have made for several years. My mistake? Cutting down and actually trying to root out the beautiful plant in the photograph above. The reason: I forgot I planted it, and the look of the foliage reminded me of a rampant weed that invades my garden. So of course, I worked hard each Spring to eradicate the intruder from my flower bed.

IMG_1455

This year the foliage returned, lusher and more determined than in past years. Because the extra-snowy winter we experienced had killed off many of my bushes and perennials, I decided the glowing foliage really wasn’t bad in appearance, and perhaps the green would be a good foil for the mandevilla plant I was growing in a pot nearby. Imagine my surprise when small buds began to form. I decided they were going to open into the insignificant flowers of a weed. Within a few days the buds became more interesting, opening a week or two ago into beautiful purple-flecked bells.

Oh my, I’m in love with this plant. I researched the flower image on the Internet and identified it as Campanula punctata, commonly known as a bellflower. Campanula punctata can be a bit invasive, but is also graceful, beautiful, and as my cutting revealed…very persistent in growth. Once again, I’m reminded to write every plant name and location down, and keep a permanent record of all my garden plantings.

IMG_1452

Here’s a bit more information on this lovely plant: Campanula Punctata

Problem-Solving – Broken and Vanishing Plants

IMG_1021

It’s inevitable…I will lose a few plants to errant balls, foam noodle battles, rambunctious squirrels, or foraging chipmunks. This pot had two Roma tomato plants, but one was broken off by one of the above. 😦 I am betting on rambunctious squirrels.

IMG_1022

Happily for me one of last year’s problems, squirrels biting into ripe tomatoes, is the solution to this year’s broken tomato plant. In summers past, when I found a chewed tomato I often just picked it and let it drop beneath the plant in hopes the squirrels would eat from the easy pickings on the ground and leave my plants alone. This usually didn’t work, but it did deposit numerous seeds into the soil, and now I have sweet little volunteer seedlings growing everywhere. I will plant a few into the big pot and see if they will thrive. Most likely, it will be close to September before I will harvest tomatoes from these vines, but hey, I have plenty of other tomato plants, and I can wait on these babies. Hooray for volunteers!

Problem-Solving – This is War Parts I & II

Recharging…Resting…Rejuvenating… In the meantime, I’m re-blogging some of my best garden posts. Happy Spring!

I hope the photograph shows the deep hole in my Square Foot Garden. My peas were just beginning to sprout when some type of marauding critter decided to make them a meal.

Something large and furry had to be the culprit, or could it have been something large and feathery? My first impulse was to blame the squirrels, but they have been in the yard with my Square Foot Garden for several weeks and have not ventured past the chicken wire enclosing it. The same day I saw the devastation in the garden, I spotted a large chipmunk running around the yard. I know they are cute, but chipmunks are tops on my problem wildlife list. They are voracious and destructive and actually can be dangerous. My neighbor broke her wrist a summer or two ago by catching her foot in a chipmunk burrow and falling. One summer our yard became so overrun the chipmunks scavenged relentlessly even when we were only a few feet away. Wild turkeys have visited my yard too, but thankfully, only once. Yesterday I saw the mallard ducks. They are back. Every spring they return to my yard. Why? To eat beneath the birdfeeder, and then for dessert feast on every fish they can scoop up in my pond. The ducks have become a pest too and are able to easily fly over the chicken wire and gobble up my sprouting peas and greens.

So the big question is what to do to fight them. I have had mixed results in past years. The bug spray I made a few days ago might repel the animals, but the ducks don’t have a sense of smell and will not be stopped by a repellent scent. I also must reapply every time it rains, and if I don’t get out there and re-spray within five minutes of rain stopping, the hungry pests might get there first.

My first weapon was applied immediately, chile powder straight out of the bottle. I have some dried chiles still on hand, and I will blend those and keep at the ready to spread around. So far this has repelled whatever it was that dug up the peas.

I am also a firm believer in scare tactics. Anyone who has lived beside me might know that when I see something near sprouting plants I might run outside roaring like a lion in attempts to scare them away. It works. It also sends my heart rate pounding. I don’t know how wise it is to sprint and roar like this, but hey, it works. I also came up with a few temporary and permanent solutions. Tomorrow I’ll post the permanent solution, but for today, the temporary solution is the focus.

Water balloons. They are at the ready in a basket, filled with water and bit of garlic powder for a little added punch. If I see one of the culprits in or near my garden, they are in for a surprise. Tee-hee! I just hope tomorrow’s newspaper headlines don’t read: “Grandmother falls out second story window lobbing water balloons at wildlife.”

IMPORTANT CAUTION: Balloons can be lethal to small children because they are a choking hazard. Make sure to remove all shreds of balloons out of your yard.

Follow Me on Pinterest

Update on Water Balloons: Lobbing them out of the upstairs window didn’t work. I couldn’t get enough “oomph” behind my arm to really launch them well. I moved the basket of balloons out onto the back porch. I had decided that the marauding critters get “baptized” with the water balloons only if they get in the vicinity of my gardens. Uh-oh, sooner or later the nibbling rabbit got too close. Tee-hee! I let a balloon soar through air. It bounced down and burst near enough to him to spray him with water. He ran…hooray! It works. The bunny was very surprised…not hurt. Next was a squirrel. He moved much quicker than the bunny. I think he saw the water balloon coming, but he was sprinkled with a few drops too, and I did not see him back, at least not yet.

Garden Wars weapon number two is recycled CD’s. I strung glass beads, a few metal bells, and some old crystal necklace beads onto wire. I then loaded the inside of a computer CD with goop, put a paper clip at the top, extending a bit past the edge, and added three seven to nine-inch wires to the bottom of each CD. I pressed a second CD onto this arrangement, making sure the iridescent side of both CD’s was facing out, clothespinned the edges, and let them dry overnight. Actually, I thought they might look junky, but after I hung them on mini shepherd’s hooks beside the garden I was pleased with the way they looked. The slightest breeze sets them spinning. The reflections on the front change and swirl, the beads click a little, hopefully sounding a bit like a rattlesnake to the little critters raiding my gardens. All in all, I feel good about my preventative measures. I’ll update in a week or two and record my results. I wish you, “Happy Gardening,” and “Victory” in the “Critter Wars!”

Problem-Solving – Critter Prevention

Recharging…Resting…Rejuvenating… In the meantime, I’m re-blogging some of my best garden posts. Happy Spring!

pictures test 004

At first glance this photograph resembles goldfish swimming in a large school. In reality what you are seeing is a layer of hot peppers, covered with oil, simmering OUTSIDE ON THE PORCH in a crockpot. Only adults wearing protection on their hands, and possibly a mask over their mouth and nose, should concoct this brew. After a few hours simmering, I strain out the peppers and keep the resulting oil in a jar. The oil itself did not cause me any distress when I gingerly sniffed it, but when I cleaned the crockpot in water, the steam from the hot water rinse made me gasp a bit as it was loaded with hot pepper particles.

I have been using this on the edges of pots of sunflowers that I am growing outdoors until time to plant in the ground. Every year most of my sunflowers and many other seedlings are nipped off by squirrels, rabbits and chipmunks. To combat this in the past I have tried chili powder sprinkled around my plants, but as soon as rain or heavy dew falls, “Nip, Nibble, Nip,” and all my careful plantings are ruined. There is no cruelty to the animals in using this oil. Their noses are so ultra-sensitive they should be able to smell the heat at least a yard away. I do have to make sure I explain to my grandsons why they must not touch or even walk near the pots. The smallest drop on a fingertip could seriously irritate their eyes.

This method of pest control is organic. Take precautions in using and it should help in repelling rodent and other pests.

Follow Me on Pinterest

Pleasures and Problem-Solving – Bunnies

IMG_0524

Years ago I transplanted some violets to my gardens. They are very prolific…almost becoming weedlike in spots. They are even scattered throughout the lawn. I love them though…they are welcome in my yard.

IMG_0527

Recently, I spotted this little bunny under a pine. I have mixed feelings about bunnies, squirrels and chipmunks. I love them and enjoy watching their antics in the yard, but they also can be invasive and cause quite a bit of damage in the yard and gardens. I guess I will have to develop the same love for their invasiveness as I do for the violets and learn to battle them gently, but also enjoy their presence.

Problem-solving – Two on Tuesday/Tulip Bulb Forcing-The Crash and Burn

Today is a “Two on Tuesday” post. First post-the bad news, my tulip bulb forcing project has crashed and burned.

IMG_0169

I would much rather have left this admission out of the blog posts, BUT, on my “Hello” page I promised to post about the projects that “crash and burn” for me. I am not sure what went wrong with the bulbs. Should I have been more careful about the water level? Would forcing each bulb in a separate container be a better choice? In hindsight, I should have misted the foliage every day, maybe twice. Was the sunny window too hot and bright for the foliage? I didn’t take into account that the sun’s rays would be magnified through not only the windowpanes, but through the glass of the vase also. To be honest the last explanation seems the most feasible to me. I will try again next year…for sure!

Planting & Problem-Solving – Tulip Bulbs/Update

tulips 1

On February 20th, I shared a post on how my grandsons and I placed pre-chilled tulip bulbs in a vase of pebbles and water in an attempt to bring them into bloom.

You can read the post here: Planting/Tulip Bulbs

We are watching their progress now. The bulbs have sprouted at different rates, some leafing out quickly, others plodding along, but all are showing signs of growth. A few days ago I noticed a problem that needed solving if I hoped to continue bringing the tulips into flower, yucky green mold thriving on a bulb where it touched the side of the vase.

tulip2

I decided to give my trusty bottle of alcohol a try. Alcohol, safe and pure, is usually my first go-to solution for houseplant or gardening problems.

tulip 3

A few swipes of the alcohol and “Voila,” goodbye pesky green mold.

tulip 4

I realized another solution was keeping the bare portion of the bulbs away from the side of the vase and let the skin side protect the bulb from another bout of mold. I’m looking forward to showing my grandsons the progress of their tulips this week. Happy Gardening!

tulip 5

Follow Me on Pinterest

Plants and Problem-Solving – Eradicating Scale on Houseplants

scale 1

I don’t know how I missed it for so long. By the time I saw the shiny residue on the arrowhead plant, scale insects had already infested at least half the leaves and stems.

scale 2

I took a closer look on the underside of a leaf to be sure…yup…scale. Yuck! For more information on scale insects check out this site: Scale Insect Pests

scale 3

I don’t like to use harsh chemicals on my plants. I have grandchildren and two cats. I also attempt to keep products I use as organic as possible. I decided to try rubbing alcohol to treat the scale, a good treatment I have used in the past on mealy bugs and other insect pests.

scale 4

Using a cotton swab, I dipped in alcohol and swiped the legions of scale off the plant. I checked every leaf and stem. When I was finished I removed any leaves yellowed by the insects. I also dipped the plant beneath tepid running water from the faucet. The alcohol kills the insect pests on contact. If you leave it on the plant too long it could cause damage, especially to tender new growth.

I will keep a close watch on the plant. It is also a good idea to remove it from close contact with other plants, and to disinfect the surface it stood upon, and any drip saucers beneath its pot.

Follow Me on Pinterest

Problem-Solving – Feeding the Birds in Snowy Conditions

IMG_9486

In my backyard, the earth and tree branches are covered with three separate layers of snow. The natural edibles of birds are not readily available. I have a small bird-feeder, but there are hundreds of hungry birds this winter. Yesterday I placed a large board across the snow and threw bird seed on top. The impromptu bird feeder was visited many times before another layer of snow covered it over. Tomorrow I will shake the board off and add more birdseed.

IMG_9485

I also tried casting a bit of the seed on top of the snow, but it had enough weight to sink below the surface a half-inch or so, and now is completely covered once more.

IMG_9488

A deep footprint worked for a bit of seed too. Packed down hard with a few stomps of my snowboot, the print provided a small basin-like area in which to place some seeds.

Problem-Solving – Preventing Fires/9 Volt Battery Dangers

I had no idea that 9-volt batteries stored improperly are a fire hazard. I’ve included the terrific video that alerted me to this in today’s post. Pass it on to everyone you know and perhaps save a life.

For more information: 9-Volt Battery Fire Hazard

On the flip side of the dangers of 9-volt batteries is their ability to start a fire in an emergency situation. In the above link you will find a video that demonstrates how to start a fire with a 9-volt battery.

Problems – Reading the Signs

Untitled

The funny thing about the flu is, I am never sure if I have it or if it is something else. Vague symptoms, combined with a klutzy fall in tangled ivy, caused me to be unsure if my body aches and feelings of illness were due to the fall or due to something else. (Hmmm…is ‘Wasn’t sure I was sick,’ going to be my epitaph?) Now I think the fall might have been caused because I was a bit unsteady on my feet due to…yes…probably a mild case of the flu. A general all-encompassing feeling of something being wrong, a constant need to lay down, whether it be on the couch, a bed, the tub, or during a few very bad hours…on the bathroom floor.

I’m on the upswing today, but the nefarious hold of this type of illness is that it claims you back, a bit like a rogue and violent wave in a peaceful lagoon. I will think I am on the upswing and then, “Bam!” another wave of ill feelings will engulf me. So…I guess I am going to chalk up my days of feeling “off,” to the flu. Especially since, everyone, but a very blessed few in the family, has come down with exactly the same thing over the past few weeks. The illness seems to hit people in the area where they are weakest along with an unrelenting day or two of headache.

And as to the problem-solving category this post is in, I had my best few hours when I stewed down some chicken legs, onions, carrots, garlic, fresh oregano, dill, basil…added the juice of a lemon, a touch of orange juice, and felt compelled to add a splash of vinegar too…a pinch of sugar, a teaspoon of salt and a shake of pepper. Don’t know if I’d recommend it for anyone else but for some odd reason I added a pinch of baking soda…oh yes…don’t forget to cover all with water and the pan with a lid. 🙂 I cooked this concoction for 2 1/2 hours, cooled down and strained all solid pieces out, re-boiled, added some cut spaghetti pieces and dined. Oh my, I thanked God the whole time it was cooking…I knew just by smelling the incredible aroma of the steam that I would feel better. That was the best day of the whole illness. I think I am on the upswing now…we will see. My advice…at all times have some chicken in your freezer ready to boil down. Chicken broth has been proven to help combat the symptoms of cold and flu: 10 Foods To Eat When You A Cold or Flu.

I apologize for the rambling nature of this post…but hey…I’ll just blame it on a brain dealing with the flu!

Problem-Solving – Cleaning Salt Stains from Uggs Boots

Cleaning Salt Stains from Ugg Boots

My Uggs Boots were stained by salt last year. I don’t know why I waited a whole year to clean them off, I suppose it is the classic, out of sight, out of mind syndrome. Thankfully, I do know a good way of cleaning them by applying shaving cream and rubbing with a soft cloth. Below you can see my progress. As I write, the boot I treated is sitting beside a heater vent drying. If there is any residue still left I will repeat the steps.

IMG_9233

Dampen the entire boot so there is no line of demarcation when they dry. Apply the shaving cream and gently rub the soiled area with a soft cleaning cloth. Spread the shaving cream lightly around the entire boot with the cloth. No need for a heavy coat, just a light touch of the shaving cream will keep the color and texture of the boot uniform.

IMG_9234

The boot on the right was previously treated. You can see the slightest bit of salt stain around arch of the boot, but all in all, unless someone was looking for the problem area, I don’t think it is very noticeable. Give this money saving tip a try. It certainly beats spending near $15.00 to have your boots professionally cleaned.

Follow Me on Pinterest

IMG_9231

Problem-Solving – A Cure for Damping-Off Disease

A repost of a terrific hint: How to Cure Damping-Off Disease

The fluffy white substance on the surface of the potting soil is a seed sprouter’s nightmare. Damping Off is lethal to newly sprouted seedlings. Since I am trying to be as organic as possible this year, I wanted a remedy that would not break my resolve so early in the season. I searched the web and found some odd fixes: lemon jello, ground up moss sprinkled on soil, cinnamon & sand. There were also two remedies I decided were the most logical for me to use. One idea was weak mixture of hydrogen peroxide and water, and the other was a weak solution of chamomile tea. I opted for the chamomile tea.

I went to my local grocery store and picked up a box of tea with ingredients of chamomile alone. There were many other mixes, some with lemon, which probably would also work, but I was taking no chances. When I arrived home I boiled water, steeped one bag in two cups, and let it cool down. I used an old hair spray bottle to treat the affected area. These bottles produce small droplets. A bottle with a heavier spray might beat the small seedlings into the soil, killing them even quicker than the damp-off disease.

Twelve hours later there is no sign of the damp off disease on the soil. To read more check out this forum on Gardenweb. Gardenweb Damping-Off Forum Responses.

Follow Me on Pinterest

Problem-Solving – Mealy Bugs

I have also treated scale using this method.

While watering my succulents I noticed the dreaded white fluff of a Mealy Bug. Oh no. I have had experience with these pests in the past and know they can become a full-blown infestation. I wasted no time in treating the infested plant.

I like to use organic products and things I already have around the house. For Organic Mealy Bug Treatment Isopropyl Rubbing Alcohol is a good choice. Using a Q-tip I touched the saturated tip to the back of the mealy bug. As I checked the plant I saw a few more of his family residing along the stems and treated them too. Further down there were more, oh no, it was beginning to look like an infestation, time for more drastic measures. I filled an atomizer with some of the alcohol and sprayed the entire plant. I left it on for a few moments and then washed all the foliage in tepid water. Most organic pest control sites recommend watering the alcohol down first, but for a hardy succulent, straight out the bottle did no harm. If I was treating one of my african violets I would definitely water the solution down before using.

I knew I had to check all the plants that were in the same room with the infested succulent, and sure enough, on one coleus I found the beginnings of more mealy bugs. Hopefully the intervention with rubbing alcohol has eradicated the problem.